My niece Lily took one bite of these spiderweb cookies, froze mid-chew, and whispered “Auntie, these taste like the inside of a Halloween store.” I had no idea what that meant, but she ate four of them standing at the counter, so I took it as a win.
I wasn’t trying to reinvent the wheel with these Perfect Spiderweb Halloween Sugar Cookies. Honestly, I was just tired of buying those sad, flavorless packaged cookies from the grocery store every October. You know the ones—they look festive but taste like cardboard with food coloring. I wanted something that actually tasted good while still looking like it belonged in a haunted house display.
So I started messing around with my go-to sugar cookie recipe, the one I’ve been making since I was twelve years old. The dough needed to hold its shape during baking (nobody wants a spiderweb that looks like a melted doily), and the icing had to be thick enough to pipe clean lines without running everywhere. After three test batches and one very sticky kitchen floor, I finally landed on this version.
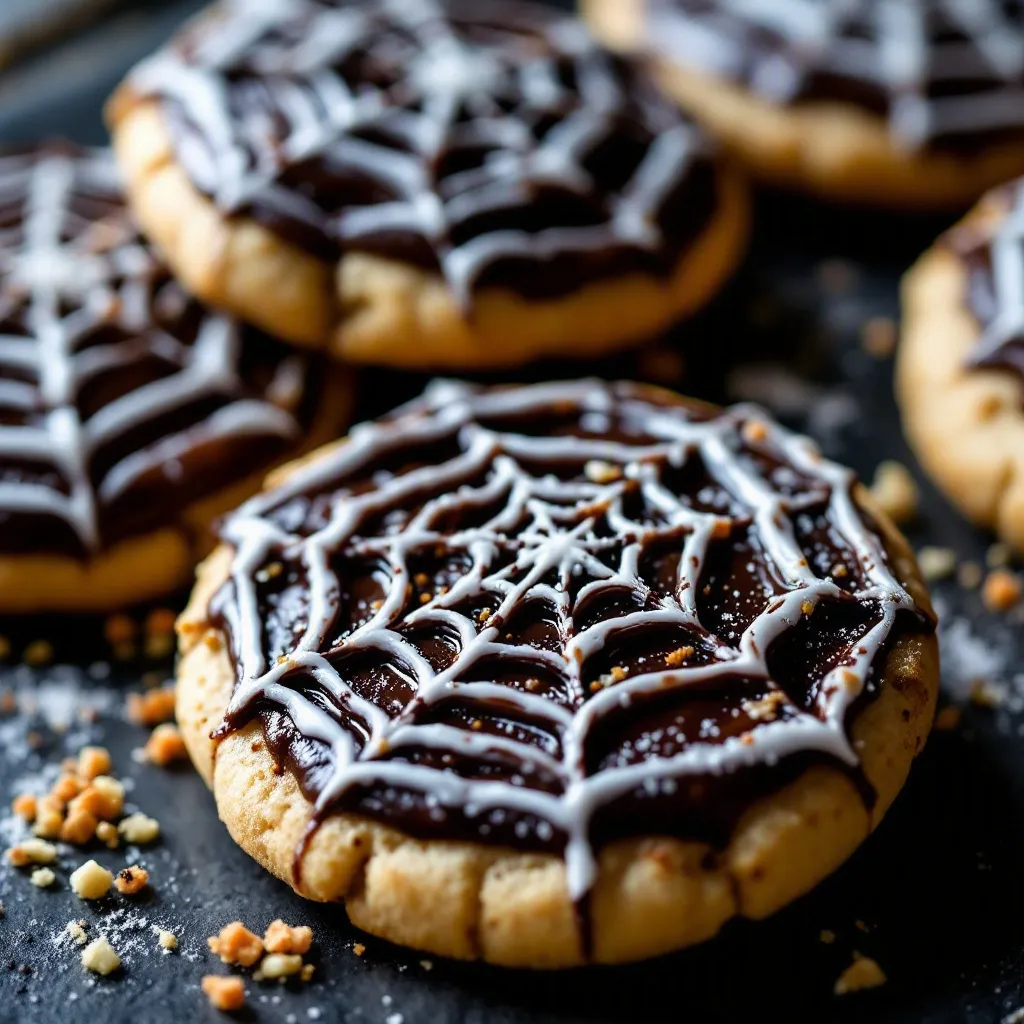
The first time I pulled a tray out of the oven, the spiderweb design had held perfectly—sharp lines, no bleeding colors, and the cookies had that slight crackle on top with a soft, tender center. I texted a picture to my sister and she replied with just a bunch of skull emojis. That’s when I knew this recipe was going to stick around.
These cookies have become our official Halloween tradition now. They’re the thing my family actually looks forward to every October, and honestly? That makes me happier than any fancy bakery display ever could.
Why You’ll Love This Recipe
These aren’t just pretty cookies—they’re actually, genuinely delicious. The sugar cookie base is soft in the middle with slightly crispy edges, and the royal icing sets up firm enough to stack but soft enough to bite through without shattering.
- Completely Customizable : You can make the webs any color you want. Classic black and orange, spooky purple and green, or even all-white for a ghostly look.
- Beginner-Friendly Design : The spiderweb pattern looks complicated but it’s actually just concentric circles dragged outward with a toothpick. I promise, if you can draw a circle, you can make these.
- No Special Equipment Needed : You don’t need a cookie stamp, a projector, or a pastry degree. Just a round cutter, some piping bags, and a toothpick.
- Perfect for Parties : These cookies travel well, stack beautifully on dessert tables, and absolutely stop kids in their tracks. I brought a batch to my son’s classroom Halloween party and the teacher asked for the recipe before I even left the room.
- Make-Ahead Friendly : The dough freezes beautifully for up to three months, and the decorated cookies stay fresh for over a week when stored properly.
What makes these different from every other Halloween cookie recipe out there is the technique. Most recipes tell you to pipe the web directly onto wet icing, which always bleeds and turns muddy. My method uses a slightly-set icing base that holds the web lines crisp and clean. It took me way too many failed batches to figure that out, but now you get to skip all the frustration.
What Ingredients You Will Need
This recipe uses simple, pantry-friendly ingredients to create cookies that taste like they came from a fancy bakery. The magic is in how they come together, not in any hard-to-find specialty items.
For the Sugar Cookies
- Unsalted butter, softened to room temperature (1 cup / 226g) — I prefer Kerrygold for its rich flavor, but any good-quality unsalted butter works. Make sure it’s truly softened, not melted, or your cookies will spread into puddles.
- Granulated sugar (1 cup / 200g) — Regular white sugar gives these cookies their signature tender crumb.
- Large egg, room temperature (1) — Cold eggs can seize the butter and make the dough tough. Set yours out 30 minutes before starting.
- Vanilla extract (1 teaspoon) — Pure vanilla makes a noticeable difference here. Save the imitation stuff for baking soda volcanoes.
- All-purpose flour (2 ½ cups / 312g) — Spoon and level your flour. Scooping directly from the bag packs in too much and makes cookies dry.
- Baking powder (½ teaspoon) — Just enough to give them a little lift without puffing up the design.
- Salt (½ teaspoon) — Balances the sweetness and brings out the vanilla flavor.
For the Royal Icing
- Powdered sugar (4 cups / 480g) — Sift it first unless you enjoy lumpy icing. I learned this the hard way.
- Meringue powder (3 tablespoons) — This stabilizes the icing and makes it dry hard. You can find it in the baking aisle or online. I use Wilton brand.
- Warm water (about 6 tablespoons, plus more as needed) — Add slowly. You can always add more but you can’t take it back.
- Gel food coloring (black, orange, and purple) — Gel is thicker than liquid coloring and won’t thin out your icing. Americolor and Wilton both work great.
- Vanilla extract (½ teaspoon, optional) — Adds a little flavor to the icing. Leave it out if you want pure white icing.
For Decoration
- Black sanding sugar or black sprinkles (optional, for extra crunch and sparkle)
- Edible glitter spray (optional, for a magical finish — my niece insists on this step)
Equipment Needed
- Stand mixer or hand mixer — A stand mixer makes creaming butter and sugar effortless, but a hand mixer works perfectly fine too. I’ve made these cookies with both.
- Round cookie cutters (2.5-inch and 3-inch) — Any size works, but I find 3-inch cookies are the perfect canvas for the spiderweb design.
- Baking sheets (2-3) — Light-colored metal sheets give the most even browning. Dark sheets can over-brown the bottoms.
- Parchment paper or silicone baking mats — Silpat mats are my favorite because the cookies slide right off and the bottoms never burn.
- Piping bags (or zip-top bags with a tiny corner snipped off) — Disposable piping bags save cleanup time. I buy the 12-inch size.
- Toothpicks or a scribe tool — For dragging the spiderweb lines. Toothpicks work perfectly and cost pennies.
- Cooling racks — Essential for letting cookies cool completely before icing. Stacking warm cookies creates condensation and sticky spots.
- Offset spatula (optional but helpful) — For spreading the base icing layer if you prefer that method over piping.
Preparation Method
Step 1: Make the Cookie Dough
In the bowl of your stand mixer fitted with the paddle attachment, cream the softened butter and granulated sugar together on medium speed until light and fluffy, about 3 minutes. Scrape down the sides of the bowl halfway through. Add the egg and vanilla extract, then beat on medium until fully combined, about 1 minute. The mixture should look smooth and slightly glossy.
In a separate bowl, whisk together the flour, baking powder, and salt. With the mixer on low speed, gradually add the dry ingredients to the wet mixture. Mix just until the dough comes together and no streaks of flour remain. Overmixing at this stage develops gluten and makes cookies tough, so stop as soon as it looks cohesive.
Step 2: Chill the Dough
Turn the dough out onto a lightly floured surface and divide it in half. Flatten each half into a disk about 1-inch thick, wrap tightly in plastic wrap, and refrigerate for at least 2 hours. I’ve skipped this step before when I was in a hurry, and the cookies spread into misshapen blobs that looked nothing like circles. Chilling solidifies the butter and prevents spreading.
You can refrigerate the dough for up to 3 days, or freeze the wrapped disks for up to 3 months. If frozen, thaw overnight in the refrigerator before rolling.
Step 3: Roll and Cut the Cookies
Preheat your oven to 350°F (175°C) and line two baking sheets with parchment paper or silicone mats. Remove one disk of dough from the refrigerator and let it sit at room temperature for about 5 minutes—just long enough to be rollable without cracking.
On a lightly floured surface, roll the dough to ¼-inch thickness. I use wooden rolling pin rings to keep the thickness even, but you can also eyeball it by placing two identical coins on either side of the dough as guides. Cut out circles using your round cookie cutter, re-rolling the scraps once. Avoid re-rolling more than once, or the cookies get tough.
Place the cut cookies about 2 inches apart on the prepared baking sheets. Bake for 8-10 minutes, rotating the pans halfway through. The cookies are done when the edges are just barely golden and the centers look set but not browned. Let them cool on the baking sheet for 5 minutes, then transfer to a wire rack to cool completely before icing.
Step 4: Make the Royal Icing
In the bowl of your stand mixer fitted with the whisk attachment, combine the powdered sugar and meringue powder. Add 6 tablespoons of warm water and the vanilla extract, then mix on low speed until combined. Increase to medium-high speed and beat for 4-5 minutes, until the icing is thick, glossy, and holds stiff peaks when you lift the whisk.
Test the consistency by lifting the whisk—the ribbon of icing that falls back into the bowl should hold its shape on the surface for about 10 seconds before sinking back in. If it’s too thick, add water one teaspoon at a time. If it’s too thin, add more sifted powdered sugar a tablespoon at a time.
Step 5: Color and Thin the Icing
Divide the icing into separate bowls for each color you plan to use. For the spiderweb design, you’ll need a base color (orange or purple works beautifully) and a web color (usually black or white).
For the base icing, thin it to “flood” consistency by adding water a few drops at a time until the icing flows like thick maple syrup. It should spread smoothly and settle into an even layer within about 15 seconds. For the web icing, keep it at “pipe” consistency—thick enough to hold its shape when piped, but soft enough to drag with a toothpick.
Step 6: Decorate the Cookies
Fit a piping bag with a small round tip (or snip a tiny corner off a zip-top bag) and fill it with your base color icing. Outline each cookie about ¼ inch from the edge, then fill the center with more icing. Use a toothpick to gently spread the icing into the corners and pop any air bubbles. Let the base icing sit for 15-20 minutes until it’s set but still slightly tacky to the touch.
This is the crucial step most recipes get wrong. If the base icing is too wet when you pipe the web, the lines will bleed and blur. If it’s too dry, the toothpick won’t drag cleanly. You want it set enough that the web sits on top, but soft enough that dragging through it creates clean lines.
Once the base is ready, switch to your web color icing and pipe a small dot in the center of each cookie. Pipe concentric rings around the center dot, spacing them about ¼ inch apart. Three or four rings is usually enough for a 3-inch cookie.
Working quickly, take a toothpick and drag it from the center dot outward through all the rings, like drawing the spokes of a wheel. Space the spokes evenly around the cookie—I usually do 8 spokes for a classic web look. Wipe the toothpick clean between each drag to keep the lines sharp.
If you want a sparkly finish, sprinkle black sanding sugar over the wet icing immediately after dragging the web lines. The sugar sticks to the icing and adds a gorgeous crunchy texture.
Step 7: Let the Icing Set
Allow the decorated cookies to dry completely at room temperature, uncovered, for at least 4-6 hours or overnight. The icing should be completely hard to the touch before you stack or store them. If you’re in a humid climate, this can take up to 12 hours. Patience is hard, but smudged webs are sadder than waiting.
Cooking Tips & Techniques
I’ve made probably ten thousand sugar cookies at this point, and I’ve messed up almost every single step at least once. Here’s what I’ve learned the hard way so you don’t have to.
Don’t skip the chill time. I know it’s tempting to rush, especially when you’re excited about making Halloween cookies. But warm dough spreads. I once tried to speed things up by refrigerating for only 30 minutes, and my “round” cookies came out looking like abstract maps of Australia. Two hours minimum, no shortcuts.
Use a kitchen scale for accuracy. Flour measurement is the number one reason cookies fail. A cup of flour can weigh anywhere from 120 to 150 grams depending on how you scoop it. That 30-gram difference is enough to turn tender cookies into dry hockey pucks. Weigh your ingredients if you can.
Keep the web icing thick. The first time I tried making spiderweb cookies, I thinned my black icing too much because I thought it would be easier to pipe. It was—and then it immediately bled into the orange base like a watercolor painting. Keep your web icing at a pipe consistency that holds a distinct line when you squeeze it onto a plate.
Work in small batches. Only ice a few cookies at a time, especially when you’re dragging the webs. The base icing starts to set after about 20 minutes, and if you wait too long, the toothpick won’t drag cleanly. I usually ice 4-6 cookies, drag the webs, then move on to the next batch.
Use a scribe tool for precision. Toothpicks work great, but a dental scribe tool (you can find them at baking supply stores) gives you a finer point and better control. I bought one for three dollars and it made my webs noticeably cleaner.
Variations & Adaptations
Gluten-Free Version : Substitute the all-purpose flour with a 1:1 gluten-free baking flour blend that contains xanthan gum. I’ve had good results with King Arthur Measure for Measure. Chill the dough for at least 3 hours, as gluten-free dough tends to be softer and spreads more easily.
Vegan Version : Use vegan butter sticks (not tub margarine) and replace the egg with a flax egg (1 tablespoon ground flaxseed mixed with 3 tablespoons water, let sit for 5 minutes). For the royal icing, replace meringue powder with 3 tablespoons aquafaba (the liquid from a can of chickpeas) and beat until stiff peaks form. It takes a little longer to whip, but it works.
Different Web Designs : Instead of a classic spiderweb, try piping a spiral from the center outward and dragging a toothpick through it at regular intervals for a different geometric pattern. Or pipe a small spider shape in the corner of each cookie using black icing—just a round body and eight tiny legs.
Flavor Twists : Add ½ teaspoon of almond extract along with the vanilla for a subtle nutty flavor. Or zest half an orange into the dough for a citrusy Halloween cookie that pairs beautifully with the sweet royal icing. I made an orange-vanilla batch last year and they disappeared faster than the plain ones.
Mini Cookie Version : Use a 1.5-inch round cutter and adjust baking time to 6-7 minutes. These are perfect for Halloween party favors or packaging in little cellophane bags for classmates.
Serving & Storage Suggestions
These cookies are best served at room temperature, which lets the icing firm up perfectly and the cookie stay tender. Arrange them on a platter with some festive fruit pizza for a Halloween dessert spread that covers all bases. The contrast between the crunchy icing and soft cookie is the whole point—don’t refrigerate them before serving or the icing can get tacky.
For storage, place the fully dried and decorated cookies in a single layer in an airtight container, with parchment paper between layers if you need to stack them. They’ll stay fresh at room temperature for up to 10 days. Do not refrigerate—the moisture in the fridge softens the icing and makes the cookies taste stale.
You can freeze undecorated baked cookies for up to 3 months. Wrap them tightly in plastic wrap and then foil, or place them in a freezer-safe bag. When you’re ready to decorate, thaw them at room temperature in their packaging to prevent condensation, then ice as directed.
If you’re making these for a party, I recommend decorating them the day before. The icing needs a full 6-8 hours to set completely, and doing it ahead of time removes all the stress. Plus, the flavors actually meld together overnight and the cookies taste even better the next day.
These cookies also make fantastic gifts. Pack them in a clear cellophane bag tied with orange ribbon, or arrange them in a treat box lined with black tissue paper. Add a little tag with the recipe name and you’ve got a Halloween gift that beats store-bought candy every time.
Nutritional Information & Benefits
Let’s be honest—these are sugar cookies with royal icing. They’re a treat, not a health food. But here’s the estimated breakdown per cookie (based on a 3-inch cookie with icing):
| Nutrient | Amount Per Cookie |
|---|---|
| Calories | 185 |
| Total Fat | 8g |
| Saturated Fat | 5g |
| Carbohydrates | 27g |
| Sugar | 18g |
| Protein | 2g |
| Sodium | 85mg |
The good news is that these cookies use real butter and vanilla, so you’re getting actual food ingredients rather than preservatives and artificial flavors. The meringue powder adds a tiny bit of protein, and if you use gel food coloring, you’re avoiding the artificial dyes found in many pre-made icings.
For dietary considerations, this recipe contains wheat, dairy, and eggs. For gluten-free and vegan alternatives, see the variations section above.
My personal philosophy on treats like these: they’re meant to be enjoyed without guilt. Halloween comes once a year, and a few homemade cookies made with real ingredients are infinitely better for you than a bag of ultra-processed candy from the store. Plus, the act of baking and decorating together as a family has its own mental health benefits—it’s creative, it’s connecting, and it’s fun.
Frequently Asked Questions
Can I use store-bought sugar cookie dough instead?
You can, but the texture won’t be quite the same. Store-bought dough often has more preservatives and less butter, which can affect how the cookies spread and hold their shape. If you’re short on time, look for a refrigerated sugar cookie dough that specifically says “cut-out” on the package, as these are formulated to hold their shape better during baking.
Why did my spiderweb lines bleed into the base icing?
This usually happens when the base icing is too wet when you pipe the web. Let the base icing sit for 15-20 minutes after flooding until it’s set but still slightly tacky. If the base is still shiny and liquid, the web lines will bleed every time. Also make sure your web icing is thick enough to hold its shape—thin icing spreads more easily.
How far in advance can I make these cookies?
You can make the dough up to 3 days ahead and keep it refrigerated, or freeze it for up to 3 months. Baked undecorated cookies can be frozen for 3 months. Decorated cookies stay fresh at room temperature for up to 10 days. So honestly, you can start these weeks ahead if you plan properly.
My cookies spread into weird shapes. What went wrong?
Three possible culprits: the dough wasn’t chilled long enough, the butter was too soft when you creamed it, or your baking sheets were too warm when you placed the cut dough on them. Make sure your dough chills for at least 2 hours, use butter that’s softened but not greasy, and always start with cool baking sheets. If you’re reusing pans, let them cool completely between batches.
Can I use liquid food coloring instead of gel?
You can, but liquid coloring will thin out your royal icing and make it harder to work with. You’ll need to add more powdered sugar to compensate, which throws off the whole recipe. Gel food coloring is thicker, more concentrated, and won’t affect the consistency of your icing. It’s worth the small investment, especially if you plan to decorate cookies regularly.
Conclusion
These Perfect Spiderweb Halloween Sugar Cookies are everything I want in a holiday treat—they look impressive, they taste genuinely delicious, and they’re actually fun to make. Not stressful, not fussy, just satisfying in that way that only a homemade project can be.
I love that this recipe gives you room to play. Maybe you want neon green webs on purple cookies, or maybe you’re a traditionalist who sticks with black and orange. Maybe you add sprinkles, maybe you don’t. The base recipe is solid enough to handle whatever creative direction you take it.
If you make these cookies, I’d love to hear how they turn out. Drop a comment below with your favorite color combination, or tag me in your photos if you share them online. There’s something special about seeing these spooky little webs come to life in other people’s kitchens.
So go ahead—preheat that oven, dust off your rolling pin, and make some Halloween magic. These cookies are worth every bit of effort, and I promise you’ll be proud of what comes out of your oven. Happy Halloween, and happy baking!
Pin This Recipe!
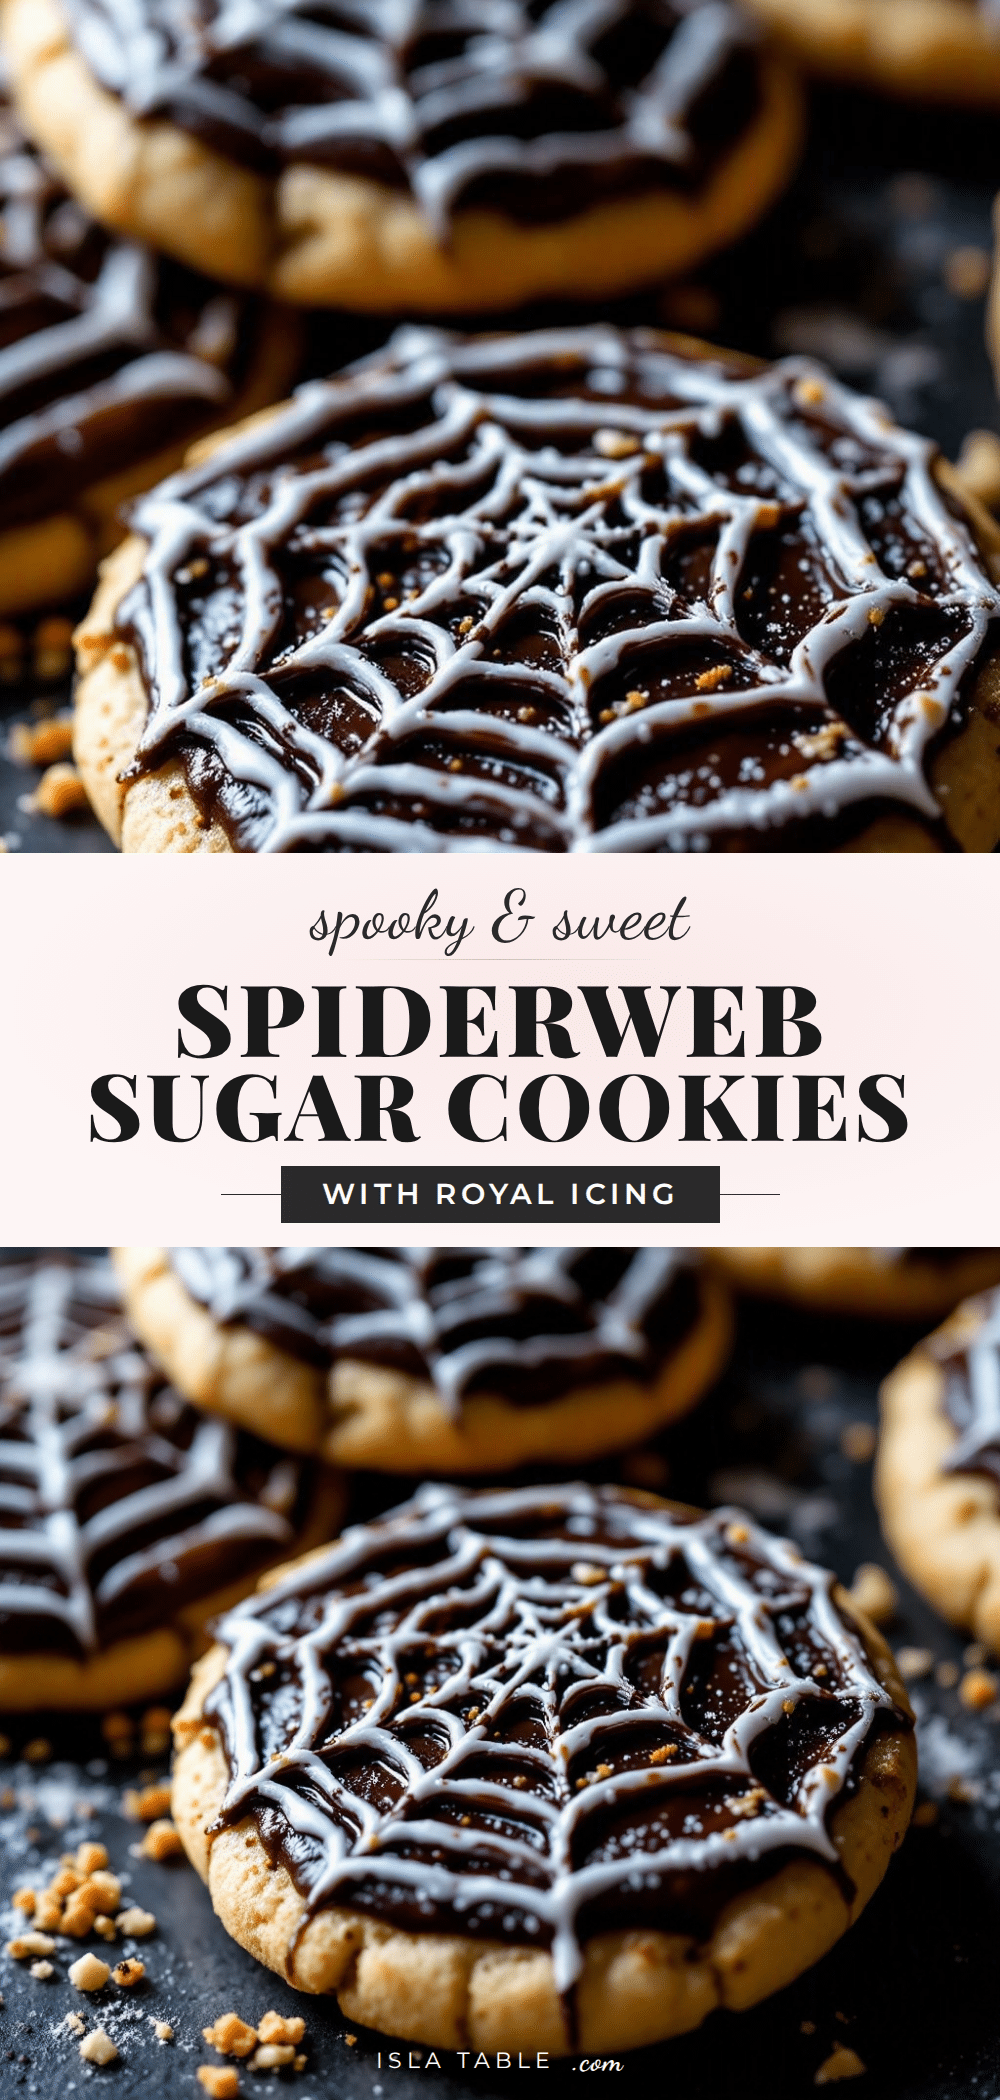
Perfect Spiderweb Halloween Sugar Cookies – Easy Recipe
These soft, tender sugar cookies feature a crisp royal icing spiderweb design that holds perfectly without bleeding. A fun and delicious Halloween tradition that’s beginner-friendly and completely customizable.
- Prep Time: 30 minutes
- Cook Time: 10 minutes
- Total Time: 2 hours 40 minutes (includes 2 hours chilling)
- Yield: 24 servings 1x
- Category: Dessert
- Cuisine: American
Ingredients
- 1 cup (226g) unsalted butter, softened to room temperature
- 1 cup (200g) granulated sugar
- 1 large egg, room temperature
- 1 teaspoon vanilla extract
- 2 ½ cups (312g) all-purpose flour
- ½ teaspoon baking powder
- ½ teaspoon salt
- 4 cups (480g) powdered sugar
- 3 tablespoons meringue powder
- 6 tablespoons warm water (plus more as needed)
- Gel food coloring (black, orange, purple)
- ½ teaspoon vanilla extract (optional, for icing)
- Black sanding sugar or black sprinkles (optional)
- Edible glitter spray (optional)
Instructions
- Make the cookie dough: In a stand mixer with paddle attachment, cream butter and sugar on medium speed until light and fluffy, about 3 minutes. Add egg and vanilla, beat until combined. In a separate bowl, whisk flour, baking powder, and salt. Gradually add dry ingredients to wet mixture on low speed, mixing just until dough comes together.
- Chill the dough: Divide dough in half, flatten into 1-inch thick disks, wrap in plastic wrap, and refrigerate for at least 2 hours (up to 3 days). Can be frozen for up to 3 months.
- Roll and cut cookies: Preheat oven to 350°F (175°C). Line baking sheets with parchment or silicone mats. Roll dough to ¼-inch thickness on a lightly floured surface. Cut into rounds using a 2.5-3 inch cookie cutter. Place 2 inches apart on prepared sheets. Bake 8-10 minutes, rotating pans halfway. Cool on sheet 5 minutes, then transfer to wire rack to cool completely.
- Make royal icing: In stand mixer with whisk attachment, combine powdered sugar and meringue powder. Add 6 tablespoons warm water and vanilla. Mix on low, then beat on medium-high 4-5 minutes until thick, glossy, and holds stiff peaks. Adjust consistency with water or powdered sugar as needed.
- Color and thin icing: Divide icing into bowls for base color (e.g., orange) and web color (e.g., black). Thin base icing to flood consistency (like thick maple syrup). Keep web icing at pipe consistency (thick enough to hold shape).
- Decorate cookies: Pipe base icing outline on each cookie, then fill center. Use toothpick to spread and pop bubbles. Let set 15-20 minutes until tacky. Pipe a small dot of web color in center, then concentric rings ¼ inch apart. Drag toothpick from center outward through rings to create web spokes. Wipe toothpick clean between drags. Add sprinkles if desired.
- Let icing set: Allow decorated cookies to dry completely at room temperature, uncovered, for 4-6 hours or overnight until hard to the touch.
Notes
Don’t skip chilling the dough—it prevents spreading. Use a kitchen scale for accurate flour measurement. Keep web icing thick to avoid bleeding. Work in small batches when decorating. Let base icing set 15-20 minutes before piping web. Cookies stay fresh at room temperature for up to 10 days in an airtight container. Undecorated baked cookies can be frozen for up to 3 months.
Nutrition
- Serving Size: 1 cookie
- Calories: 185
- Sugar: 18
- Sodium: 85
- Fat: 8
- Saturated Fat: 5
- Carbohydrates: 27
- Protein: 2
Keywords: Halloween cookies, spiderweb cookies, sugar cookies, royal icing, Halloween dessert, easy cookie recipe


