The faint crackle of sea salt crystals catching the light against a dark, fudgy crumb — that’s what I was chasing when I first made these. Not the pumpkin spice hype, not the seasonal obligation. Just that one specific visual: a cookie so dark it’s almost mahogany, speckled with melted chocolate, and glittering with irregular salt crystals like frost on a November windowpane. Everything else in the recipe came second to that image in my head.
I’d been burned before by pumpkin cookies, you know? The ones that puff up into sad, cakey discs with all the structural integrity of a wet leaf. They taste fine, sure, but they’re not a *cookie*. Not the kind you reach for when you want something chewy, something with edges that shatter and a center that bends. So I went the other way entirely. I stripped back the moisture, bumped up the butter, and let the pumpkin puree play a supporting role instead of the lead. The result was this dark, dense, almost fudgy situation that barely looks like it belongs in October. And honestly? That’s exactly what I wanted.
These Ultimate Pumpkin Chocolate Chip Cookies with Sea Salt aren’t trying to be a pumpkin pie in cookie form. They’re their own thing — a chocolate-forward cookie with a subtle, earthy warmth from the pumpkin and spices. The salt isn’t garnish; it’s the structural counterpoint that makes every other flavor stand up straight. I’ve made about six batches tweaking the ratios before I landed on this version, and it’s the one I keep coming back to. Not because it’s the prettiest (though the salt really does catch the light beautifully), but because it’s the one that actually tastes like something worth baking.
Why You’ll Love This Recipe
Let me tell you what makes these cookies different from every other pumpkin chocolate chip recipe you’ve scrolled past. I’ve tested this about a dozen times (not exaggerating), and here’s what I found works:
- Chewy, not cakey: Most pumpkin cookies turn out like little muffins. These have real chew, thanks to a higher butter-to-pumpkin ratio and a short resting time for the dough.
- Fudgy chocolate distribution: I use a mix of chopped dark chocolate and mini chips. The chopped bits melt into pools, the mini chips stay intact. You get both textures in every bite.
- That salt finish: Flaky sea salt isn’t optional here. It cuts through the sweetness and makes the pumpkin and spice flavors pop in a way that’s honestly addictive.
- Simple ingredients: No weird stabilizers, no specialty flours. You probably have everything except maybe the pumpkin puree and the salt.
- Make-ahead friendly: The dough rests beautifully in the fridge for up to three days. Actually, it gets better. The flavors meld, the sugar absorbs, and the cookies bake up with deeper, more complex flavor.
- Crowd-pleaser status: I brought these to a fall gathering and watched people who claimed they “don’t like pumpkin desserts” go back for thirds. The chocolate does the heavy lifting.
This recipe isn’t just another version of the same cookie. It’s the version where I finally stopped trying to make pumpkin the star and let it do what it does best — add moisture and a subtle, earthy backbone to something already delicious. The first time I bit into one fresh from the oven, still warm, with the salt just beginning to dissolve on my tongue, I actually closed my eyes. That’s the kind of cookie this is.
What Ingredients You Will Need
This recipe uses simple, honest ingredients to build something that tastes far more complex than the sum of its parts. Here’s what you’ll need and why each one matters:
For the Cookie Dough
- Unsalted butter, softened: 1 cup (2 sticks / 226g). I use Kerrygold here — the higher butterfat content gives a richer flavor and better spread. Let it sit out for at least an hour before starting.
- Granulated sugar: ¾ cup (150g). Adds sweetness and helps with spread and browning.
- Light brown sugar, packed: ¾ cup (150g). This is where the chew comes from. The molasses in brown sugar keeps the cookies tender and adds a subtle caramel note that plays beautifully with the pumpkin.
- Pumpkin puree: ½ cup (120g). Not pumpkin pie filling — just pure pumpkin. I prefer Libby’s for its consistent texture and lower water content. Too much pumpkin makes cookies cakey, so this measured amount is intentional.
- Large egg: 1, room temperature. Helps bind the dough and adds structure.
- Vanilla extract: 2 teaspoons. Use real vanilla, not imitation. It rounds out the spices.
- All-purpose flour: 2 cups (240g). Spoon and level your flour — scooping directly from the bag packs in too much and makes cookies dry.
- Baking soda: 1 teaspoon. Helps the cookies spread just enough without puffing up.
- Baking powder: ½ teaspoon. Adds a little lift to balance the density.
- Salt: ½ teaspoon. I use fine sea salt in the dough; the flaky stuff goes on top.
- Ground cinnamon: 1½ teaspoons. The backbone of the spice blend.
- Ground ginger: ½ teaspoon. Adds warmth without overpowering.
- Ground nutmeg: ¼ teaspoon. Freshly grated if you have it — it makes a difference.
- Ground cloves: ⅛ teaspoon. Just a whisper. Cloves can dominate fast.
- Dark chocolate, chopped: 4 oz (115g). I use a 70% cacao bar from Ghirardelli or Lindt. The bitterness balances the sweet dough perfectly.
- Semi-sweet mini chocolate chips: ½ cup (90g). These stay intact during baking for pockets of melty chocolate throughout.
For the Finish
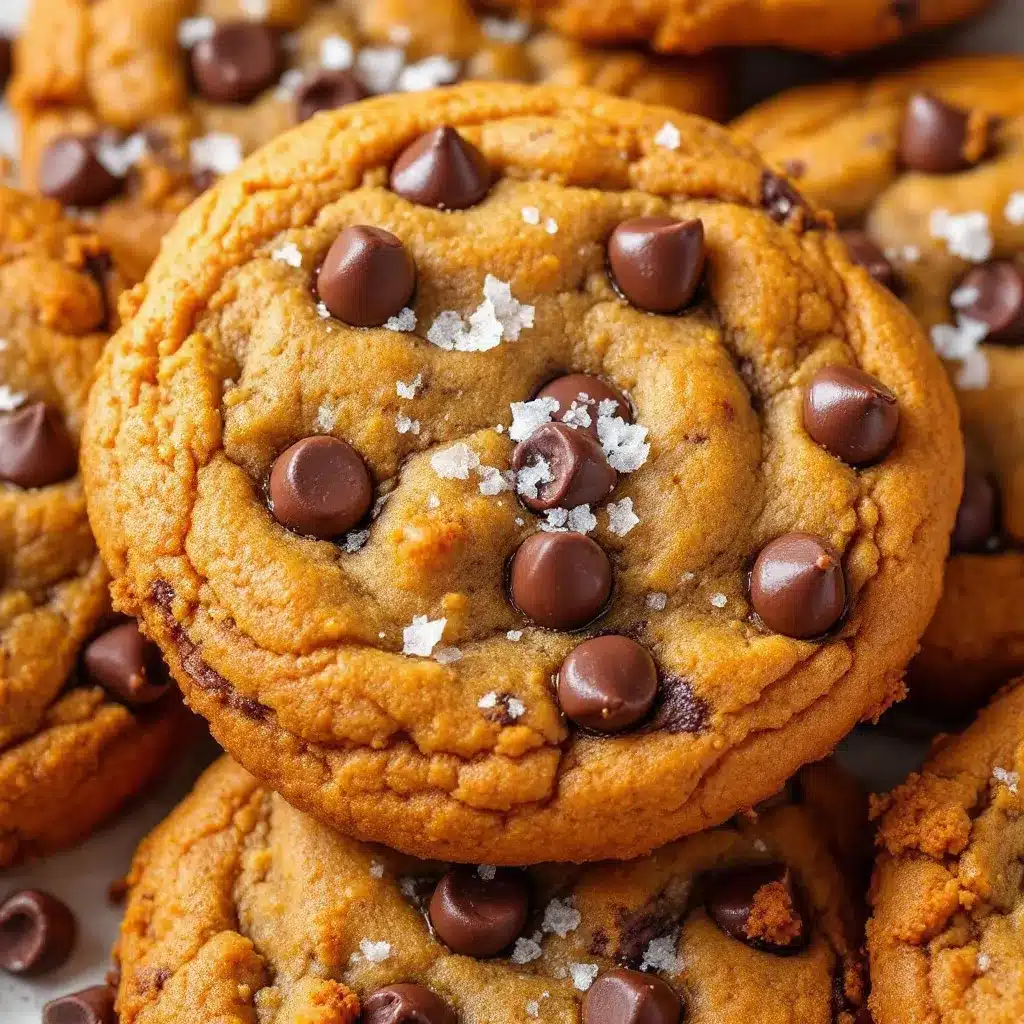
- Flaky sea salt: 1-2 teaspoons. Maldon is my go-to. The large, irregular crystals provide that signature crackle and burst of salinity.
Ingredient substitution notes: For a dairy-free version, use vegan butter (I like Miyoko’s) and ensure your chocolate is dairy-free. For a gluten-free option, swap the all-purpose flour with a 1:1 gluten-free baking blend that contains xanthan gum — I’ve tested this with King Arthur’s Measure for Measure and it works beautifully. If you’re out of pumpkin puree, butternut squash puree works in a pinch (roast and blend a squash), though the flavor will be milder. And if you’re avoiding refined sugar, you can try coconut sugar in place of both sugars, but know the cookies will be darker, less sweet, and slightly more crumbly.
I also want to mention that the quality of your chocolate matters more here than you might think. Since the chocolate flavor is front and center, using a cheap bar or waxy chips will leave you with a flat-tasting cookie. Spend the extra dollar or two — your taste buds will thank you.
Equipment Needed
You don’t need a fancy kitchen to make these cookies. Here’s what I use and what works:
- Stand mixer or hand mixer: I use my KitchenAid for creaming the butter and sugars, but a hand mixer works just as well. You could even do it by hand with a wooden spoon if you’re patient — just make sure the butter is very soft.
- Large mixing bowl: For the dry ingredients.
- Medium mixing bowl: For the wet ingredients.
- Rubber spatula: For folding in the chocolate and scraping down the bowl.
- Baking sheets: I prefer light-colored aluminum sheets. Dark sheets make the bottoms brown too fast. If that’s all you have, reduce the oven temperature by 25°F.
- Parchment paper or silicone baking mat: Parchment is my preference — it promotes even browning and makes cleanup a breeze. Silicone mats work too but can result in slightly less spread.
- Cookie scoop: A 1.5-tablespoon scoop (size #40) gives consistent cookies. I’ve used a regular spoon in a pinch, but the scoop makes a difference in even baking.
- Cooling rack: Essential for letting the cookies set properly. If you leave them on the hot baking sheet, they’ll continue to cook and can overbake.
- Small bowl: For the flaky salt — you’ll want it within easy reach right when the cookies come out of the oven.
Budget-friendly tip: If you don’t have a stand mixer, a sturdy whisk and some elbow grease work fine. Just cream the butter and sugars together until light and fluffy — it’ll take about 5 minutes of vigorous whisking. And if you don’t have a cookie scoop, use two spoons to portion the dough, or just roll it into balls by hand.
Preparation Method
- Prep your ingredients. Take the butter and egg out of the fridge at least an hour before you start. Measure out your pumpkin puree and let it sit at room temperature too. Cold ingredients don’t cream together properly, and you’ll end up with a dense, greasy dough. I learned this the hard way — my first batch was a sad, flat mess because I was impatient.
- Whisk the dry ingredients. In a medium bowl, whisk together the 2 cups all-purpose flour, 1 teaspoon baking soda, ½ teaspoon baking powder, ½ teaspoon fine sea salt, 1½ teaspoons cinnamon, ½ teaspoon ginger, ¼ teaspoon nutmeg, and ⅛ teaspoon cloves. Set aside. Whisking aerates the flour and distributes the leaveners and spices evenly — no one wants a pocket of baking soda in their cookie.
- Cream the butter and sugars. In the bowl of a stand mixer fitted with the paddle attachment (or using a hand mixer), beat the 1 cup softened butter with ¾ cup granulated sugar and ¾ cup packed brown sugar on medium speed for 3-4 minutes, until light, fluffy, and noticeably paler in color. Scrape down the sides and bottom of the bowl halfway through. This step is crucial — proper creaming incorporates air that helps the cookies rise just a little and gives them a tender texture.
- Add the wet ingredients. Beat in the ½ cup pumpkin puree, 1 large egg, and 2 teaspoons vanilla extract on medium-low speed until fully combined. The mixture may look slightly curdled at this point — that’s normal. Pumpkin is watery, and it can make the butter-sugar emulsion look a little broken. Don’t panic. It comes together once you add the flour.
- Fold in the dry ingredients. With the mixer on low speed, gradually add the flour mixture in two additions, mixing just until the streaks of flour disappear. Overmixing at this stage develops gluten and makes cookies tough. I stop the mixer when there are still a few floury patches and finish folding by hand with a rubber spatula.
- Fold in the chocolate. Add the 4 oz chopped dark chocolate and ½ cup mini chocolate chips to the dough. Fold gently with the spatula until evenly distributed. The dough will be thick, slightly sticky, and fragrant with warm spices. Try not to eat it all before baking — though I won’t judge you if you do.
- Chill the dough. Cover the bowl with plastic wrap and refrigerate for at least 30 minutes, or up to 3 days. This step is non-negotiable. Chilling solidifies the butter, which prevents the cookies from spreading too thin in the oven. It also allows the flour to fully hydrate and the flavors to meld. Cookies baked from chilled dough are thicker, chewier, and more flavorful. I’ve tested this side by side, and the difference is dramatic.
- Preheat the oven. About 15 minutes before you’re ready to bake, preheat your oven to 350°F (175°C). Line two baking sheets with parchment paper.
- Portion the dough. Use a 1.5-tablespoon cookie scoop to portion the dough into balls, about 1½ inches in diameter. Place them 2 inches apart on the prepared baking sheets — these cookies spread, so give them room. I fit 8 cookies per standard half-sheet pan.
- Bake. Bake one sheet at a time on the center rack for 11-13 minutes. At 11 minutes, the edges should be set and lightly golden, but the centers will still look soft and slightly underdone. That’s exactly what you want. The cookies will continue to bake on the hot pan as they cool. For a softer, chewier cookie, pull them at 11 minutes. For a slightly crisper edge, go to 12 or 13.
- Finish with salt. As soon as the cookies come out of the oven, sprinkle each one with a pinch of flaky sea salt. Do this while they’re still hot so the salt adheres. Don’t skip this — the salt is what transforms these from a good pumpkin chocolate chip cookie into something you’ll crave.
- Cool on the pan. Let the cookies rest on the baking sheet for 5 minutes. This allows them to set up enough to transfer without falling apart. After 5 minutes, use a thin metal spatula to transfer them to a wire rack to cool completely. Or, you know, eat one warm. I always do. It’s the cook’s privilege.
Sensory cues: When the cookies are done, the edges will be a deep golden brown and the centers will look puffed but still soft. The kitchen will smell like a fall candle — warm cinnamon, nutty butter, and rich chocolate. The tops should be slightly crackled, with bits of chocolate peeking through. If you gently press the center of a cookie, it should feel soft but not raw.
Cooking Tips & Techniques
I’ve made more batches of these cookies than I care to count, and I’ve picked up a few things along the way. Here are the tips that actually matter:
Don’t overmix the dough. This is the most common mistake I see. Once you add the flour, mix just until it disappears. Overmixing develops gluten, and gluten makes cookies tough and bread-like. You want tender, not tough. I’ve ruined batches by getting distracted and letting the mixer run an extra 30 seconds — the difference was noticeable.
Use a cookie scoop for consistent sizing. Cookies that are all the same size bake evenly. If you’re scooping by hand, try to make each ball about the same volume. I use a #40 scoop (about 1.5 tablespoons) and get exactly 24 cookies every time. Consistent sizing also means consistent baking time — no more pulling some cookies that are overdone while others are still raw in the middle.
Chill the dough, no shortcuts. I know it’s tempting to skip the chill time when you want cookies *now*. But trust me on this one. Chilled dough spreads less, bakes up thicker, and has a better texture. If you’re in a hurry, you can chill the scooped dough balls on a plate in the freezer for 15 minutes instead of 30 in the fridge. It’s not quite as good, but it works in a pinch.
Rotate the pan halfway through. Ovens have hot spots. Halfway through the bake time (around 6 minutes), rotate the baking sheet 180 degrees. This ensures even browning and prevents one side of the cookies from getting too dark. I learned this after a batch came out with half the cookies perfectly golden and the other half bordering on burnt.
Let them cool on the pan. Those 5 minutes of rest on the hot baking sheet are crucial. The residual heat finishes setting the centers without overbaking the edges. If you try to move them too soon, they’ll fall apart. If you leave them on the pan too long, they’ll continue to cook and can become dry. Set a timer if you need to — I do.
Salt timing matters. Sprinkle the flaky salt on the cookies while they’re still hot from the oven. If you wait until they’ve cooled, the salt won’t stick and will just fall off onto your plate. And use a light hand — you can always add more, but you can’t take it away. A pinch per cookie is perfect.
One more thing: If your cookies spread too thin, your butter was probably too soft or your dough wasn’t chilled enough. If they didn’t spread enough, your flour was overmeasured or your butter was too cold. Baking is a science, but it’s also a conversation. Pay attention to what the dough tells you, and adjust next time.
Variations & Adaptations
One of the things I love about this recipe is how adaptable it is. Here are some variations I’ve tried and loved:
Gluten-Free Version: Substitute the all-purpose flour with a 1:1 gluten-free baking blend that contains xanthan gum. I’ve tested this with King Arthur’s Measure for Measure and Bob’s Red Mill 1-to-1, and both work well. The cookies will be slightly more delicate, so handle them gently when transferring to the cooling rack. Chill time is even more important here — at least 1 hour.
Vegan Version: Replace the butter with vegan butter (I like Miyoko’s or Earth Balance), and use a flax egg (1 tablespoon ground flaxseed mixed with 3 tablespoons water, let sit for 5 minutes) in place of the egg. The cookies will be a bit less rich, but still delicious. Make sure your chocolate is dairy-free — most dark chocolate is, but check the label.
White Chocolate & Cranberry: Swap the dark chocolate and mini chips for 1 cup white chocolate chips and ½ cup dried cranberries. The sweetness of the white chocolate pairs beautifully with the pumpkin and spices, and the cranberries add a tart pop. This version is especially good for holiday cookie exchanges.
Spice It Up: Add ½ teaspoon of cardamom or a pinch of cayenne pepper to the spice blend. Cardamom adds an aromatic, almost floral note that’s unexpected and lovely. Cayenne adds a subtle warmth that plays well with the chocolate. Start small — you can always add more next time.
Pumpkin Seed Crunch: Press a few pepitas (pumpkin seeds) into the top of each dough ball before baking, along with the flaky salt. The seeds toast in the oven and add a wonderful crunch. It also makes the cookies look extra pretty — perfect for gifting.
Low-Sugar Option: Reduce the granulated sugar to ½ cup and the brown sugar to ½ cup. The cookies will be less sweet, but the chocolate and salt will still carry the flavor. I’ve made this version for friends who are watching their sugar intake, and they loved it. Just note that the texture will be slightly less tender.
Extra Pumpkin Flavor: If you really want the pumpkin to shine, increase the pumpkin puree to ¾ cup and reduce the butter to ¾ cup (1½ sticks). The cookies will be a bit softer and more cake-like, but the pumpkin flavor will be more pronounced. You may need to increase the baking time by a minute or two.
I’ve personally tried the white chocolate and cranberry version for a holiday party, and it was a huge hit. The tartness of the cranberries cuts through the sweetness perfectly, and the white chocolate makes the cookies feel extra special. It’s a great option if you’re not a dark chocolate fan.
Serving & Storage Suggestions
These cookies are at their absolute best when served slightly warm, with the chocolate still a little melty and the salt crystals just beginning to dissolve. I like to pop them in a 300°F oven for 3-4 minutes to rewarm them if they’ve been sitting out for a while. A glass of cold milk is the classic pairing, but they’re also fantastic with a cup of hot coffee or a mug of spiced chai.
At room temperature: Store the cookies in an airtight container at room temperature for up to 5 days. Layer them between sheets of parchment paper to prevent sticking. I’ve found they actually get better on day two — the flavors meld and the texture softens slightly. If you live in a humid climate, add a piece of bread to the container to absorb excess moisture and keep the cookies from getting soggy.
In the refrigerator: You can store the cookies in the fridge for up to a week. They’ll be firmer and less tender straight from the fridge, so let them sit at room temperature for 10-15 minutes before serving. I don’t usually recommend refrigerating baked cookies unless you need them to last longer — the fridge tends to dry them out.
In the freezer: These cookies freeze beautifully. Let them cool completely, then arrange them in a single layer on a baking sheet and freeze until solid (about 1 hour). Transfer the frozen cookies to a zip-top freezer bag or an airtight container, layering parchment between stacks. They’ll keep for up to 3 months. To thaw, let them sit at room temperature for 15-20 minutes, or rewarm in a 300°F oven for 5 minutes. You can also freeze the unbaked dough balls — just scoop them onto a baking sheet, freeze until solid, then transfer to a freezer bag. Bake from frozen, adding 2-3 minutes to the bake time.
Flavor development: Here’s something interesting — these cookies actually taste better the day after baking. The spices have time to mellow and meld with the pumpkin and chocolate, and the texture becomes more uniformly tender. If you can resist eating them all on day one, you’ll be rewarded on day two. I’ve tested this extensively (for science, obviously), and it’s consistently true.
Nutritional Information & Benefits
Let’s be real — these are cookies, not health food. But they do have a few redeeming qualities worth mentioning. Here’s the approximate nutritional breakdown per cookie (based on 24 cookies):
- Calories: 195
- Total Fat: 11g
- Saturated Fat: 7g
- Carbohydrates: 24g
- Fiber: 1g
- Sugar: 15g
- Protein: 3g
- Sodium: 180mg (including sea salt topping)
These values are estimates and will vary based on your specific ingredients and portion sizes.
Health highlights: Pumpkin is rich in vitamin A (from beta-carotene), fiber, and antioxidants. The dark chocolate provides flavonoids that support heart health, and the cinnamon has anti-inflammatory properties. The flaky sea salt adds trace minerals like magnesium and potassium. Are these a health food? No. But they’re not empty calories either. They’re a treat made with real ingredients, and there’s value in that.
Dietary considerations: This recipe contains gluten, dairy, and eggs. For gluten-free, dairy-free, or vegan adaptations, see the Variations section above. The cookies are nut-free as written (check your chocolate for nut contamination if needed). They’re also relatively low in fiber, so if you want to boost that, try swapping ½ cup of the all-purpose flour for whole wheat pastry flour or oat flour.
I’m not a nutritionist, and I don’t pretend to be one. But I do believe in eating real food, including treats made with butter and sugar, in moderation. These cookies are meant to be enjoyed, not analyzed. So eat one, savor it, and don’t feel guilty about it.
Conclusion
These Ultimate Pumpkin Chocolate Chip Cookies with Sea Salt are the cookie I’ve been searching for — the one that actually delivers on the promise of a chewy, chocolatey, pumpkin-spiced treat without the cakey disappointment. The dark chocolate brings depth, the pumpkin adds moisture and warmth, and the sea salt? That’s the secret weapon that makes every bite sing.
I’ve made these for fall gatherings, holiday cookie exchanges, lazy Sunday afternoons, and late-night cravings. They’ve never let me down. They’re the kind of cookie that makes people close their eyes and go quiet for a second — which, in my book, is the highest compliment a cookie can receive.
I’d love to hear how they turn out for you. Did you try a variation? Add extra salt? Swap the chocolate for something unexpected? Drop a comment below and let me know — I read every single one. And if you share a photo on social media, tag me so I can see your beautiful, salty, chocolate-studded creations.
Happy baking, friends. May your cookies be chewy, your chocolate be melty, and your salt be flaky.
Frequently Asked Questions
Can I use pumpkin pie filling instead of pumpkin puree?
No, please don’t. Pumpkin pie filling is pre-sweetened and spiced, which will throw off the sugar and spice ratios in this recipe. Stick with 100% pure pumpkin puree. If you accidentally buy pie filling, save it for making a quick pumpkin pie or mix it into oatmeal.
Why did my cookies turn out cakey?
Most likely, you used too much pumpkin puree or didn’t chill the dough long enough. Pumpkin is high in water content, and too much of it creates steam in the oven, which puffs up the cookies. Stick to the ½ cup measurement and chill the dough for at least 30 minutes. Also, make sure you’re not overmixing the flour into the dough.
Can I freeze the cookie dough?
Absolutely. Scoop the dough into balls, place them on a baking sheet, and freeze until solid (about 1 hour). Transfer the frozen dough balls to a freezer bag and store for up to 3 months. When you’re ready to bake, place the frozen dough balls on a parchment-lined baking sheet and bake at 350°F for 13-15 minutes — no need to thaw first. You may need to add a minute or two to the bake time.
What if I don’t have flaky sea salt?
You can use kosher salt or even a fine sea salt in a pinch, but the texture and experience will be different. Flaky salt provides those big, irregular crystals that crunch and dissolve slowly. Fine salt will just melt into the cookie. If you’re using fine salt, use about half the amount and sprinkle it very lightly. I really recommend picking up a box of Maldon or another flaky salt — it’s inexpensive and lasts forever.
Can I make these cookies without a stand mixer?
Yes, absolutely. You can cream the butter and sugars by hand with a wooden spoon or a sturdy whisk. Just make sure your butter is very soft (almost room temperature) to make the job easier. It’ll take a bit more elbow grease, but the cookies will turn out just as delicious. I’ve made them this way when traveling and staying at a friend’s house with minimal kitchen equipment.
Pin This Recipe!
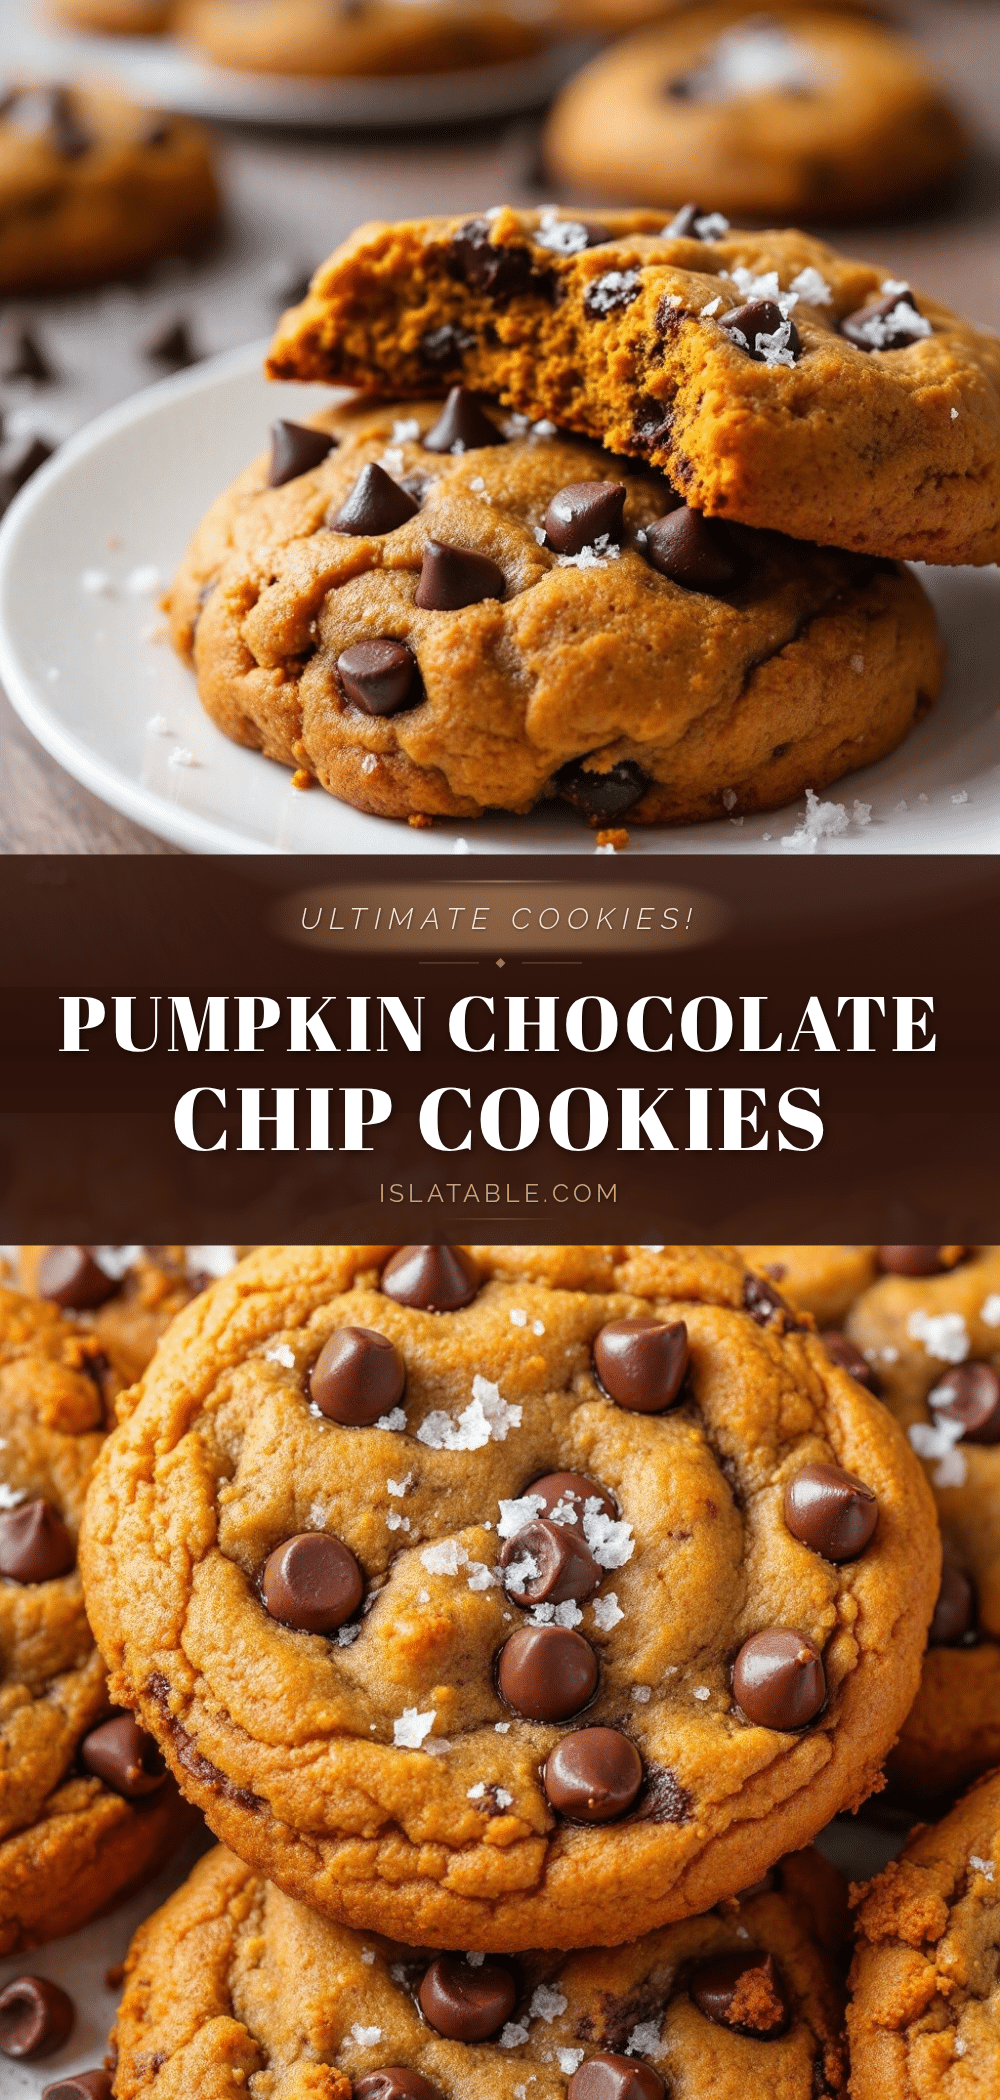
Ultimate Pumpkin Chocolate Chip Cookies with Sea Salt
These dark, fudgy pumpkin chocolate chip cookies are chewy, not cakey, with pools of melted dark chocolate and a crackling finish of flaky sea salt. The pumpkin plays a supporting role, adding moisture and earthy warmth to a chocolate-forward cookie that will convert even pumpkin skeptics.
- Prep Time: 15 minutes
- Cook Time: 12 minutes
- Total Time: 57 minutes
- Yield: 24 cookies 1x
- Category: Dessert
- Cuisine: American
Ingredients
- 1 cup (2 sticks / 226g) unsalted butter, softened
- ¾ cup (150g) granulated sugar
- ¾ cup (150g) light brown sugar, packed
- ½ cup (120g) pumpkin puree (not pumpkin pie filling)
- 1 large egg, room temperature
- 2 teaspoons vanilla extract
- 2 cups (240g) all-purpose flour
- 1 teaspoon baking soda
- ½ teaspoon baking powder
- ½ teaspoon fine sea salt
- 1½ teaspoons ground cinnamon
- ½ teaspoon ground ginger
- ¼ teaspoon ground nutmeg
- ⅛ teaspoon ground cloves
- 4 oz (115g) dark chocolate (70% cacao), chopped
- ½ cup (90g) semi-sweet mini chocolate chips
- 1–2 teaspoons flaky sea salt (for finishing)
Instructions
- Prep your ingredients: Take the butter and egg out of the fridge at least an hour before starting. Measure out the pumpkin puree and let it come to room temperature.
- Whisk the dry ingredients: In a medium bowl, whisk together the flour, baking soda, baking powder, fine sea salt, cinnamon, ginger, nutmeg, and cloves. Set aside.
- Cream the butter and sugars: In the bowl of a stand mixer fitted with the paddle attachment (or using a hand mixer), beat the softened butter with granulated sugar and brown sugar on medium speed for 3-4 minutes until light, fluffy, and noticeably paler. Scrape down the sides and bottom of the bowl halfway through.
- Add the wet ingredients: Beat in the pumpkin puree, egg, and vanilla extract on medium-low speed until fully combined. The mixture may look slightly curdled — that’s normal.
- Fold in the dry ingredients: With the mixer on low speed, gradually add the flour mixture in two additions, mixing just until the streaks of flour disappear. Stop the mixer when there are still a few floury patches and finish folding by hand with a rubber spatula.
- Fold in the chocolate: Add the chopped dark chocolate and mini chocolate chips. Fold gently with the spatula until evenly distributed.
- Chill the dough: Cover the bowl with plastic wrap and refrigerate for at least 30 minutes, or up to 3 days.
- Preheat the oven: About 15 minutes before baking, preheat the oven to 350°F (175°C). Line two baking sheets with parchment paper.
- Portion the dough: Use a 1.5-tablespoon cookie scoop to portion the dough into balls, about 1½ inches in diameter. Place them 2 inches apart on the prepared baking sheets.
- Bake: Bake one sheet at a time on the center rack for 11-13 minutes. At 11 minutes, the edges should be set and lightly golden, but the centers will still look soft and slightly underdone.
- Finish with salt: As soon as the cookies come out of the oven, sprinkle each one with a pinch of flaky sea salt while still hot.
- Cool on the pan: Let the cookies rest on the baking sheet for 5 minutes, then transfer to a wire rack to cool completely.
Notes
Chilling the dough is non-negotiable for best texture. The cookies actually taste better the day after baking as the flavors meld. For a softer, chewier cookie, bake for 11 minutes; for slightly crisper edges, bake for 12-13 minutes. If using dark baking sheets, reduce oven temperature by 25°F.
Nutrition
- Serving Size: 1 cookie
- Calories: 195
- Sugar: 15
- Sodium: 180
- Fat: 11
- Saturated Fat: 7
- Carbohydrates: 24
- Fiber: 1
- Protein: 3
Keywords: pumpkin cookies, chocolate chip cookies, pumpkin chocolate chip, fall cookies, chewy cookies, sea salt cookies, pumpkin dessert, easy cookie recipe


