I was wearing that oversized, flannel shirt I’d stolen from my dad, the one with the missing button on the cuff. The house was quiet, save for the hum of the refrigerator and the distant, rhythmic thumping of bass from a neighbor’s Halloween party. We had just finished carving pumpkins that were more lopsided than scary, and the kids were finally asleep. I didn’t want a complicated dessert. I didn’t want to stand over a stove stirring caramel or temper chocolate. I just wanted something sweet, something easy, and something that felt festive without being exhausting.
So, I pulled out a box of sugar cookie mix, a can of frosting, and a bag of orange and black sprinkles. Honestly, it was lazy. It was messy. It was perfect. That specific combination of chewy edges and soft centers, dusted with that garish but joyful sprinkles, became the unofficial anthem of our neighborhood’s trick-or-treat route. I remember handing out little plates of these warm bars to the kids, watching their eyes light up at the simple, bright colors. It wasn’t gourmet. It was better. It was comfort.
Fast forward to today, and while I have plenty of fancy, from-scratch recipes up my sleeve, this Spooky Halloween Sugar Cookie Bars recipe remains my go-to for last-minute scares. It’s not about perfection; it’s about that rush of nostalgia and the ease of making something delightful with what you already have. You know how it is when you’re tired and the oven is already on? You don’t want to debate sourdough starters. You want results. These bars deliver that immediate satisfaction, the kind that makes you close your eyes after the first bite and smile, even if the kitchen is a mess.
Why You’ll Love This Recipe
There is a certain magic in simplicity, especially when it comes to holiday baking. This recipe isn’t just good; it is the kind that makes you feel like a hero in your own kitchen without requiring a degree in pastry arts. I’ve tested this version countless times, tweaking the ratios of frosting to dough to ensure that perfect balance between chewy and cakey. Here is why this Spooky Halloween Sugar Cookie Bars recipe has earned a permanent spot in my rotation:
- Quick & Easy: Comes together in under 30 minutes of prep time. Perfect for busy weeknights or last-minute cravings when you need a sweet fix but don’t have hours to spare. It’s the ultimate rescue dessert for those unexpected guests or sudden party invites.
- Simple Ingredients: No fancy grocery trips needed. You likely already have everything in your kitchen. Sugar cookie mix, butter, frosting, and sprinkles are pantry staples that everyone loves. It’s accessible cooking at its finest.
- Perfect for Parties: Great for Halloween gatherings, classroom parties, or cozy dinners. The bar format makes serving effortless, and the spooky theme instantly sets the mood without any extra effort.
- Crowd-Pleaser: Always gets rave reviews from kids and adults alike. The familiar taste of sugar cookies combined with the fun factor of Halloween colors makes it a universal hit.
- Unbelievably Delicious: The texture and flavor combo is next-level comfort food. The frosting adds a creamy richness that balances the sweetness of the cookies, creating a bite that is both indulgent and satisfying.
What makes this recipe different from the rest is the technique of layering. Instead of just baking cookies and topping them later, we bake the frosting *into* the bars. This ensures every single bite has that creamy, sweet finish, rather than just having frosting on top that slides off. It’s a small tweak, but it makes a huge difference in the overall experience. Whether you are a seasoned baker or a beginner, this method is foolproof. It’s comfort food reimagined—faster, easier, but with the same soul-soothing satisfaction as a homemade batch from scratch.
What Ingredients You Will Need
This recipe uses simple, wholesome ingredients to deliver bold flavor and satisfying texture without the fuss. The beauty of this Spooky Halloween Sugar Cookie Bars recipe lies in its reliance on high-quality store-bought bases, which we then elevate with fresh touches and seasonal flair. Here is what you will need to make them:
- Sugar Cookie Mix: One standard box (15-18 oz). I recommend using a premium brand like Betty Crocker or Duncan Hines for the best texture. Avoid the “homestyle” mixes if you want a chewier bar; the classic mix works best here. This forms the base of our bars.
- Unsalted Butter: 1/2 cup (1 stick), melted. This adds richness and helps bind the dough. Using unsalted butter allows you to control the saltiness, though salted butter works in a pinch.
- Vanilla Extract: 1 teaspoon. A small splash of real vanilla enhances the sweetness and adds depth. It’s an optional step, but I highly suggest it for a more homemade taste.
- Vanilla Frosting: One jar (16 oz). Look for a thick, creamy vanilla frosting. Brands like Pillsbury or Betty Crocker work well. Avoid “whipped” frostings as they are too airy and won’t spread evenly.
- Halloween Sprinkles: 1/2 cup. Orange and black jimmies or sprinkles are traditional, but don’t be afraid to mix in purple or green for extra spookiness. These add the visual appeal and a tiny crunch.
- Optional: Cream Cheese: 2 oz, softened. For a tangier frosting layer, you can mix this into the store-bought frosting. It cuts the sweetness and adds a professional touch.
If you are looking to substitute ingredients, you can use gluten-free sugar cookie mix if needed, though the texture may be slightly more crumbly. For a dairy-free option, use dairy-free butter and frosting, though the flavor profile will change. The key is to keep the base simple so the festive toppings can shine.
Equipment Needed
You don’t need a fancy kitchen to make these bars. The essential equipment is minimal, which is part of the appeal. Here is what you will need:
- 9×13 Inch Baking Pan: A standard glass or metal pan works best. Glass distributes heat evenly, while metal gives slightly crispier edges. Grease it lightly with butter or cooking spray.
- Mixing Bowls: Two medium-sized bowls. One for the cookie dough and one for the frosting mixture. Plastic or stainless steel are ideal.
- Spatula: A silicone spatula is crucial for spreading the frosting evenly and scraping the bowl clean. It’s the most used tool in this recipe.
- Measuring Cups and Spoons: Standard sets for accurate measurements. Precision matters even in simple baking.
- Wire Cooling Rack: Essential for cooling the bars before cutting. Cutting warm bars can lead to messy, uneven squares.
If you don’t have a 9×13 pan, you can use an 8×8 pan, but the bars will be thicker and may require slightly longer baking time. Keep an eye on them. A budget-friendly option for the pan is a disposable aluminum foil pan, which makes cleanup a breeze—perfect for those messy holiday baking sessions.
Preparation Method
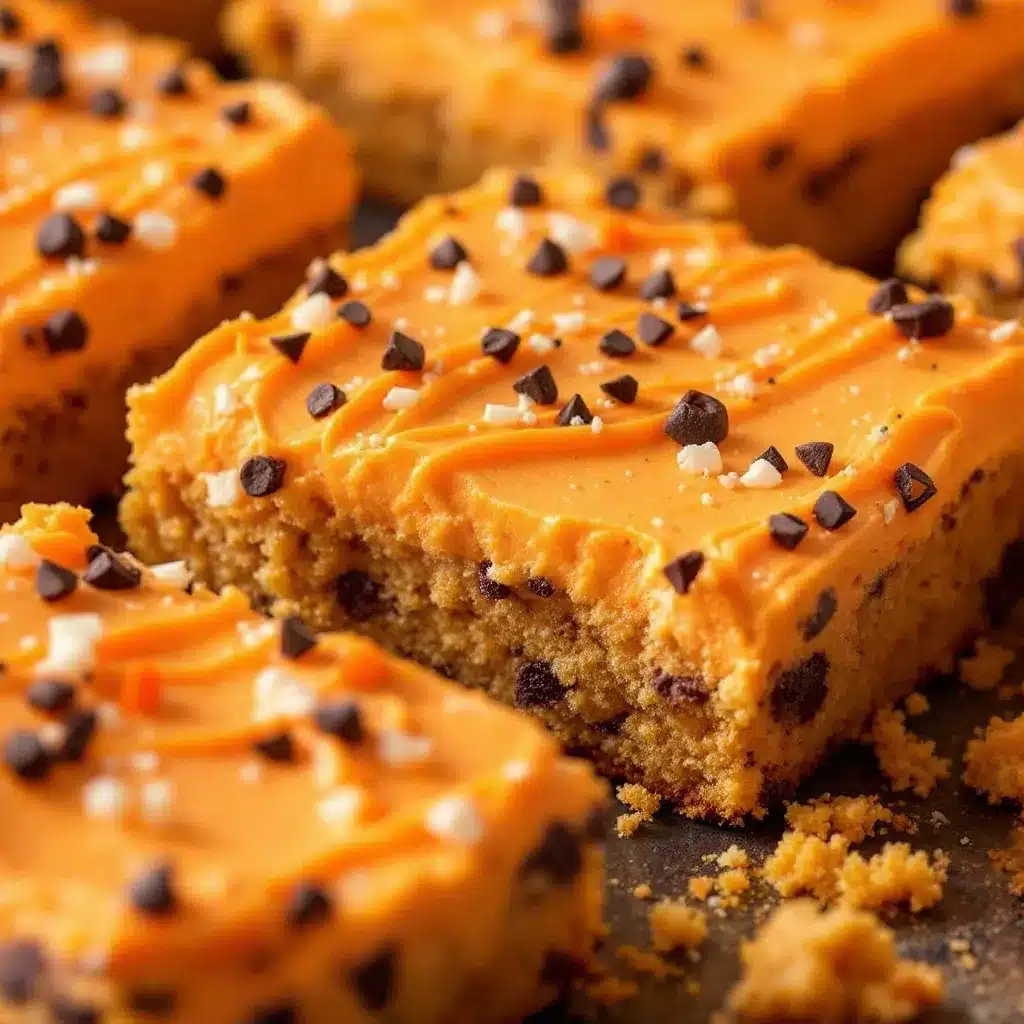
Making these Spooky Halloween Sugar Cookie Bars is straightforward, but attention to detail ensures the best results. Follow these steps carefully for perfect, festive bars every time.
- Preheat and Prepare (5 minutes): Preheat your oven to 350°F (175°C). Grease your 9×13 inch baking pan thoroughly with butter or non-stick spray. This prevents sticking and ensures easy removal later. Line the pan with parchment paper for extra security if you prefer.
- Mix the Dough (3 minutes): In a medium mixing bowl, combine the sugar cookie mix, melted butter, and vanilla extract. Stir with a spatula until a stiff dough forms. It will look crumbly at first, but keep mixing until it comes together. Do not overmix, or the bars can become tough.
- Press into Pan (2 minutes): Transfer the dough to the prepared pan. Use your hands or the bottom of a measuring cup to press the dough evenly into the pan. Aim for a uniform layer, about 1/2 inch thick. This ensures even baking. If the dough is sticky, wet your hands slightly.
- Bake the Base (15-18 minutes): Place the pan in the preheated oven. Bake for 15-18 minutes, or until the edges are lightly golden. The center may still look slightly soft, but it will firm up as it cools. Do not overbake, as this leads to dry bars.
- Prepare the Frosting (While baking): In a separate bowl, mix the vanilla frosting with the cream cheese (if using) until smooth. Stir in the Halloween sprinkles. If the frosting is too thick, microwave it for 10-15 seconds to loosen it up. This makes spreading much easier.
- Add Frosting (2 minutes): Remove the pan from the oven. Immediately scoop the frosting mixture onto the hot cookie base. Use the spatula to spread it evenly over the top. The heat from the cookies helps the frosting melt slightly, creating a beautiful marbled effect.
- Final Bake (5 minutes): Return the pan to the oven for 5 more minutes. This sets the frosting and bakes it into the cookie. You want the frosting to look set, not liquid.
- Cool and Cut (30 minutes): Let the bars cool completely in the pan on a wire rack. This is crucial; cutting them warm will result in a mushy mess. Once cool, lift them out using the parchment paper and cut into squares or spooky shapes.
Personal tip: If you want sharper edges, chill the pan in the refrigerator for 15 minutes before cutting. It makes slicing much cleaner.
Cooking Tips & Techniques
Even simple recipes have tricks to master. Here are some professional techniques and lessons I’ve learned over the years to ensure your Spooky Halloween Sugar Cookie Bars turn out perfectly.
- Don’t Overbake the Base: The most common mistake is baking the cookie base too long. It should look slightly underdone in the center when you take it out. It continues to cook from residual heat.
- Warm Frosting Spreads Better: If your frosting is stiff, microwave it briefly. Cold frosting tears the soft cookie base when you try to spread it. Warm frosting glides on smoothly.
- Use a Sharp Knife: For clean cuts, use a sharp chef’s knife. Wipe the blade with a clean cloth between cuts to prevent frosting buildup. This keeps each bar looking neat and professional.
- Room Temperature Ingredients: While butter is melted, ensure your frosting is at room temperature. Cold frosting from the fridge can be too hard to spread, and hot frosting can melt too much. Aim for a spreadable consistency.
- Patience is Key: Resist the urge to cut the bars while they are warm. I know it’s tempting, but waiting allows the structure to set. Trust the process; the reward is worth the wait.
I once rushed this step and ended up with a crumbled mess. Now, I set a timer and walk away. It’s the hardest part of the recipe, but it pays off in the presentation.
Variations & Adaptations
While the classic orange and black combo is iconic, there are many ways to adapt this recipe to suit different tastes and dietary needs.
- Gluten-Free Option: Use a certified gluten-free sugar cookie mix and ensure your frosting and sprinkles are also gluten-free. Many major brands offer GF versions now.
- Dairy-Free Twist: Swap butter for coconut oil or a dairy-free butter alternative. Use dairy-free frosting, such as those made with oat or almond milk. The flavor will be slightly different but still delicious.
- Flavor Variations: Add 1/2 teaspoon of pumpkin pie spice to the dough for a seasonal twist. Or, use chocolate frosting instead of vanilla for a “monster mud” look. You can also add orange food coloring to the frosting for a brighter hue.
- Low-Sugar Version: Use a sugar-free cookie mix and sugar-free frosting. The texture may be slightly different, but it’s a great option for those watching their sugar intake.
- Personal Favorite: I sometimes add a layer of orange jam between the cookie and frosting for a fruity burst. It adds moisture and a tart contrast to the sweet frosting.
These variations allow you to customize the bars for different guests, ensuring everyone gets to enjoy a spooky treat.
Serving & Storage Suggestions
These bars are best served at room temperature, allowing the flavors to fully develop. They pair wonderfully with a cold glass of milk or a hot cup of coffee. For a Halloween party, arrange them on a platter with other spooky treats for a festive display.
Storage: Store leftover bars in an airtight container at room temperature for up to 3 days. For longer storage, refrigerate for up to a week. The frosting may firm up in the fridge, so let them sit out for 15 minutes before serving. You can also freeze the bars for up to 2 months. Wrap them individually in plastic wrap and place them in a freezer-safe bag. Thaw at room temperature before eating.
Reheating: If you prefer warm bars, microwave a single serving for 10-15 seconds. This softens the frosting and makes the cookie extra chewy. The flavors meld beautifully over time, so they often taste even better the next day.
Nutritional Information & Benefits
While these bars are a treat, they are made with simple ingredients that provide energy for your Halloween festivities. Each bar contains approximately 250-300 calories, depending on size. The sugar cookie mix provides carbohydrates for energy, while the frosting adds fats for satiety.
Allergens: This recipe contains gluten, dairy, and eggs. Use substitutions as noted in the variations section for allergen-friendly options. Health Benefits: While not a health food, using real vanilla and quality ingredients can make a difference in taste and satisfaction, allowing you to enjoy smaller portions. It’s a balanced approach to holiday indulgence.
Conclusion
Spooky Halloween Sugar Cookie Bars are more than just a dessert; they are a celebration of simple joys and festive memories. They are easy to make, delicious to eat, and perfect for sharing with friends and family. I love this recipe because it brings back those warm, cozy nights of baking and decorating, without the stress of complicated techniques. It’s a recipe that encourages creativity and fun, allowing you to experiment with colors and shapes.
I encourage you to try this recipe and make it your own. Add your favorite sprinkles, try a different frosting flavor, or experiment with new shapes. Share your creations with us by leaving a comment below or tagging us on social media. I’d love to see your spooky masterpieces. Happy Halloween, and happy baking!
Frequently Asked Questions
Can I make these bars ahead of time?
Yes, you can make them up to 2 days in advance. Store them in an airtight container at room temperature. They actually taste better after sitting for a day as the flavors meld together.
Can I use homemade sugar cookie dough?
Absolutely. If you prefer homemade, you can use your favorite sugar cookie dough recipe. Press it into the pan and bake as directed, then add the frosting layer. Note that homemade dough may spread more, so chill it first if needed.
How do I get clean cuts?
Ensure the bars are completely cool. Use a sharp knife and wipe the blade clean between each cut. For even cleaner cuts, you can dip the knife in hot water and dry it before each slice.
Can I freeze these bars?
Yes, freeze them for up to 2 months. Wrap them tightly in plastic wrap and place in a freezer bag. Thaw at room temperature before serving. The texture remains soft and delicious.
What if I don’t have Halloween sprinkles?
Don’t worry! Any sprinkles will work. You can use regular rainbow sprinkles, white sprinkles, or even chopped nuts for a different texture. The flavor will be just as good.
Pin This Recipe!
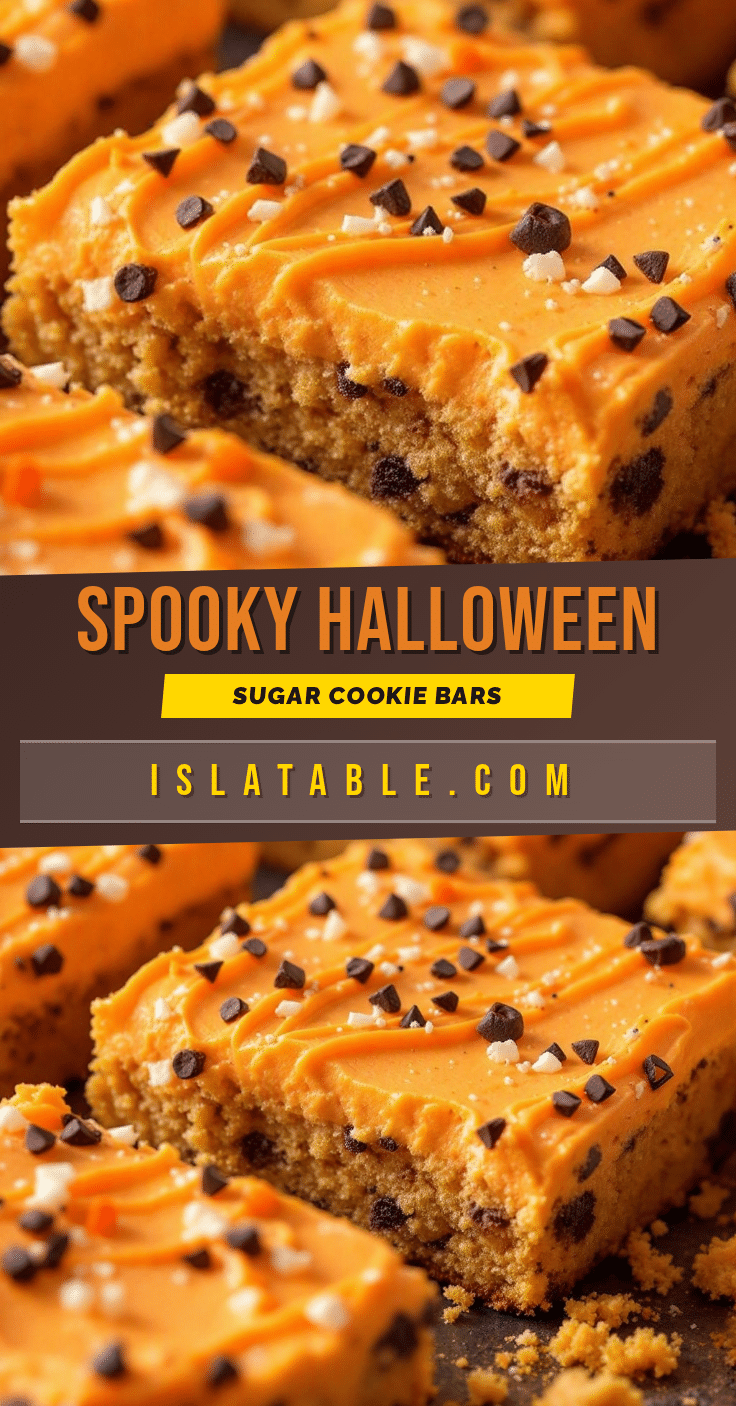
Spooky Halloween Sugar Cookie Bars
An easy, 5-ingredient Halloween dessert featuring chewy sugar cookie bars baked with a layer of creamy vanilla frosting and festive sprinkles.
- Prep Time: 10 minutes
- Cook Time: 23 minutes
- Total Time: 45 minutes
- Yield: 12 servings 1x
- Category: Dessert
- Cuisine: American
Ingredients
- 1 box (15-18 oz) sugar cookie mix
- 1/2 cup (1 stick) unsalted butter, melted
- 1 teaspoon vanilla extract
- 1 jar (16 oz) vanilla frosting
- 1/2 cup Halloween sprinkles (orange and black)
- 2 oz cream cheese, softened (optional)
Instructions
- Preheat oven to 350°F (175°C) and grease a 9×13 inch baking pan.
- In a medium bowl, combine sugar cookie mix, melted butter, and vanilla extract. Stir until a stiff dough forms.
- Press the dough evenly into the prepared pan, about 1/2 inch thick.
- Bake the base for 15-18 minutes until edges are lightly golden.
- While baking, mix vanilla frosting with cream cheese (if using) and sprinkles in a separate bowl.
- Remove pan from oven and immediately spread the frosting mixture over the hot cookie base.
- Return to oven and bake for 5 more minutes to set the frosting.
- Cool completely in the pan on a wire rack before cutting into squares.
Notes
Do not overbake the cookie base as it continues to cook from residual heat. Ensure bars are completely cool before cutting to prevent crumbling. For cleaner cuts, use a sharp knife and wipe the blade between slices.
Nutrition
- Serving Size: 1 bar
- Calories: 275
- Sugar: 28
- Sodium: 180
- Fat: 12
- Saturated Fat: 6
- Carbohydrates: 40
- Protein: 2
Keywords: Halloween, sugar cookie bars, easy dessert, 5-ingredient recipe, holiday baking, spooky treats


