I ruined three batches of gingerbread cookies before I understood what a crinkle was supposed to look like.
The first batch came out flat as pancakes. The second batch looked like sad little brown lumps. The third batch – well, I don’t talk about the third batch. I was convinced the crinkle effect was some kind of baking wizardry I’d never master. I mean, how do you get those beautiful crackled tops that look like snow-covered hills? I’d scroll through Pinterest, staring at those perfect cookies, and honestly, I thought it was a filter.
Turns out, it’s not magic. It’s just a little patience and the right dough temperature. And now, these soft baked gingerbread crinkle cookies are the first thing I make when December rolls around. They’re the ones my neighbor texts me about. The ones my kid’s teacher specifically requests for the holiday party. The ones I hide in the back of the freezer so I don’t eat them all before Christmas Eve.
There’s something about pulling a tray of these out of the oven. The kitchen smells like a holiday candle, but better. The powdered sugar dusts everything like fresh snow. And when you bite into one – soft, spiced, chewy – it’s the kind of moment that makes you slow down. Even if just for a second.
So trust me when I say: if I can figure these out, you absolutely can too.
Why You’ll Love This Recipe
Let me tell you why these cookies have earned a permanent spot in my holiday rotation. I’ve tested this recipe more times than I care to admit, and every single time, they disappear within hours.
- Perfectly Soft and Chewy – These aren’t those hard, crunchy gingerbread cookies that break your teeth. They’re soft-baked, with a tender center that stays moist for days. The crinkle tops add the most beautiful texture contrast.
- Simple Pantry Ingredients – You probably have most of this in your kitchen right now. No fancy extracts, no hard-to-find spices. Just good old-fashioned baking staples.
- Holiday Crowd-Pleaser – I’ve brought these to cookie exchanges, office parties, and family gatherings. They’re always the first plate emptied. Kids love the powdered sugar snow effect, and adults love the warm spice flavor.
- Beginner-Friendly – If you can roll a dough ball and count to twelve, you can make these. The crinkle effect does half the decorating work for you.
- Freezer-Friendly – Make the dough ahead, freeze it, and bake fresh cookies whenever you need them. Perfect for those last-minute holiday emergencies.
What makes these different from every other gingerbread cookie recipe out there? It’s the ratio. I spent weeks tweaking the butter-to-flour ratio and the molasses amount until I got that perfect soft texture that still holds its crinkle shape. No spread-out blobs. No rock-hard discs. Just soft, pillowy cookies with those gorgeous crackled tops.
Honestly, this is the kind of cookie that makes you close your eyes after the first bite. It’s comfort food at its finest – warm, spiced, and covered in a blanket of snowy sugar.
What Ingredients You Will Need
This recipe keeps things simple. Most of these ingredients are pantry staples, which means you can whip up a batch without a special trip to the store. Here’s what you’ll need and why each one matters.
- Unsalted butter (1/2 cup, softened) – I always use unsalted so I can control the salt level. Let it sit out for about 30 minutes before you start. It should be soft enough that a finger presses into it easily, but not melted.
- Granulated sugar (1/2 cup) – This gives the cookies structure and helps with that crinkle effect. Don’t substitute with brown sugar here – the granulated sugar creates the right texture for cracking.
- Molasses (1/3 cup) – This is the heart of the gingerbread flavor. Use unsulphured molasses, not blackstrap. Blackstrap is too bitter and will make your cookies taste like medicine. I prefer Grandma’s or Brer Rabbit brand for consistent results.
- Large egg (1, room temperature) – Room temperature eggs mix more evenly into the batter. If you forget to take it out ahead of time, place it in a bowl of warm water for 5 minutes.
- Vanilla extract (1 teaspoon) – Pure vanilla makes a difference here. The imitation stuff works in a pinch, but pure vanilla adds a warmth that complements the spices beautifully.
- All-purpose flour (2 cups) – Standard all-purpose flour works perfectly. Don’t use bread flour – it’ll make the cookies too tough. If you need a gluten-free option, I’ve had good results with a 1:1 gluten-free baking flour blend.
- Baking soda (1 teaspoon) – This helps the cookies spread just enough and creates those beautiful cracks on top.
- Ground ginger (1 tablespoon) – Fresh ground ginger is nice, but for cookies, dried ground ginger gives that classic warm bite. Make sure your ginger isn’t years old – spices lose potency over time.
- Ground cinnamon (1 teaspoon) – Cinnamon and ginger are best friends in this recipe. They balance each other perfectly.
- Ground cloves (1/2 teaspoon) – Just a touch. Cloves are strong, so don’t go overboard. A little goes a long way toward that holiday flavor.
- Salt (1/4 teaspoon) – Salt enhances all the other flavors. Don’t skip it, even if you’re watching your sodium.
- Powdered sugar (1/2 cup, for rolling) – This is what creates the crinkle effect. You’ll roll the dough balls in powdered sugar right before baking. The sugar cracks as the cookies spread, giving you that beautiful snowy look.
One thing I learned the hard way – check your molasses expiration date. I once used an old bottle and the cookies came out flat and flavorless. Fresh molasses makes a huge difference. Also, if your kitchen is warm, pop the dough in the fridge for 15 minutes before rolling. It makes the balls easier to handle.
Equipment Needed
You don’t need a fancy bakery setup for these cookies. Here’s what I use and what you can substitute if needed.
- Mixing bowls – You’ll need a large bowl for the wet ingredients and a medium bowl for the dry ingredients. Any bowl works, but I prefer glass or stainless steel.
- Electric mixer – A hand mixer or stand mixer both work great. You can mix by hand with a wooden spoon, but your arm will get a workout. The butter and sugar need to be creamed until light and fluffy, which takes some elbow grease.
- Baking sheets – Two standard baking sheets work well. If you only have one, let it cool completely between batches. A hot baking sheet will make the dough spread too fast.
- Parchment paper – Non-negotiable for me. Parchment paper prevents sticking and makes cleanup a breeze. Silicone baking mats work too, but I find parchment gives better crinkle results.
- Cookie scoop – A 1.5-tablespoon cookie scoop makes uniform balls. If you don’t have one, just use a spoon and your hands. Uniform size means even baking.
- Cooling rack – Letting the cookies cool on a rack prevents soggy bottoms. If you don’t have one, transfer them to a plate after 5 minutes on the baking sheet.
- Small bowl for powdered sugar – You’ll need a shallow bowl to roll the dough balls in. A cereal bowl works perfectly.
I’ve made these cookies in a tiny apartment kitchen with a hand mixer from the thrift store. They turned out just as good as the ones I make now with my fancy stand mixer. Don’t let equipment hold you back.
Preparation Method
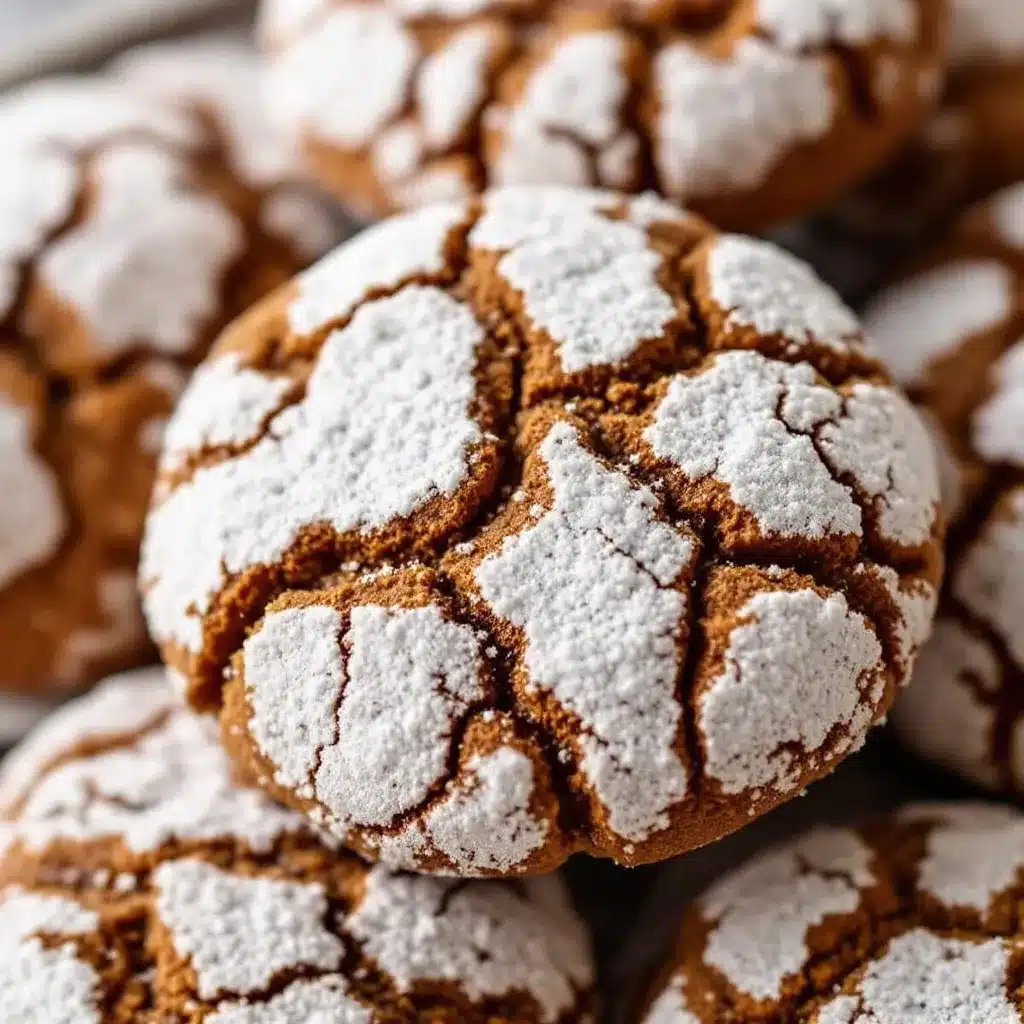
Alright, let’s get baking. I’ll walk you through every step so you get perfect crinkle cookies every time.
- Cream the butter and sugar. In a large mixing bowl, beat the softened butter and granulated sugar together until light and fluffy. This takes about 2-3 minutes with an electric mixer on medium speed. You’re looking for a pale yellow color and a texture that looks like soft sand. Scrape down the sides of the bowl halfway through.
- Add the wet ingredients. Beat in the molasses, egg, and vanilla extract. Mix until everything is combined. The mixture will look a little separated at this point – that’s normal. Don’t overmix. Just until it comes together.
- Whisk the dry ingredients. In a separate bowl, whisk together the flour, baking soda, ginger, cinnamon, cloves, and salt. Whisking ensures the spices are evenly distributed. Nobody wants a cookie with a pocket of pure cloves.
- Combine wet and dry. Gradually add the dry ingredients to the wet mixture. Mix on low speed until just combined. You should see a few streaks of flour remaining. Stop mixing and finish folding with a spatula. Overmixing develops gluten and makes tough cookies.
- Chill the dough. Cover the bowl with plastic wrap and refrigerate for at least 2 hours. I know, I know – waiting is hard. But this step is crucial. Chilled dough spreads slower and creates better crinkles. Overnight chilling works even better. The dough will be firm and easy to handle.
- Preheat the oven. Set your oven to 350°F (175°C). Line two baking sheets with parchment paper. Give the oven a full 15 minutes to come to temperature. An oven thermometer is worth its weight in gold here – my oven runs hot, and I’d never know without one.
- Shape the dough balls. Scoop the chilled dough into 1.5-tablespoon portions. Roll each portion into a smooth ball between your palms. The dough should be firm but pliable. If it’s too sticky, pop it back in the fridge for 10 minutes.
- Roll in powdered sugar. Here’s the magic step. Drop each dough ball into a bowl of powdered sugar. Roll it around until completely coated. Don’t be shy – you want a thick, even coating. The sugar creates the crinkle effect as the cookie spreads. I like to roll them twice for extra snowy tops.
- Arrange on baking sheets. Place the sugar-coated dough balls on the prepared baking sheets, spacing them about 2 inches apart. These cookies spread, so give them room. I fit 6 per standard baking sheet.
- Bake. Bake for 10-12 minutes. The cookies should look puffed and cracked on top. The edges will be set but the centers will still look soft and slightly underdone. That’s exactly what you want. Overbaking gives you crunchy cookies.
- Cool. Let the cookies cool on the baking sheet for 5 minutes. The residual heat finishes the cooking process. Then transfer them to a wire rack to cool completely. The crinkles will continue to develop as they cool.
One thing I learned from my failed batches – don’t skip the chilling step. I know it’s tempting to rush, but warm dough spreads into flat discs with no crinkles. Chilled dough gives you those thick, soft cookies with beautiful crackled tops. Trust the process.
Also, if your first batch doesn’t look perfect, don’t panic. The powdered sugar hides a multitude of sins. And honestly, even the ugly ones taste amazing.
Cooking Tips & Techniques
After making these cookies more times than I can count, I’ve picked up a few tricks that make a real difference. Here’s what I wish someone had told me.
Temperature matters more than you think. Cold dough is your best friend for crinkle cookies. If the dough starts getting sticky while you’re rolling balls, just pop it back in the fridge for 10 minutes. I keep a small bowl of cold water nearby to dip my hands in – it keeps the dough from sticking to my palms.
Powdered sugar technique. Don’t just lightly dust the dough balls. Roll them generously. I use a deep bowl and really press the sugar into the dough. The thicker the coating, the more dramatic the crinkle effect. If you’re feeling fancy, you can give them a second dusting halfway through rolling.
Watch the oven like a hawk. Every oven is different. My friend’s oven bakes these in exactly 10 minutes. Mine takes 11. The difference between perfect and overbaked is about 30 seconds. Start checking at the 9-minute mark. The cookies are done when the edges are set and the tops are cracked, but the centers still look slightly soft.
Don’t overcrowd the baking sheet. I know it’s tempting to fit more cookies on the sheet, but they need space to spread. Six cookies per standard sheet is my sweet spot. If the cookies are too close together, they’ll merge into one giant cookie. Which, honestly, isn’t the worst problem to have.
Cooling is part of the process. Those 5 minutes on the hot baking sheet are crucial. The cookies continue to set and the crinkles finish developing. If you try to move them too soon, they’ll fall apart. Be patient – I learned this the hard way when I ended up with a plate of cookie crumbs.
I once forgot to chill the dough and baked them anyway. They spread into thin, crispy discs with barely any crinkles. They still tasted good, but they weren’t the soft, thick cookies I wanted. Now I set a timer on my phone for the chilling step. It’s the little things that make the difference.
Variations & Adaptations
One of the best things about this recipe is how adaptable it is. Here are some variations I’ve tried and loved.
Gluten-Free Version – Swap the all-purpose flour for a 1:1 gluten-free baking blend. I’ve used Bob’s Red Mill and King Arthur with great results. Add 1/4 teaspoon of xanthan gum if your blend doesn’t include it. The texture is slightly more delicate, but the crinkle effect works perfectly. For another gluten-free treat, try my easy gluten-free cornbread muffins – they’re just as satisfying for holiday baking.
Dairy-Free Option – Use vegan butter or coconut oil in place of the butter. I recommend Earth Balance or Miyoko’s for the best texture. The cookies might spread a tiny bit more, so chill the dough for an extra 30 minutes.
Spice It Up – Add 1/4 teaspoon of black pepper for a subtle warmth that pairs beautifully with the ginger. Or try 1/2 teaspoon of cardamom for a more complex flavor profile. My neighbor adds a pinch of cayenne – it’s unexpected but delicious.
Citrus Twist – Add 1 teaspoon of orange zest to the dough. The citrus brightens the molasses and spices. I sometimes dip the cooled cookies in melted dark chocolate and sprinkle with more orange zest. It’s dangerously good.
Holiday Sandwich Cookies – Once the cookies are cool, sandwich them with a cream cheese frosting or a simple buttercream. The soft texture holds up beautifully to filling. These make an impressive addition to any cookie platter.
Vegan Version – Replace the egg with a flax egg (1 tablespoon ground flaxseed mixed with 3 tablespoons water, let sit for 5 minutes). Use vegan butter and ensure your sugar is vegan-friendly. The texture is slightly more cake-like, but the crinkle effect still works.
I’ve also made these with fresh grated ginger instead of ground. Use 1 tablespoon of fresh ginger and reduce the ground ginger to 1 teaspoon. The fresh ginger adds a bright, zingy kick that’s incredible. Just make sure to grate it finely so you don’t get stringy bits in your cookies.
Serving & Storage Suggestions
These cookies are versatile enough for any holiday occasion. Here’s how I serve and store them.
Serving Temperature – These are best at room temperature. The soft texture really shines when they’re not straight out of the fridge. If you’re serving them at a party, arrange them on a platter about an hour before guests arrive. The powdered sugar will still look fresh and snowy.
Presentation Ideas – I like to stack them in a decorative tin lined with parchment paper. For gift-giving, place them in a clear cellophane bag tied with a red ribbon. Add a small tag with the recipe name – people always ask for it. You can also arrange them on a cake stand for a beautiful holiday centerpiece.
Complementary Dishes – These cookies pair perfectly with a cup of hot cocoa or spiced chai. For a full holiday spread, serve them alongside this dairy-free brunch casserole for a cozy morning treat. They also go beautifully with a glass of cold milk or a warm mug of apple cider.
Storage Instructions – Store the cookies in an airtight container at room temperature for up to 5 days. Place a slice of bread in the container to keep them soft – the bread absorbs excess moisture and releases it back to the cookies. Replace the bread slice every other day.
Freezer Tips – These cookies freeze beautifully. Freeze the baked cookies in a single layer on a baking sheet, then transfer to a freezer-safe bag. They’ll keep for up to 3 months. Thaw at room temperature for about 30 minutes before serving. You can also freeze the unbaked dough balls – just roll them in powdered sugar right before baking, adding 1-2 minutes to the bake time.
Flavor Development – Here’s a secret: these cookies taste even better the next day. The spices mellow and meld together overnight. If you can resist eating them all on day one, you’ll be rewarded with even more flavorful cookies on day two.
Nutritional Information & Benefits
Let’s be real – these are holiday cookies, not health food. But they do have some redeeming qualities.
Estimated Nutritional Values (per cookie) – Approximately 120 calories, 4g fat, 20g carbohydrates, 1g fiber, 10g sugar, 2g protein. These numbers will vary based on exact ingredients and portion sizes.
Health Benefits – Molasses is actually a good source of iron, calcium, and magnesium. One tablespoon of molasses contains about 20% of your daily iron needs. Ginger has anti-inflammatory properties and can help with digestion. Cinnamon may help regulate blood sugar levels. So while these aren’t health cookies, they’re not completely empty calories either.
Dietary Considerations – This recipe contains gluten, dairy, and eggs. For gluten-free and dairy-free alternatives, see the variations section above. The sugar content is moderate for a cookie, but if you’re watching your sugar intake, you can reduce the powdered sugar coating slightly.
Potential Allergens – Wheat (gluten), dairy (butter), eggs. Check your molasses and vanilla extract labels if you have specific allergies. Some brands process their products in facilities that handle nuts.
My Personal Take – I believe in balance. These cookies are a treat, meant to be enjoyed in moderation during the holiday season. I make them once a year, savor every bite, and don’t feel guilty about it. Life’s too short to skip the cookies.
Conclusion
These soft baked gingerbread crinkle cookies have become a non-negotiable part of my holiday season. They’re the recipe I turn to when I want something that feels special but doesn’t require hours in the kitchen. The crinkle tops never get old – every batch looks a little different, and that’s part of the charm.
I love that this recipe is forgiving enough for beginners but impressive enough for seasoned bakers. It’s the kind of cookie that makes people think you spent all day in the kitchen, when really, you just followed a few simple steps and let the oven do the work.
So go ahead – make a batch for your next holiday party. Or make a batch just because it’s Tuesday and you deserve something warm and spiced. Customize them with your favorite spices, add a chocolate drizzle, or keep them classic. However you make them, they’ll be perfect.
I’d love to hear how yours turn out. Drop a comment below and let me know if you tried any variations, or tag me in your photos if you share them online. Happy baking, friends – may your cookies be soft, your crinkles be beautiful, and your holidays be filled with warmth.
Frequently Asked Questions
Why didn’t my cookies crinkle?
The most common reason is that the dough wasn’t chilled enough. Cold dough is essential for the crinkle effect. Also, make sure you’re rolling the dough balls generously in powdered sugar. A thick, even coating is what creates those beautiful cracks as the cookies spread.
Can I use blackstrap molasses?
I don’t recommend it. Blackstrap molasses is much more bitter and less sweet than regular unsulphured molasses. It will give your cookies a strong, almost medicinal flavor. Stick with unsulphured molasses for the best results.
How do I keep the cookies soft?
Don’t overbake them. Pull them out when the edges are set but the centers still look soft. Store them in an airtight container with a slice of bread to maintain moisture. The bread absorbs excess air and releases moisture back to the cookies.
Can I make the dough ahead of time?
Absolutely. The dough can be refrigerated for up to 3 days. You can also freeze the dough balls for up to 3 months. Just roll them in powdered sugar right before baking, and add a minute or two to the bake time if baking from frozen.
My cookies spread too much. What went wrong?
This usually happens when the dough is too warm or the butter was too soft. Make sure your butter is softened but not melted. Chill the dough for at least 2 hours, and if your kitchen is warm, pop the baking sheet in the fridge for 10 minutes before baking.
Pin This Recipe!
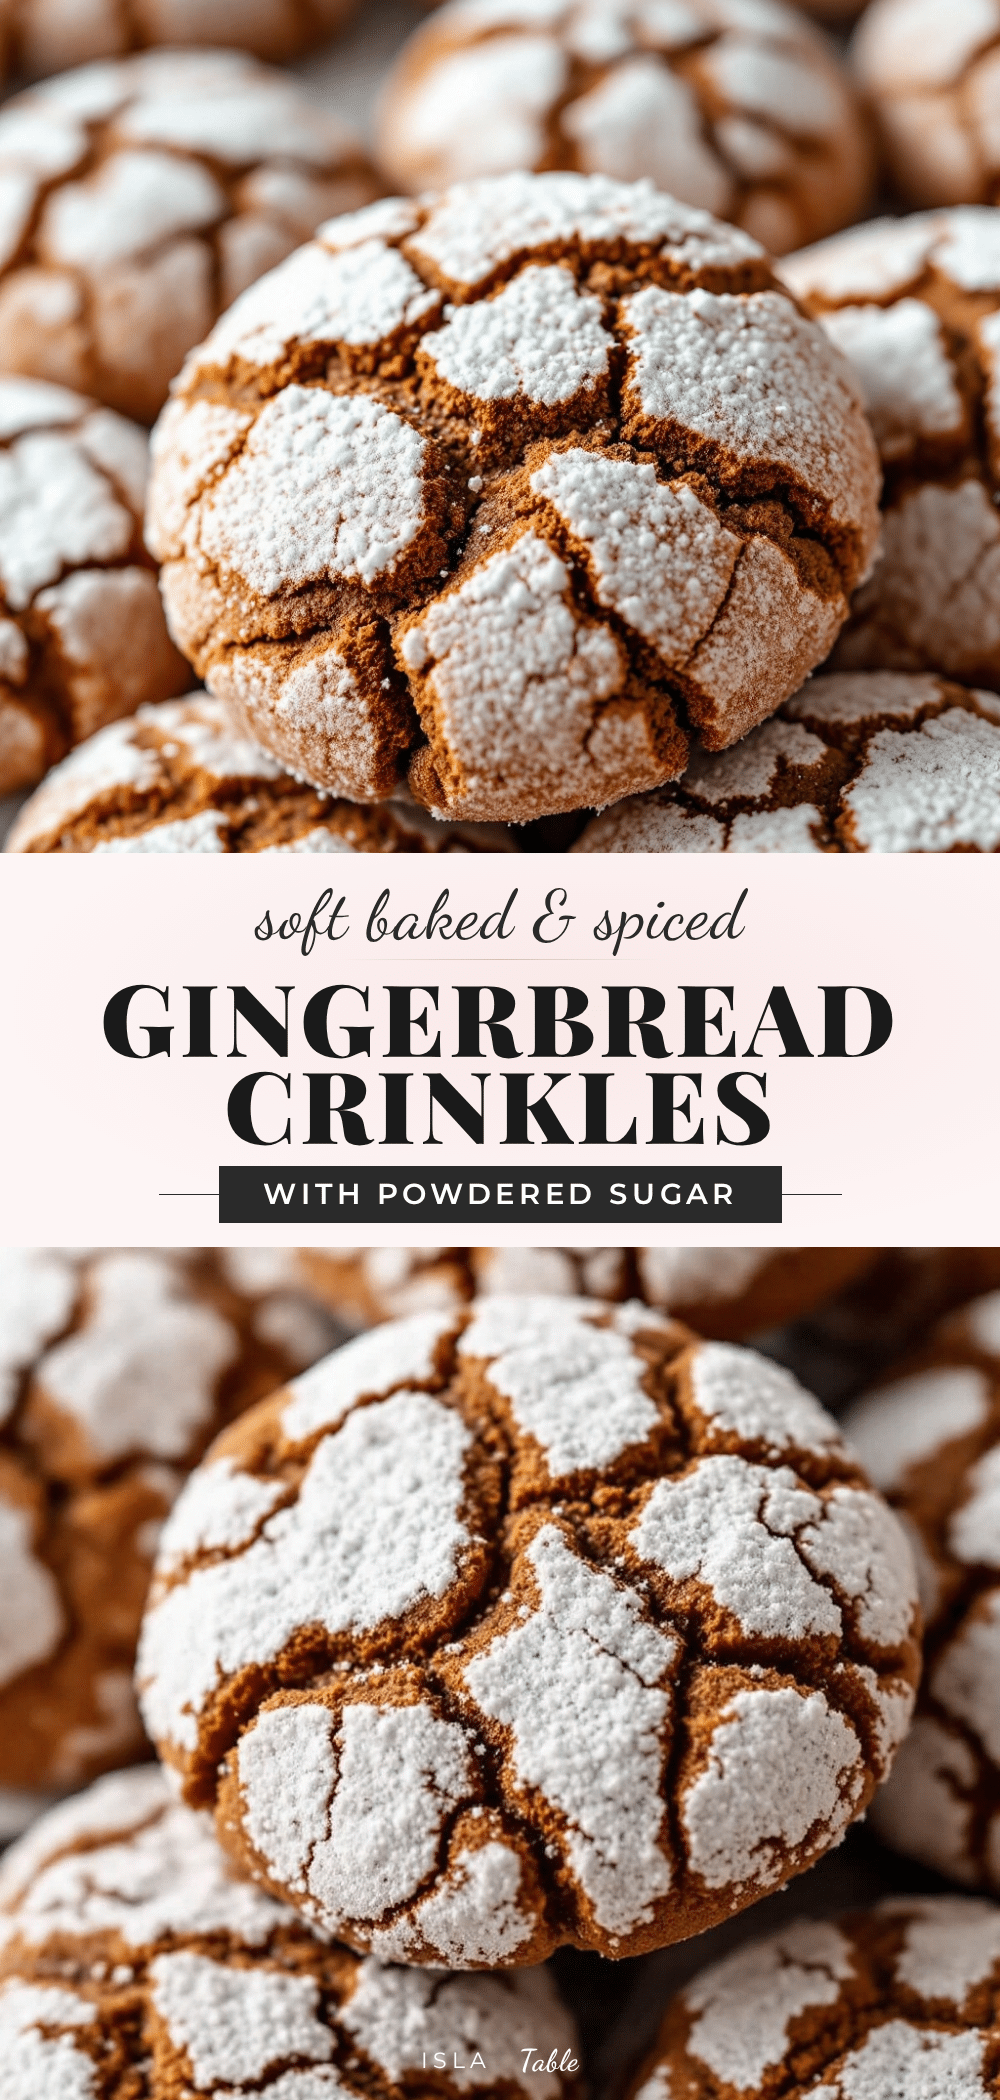
Soft Baked Gingerbread Crinkle Cookies: Easy Holiday Recipe
These soft baked gingerbread crinkle cookies are perfectly spiced, chewy, and coated in powdered sugar for a beautiful snowy effect. An easy holiday recipe that’s beginner-friendly and always a crowd-pleaser.
- Prep Time: 15 minutes
- Cook Time: 12 minutes
- Total Time: 2 hours 27 minutes (includes chilling)
- Yield: 24 servings 1x
- Category: Dessert
- Cuisine: American
Ingredients
- 1/2 cup unsalted butter, softened
- 1/2 cup granulated sugar
- 1/3 cup unsulphured molasses
- 1 large egg, room temperature
- 1 teaspoon vanilla extract
- 2 cups all-purpose flour
- 1 teaspoon baking soda
- 1 tablespoon ground ginger
- 1 teaspoon ground cinnamon
- 1/2 teaspoon ground cloves
- 1/4 teaspoon salt
- 1/2 cup powdered sugar (for rolling)
Instructions
- Cream the butter and sugar. In a large mixing bowl, beat the softened butter and granulated sugar together until light and fluffy, about 2-3 minutes with an electric mixer on medium speed. Scrape down the sides of the bowl halfway through.
- Add the wet ingredients. Beat in the molasses, egg, and vanilla extract until combined. The mixture may look slightly separated; do not overmix.
- Whisk the dry ingredients. In a separate bowl, whisk together the flour, baking soda, ginger, cinnamon, cloves, and salt until evenly distributed.
- Combine wet and dry. Gradually add the dry ingredients to the wet mixture, mixing on low speed until just combined. Finish folding with a spatula; do not overmix.
- Chill the dough. Cover the bowl with plastic wrap and refrigerate for at least 2 hours (overnight is better).
- Preheat the oven to 350°F (175°C). Line two baking sheets with parchment paper.
- Shape the dough balls. Scoop the chilled dough into 1.5-tablespoon portions and roll into smooth balls.
- Roll in powdered sugar. Drop each dough ball into a bowl of powdered sugar and roll until completely coated. For extra snowy tops, roll twice.
- Arrange on baking sheets. Place the sugar-coated dough balls 2 inches apart on the prepared baking sheets (6 per standard sheet).
- Bake for 10-12 minutes. The cookies should look puffed and cracked on top; edges set but centers still soft.
- Cool. Let the cookies cool on the baking sheet for 5 minutes, then transfer to a wire rack to cool completely.
Notes
Chilling the dough is essential for the crinkle effect. Do not skip it. Use unsulphured molasses, not blackstrap. For best results, roll dough balls generously in powdered sugar. Check cookies at 9 minutes to avoid overbaking. Store in an airtight container at room temperature for up to 5 days; freeze for up to 3 months.
Nutrition
- Serving Size: 1 cookie
- Calories: 120
- Sugar: 10
- Sodium: 95
- Fat: 4
- Saturated Fat: 2.5
- Carbohydrates: 20
- Fiber: 1
- Protein: 2
Keywords: gingerbread crinkle cookies, soft baked gingerbread, holiday cookies, crinkle cookies, gingerbread recipe, easy holiday cookies


