That first crack—sharp and clean—as the peppermint bark breaks under my thumb still takes me straight to my aunt’s kitchen, December 2008. She was never a baker, not really. But every Christmas, she’d lay out a sheet of dark chocolate, sprinkle crushed candy canes on top, and call it done. I was maybe fourteen, sitting on a stool too tall for my legs, watching her work without measuring cups or timers. She just knew. That bark wasn’t fancy, but it was hers. And somehow, that made it taste better than anything from a bakery.
Years later, I started messing around with cookie bars—those thick, chewy slabs that don’t require rolling dough or chilling sheets. I wanted something that felt like her bark but had that soft, buttery center you only get from a good chocolate chip cookie. So I crushed up some peppermint bark, folded it into the dough, and crossed my fingers. The first batch came out okay. The second batch came out gone by morning. By the third, I knew I had something.
These Perfect Peppermint Bark Chocolate Chip Cookie Bars are that something. They’ve got the crunch of the bark, the melt of chocolate chips, and that soft, almost-gooey middle that makes you close your eyes for a second. They’re not complicated. They don’t need to be. Sometimes the best recipes are the ones you stumble into, holding a memory and hoping it works.
Why You’ll Love This Recipe
Let’s be real—holiday baking can feel like a second job. Between the rolling, the chilling, the decorating, and the cleanup, it’s easy to wonder if it’s worth it. These cookie bars? They’re the shortcut that doesn’t taste like one. Here’s why they’ll become your go-to:
- Quick & Easy : From mixing bowl to oven in under 15 minutes. No dough chilling, no cookie scooping, no fuss.
- Simple Ingredients : Butter, sugar, eggs, flour, chocolate chips, and store-bought peppermint bark. That’s it.
- Perfect for Holiday Gatherings : Bring these to a cookie swap, potluck, or family dinner, and watch them disappear faster than the fancy stuff.
- Crowd-Pleaser : Kids love the peppermint crunch. Adults love the nostalgic flavor. Everyone wins.
- Unbelievably Delicious : The combo of soft cookie, melty chocolate, and crunchy peppermint is next-level comfort food.
What makes these different from every other peppermint cookie out there? It’s the bark itself. I use a high-quality dark chocolate peppermint bark—the kind with a thick layer of chocolate and real crushed candy cane pieces. When you fold it into the dough, it stays in chunks, so every bite has that satisfying snap. Plus, the dough is intentionally underbaked just a little. That gives you a soft, almost fudgy center that contrasts perfectly with the crunchy topping.
This isn’t just another holiday cookie. It’s the kind that makes you sneak one at 10 p.m. when nobody’s looking. And honestly? That’s the highest compliment I can give.
What Ingredients You Will Need
This recipe uses simple, wholesome ingredients to deliver bold flavor and satisfying texture without the fuss. Most of these are pantry staples, which means you’re probably already halfway there.
- Unsalted butter, softened (1 cup / 226g) – I always use unsalted so I can control the salt level. Let it sit out for 30 minutes before starting.
- Granulated sugar (¾ cup / 150g) – Adds sweetness and helps create that chewy texture.
- Light brown sugar, packed (¾ cup / 150g) – This is the secret to soft cookie bars. The molasses in brown sugar keeps them tender.
- Large eggs (2, room temperature) – Room temp eggs incorporate better into the butter-sugar mixture. Just set them on the counter with the butter.
- Vanilla extract (2 teaspoons) – Pure vanilla, not imitation. It makes a difference, I promise.
- All-purpose flour (2¼ cups / 280g) – Spoon and level it. Scooping directly from the bag packs in too much flour and makes dry bars.
- Baking soda (1 teaspoon) – Helps the bars rise just enough without puffing up too much.
- Salt (½ teaspoon) – Balances the sweetness. Don’t skip it.
- Semi-sweet chocolate chips (1 cup / 175g) – I prefer Ghirardelli or Guittard for consistent melting.
- Peppermint bark, chopped (1½ cups / about 225g) – Use a good-quality dark chocolate bark. I like Williams Sonoma or even the seasonal Ghirardelli peppermint bark squares. Chop into rough ½-inch pieces.
- Optional topping – Extra crushed candy canes or peppermint bark pieces to press on top before baking.
If you’re looking for a dairy-free option, you can swap the butter with a high-quality vegan butter stick. Just make sure it’s the stick version, not the spreadable kind. The texture will be slightly different, but still delicious.
Equipment Needed
You don’t need a lot of fancy tools for these cookie bars, which is part of the beauty. Here’s what you’ll want on hand:
- 9×13-inch baking pan – Metal is best for even browning. Glass works, but you might need to add 2-3 minutes to the bake time.
- Parchment paper – Line the pan with it, leaving an overhang on two sides. This makes lifting the bars out a breeze.
- Stand mixer or hand mixer – You can mix by hand if you’re patient, but a mixer makes creaming the butter and sugar much easier.
- Large mixing bowl – For the dry ingredients.
- Medium mixing bowl – For the wet ingredients.
- Rubber spatula – For folding in the chocolate chips and peppermint bark without overmixing.
- Sharp knife – For chopping the peppermint bark into chunks. A serrated knife works well too.
- Cooling rack – Let the bars cool completely in the pan before cutting, or they’ll crumble.
If you don’t have a stand mixer, no worries. I’ve made these with a hand mixer and even a wooden spoon. The key is just to cream the butter and sugar until light and fluffy—however you get there is fine.
Preparation Method
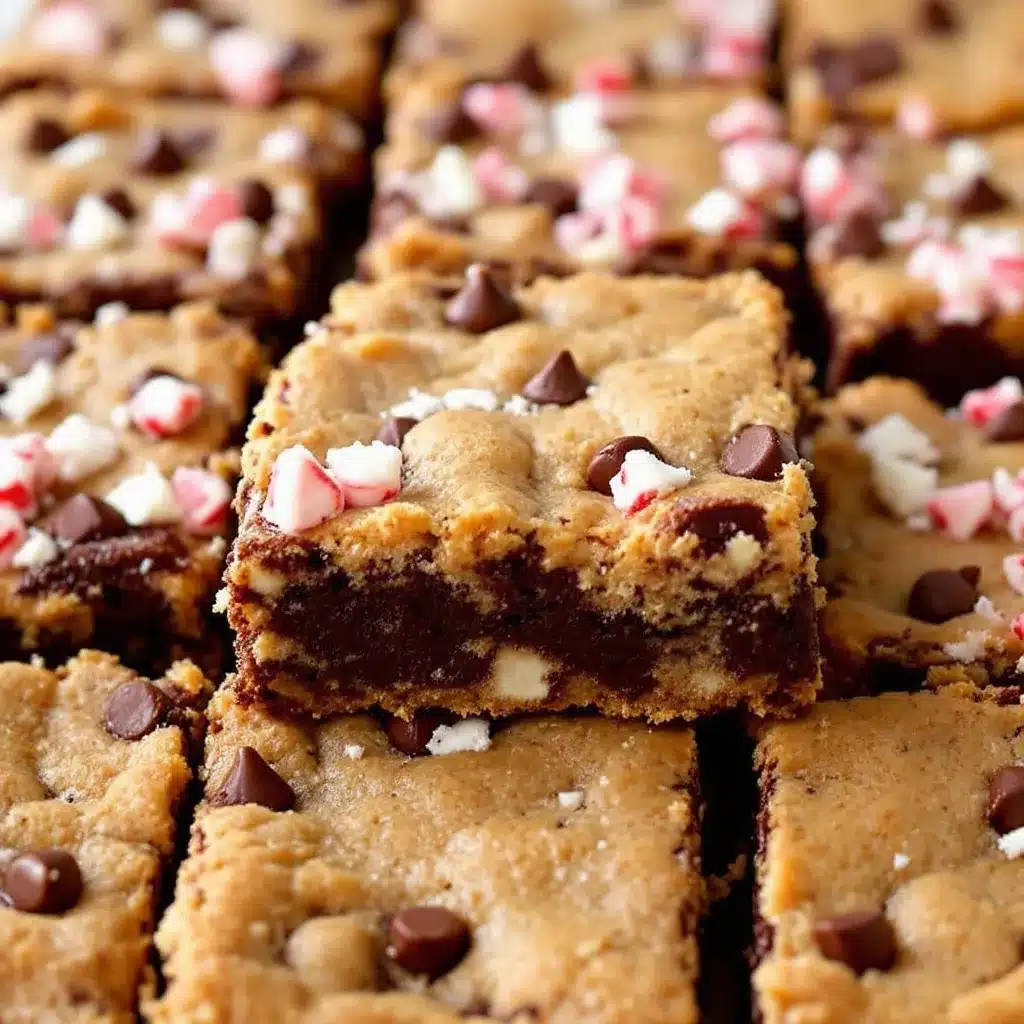
Alright, let’s get to it. This is where the magic happens.
- Preheat your oven to 350°F (175°C). Line your 9×13-inch pan with parchment paper, leaving a 2-inch overhang on the long sides. Lightly spray the parchment with non-stick spray.
- Chop the peppermint bark. Take your 1½ cups of peppermint bark and cut it into rough ½-inch pieces. Some will be smaller, some bigger—that’s fine. You want a mix of sizes for texture. Set aside about ¼ cup for the topping.
- Cream the butter and sugars. In a large mixing bowl, beat the softened butter, granulated sugar, and brown sugar together on medium speed for 2-3 minutes, until light and fluffy. You’ll see it turn pale and airy. Scrape down the sides of the bowl halfway through.
- Add the eggs and vanilla. Crack in the eggs one at a time, beating well after each addition. Then add the vanilla extract and mix until combined. The mixture should look smooth and glossy.
- Mix the dry ingredients. In a separate medium bowl, whisk together the flour, baking soda, and salt. This ensures the leavening is evenly distributed.
- Combine wet and dry. Gradually add the dry ingredients to the wet mixture, mixing on low speed. Stop as soon as the flour disappears. Overmixing at this stage makes the bars tough.
- Fold in the chocolate chips and peppermint bark. Using a rubber spatula, gently fold in the chocolate chips and the chopped peppermint bark (reserving that ¼ cup for topping). Don’t overdo it—just until evenly distributed.
- Press into the pan. Transfer the dough to the prepared pan. It’s thick, so use your spatula or lightly greased hands to press it evenly into the corners. The dough should be about ¾-inch thick.
- Add the topping. Sprinkle the reserved peppermint bark pieces evenly over the top. Gently press them into the dough so they stick.
- Bake for 22-25 minutes. The edges should be golden brown and set, but the center will still look slightly soft and underdone. That’s exactly what you want. A toothpick inserted in the center should come out with a few moist crumbs.
- Cool completely in the pan. Place the pan on a wire rack and let it cool for at least 1 hour. This is crucial—cutting too early will give you a crumbly mess. Once cool, use the parchment overhang to lift the entire slab out onto a cutting board.
- Slice into bars. Use a sharp knife to cut into 12-16 bars, depending on how big you want them. I usually go for 12 generous bars because, you know, holidays.
A quick note: If your kitchen is warm, the dough might feel a bit sticky. That’s normal. Just pop it in the fridge for 10 minutes before pressing it into the pan.
Cooking Tips & Techniques
I’ve made these bars more times than I can count, and I’ve definitely learned a few things the hard way. Here’s what I wish someone had told me:
- Don’t overbake. The number one mistake with cookie bars is leaving them in the oven too long. They continue to set as they cool, so pulling them out when the center still looks slightly underdone is the key to that soft, fudgy texture.
- Use room temperature ingredients. Cold eggs or butter won’t cream properly, which means your bars will be denser and less tender. Set everything out 30 minutes ahead of time.
- Chop the bark by hand. I tried using a food processor once. Once. It turned the peppermint bark into a powdery mess. Hand chopping gives you those satisfying chunks that make every bite interesting.
- Line the pan properly. Parchment paper with an overhang is non-negotiable. Without it, you’ll be scraping and cursing. Trust me on this.
- Let them cool completely. I know it’s hard. The smell is intoxicating, and you want one right now. But warm bars will fall apart when you cut them. Give them the full hour.
One time, I was rushing to bring these to a party and cut them after only 30 minutes. They were delicious, but they looked like a crime scene. Learn from my impatience.
Variations & Adaptations
These cookie bars are pretty forgiving, so feel free to make them your own. Here are a few ways I’ve played around with the recipe:
- Dark Chocolate Peppermint : Swap the semi-sweet chips for dark chocolate chunks. It dials down the sweetness and lets the peppermint shine.
- White Chocolate Cranberry : Replace the peppermint bark with white chocolate chips and dried cranberries. It’s a completely different vibe—more tart, less minty—but perfect for winter.
- Gluten-Free Version : Use a 1:1 gluten-free flour blend (I like King Arthur’s). The texture will be slightly more crumbly, but still delicious.
- Vegan Adaptation : Swap the butter for vegan butter sticks, use flax eggs (1 tablespoon ground flax + 3 tablespoons water per egg), and use dairy-free chocolate chips and vegan peppermint bark. It works, though the bars will be a bit more delicate.
- Extra Crunchy : Add ½ cup of chopped pecans or walnuts along with the chocolate chips. The nutty flavor pairs beautifully with the peppermint.
I once made a batch with crushed Oreos folded in instead of peppermint bark. It was chaotic and wonderful, and my kids still talk about it. Don’t be afraid to experiment.
Serving & Storage Suggestions
These bars are best served at room temperature—that’s when the texture is just right. If you’re serving them at a party, arrange them on a platter with a light dusting of powdered sugar for a snowy effect. They pair beautifully with a cup of hot cocoa or a strong coffee to balance the sweetness.
For storage, place the bars in an airtight container at room temperature. They’ll stay fresh for up to 5 days. If you stack them, put a sheet of parchment paper between layers to prevent sticking. The flavors actually meld together after a day or two, so they might taste even better on day three.
You can also freeze these bars. Wrap the entire slab (or individual bars) tightly in plastic wrap, then foil, and freeze for up to 3 months. To thaw, let them sit at room temperature for about 30 minutes. They’ll taste just-baked.
One thing I’ve noticed: the peppermint crunch softens slightly after a day or two. If you want to bring back some snap, just sprinkle a few crushed candy canes on top right before serving.
Nutritional Information & Benefits
Let’s be honest—these are a treat, not a health food. But I don’t believe in guilt, especially during the holidays. Here’s the estimated breakdown per bar (based on 12 servings):
- Calories: 380-420
- Fat: 18g
- Carbohydrates: 52g
- Sugar: 34g
- Protein: 5g
The dark chocolate in the peppermint bark does offer some antioxidants, and if you use a high-quality bark, you’re getting real cocoa butter, not fillers. The butter and eggs provide a bit of protein and fat, which helps keep you full. That said, if you’re watching your sugar intake, you could reduce the granulated sugar by ¼ cup without affecting the texture too much.
I’ve made these for friends with diabetes by using a sugar substitute like monk fruit blend, and they turned out well. Just note that the texture will be slightly less tender.
Conclusion
These Perfect Peppermint Bark Chocolate Chip Cookie Bars are exactly what holiday baking should be: simple, forgiving, and absolutely delicious. They carry that nostalgic peppermint crunch you remember from childhood, wrapped in a soft, buttery cookie that feels like a hug. Whether you’re making them for a cookie swap, a family gathering, or just because it’s Tuesday in December, they deliver every time.
I love that this recipe doesn’t require any special skills or equipment. It’s the kind of thing you can whip up in an afternoon, even with kids underfoot. And honestly? The mess is part of the fun. So go ahead—crush some candy canes, get chocolate on your counter, and make a batch. Then let me know how they turned out. Did you add your own twist? Did they disappear as fast as mine always do? Drop a comment below or tag me in your photos. I’d love to see your version.
Happy baking, friend. You’ve got this.
Frequently Asked Questions
Can I use homemade peppermint bark instead of store-bought?
Absolutely. Homemade peppermint bark works great here. Just make sure it’s fully set before chopping, and keep the chocolate-to-candy cane ratio balanced. Too much candy cane can make the bars overly crunchy.
Why did my cookie bars turn out dry?
Dry bars usually mean overbaking or too much flour. Make sure you spoon and level your flour, and pull the bars out when the center still looks slightly soft. They’ll set as they cool.
Can I use milk chocolate instead of semi-sweet?
You can, but the bars will be much sweeter. I prefer semi-sweet because it balances the peppermint and the sugar in the dough. If you use milk chocolate, consider reducing the sugar by 2 tablespoons.
How do I keep the peppermint bark from melting into the dough?
Chop the bark into larger chunks (about ½ inch) and fold them in gently at the very end. Pressing extra pieces on top before baking also helps keep them visible and crunchy.
Can I make these ahead of time for a party?
Yes! These bars actually taste better the next day. Bake them a day ahead, cool completely, and store in an airtight container at room temperature. They’ll be perfect for your event.
Pin This Recipe!
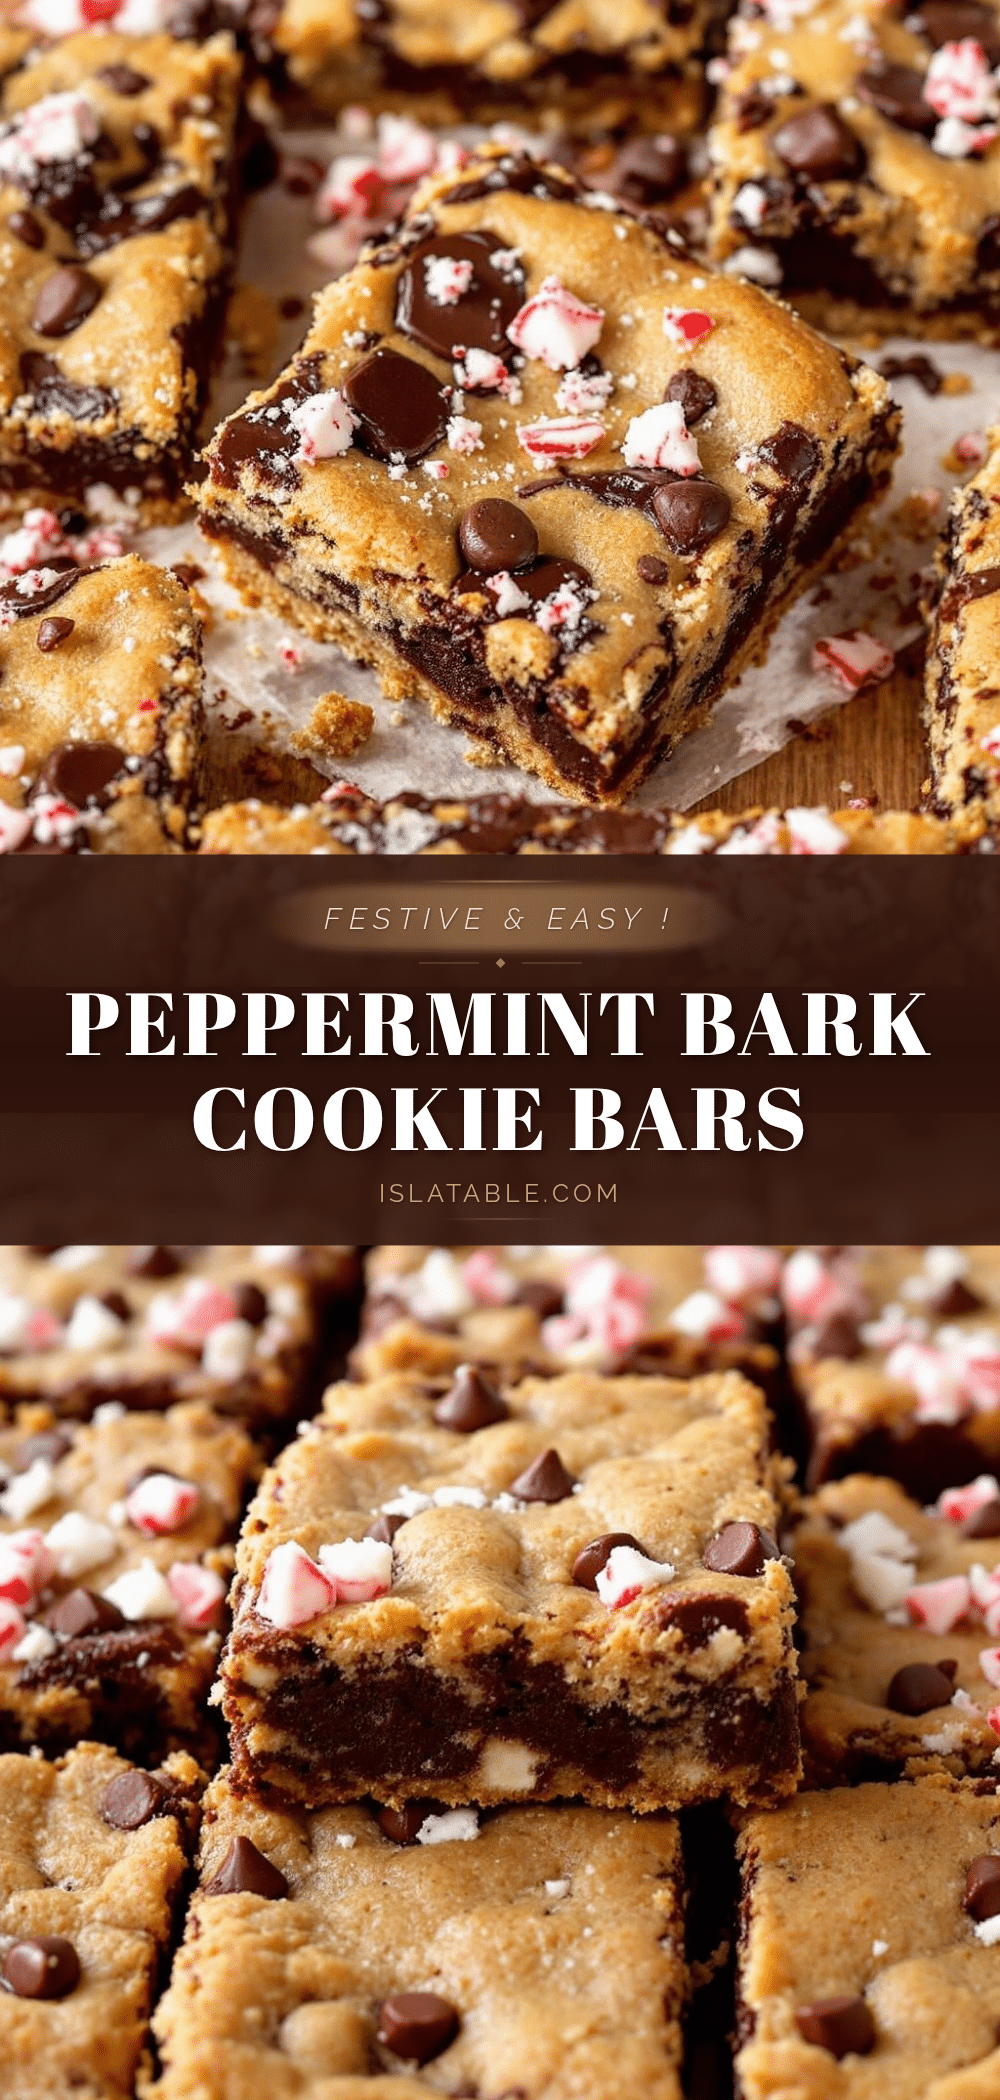
Perfect Peppermint Bark Cookie Bars: Easy Holiday Dessert
These Perfect Peppermint Bark Chocolate Chip Cookie Bars combine the crunch of peppermint bark with a soft, buttery cookie center. They’re quick, easy, and perfect for holiday gatherings.
- Prep Time: 15 minutes
- Cook Time: 25 minutes
- Total Time: 1 hour 40 minutes
- Yield: 12-16 servings 1x
- Category: Dessert
- Cuisine: American
Ingredients
- 1 cup (226g) unsalted butter, softened
- ¾ cup (150g) granulated sugar
- ¾ cup (150g) light brown sugar, packed
- 2 large eggs, room temperature
- 2 teaspoons vanilla extract
- 2¼ cups (280g) all-purpose flour
- 1 teaspoon baking soda
- ½ teaspoon salt
- 1 cup (175g) semi-sweet chocolate chips
- 1½ cups (about 225g) peppermint bark, chopped
- Optional: extra crushed candy canes or peppermint bark pieces for topping
Instructions
- Preheat your oven to 350°F (175°C). Line a 9×13-inch baking pan with parchment paper, leaving a 2-inch overhang on the long sides. Lightly spray the parchment with non-stick spray.
- Chop the peppermint bark into rough ½-inch pieces. Set aside about ¼ cup for the topping.
- In a large mixing bowl, beat the softened butter, granulated sugar, and brown sugar together on medium speed for 2-3 minutes, until light and fluffy. Scrape down the sides of the bowl halfway through.
- Add the eggs one at a time, beating well after each addition. Then add the vanilla extract and mix until combined.
- In a separate medium bowl, whisk together the flour, baking soda, and salt.
- Gradually add the dry ingredients to the wet mixture, mixing on low speed until just combined. Do not overmix.
- Using a rubber spatula, gently fold in the chocolate chips and the chopped peppermint bark (reserving the ¼ cup for topping).
- Transfer the dough to the prepared pan and press it evenly into the corners. The dough should be about ¾-inch thick.
- Sprinkle the reserved peppermint bark pieces evenly over the top and gently press them into the dough.
- Bake for 22-25 minutes, until the edges are golden brown and set, but the center still looks slightly soft. A toothpick inserted in the center should come out with a few moist crumbs.
- Cool completely in the pan on a wire rack for at least 1 hour.
- Use the parchment overhang to lift the slab out onto a cutting board. Slice into 12-16 bars.
Notes
Don’t overbake; the center should look slightly underdone. Use room temperature ingredients. Chop the bark by hand for best texture. Let bars cool completely before cutting to avoid crumbling.
Nutrition
- Serving Size: 1 bar
- Calories: 400
- Sugar: 34
- Sodium: 200
- Fat: 18
- Saturated Fat: 10
- Carbohydrates: 52
- Fiber: 2
- Protein: 5
Keywords: peppermint bark, cookie bars, holiday dessert, chocolate chip, easy recipe


