Honestly, I thought making monster eye cake pops with bloodshot veins sounded like a silly over-the-top Halloween gimmick—something that would end up looking more like a mess than a spooky treat. I mean, cake pops? Those tiny balls of cake on sticks always seemed a bit fussy and fiddly to me. Plus, the idea of creating those creepy, veiny eyeballs felt like a lot of unnecessary effort just for a party snack. But then, one restless October evening, I found myself staring at a bag of leftover cake crumbs and some frosting, with nothing but a vague plan to make something “Halloween-y.”
So, I decided to give it a shot—half expecting a disaster but secretly hoping for a cute result. The process was oddly satisfying: rolling the cake crumbs and frosting into perfect little spheres, dipping them in glossy white chocolate, and then painstakingly painting on those bloodshot veins with edible red gel. It wasn’t instant magic, though. The first few pops looked a bit more like eyeballs from a sci-fi B-movie than a spooky masterpiece. But with a bit of patience and a few tweaks, the eerie veins began to pop, the glossy eyeballs gleamed just right, and suddenly the whole thing felt worth it.
What stuck with me was how these monster eye cake pops brought a little bit of creepy fun to an otherwise simple dessert. It’s not just about the look—it’s that thrill of making something so distinctively Halloween. These cake pops ended up being a conversation starter, a kid-approved treat, and honestly, a bit of a pride moment in my kitchen. It’s not just candy with a stick; it’s a tiny, edible monster staring back at you, daring you to take a bite. That’s why I keep coming back to this recipe every spooky season.
Why You’ll Love This Recipe
Trust me, these perfect monster eye cake pops aren’t your average Halloween snack—they bring a whole lot of fun and flavor in just a few easy steps. Here’s why they’ve become a staple in my Halloween baking:
- Quick & Easy: From cake crumbs to finished eyeballs in under an hour, perfect for last-minute party prep or a fun weekend project.
- Simple Ingredients: All pantry-friendly and easy to find, so no wild grocery store runs needed.
- Perfect for Halloween Parties: They’re spooky, cute, and just the right size to pass around at gatherings or hand out to trick-or-treaters.
- Crowd-Pleaser: Both kids and adults love the creepy vibe and sweet taste — it’s a total win for mixed groups.
- Unbelievably Delicious: Thanks to the moist cake base and smooth chocolate coating, the texture combo is downright addictive.
What really sets this monster eye cake pops recipe apart is the little trick I learned to create those realistic bloodshot veins with edible gel—it makes the eyes look genuinely eerie and not just like painted circles. Also, mixing the cake crumbs with just the right amount of frosting results in a pop that’s firm but melts in your mouth. This isn’t just another cake pop recipe; it’s a Halloween showstopper that’s surprisingly approachable even if you’re not a pro baker.
Honestly, biting into one feels like a tiny Halloween miracle—a mix of sweet, creamy, and a little bit weird (in the best way). It’s that kind of treat that makes you pause, smile, and then go back for another. If you want a dessert that’s both fun to make and festive to eat, these monster eye cake pops are where it’s at.
What Ingredients You Will Need
This recipe keeps things straightforward with familiar ingredients that come together to create that perfect spooky effect. You probably have most of these on hand already:
- For the Cake Base:
- 1 box of vanilla or chocolate cake mix (or about 3 cups homemade cake crumbs)
- 1/2 cup (120g) frosting (cream cheese or buttercream works great)
- For the Coating:
- 12 oz (340g) white candy melts or white chocolate chips (I prefer Wilton for smooth melting)
- 1 tsp vegetable oil (to thin the coating for easier dipping)
- For Decoration:
- Black edible marker or black gel icing (for the pupil)
- Red edible gel or piping gel (to create the bloodshot veins)
- Optional: green or blue gel for iris color variation
Since the cake base is flexible, you can swap out the cake mix for gluten-free or vegan versions depending on your needs. If you want to make these even lighter, using a sugar-free frosting or low-fat cream cheese can trim some calories without losing flavor.
For the coating, I recommend white candy melts over white chocolate chips as they tend to melt more evenly and set faster, which is helpful when you’re working on detailed decorations like veins. If you want to change up the colors, you can use colored candy melts for a different eye color or even add edible glitter for a supernatural glow.
For a fun twist, adding green or blue gel for the iris can really make the monster eyes pop—literally. And if you want to turn these into spider eyes or other creepy creatures, just tweak the decoration step a bit.
Equipment Needed
You don’t need fancy gear to pull off these monster eye cake pops, but a few kitchen tools definitely make the process smoother:
- Baking sheet or tray: To place your pops while they set (lined with parchment paper for easy cleanup).
- Mixing bowls: One for crumbling and mixing the cake with frosting, and another for melting the candy melts.
- Microwave-safe bowl or double boiler: For melting the candy melts gently without scorching.
- Cake pop sticks or sturdy lollipop sticks: Essential for holding those eyeballs (Wilton brand sticks are reliable).
- Small paintbrush or toothpicks: For drawing the bloodshot veins with red gel (a fine brush works best for precision).
- Edible markers or gel piping bags: For adding the pupils and iris details.
If you don’t have cake pop sticks, sturdy wooden skewers or even clean coffee stirrers can work in a pinch, though they might not be as easy to handle. For melting candy melts, I prefer the microwave method (short bursts on 20-second intervals), but a double boiler offers more control if you’re nervous about burning the chocolate.
Keeping a damp cloth nearby helps to clean your paintbrush or toothpick between strokes when drawing veins, which really speeds things up and keeps your design sharp. Also, investing in a turntable or lazy Susan can make decorating way less clumsy if you plan to make these regularly.
Preparation Method
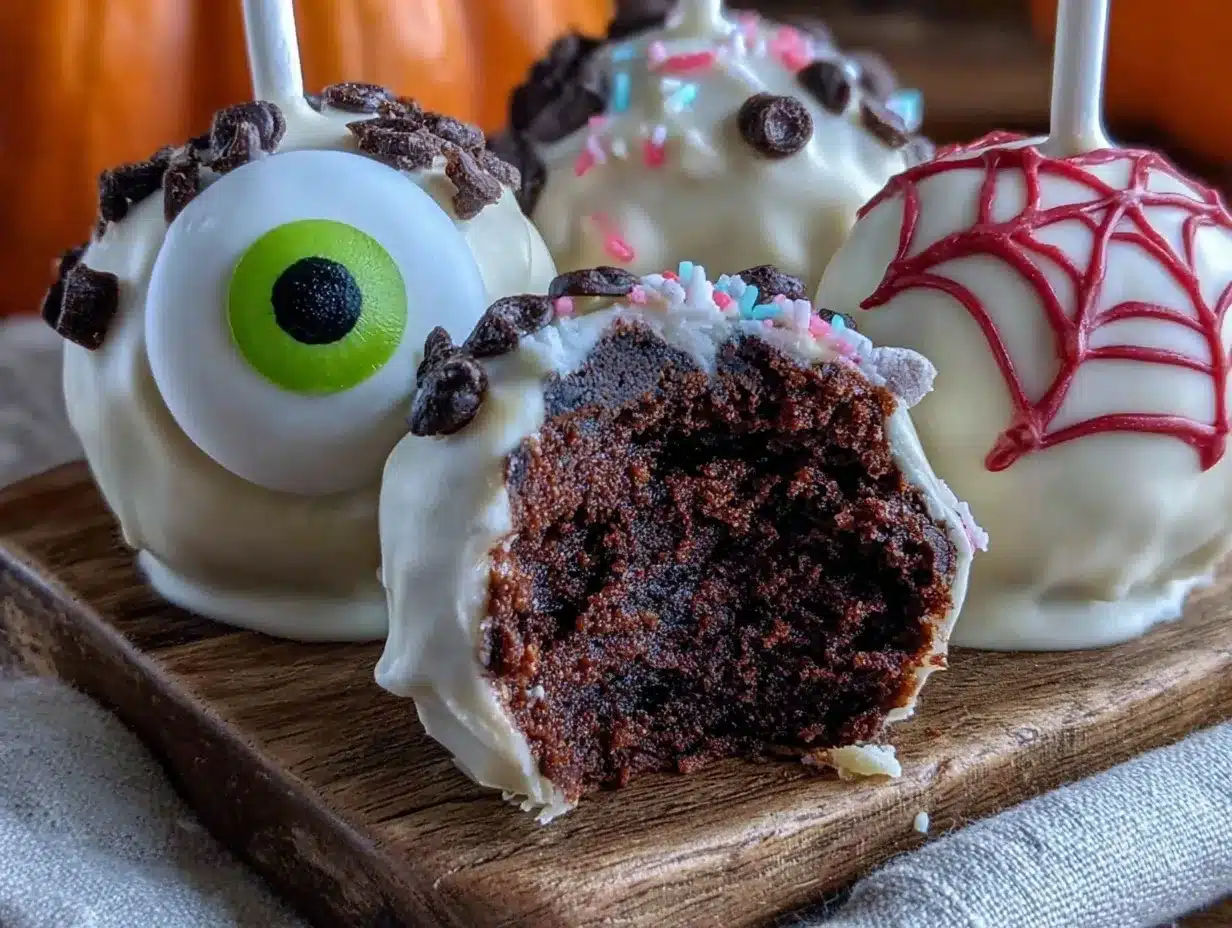
- Prepare the Cake Crumbs: Start by baking a cake from your chosen mix according to package instructions, or use leftover cake. Once cooled, crumble the cake finely into a large bowl, removing any large lumps. Aim for a texture like coarse breadcrumbs. This should take about 5 minutes.
- Mix in the Frosting: Add 1/2 cup (120g) of frosting to the cake crumbs. Use a spoon or your hands to combine until the mixture holds together when pressed—you want it moist but not sticky. This step is key for forming your pops and usually takes around 3-4 minutes.
- Form the Cake Pops: Scoop about 1 tablespoon (15g) of the cake mixture and roll it into a smooth ball. Place each ball on a parchment-lined tray. Chill in the fridge for 15-20 minutes to firm up; this makes dipping much easier.
- Melt the Candy Coating: In a microwave-safe bowl, melt the white candy melts with 1 teaspoon of vegetable oil in 20-second bursts, stirring well between each. The oil thins the coating for a smoother dip. Aim for a silky, pourable consistency.
- Dip and Decorate: Dip the tip of each cake pop stick into the melted coating, then insert it halfway into a cake ball—this helps secure the stick. Next, dip the entire cake ball into the coating, gently tapping off excess. Let the coating set slightly (about 2 minutes), then use black edible marker or gel to draw a pupil in the center.
- Add Bloodshot Veins: Using a small paintbrush or toothpick, draw thin, irregular red lines radiating from the pupil outward with edible red gel. Don’t worry about perfection—veins are naturally uneven and messy. Clean your brush between strokes for crisp lines. Allow the gel to dry completely (about 15 minutes).
- Final Touches: Optionally, add a tiny white dot of gel on the pupil for a gleam effect. Chill the cake pops for another 10 minutes to fully set before serving.
Pro tip: If your cake pops crack or fall off the stick during dipping, it usually means the cake mixture is too dry or the coating is too thick. Add a bit more frosting or a splash of milk to the mixture next time, and thin the candy melts with a little more oil.
Cooking Tips & Techniques
Making monster eye cake pops requires a bit of patience and a few tricks I picked up over the years. Here’s what I’ve learned:
- Don’t skip chilling: Letting the cake balls firm up in the fridge is crucial. Warm or soft balls will crumble or detach from the stick when dipped.
- Work quickly but carefully: Candy melts set fast, so have your dipping station ready. If the coating thickens, reheat gently in the microwave.
- Use the right tools for decoration: A tiny paintbrush or a fine-tipped toothpick helps create the best bloodshot veins. I once tried using a toothpick that was too thick, and the veins looked like messy red blobs—definitely not the look you want.
- Practice the vein pattern: Veins are random and uneven. Try sketching a few on parchment paper with the red gel before decorating the pops to get comfortable.
- Keep your edible markers airtight: They dry out quickly. I learned the hard way that a dried marker means a less precise pupil, so cap them tightly after each use.
- Multitask by preparing cake pops in batches: While the first batch chills, roll the next. It saves time and keeps the workflow smooth.
One time, I tried piping the veins with a gel bag—that was a disaster, too thick and clumpy. Sticking to a brush or toothpick is way easier and more effective for those creepy, thin bloodshot lines.
Variations & Adaptations
One of the best things about this monster eye cake pops recipe is how adaptable it is. Here are some ideas to switch things up:
- Dietary tweaks: Use gluten-free cake mix or vegan frosting to suit dietary needs. For a keto-friendly twist, try a low-carb almond flour cake and sugar-free frosting.
- Seasonal flavors: Swap vanilla cake crumbs for pumpkin spice cake or red velvet for a richer fall vibe. For a spooky twist, use black cocoa cake crumbs for pitch-black eyeballs.
- Color variations: Instead of just white eyeballs, tint the candy melts with gel food coloring to create green, blue, or even glowing neon eyes. Adding edible glitter can make them look otherworldly.
- Edible glitter veins: Mix a little shimmer powder into the red gel to make bloodshot veins glisten under party lights.
- Personal touch: Once, I made a batch with candy corn centers inside the cake balls—hidden surprise for anyone biting in!
If you want to avoid candy melts, melting high-quality white chocolate and adding a bit of shortening works well, though it can be a bit trickier to handle. For a fun twist, try dipping the cake pops in dark chocolate and painting veins with white and red gel for a vampire eye look.
Serving & Storage Suggestions
These monster eye cake pops are best served chilled or at room temperature when the coating is firm but not cold to the point of dullness. They look fantastic arranged on a platter with artificial cobwebs or Halloween-themed cupcake liners for that extra spooky presentation.
Pair them with something savory, like smokeless BBQ chicken or a simple veggie tray, to balance the sweetness at your Halloween spread. For drinks, a dark berry punch or a creamy pumpkin spice latte complements the eerie theme.
Store cake pops in an airtight container in the refrigerator for up to 5 days. If you want to keep them longer, freeze wrapped cake pops for up to a month, thawing them in the fridge before serving. Just note that freezing may soften the candy coating slightly.
When reheating, avoid the microwave as it can melt the coating unevenly. Instead, let them sit at room temperature for 20 minutes for the best texture. The flavors actually develop nicely overnight, making the cake pops even more moist and flavorful the next day.
Nutritional Information & Benefits
These monster eye cake pops are definitely an indulgence, but here’s the scoop on what you’re biting into per pop (approximate):
| Nutrient | Per Cake Pop |
|---|---|
| Calories | 120-140 kcal |
| Fat | 6-8g |
| Sugar | 14-16g |
| Protein | 1-2g |
| Carbohydrates | 18-20g |
While these aren’t health food, using quality cake and frosting means you get real ingredients without weird additives. The white chocolate coating provides a good source of calcium, and you can make them slightly lighter by choosing sugar-free or low-fat options.
These cake pops contain common allergens like gluten, dairy, and eggs, so swap out ingredients as needed for allergies. From a wellness perspective, I think it’s important to enjoy treats like these in moderation—especially when they bring joy and festive fun to your table.
Conclusion
So, there you have it: a monster eye cake pops recipe that’s as fun to make as it is to eat. It’s perfect if you want a Halloween treat that’s a little creepy, a little cute, and totally memorable. The best part? You can tweak it to fit your style, whether that’s bold colors, spooky flavors, or dietary needs.
I keep coming back to this recipe because it’s not just dessert—it’s a way to bring a little laughter and delight to Halloween gatherings, even if you’re not the biggest fan of fussing over decorations. If you try it, I’d love to hear how your monster eyes turned out or what crazy variations you dreamed up!
Happy haunting in your kitchen!
FAQs
- Can I use homemade cake instead of boxed cake mix?
Absolutely! Homemade cake crumbs work wonderfully and add a personal touch to your monster eye cake pops. - How do I prevent the cake pops from falling off the sticks?
Make sure to chill the cake balls before dipping and dip the stick tip in melted coating before inserting into the cake ball for extra hold. - Can I make these cake pops ahead of time?
Yes, they keep well refrigerated for up to 5 days and can be frozen for longer storage. - What if I don’t have edible markers?
You can use black gel icing with a fine piping tip or a toothpick to create the pupils. - Can I make these gluten-free or vegan?
Definitely. Use gluten-free cake and vegan frosting, plus dairy-free candy melts to adapt the recipe accordingly.
Pin This Recipe!
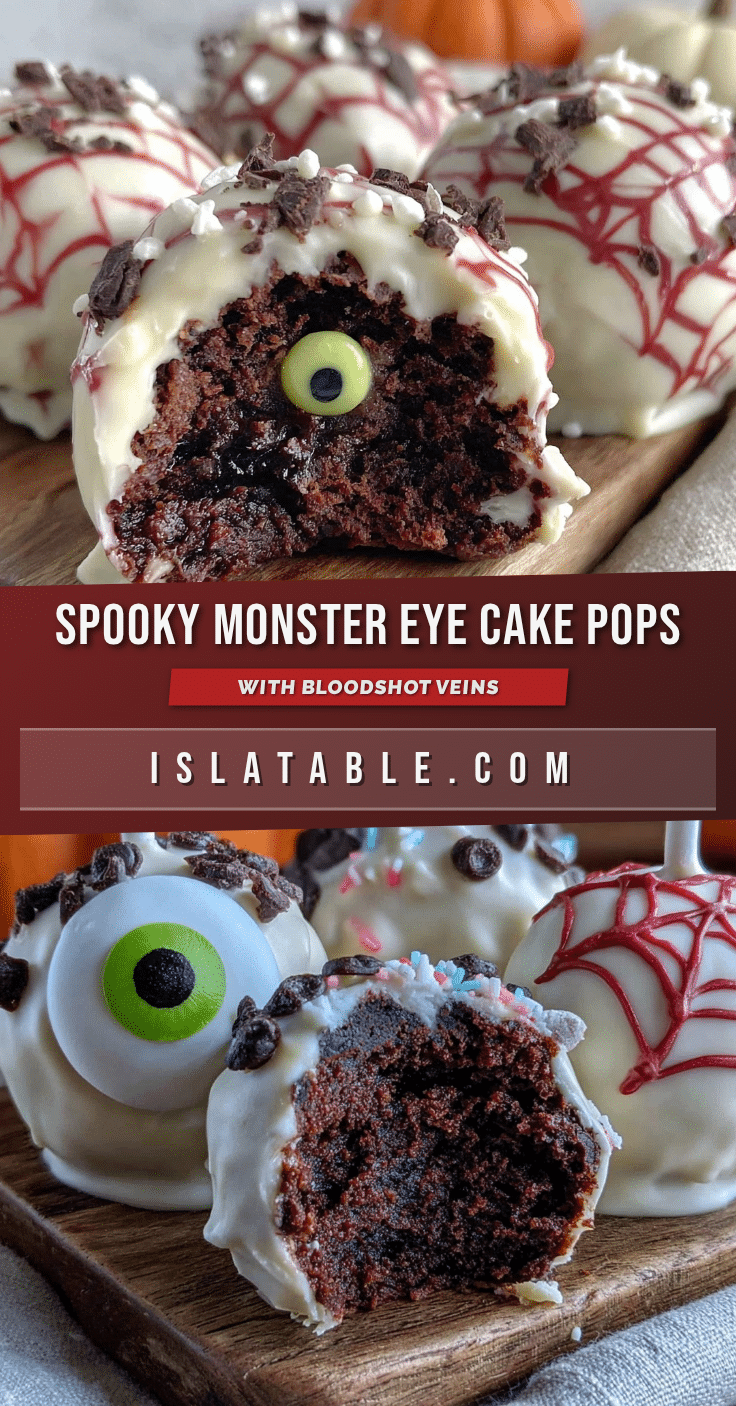
Perfect Monster Eye Cake Pops
These monster eye cake pops are a fun and spooky Halloween treat made with cake crumbs, frosting, and a white chocolate coating decorated with edible gel veins for a creepy effect.
- Prep Time: 15 minutes
- Cook Time: 30 minutes
- Total Time: 45 minutes
- Yield: 24 cake pops 1x
- Category: Dessert
- Cuisine: American
Ingredients
- 1 box of vanilla or chocolate cake mix (or about 3 cups homemade cake crumbs)
- 1/2 cup (120g) frosting (cream cheese or buttercream works great)
- 12 oz (340g) white candy melts or white chocolate chips
- 1 tsp vegetable oil
- Black edible marker or black gel icing (for the pupil)
- Red edible gel or piping gel (to create the bloodshot veins)
- Optional: green or blue gel for iris color variation
Instructions
- Prepare the Cake Crumbs: Bake a cake from your chosen mix according to package instructions or use leftover cake. Once cooled, crumble the cake finely into a large bowl, removing any large lumps. Aim for a texture like coarse breadcrumbs (about 5 minutes).
- Mix in the Frosting: Add 1/2 cup (120g) of frosting to the cake crumbs. Combine until the mixture holds together when pressed—moist but not sticky (3-4 minutes).
- Form the Cake Pops: Scoop about 1 tablespoon (15g) of the cake mixture and roll it into a smooth ball. Place each ball on a parchment-lined tray. Chill in the fridge for 15-20 minutes to firm up.
- Melt the Candy Coating: In a microwave-safe bowl, melt the white candy melts with 1 teaspoon of vegetable oil in 20-second bursts, stirring well between each until silky and pourable.
- Dip and Decorate: Dip the tip of each cake pop stick into the melted coating, then insert it halfway into a cake ball to secure. Dip the entire cake ball into the coating, gently tap off excess. Let set slightly (about 2 minutes). Use black edible marker or gel to draw a pupil in the center.
- Add Bloodshot Veins: Using a small paintbrush or toothpick, draw thin, irregular red lines radiating from the pupil outward with edible red gel. Clean brush between strokes. Allow gel to dry completely (about 15 minutes).
- Final Touches: Optionally add a tiny white dot of gel on the pupil for a gleam effect. Chill the cake pops for another 10 minutes to fully set before serving.
Notes
Chill cake balls before dipping to prevent crumbling. Thin candy melts with vegetable oil for smooth coating. Use a fine brush or toothpick for veins. Store in airtight container refrigerated up to 5 days or freeze up to 1 month. Let sit at room temperature 20 minutes before serving after refrigeration.
Nutrition
- Serving Size: 1 cake pop
- Calories: 130
- Sugar: 15
- Sodium: 90
- Fat: 7
- Saturated Fat: 4
- Carbohydrates: 19
- Fiber: 0.5
- Protein: 1.5
Keywords: Halloween, cake pops, monster eye, spooky dessert, candy melts, edible gel, party snack


