Third time this week and I still can’t get the crumb right. Well, not wrong, exactly, but that perfect balance—tender on the inside, that signature crackled top, with honey pooling in the crevices—kept slipping through my fingers. The first batch came out too dense, like a cornmeal hockey puck. The second was better, but the honey butter just slid off instead of soaking in. By Wednesday night, I was staring at a cooling skillet, fork in hand, and something finally clicked. It wasn’t about adding more butter. It was about letting the cornbread tell you when it’s ready to receive it.
This honey butter skillet cornbread started as a mission to create the perfect side for those chilly fall dinners that demand something warm, slightly sweet, and downright comforting. You know the ones—chili bubbling on the stove, a big pot of soup, or maybe some smoky pulled pork. I wanted a cornbread that could hold its own, not just a sad afterthought. And honestly, I wanted it to look good coming out of the cast iron, all golden and rustic.
After a week of obsessive testing (my family is officially over cornbread, by the way), I landed on this version. It’s got that classic, slightly gritty cornmeal texture we all love, but it stays incredibly moist thanks to a secret little trick with buttermilk and, well, patience. The honey butter isn’t just a topping; it’s a finishing glaze that seeps into the warm bread, creating pockets of sweet, buttery goodness. This isn’t just another skillet cornbread recipe. This is the one that finally made me put the fork down.
Why You’ll Love This Recipe
I’ve tested this recipe more times than I care to admit, tweaking the fat content, the resting time, even the type of skillet. What I ended up with is a cornbread that ticks every box for a busy fall evening.
- Quick & Easy: From mixing bowl to table in under 35 minutes. Seriously, the oven does most of the work while you finish up dinner.
- Simple Ingredients: No weird flours or specialty items. You probably have everything in your pantry right now, minus maybe the buttermilk (but we have a hack for that).
- Perfect for Fall Dinners: It’s the ultimate side for chili, soups, stews, or even a simple pot of vegan baked beans with maple syrup. It just works.
- Crowd-Pleaser: I’ve served this to kids, adults, and that one picky uncle—everyone goes back for seconds. The sweet-salty combo is irresistible.
- Unbelievably Delicious: That first bite, where the warm, crumbly cornbread meets the melting honey butter? It’s pure comfort. The texture is spot-on—not too dry, not too cakey.
What makes this different from every other recipe? It’s the technique. Most recipes tell you to pour the butter on top. I let the cornbread rest for a full five minutes after it comes out of the oven, then I poke holes all over the top with a skewer. That lets the honey butter sink deep into the crumb, not just sit on the surface. It’s a small step, but it changes everything. This isn’t just good cornbread—it’s the kind that makes you close your eyes after the first bite, especially on a cool October evening.
What Ingredients You Will Need
This recipe uses simple, wholesome ingredients to deliver that classic cornbread flavor with a moist, tender crumb. Most of these are pantry staples, so you’re likely already set.
- Yellow Cornmeal (1 cup / 160g): I prefer medium-grind cornmeal for that perfect texture. Stone-ground gives a more rustic feel, but standard works fine. Don’t use fine corn flour; you want that little bit of grit.
- All-Purpose Flour (1 cup / 125g): This gives the cornbread structure. For a gluten-free version, you can swap this with a 1:1 gluten-free blend, but I’ve found the texture is best with standard flour.
- Granulated Sugar (1/4 cup / 50g): Just enough to balance the corn’s earthiness. I don’t like a sweet cornbread, and this hits the perfect note. If you have a sweet tooth, you can bump it up to 1/3 cup.
- Baking Powder (1 tablespoon): Make sure it’s fresh! This is what gives the cornbread its rise and that signature crackled top.
- Baking Soda (1/2 teaspoon): Works with the buttermilk to create a tender crumb and helps with browning.
- Salt (1 teaspoon): Don’t skip this. Salt enhances all the other flavors and balances the sweetness. I use fine sea salt.
- Buttermilk (1 cup / 240ml): The key to a moist, tender cornbread. The acidity tenderizes the gluten. No buttermilk? No problem. Add 1 tablespoon of lemon juice or white vinegar to a cup of whole milk, let it sit for 5 minutes, and you’re good to go.
- Large Eggs (2, room temperature): Room temperature eggs mix more evenly into the batter, creating a smoother texture. Take them out 30 minutes before you start.
- Unsalted Butter (1/2 cup / 113g, melted and slightly cooled): I love using butter for its rich flavor. You can use melted coconut oil or a neutral oil like avocado if you prefer, but butter is best.
- Honey (1/4 cup / 85g, plus more for serving): Use a good quality, runny honey. The flavor is front and center in the butter, so don’t use the cheap stuff that tastes like sugar syrup.
- For the Honey Butter Topping:
- Unsalted Butter (1/4 cup / 56g, softened)
- Honey (2 tablespoons / 40g)
- Flaky Sea Salt (a pinch, for finishing)
I recommend using a brand like Bob’s Red Mill for your cornmeal; their medium-grind is consistently good. For the honey, look for a local varietal if you can—the flavor is more complex. And please, use real buttermilk if you have it. The texture is noticeably better than the milk-and-vinegar hack, though that works in a pinch.
Equipment Needed
You don’t need a ton of fancy gear for this, which is part of the beauty.
- 10-inch Cast Iron Skillet: This is non-negotiable for the best crust. The hot skillet creates a sizzling effect that gives the cornbread a gorgeous, crispy golden bottom. If you don’t have one, a 9-inch cake pan or a deep-dish pie plate will work, but the crust won’t be as good.
- Mixing Bowls: One large for dry ingredients, one medium for wet. I use a set of glass nesting bowls.
- Whisk: For combining the dry ingredients and for smoothing out the wet mixture.
- Rubber Spatula: For folding the wet into the dry without overmixing.
- Small Saucepan or Microwave-Safe Bowl: For melting the butter.
- Measuring Cups and Spoons: For accuracy, especially with the baking powder and soda.
- Skewer or Toothpick: For poking holes in the warm cornbread. This is my secret step!
- Oven Mitts: The skillet will be screaming hot. Be careful.
If you’re using a cast iron skillet for the first time, don’t be intimidated. Just make sure it’s seasoned well. If your skillet is new, you might want to give it a quick coat of oil and heat it in the oven for 15 minutes before you start. A well-seasoned skillet is non-stick magic. Budget-friendly option? A standard 10-inch oven-safe non-stick skillet works, but you won’t get that same crust. A Lodge cast iron skillet is a fantastic investment that will last forever.
Preparation Method
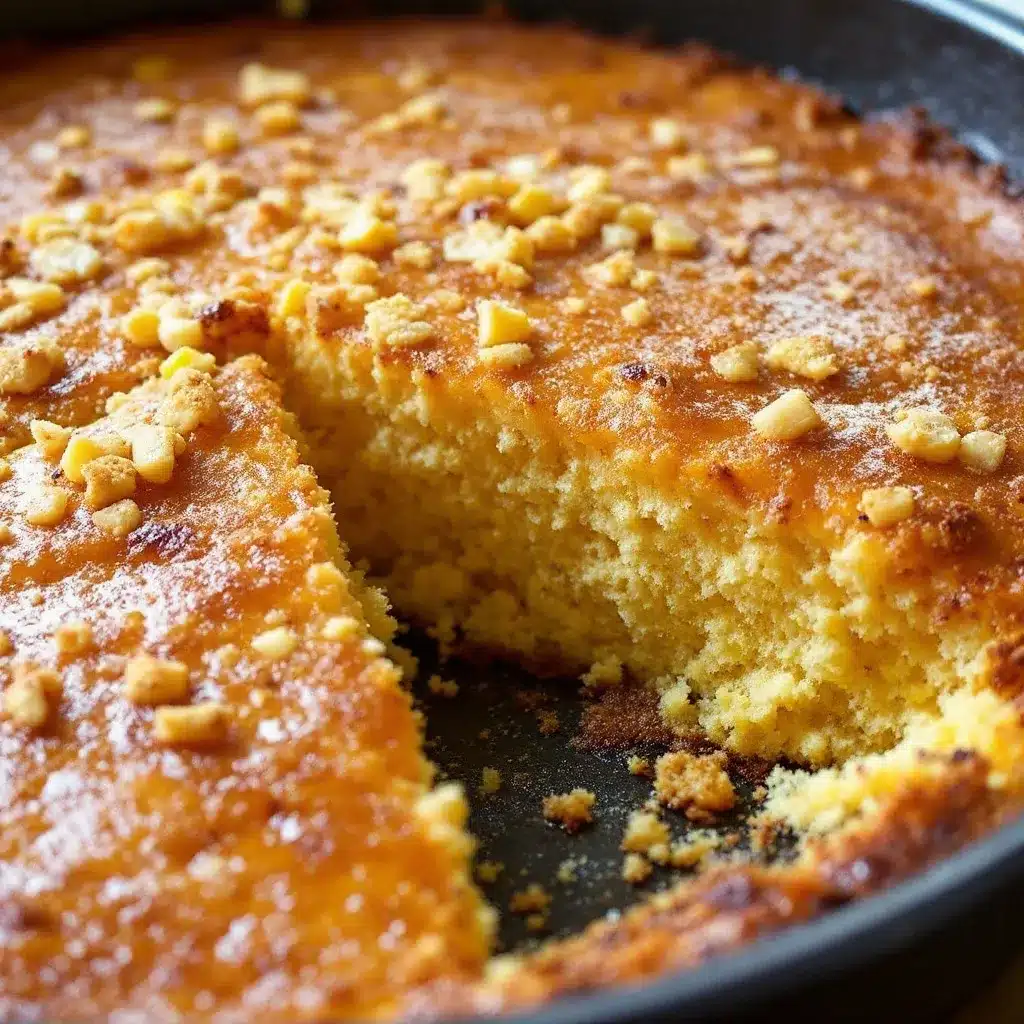
Alright, let’s get to it. This is where the magic happens. The key is to have everything ready before you start—mise en place, as the fancy folks say.
- Preheat the Oven and Skillet: Place your 10-inch cast iron skillet in the cold oven. Then, preheat the oven to 425°F (220°C). This is crucial. The skillet needs to be screaming hot when the batter hits it. While the oven is preheating, gather your ingredients.
- Mix the Dry Ingredients: In a large bowl, whisk together the cornmeal, all-purpose flour, sugar, baking powder, baking soda, and salt. Make sure there are no lumps. This only takes about 30 seconds.
- Mix the Wet Ingredients: In a separate medium bowl or large measuring cup, whisk together the buttermilk, eggs, and the 1/2 cup of melted (but slightly cooled) butter. Whisk until the eggs are fully incorporated and the mixture is smooth and pale yellow. Add the 1/4 cup of honey and whisk again.
- Combine Wet and Dry: Pour the wet ingredients into the bowl of dry ingredients. Use a rubber spatula to fold everything together. Here’s the most important rule: Do not overmix. Stir just until the flour streaks disappear. A few small lumps are perfectly fine. Overmixing develops the gluten and makes the cornbread tough. We want it tender.
- Bake the Cornbread: Carefully remove the hot skillet from the oven using your oven mitts. Place it on a heat-safe surface. Immediately pour the batter into the hot skillet. It should sizzle and hiss—that’s the sound of a perfect crust forming. Spread the batter evenly with the back of the spatula.
- Bake: Return the skillet to the oven and bake for 18-22 minutes. The cornbread is done when the top is golden brown and a toothpick inserted into the center comes out clean or with just a few moist crumbs. My oven usually takes exactly 20 minutes. The top should have that beautiful, crackled look.
- Make the Honey Butter: While the cornbread is baking, make the topping. In a small bowl, combine the 1/4 cup of softened butter and 2 tablespoons of honey. Mash them together with a fork until smooth and well-combined. Set aside.
- The Secret Step (Poke & Pour): As soon as the cornbread comes out of the oven, let it rest in the skillet for exactly 5 minutes. Do not skip this. Then, use a skewer or a toothpick to poke holes all over the top of the warm cornbread. Go about an inch deep. This creates channels for the honey butter to seep into.
- Finish with Topping: Drop spoonfuls of the honey butter mixture all over the top of the warm cornbread. It will start to melt immediately. Use the back of a spoon to gently spread it around, letting it pool into the holes you made. Sprinkle with a pinch of flaky sea salt.
- Serve: Let it sit for another 2-3 minutes to let the butter fully absorb. Then, slice it into wedges directly in the skillet. Serve warm with an extra drizzle of honey on the side.
One warning: the skillet will be hot for a long time. I always place it on a trivet or a wooden cutting board on the table to protect the surface.
Cooking Tips & Techniques
I’ve made every mistake you can imagine with cornbread. Here’s what I’ve learned so you don’t have to.
The Hot Skillet is Non-Negotiable. I once tried to be lazy and poured the batter into a cold skillet. The result? A pale, dense, soggy bottom. The sizzle when you pour the batter is what creates that beautiful, crispy, golden crust. Don’t skip preheating the pan.
Don’t Overmix the Batter. This is the number one mistake. I did it myself the first two times. You want to mix until it just comes together. Lumps are your friend. Overmixing makes the cornbread tough and rubbery. Think of it like muffin batter—gentle and quick.
Resting Time is Crucial. I know you’re hungry, but that 5-minute rest after baking is not optional. It allows the steam to redistribute and the crumb to set. If you poke holes and add the butter immediately, the cornbread might collapse or become gummy. Patience, my friend.
Buttermilk Temperature Matters. Cold buttermilk can seize the melted butter, creating lumps in your wet mixture. Let your buttermilk come to room temperature for about 15-20 minutes before mixing. Same goes for the eggs. A smooth batter bakes more evenly.
For a Crispier Top? If you want that extra-crispy, almost crackly top, bake the cornbread for the last 2-3 minutes on the top rack of the oven. Keep an eye on it so it doesn’t burn. This is a trick I picked up from a bakery in Nashville.
Timing is Everything: I usually start the cornbread batter right after I’ve put my chili or soup on to simmer. By the time the main dish is ready, the cornbread is resting, and we can sit down to eat everything hot at the same time. Multitasking is a lifesaver.
Variations & Adaptations
This recipe is a fantastic base, and I’ve played around with it a bunch. Here are a few of my favorite twists.
- Savory Cheddar & Jalapeño: This is my go-to for serving with chili. Fold in 1 cup of shredded sharp cheddar cheese and 1-2 finely diced jalapeños (seeds removed for less heat) into the batter before baking. Skip the honey butter topping and just brush the top with melted butter and a sprinkle of salt. It’s incredible.
- Gluten-Free Version: I’ve had great success swapping the all-purpose flour for a high-quality 1:1 gluten-free flour blend (like Bob’s Red Mill or King Arthur). The texture is slightly more delicate, but it’s still incredibly moist and delicious. Make sure your cornmeal is certified gluten-free if needed. For a similar side dish, you might enjoy our easy gluten-free cornbread muffins.
- Dairy-Free Adaptation: Use a high-quality vegan butter (like Miyoko’s) in place of the regular butter. For the buttermilk, use unsweetened oat milk or almond milk mixed with 1 tablespoon of apple cider vinegar. Let it sit for 5 minutes to curdle. The texture is still fantastic.
- Sweet Honey & Blueberry: For a sweeter, almost dessert-like cornbread, gently fold in 1 cup of fresh or frozen blueberries (don’t thaw them) into the batter. Use the honey butter topping as directed. This is perfect for a weekend brunch.
- Smoky Bacon Cornbread: Cook 4-5 strips of bacon until crispy, then crumble them. Reserve 2 tablespoons of the bacon fat and use it in place of 2 tablespoons of the melted butter in the batter. Fold the crumbled bacon into the batter before baking. The smoky, salty flavor with the sweet honey butter is a match made in heaven.
Serving & Storage Suggestions
This cornbread is best served warm, right out of the skillet. I love to place the hot skillet right on a trivet in the center of the table and let everyone dig in with a spoon. It’s rustic and inviting.
What to Serve With It: This is the ultimate side dish for fall. It’s phenomenal with a big bowl of chili, a hearty small batch BBQ pulled pork, or a creamy bowl of butternut squash soup. It also pairs beautifully with roasted chicken or a simple green salad with a tangy vinaigrette. For breakfast, I love it alongside scrambled eggs and bacon.
Storage: Leftover cornbread (if you have any) should be cooled completely, then wrapped tightly in plastic wrap or stored in an airtight container at room temperature for up to 2 days. It will stay moist, but the crust will soften. For longer storage, you can refrigerate it for up to 5 days, but I find it dries out a bit faster in the fridge.
Reheating: The best way to reheat is in a 350°F (175°C) oven for about 5-7 minutes, or in a toaster oven. This will re-crisp the crust. You can also microwave a slice for about 20 seconds, but the crust will be soft. If you do microwave it, add a small pat of fresh honey butter on top to bring back some moisture.
Freezing: This cornbread freezes beautifully. Slice it into wedges, wrap each one individually in plastic wrap, then place them in a freezer-safe bag. They’ll keep for up to 3 months. To serve, thaw a slice at room temperature or reheat it straight from frozen in a 350°F oven for 10-12 minutes. The flavor and texture hold up really well.
Flavor Development: Honestly, this cornbread is even better the next day. The flavors meld together, and the honey butter has fully soaked into the crumb. It’s a great make-ahead option for a busy weeknight dinner.
Nutritional Information & Benefits
While this is definitely a comfort food, it’s made with real, whole ingredients. Here’s a rough estimate per serving (based on 8 servings):
- Calories: ~330 kcal
- Fat: 18g
- Carbohydrates: 40g
- Protein: 6g
- Fiber: 2g
- Sugar: 16g
Health Benefits of Key Ingredients:
- Cornmeal: A good source of complex carbohydrates and fiber, which provides sustained energy. It also contains essential minerals like iron and magnesium.
- Buttermilk: A great source of calcium, protein, and probiotics (if using cultured buttermilk). It’s easier to digest than regular milk for some people.
- Honey: A natural sweetener with antioxidants and antibacterial properties. It’s a better option than refined sugar, though it should still be used in moderation.
- Butter: Provides fat-soluble vitamins A, D, E, and K. Using unsalted butter lets you control the sodium content.
Dietary Considerations: This recipe is vegetarian. It can be made gluten-free and dairy-free with the substitutions mentioned above. It is not suitable for a low-carb or keto diet due to the cornmeal and sugar.
Potential Allergens: Contains wheat (gluten), dairy (butter, buttermilk), and eggs. Please check your specific ingredient labels.
I believe in enjoying food in a balanced way. This cornbread is a treat, something to savor with loved ones on a cool evening. It’s not an everyday food, but when you have it, it’s worth doing right.
Conclusion
This honey butter skillet cornbread is more than just a side dish—it’s the anchor of a perfect fall dinner. It’s the warm, buttery, slightly sweet companion that makes a bowl of chili feel like a feast and a simple soup taste like a hug. The crackled top, the tender crumb, the pools of honey butter—it’s everything you want in a comfort food.
I encourage you to make this your own. Try it with cheddar and jalapeño, or fold in some blueberries for a sweeter version. The base recipe is so forgiving and versatile. Don’t be afraid to experiment a little. That’s the fun part of cooking, right?
Personally, I love this recipe because it reminds me of those crisp, golden fall afternoons when the kitchen smells amazing and everyone gathers around the table. It’s simple, it’s honest, and it’s absolutely delicious. I hope it brings that same warmth to your home.
Have you tried this recipe? I’d love to hear about it! Leave a comment below and tell me how it turned out, or share your own variation. Did you add bacon? Go sweet with blueberries? Let me know! And don’t forget to pin this recipe for later. Happy cooking, friends!
Frequently Asked Questions (FAQs)
Can I make this cornbread in a regular cake pan instead of a cast iron skillet?
Yes, you can! A 9-inch round cake pan or an 8×8 square baking dish will work. The biggest difference is the crust. You won’t get that same crispy, golden bottom that a hot cast iron skillet provides. If using a cake pan, I recommend greasing it well with butter or non-stick spray. You don’t need to preheat the pan in the oven for this method. The baking time might be slightly shorter, so start checking at 16 minutes.
My cornbread always turns out dry. What am I doing wrong?
Dry cornbread is usually a sign of overbaking or overmixing. Make sure you’re taking it out of the oven as soon as a toothpick comes out clean—don’t wait for it to be completely dry. Also, be gentle when mixing the batter. Overmixing develops the gluten, which can make it tough and dry. Finally, make sure your buttermilk and eggs are at room temperature. Cold ingredients can cause the batter to seize, leading to a less tender crumb.
Can I use white cornmeal instead of yellow?
Absolutely. Yellow and white cornmeal are very similar in texture and flavor. Yellow cornmeal has a slightly more intense corn flavor and a richer color, which I personally prefer for this recipe. White cornmeal is milder and will give you a paler cornbread. The baking results will be the same. Just make sure you’re using a medium-grind cornmeal, not a fine corn flour.
How do I make the honey butter topping ahead of time?
You can definitely make the honey butter in advance. Simply combine the softened butter and honey in a small bowl, mash them together with a fork until smooth, and then store it in an airtight container in the refrigerator. It will keep for up to a week. When you’re ready to use it, let it sit at room temperature for about 15 minutes to soften so it’s easy to spread over the warm cornbread.
Can I double this recipe?
Yes, you can easily double this recipe. If you’re feeding a crowd, I recommend using a 12-inch cast iron skillet or a 9×13-inch baking dish. The baking time will increase slightly, likely to around 25-30 minutes. Keep an eye on it and test for doneness with a toothpick. You’ll also want to double the honey butter topping to ensure you have enough to generously cover the larger surface area.
Pin This Recipe!
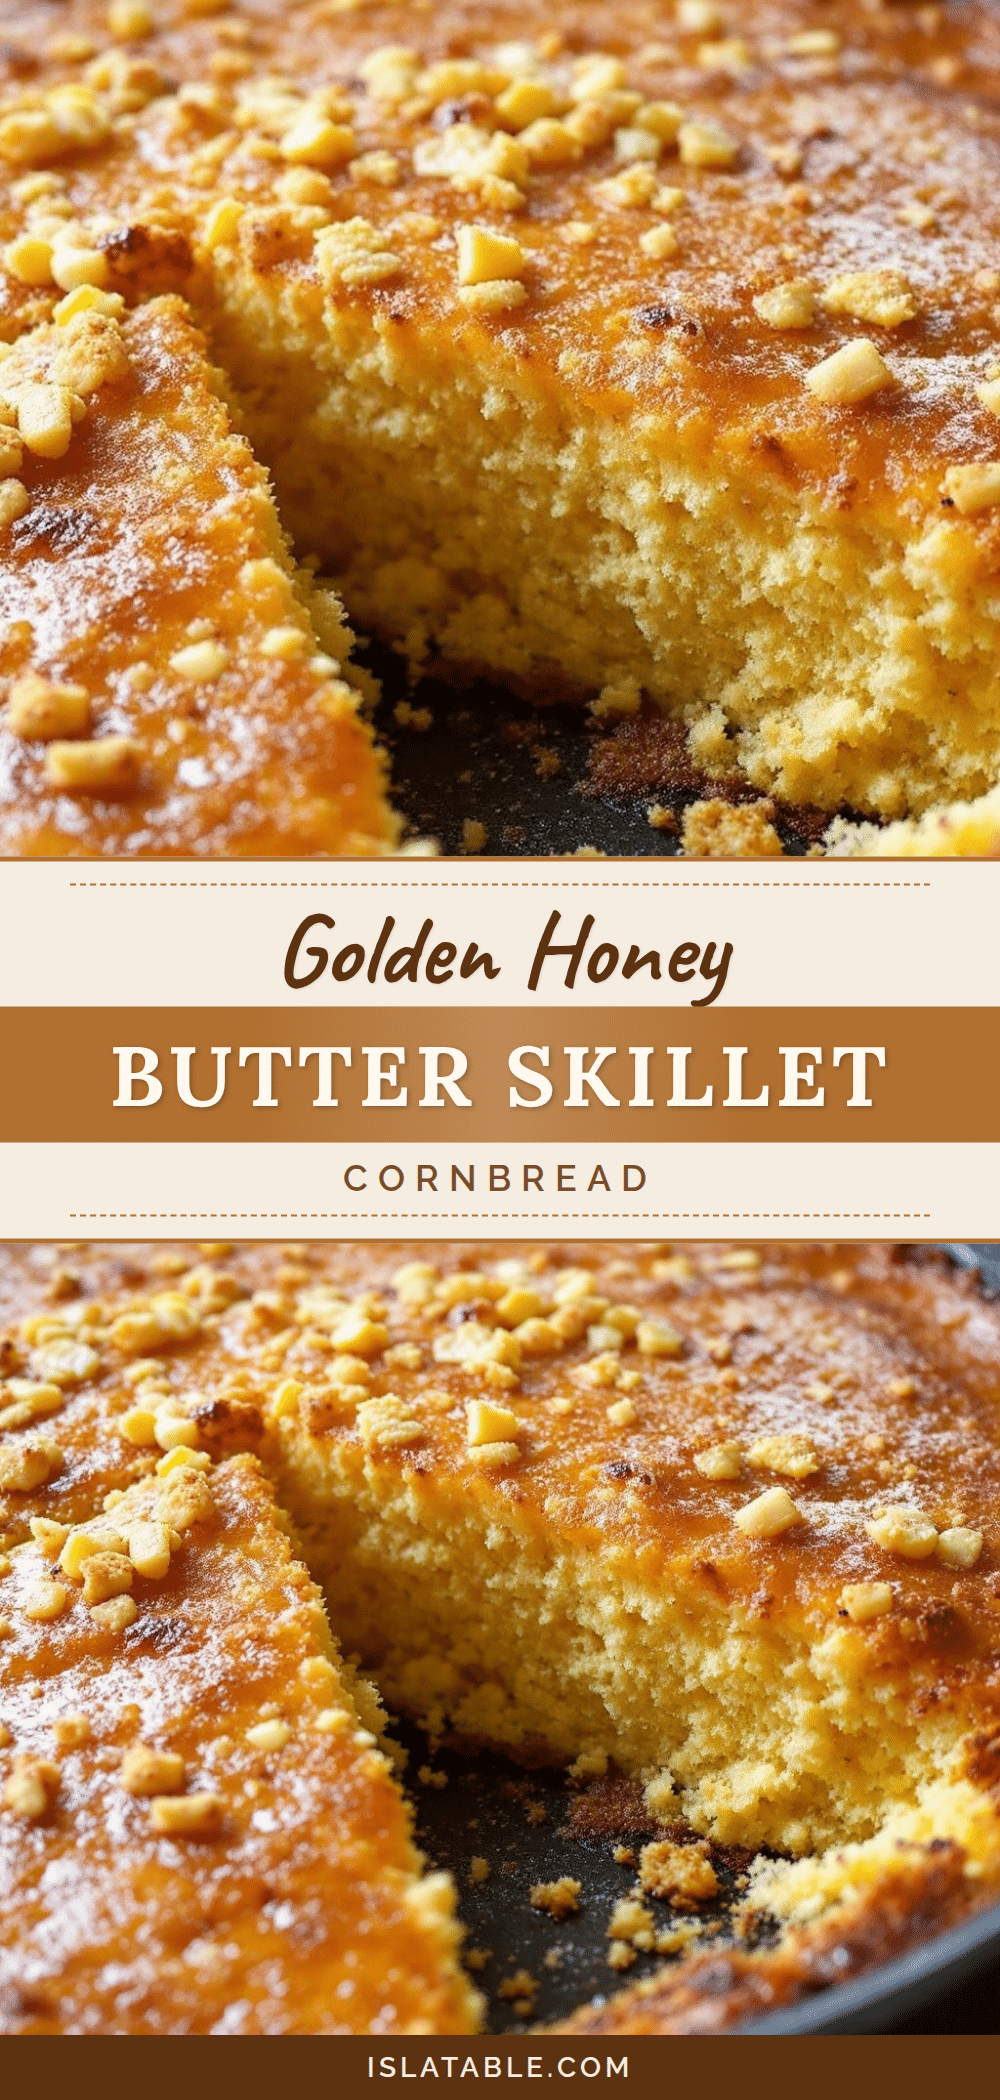
Perfect Honey Butter Skillet Cornbread for Easy Fall Dinners
This honey butter skillet cornbread is the ultimate side for fall dinners, featuring a tender, moist crumb with a crackled top and pools of sweet, buttery goodness. A secret technique of poking holes and letting the honey butter seep in makes it irresistibly delicious.
- Prep Time: 10 minutes
- Cook Time: 20 minutes
- Total Time: 35 minutes
- Yield: 8 servings 1x
- Category: Side Dish
- Cuisine: American
Ingredients
- 1 cup (160g) yellow cornmeal (medium-grind)
- 1 cup (125g) all-purpose flour
- 1/4 cup (50g) granulated sugar
- 1 tablespoon baking powder
- 1/2 teaspoon baking soda
- 1 teaspoon fine sea salt
- 1 cup (240ml) buttermilk, room temperature
- 2 large eggs, room temperature
- 1/2 cup (113g) unsalted butter, melted and slightly cooled
- 1/4 cup (85g) honey, plus more for serving
- For the Honey Butter Topping:
- 1/4 cup (56g) unsalted butter, softened
- 2 tablespoons (40g) honey
- Pinch of flaky sea salt
Instructions
- Preheat the oven to 425°F (220°C). Place a 10-inch cast iron skillet in the cold oven while it preheats.
- In a large bowl, whisk together cornmeal, flour, sugar, baking powder, baking soda, and salt.
- In a separate medium bowl, whisk together buttermilk, eggs, melted butter, and 1/4 cup honey until smooth.
- Pour the wet ingredients into the dry ingredients. Fold with a rubber spatula until just combined; do not overmix. A few lumps are fine.
- Carefully remove the hot skillet from the oven. Pour the batter into the skillet; it should sizzle. Spread evenly.
- Bake for 18-22 minutes, until the top is golden brown and a toothpick inserted in the center comes out clean or with a few moist crumbs.
- While the cornbread bakes, make the honey butter: In a small bowl, mash together softened butter and 2 tablespoons honey with a fork until smooth. Set aside.
- When the cornbread is done, let it rest in the skillet for exactly 5 minutes. Then, poke holes all over the top with a skewer or toothpick, about 1 inch deep.
- Drop spoonfuls of the honey butter mixture over the warm cornbread. Gently spread it around, letting it seep into the holes. Sprinkle with flaky sea salt.
- Let sit for 2-3 minutes for the butter to absorb. Slice into wedges and serve warm with extra honey on the side.
Notes
The hot skillet is crucial for a crispy crust. Do not overmix the batter. Let the cornbread rest for 5 minutes before poking holes and adding the honey butter. For a crispier top, bake on the top rack for the last 2-3 minutes. Buttermilk and eggs should be at room temperature for best results.
Nutrition
- Serving Size: 1 wedge (1/8 of reci
- Calories: 330
- Sugar: 16
- Sodium: 480
- Fat: 18
- Saturated Fat: 10
- Carbohydrates: 40
- Fiber: 2
- Protein: 6
Keywords: honey butter cornbread, skillet cornbread, fall dinner side, easy cornbread recipe, homemade cornbread


