My husband took his first bite of this stuffing, stopped chewing, and just looked at me. Not in a dramatic way, not with a big speech coming. Just… a look. Like he was trying to figure out if I had secretly ordered it from a restaurant. I wasn’t even watching him eat. I was at the sink, rinsing the brown butter pan, and I caught the silence out of the corner of my eye. That’s when I knew this sourdough stuffing recipe was different from every other version I’d made before.
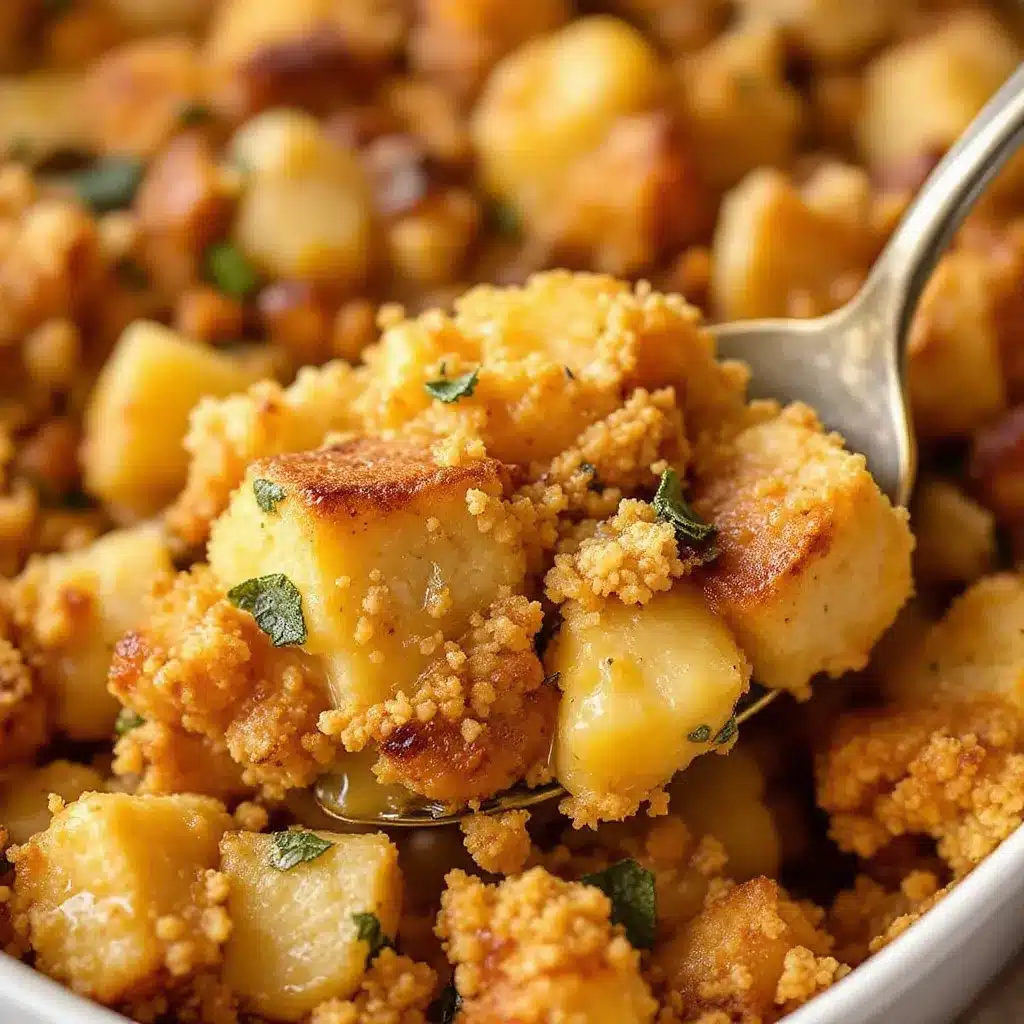
I’ve been making Thanksgiving stuffing for over a decade. Some years it was too dry. Other years it turned into a soggy, breadcrumb situation that nobody touched. But this brown butter sage stuffing with sourdough? It’s the one that made my husband stop mid-bite and question everything he thought he knew about stuffing. The nutty richness from the brown butter, the crisp edges of the sourdough, and that earthy sage hitting just right in the background—it all clicked.
Honestly, I didn’t plan on creating a new stuffing recipe. I had a leftover loaf of sourdough going stale on the counter, a bunch of sage I bought on a whim, and some butter that was about to expire. Sometimes the best recipes come from using up what you’ve got, you know? This perfect brown butter sage stuffing with sourdough became our new holiday staple, and now I’m making it for regular Tuesday dinners too.
Why You’ll Love This Recipe
Let me tell you why this stuffing stands out from the boxed stuff and even most homemade versions. I’ve tested this recipe six times to get it just right, adjusting the liquid ratio and toast time until every bite had that ideal mix of crispy edges and tender center.
- Restaurant-Quality Flavor at Home : The brown butter adds a deep, nutty complexity that you just can’t get from regular melted butter. It’s the same technique fancy restaurants use, and now you can do it in your kitchen without any special equipment.
- Perfect Texture Every Time : Sourdough holds its shape better than regular bread, so you get crispy golden cubes on top and soft, custard-like bread underneath. No more mushy stuffing disasters.
- Simple Ingredients, Big Impact : You only need basic pantry staples plus fresh sage. No cream of mushroom soup, no fancy cheese—just real, recognizable ingredients that work together beautifully.
- Make-Ahead Friendly : You can prep this entire dish the day before and pop it in the oven when you’re ready. It actually tastes better after the flavors have had time to meld together overnight.
- Crowd-Pleasing Classic : Even picky eaters who claim they don’t like stuffing end up going back for seconds. The brown butter and sage combination is universally appealing.
This isn’t just another stuffing recipe. It’s the one that will earn you requests to bring the stuffing to every family gathering from now on. The brown butter technique creates a depth of flavor that makes people think you spent hours in the kitchen, when really, you just followed a few simple steps.
What Ingredients You Will Need
This recipe uses simple, wholesome ingredients that come together to create something truly special. Most of these are pantry staples, so you might already have everything you need.
For the Bread Base
- 1 large loaf sourdough bread (about 16-18 ounces), cut into 1-inch cubes — Day-old or slightly stale bread works best because it absorbs the broth without turning to mush. I prefer a rustic bakery sourdough with a thick crust for extra texture.
- 1/2 cup unsalted butter — Use good quality butter here since it’s the star of the show. European-style butter with higher fat content browns more evenly and adds extra richness.
For the Aromatics
- 1 large yellow onion, diced — About 2 cups. Sweet onions work great too if that’s what you have.
- 3 celery stalks, diced — About 1 1/2 cups. The celery adds that classic stuffing crunch and freshness.
- 4 cloves garlic, minced — Fresh garlic is non-negotiable here. Don’t use the jarred stuff.
- 1/4 cup fresh sage leaves, chopped — This is about 15-20 leaves. Fresh sage is miles better than dried for this recipe. It’s worth seeking out.
- 2 teaspoons fresh thyme leaves — Or 1 teaspoon dried if that’s what you have on hand.
- 1 tablespoon fresh rosemary, finely chopped — Adds a piney, aromatic note that complements the sage perfectly.
For the Liquid Base
- 2 1/2 cups low-sodium chicken or vegetable broth — Low-sodium is important here so you can control the salt level. Homemade broth takes this over the top, but store-bought works fine.
- 2 large eggs, lightly beaten — These help bind everything together and create that custard-like texture inside the stuffing.
- 1 teaspoon kosher salt — Plus more to taste. I use Diamond Crystal; if you’re using Morton’s, cut back to 3/4 teaspoon.
- 1/2 teaspoon black pepper — Freshly ground, please.
- 1/4 teaspoon nutmeg — Optional but highly recommended. It’s a subtle warmth that makes the brown butter sing.
Optional Add-Ins
- 1/2 cup dried cranberries — For sweetness and color. I add these when I’m serving the stuffing with roast chicken instead of turkey.
- 1/2 cup toasted pecans or walnuts — Adds crunch and extra nuttiness that plays well with the brown butter.
- 1 cup cooked Italian sausage or bacon — If you want a heartier, meatier stuffing. Just cook it first and crumble it in.
Equipment Needed
Nothing too fancy here. You probably already own most of these items.
- Large skillet or sauté pan — A light-colored pan is actually better for browning butter because you can see when it turns amber. Dark nonstick pans make it harder to judge the color.
- 9×13 inch baking dish — Glass or ceramic works best. Metal pans can cause the edges to brown too quickly.
- Large mixing bowl — Big enough to toss all the bread cubes without spilling.
- Baking sheet — For toasting the bread cubes. A rimmed sheet prevents them from rolling off.
- Wooden spoon or silicone spatula — For stirring the brown butter and vegetables.
- Chef’s knife and cutting board — For all that chopping.
- Whisk — For beating the eggs and broth together.
If you don’t have a 9×13 dish, you can use a 10-inch cast iron skillet or divide the stuffing between two smaller dishes. Just adjust the baking time slightly—smaller dishes will cook faster. I’ve also made this in a disposable aluminum pan for potlucks, and it works perfectly.
Preparation Method
Step 1: Toast the Sourdough Cubes
Preheat your oven to 375°F (190°C). Spread the sourdough cubes in a single layer on two baking sheets. Bake for 12-15 minutes, tossing halfway through, until the cubes are dry and lightly golden around the edges. They should feel crisp but not hard—think day-old bread texture. This step is crucial because it prevents the bread from turning into a soggy mess later. Set aside to cool slightly while you prepare everything else.
Step 2: Brown the Butter
In your large skillet, melt the butter over medium heat. Swirl the pan occasionally as it melts. The butter will go through several stages: first it will foam up, then the foam will subside, and finally you’ll see brown specks forming at the bottom of the pan. This whole process takes about 5-7 minutes. Watch carefully during the last minute—brown butter can go from perfect to burnt very quickly. When the butter smells nutty and the specks are amber-colored, remove it from the heat immediately and pour it into a heat-safe bowl. Don’t leave it in the hot pan or it will continue cooking.
Step 3: Cook the Aromatics
Return the skillet to medium heat and add a tablespoon of olive oil. Add the diced onion and celery, cooking for 6-8 minutes until softened and translucent. Add the minced garlic, chopped sage, thyme, and rosemary, and cook for another minute until fragrant. The kitchen will smell incredible at this point. Season with a pinch of salt and pepper. Remove from heat and let cool slightly.
Step 4: Prepare the Custard Base
In a medium bowl, whisk together the chicken broth, beaten eggs, kosher salt, black pepper, and nutmeg if using. Make sure the eggs are fully incorporated into the broth. If your broth is cold, let it sit at room temperature for a few minutes before adding the eggs—you don’t want cold eggs shocking the warm ingredients later.
Step 5: Combine Everything
Place the toasted sourdough cubes in your large mixing bowl. Pour the cooked vegetable mixture over the bread cubes and toss gently to distribute. Drizzle about 3/4 of the brown butter over the bread and toss again. Reserve the remaining brown butter for brushing on top before baking. Pour the broth mixture over everything and fold gently until all the bread cubes are evenly moistened. Let this sit for 10 minutes so the bread can absorb the liquid. If it looks dry, add a splash more broth.
Step 6: Bake
Preheat your oven to 375°F (190°C). Transfer the stuffing mixture to your greased 9×13 baking dish and spread it evenly. Drizzle the reserved brown butter over the top. Cover with foil and bake for 25 minutes. Remove the foil and bake for another 20-25 minutes until the top is golden brown and crispy. The internal temperature should reach 165°F (74°C). Let it rest for 5-10 minutes before serving—this helps the stuffing set up and makes it easier to serve.
Cooking Tips & Techniques
I’ve made plenty of mistakes with stuffing over the years, so you don’t have to. Here’s what I’ve learned the hard way.
The biggest mistake people make is using fresh, soft bread straight from the bag. That bread will absorb liquid unevenly and turn into paste. Always toast your bread cubes first, even if you’re using day-old bread. The toasting step is non-negotiable for that perfect texture.
Watch your brown butter like a hawk. I burned my first batch because I walked away to chop onions. The butter goes from golden to burnt in about 30 seconds. Use a light-colored pan so you can see the color change, and trust your nose—when it smells nutty and toasty, it’s done.
Don’t overmix the stuffing once you add the liquid. Gently fold until just combined. Overmixing breaks down the bread cubes and gives you a dense, gummy texture. You want some larger chunks of bread to remain intact for that perfect bite.
Let the stuffing rest after baking. I know it’s tempting to dig right in, but letting it sit for 5-10 minutes allows the custard to set and makes serving much easier. The top will stay crispy while the inside becomes perfectly tender.
For extra crispy edges, spread the stuffing in a thinner layer in a larger dish. You can also broil it for the last 2-3 minutes, but watch it carefully so the brown butter doesn’t burn.
Variations & Adaptations
This brown butter sage stuffing is versatile enough to adapt to different diets and preferences. Here are some variations I’ve tried and loved.
Gluten-Free Version
Swap the sourdough for a good quality gluten-free bread. Look for one with a sturdy texture—soft sandwich bread won’t hold up. Toast the cubes a little longer since gluten-free bread tends to be more delicate. Everything else stays the same. If you’re looking for more gluten-free options, you might enjoy our easy gluten-free cornbread muffins as a side dish alternative.
Vegan Adaptation
Use vegan butter for browning (I like Miyoko’s or Country Crock Plant Butter) and replace the eggs with flax eggs (2 tablespoons ground flaxseed mixed with 6 tablespoons water, let sit for 5 minutes). Use vegetable broth instead of chicken broth. The texture will be slightly less custard-like but still delicious. Our vegan loaded nachos with cashew cheese would make a great appetizer before this stuffing.
Meat Lover’s Version
Cook 1 pound of Italian sausage or diced bacon before sautéing the vegetables. Remove the meat, cook the vegetables in the rendered fat, then add everything back together. This adds a smoky, savory depth that’s incredible with the brown butter.
Herb Variations
Don’t have sage? Try a mix of parsley, chives, and dill for a fresher flavor profile. Or use tarragon for an anise-like twist that pairs beautifully with chicken. You can also add 1/4 cup of chopped fresh parsley right before baking for a pop of color and freshness.
Make It Ahead
Assemble the stuffing completely, cover tightly, and refrigerate for up to 24 hours before baking. Add 10-15 minutes to the covered baking time since you’re starting from cold. The flavors actually meld together better overnight, so this is my preferred method for holiday meals.
Serving & Storage Suggestions
This stuffing is best served hot, straight from the oven, with the top still crispy and the inside tender and steamy. I like to garnish it with a few fresh sage leaves and a sprinkle of flaky sea salt right before serving—it looks beautiful and adds a final pop of flavor.
What to serve with it: This stuffing is a natural partner for roast turkey or chicken, but don’t limit yourself to holidays. It’s fantastic alongside roasted pork loin, grilled pork chops, or even a simple roast chicken dinner. For a lighter meal, serve it with a crisp green salad dressed with lemon vinaigrette. Our keto-friendly cobb salad with homemade ranch would balance out the richness nicely.
Storage: Leftover stuffing keeps in an airtight container in the refrigerator for up to 4 days. The texture will soften over time, but the flavor only gets better. I actually love cold stuffing straight from the fridge the next day—don’t judge me.
Reheating: The best way to reheat is in a 350°F (175°C) oven for 10-15 minutes, which helps restore some of the crispy edges. You can also reheat individual portions in a skillet over medium heat with a splash of broth to prevent drying out. Microwave works in a pinch, but the texture won’t be as good.
Freezing: You can freeze the unbaked stuffing for up to 3 months. Assemble it in a freezer-safe dish, wrap tightly in plastic wrap and foil, and freeze. Thaw overnight in the refrigerator before baking as directed. Baked stuffing can also be frozen, but the texture will be softer after thawing and reheating.
Nutritional Information & Benefits
Here’s the approximate nutritional breakdown per serving (based on 10 servings):
| Nutrient | Amount per Serving |
|---|---|
| Calories | 285 |
| Total Fat | 14g |
| Saturated Fat | 8g |
| Cholesterol | 65mg |
| Sodium | 520mg |
| Total Carbohydrates | 32g |
| Dietary Fiber | 2g |
| Sugars | 3g |
| Protein | 8g |
This stuffing offers some surprising health benefits. The sourdough fermentation process makes the bread easier to digest and may help with blood sugar regulation compared to regular bread. Sage is packed with antioxidants and has anti-inflammatory properties. Brown butter contains butyrate, a fatty acid that supports gut health. And celery provides vitamin K and potassium. It’s comfort food that actually brings something good to the table nutritionally.
For those watching their sodium, use unsalted butter and low-sodium broth, and adjust the added salt to taste. You can also reduce the butter to 1/3 cup without sacrificing too much flavor.
FAQs
Can I use dried sage instead of fresh?
Yes, but use less. Dried sage is more concentrated, so start with 1 tablespoon dried sage instead of 1/4 cup fresh. Keep in mind that dried sage has a slightly different flavor profile—more medicinal and less bright than fresh. I recommend fresh for this recipe if you can find it.
Why did my stuffing turn out soggy?
This usually happens for one of two reasons: the bread wasn’t toasted enough, or you added too much liquid. Make sure your bread cubes are thoroughly dried in the oven before mixing. Also, let the stuffing rest for 10 minutes after adding the broth so the bread can absorb it evenly before baking.
Can I make this stuffing in a slow cooker?
Absolutely. Prepare the stuffing as directed up to step 5, then transfer it to a greased slow cooker. Cook on low for 3-4 hours or on high for 1 1/2 to 2 hours. The top won’t get crispy, but you can transfer it to a baking sheet and broil for 3-4 minutes before serving to add some crunch.
How do I know when the brown butter is done?
Watch for three signs: the butter will smell nutty and toasty, it will turn a golden-amber color, and you’ll see tiny brown specks forming at the bottom of the pan. Once you see those specks, remove it from the heat immediately. It takes practice, but you’ll get the hang of it after one or two tries.
Can I use other types of bread?
Sure, but the texture will change. French bread or ciabatta work well and give similar results to sourdough. Regular sandwich bread will produce a softer, more traditional stuffing that’s still delicious but less structured. Avoid overly dense breads like rye or pumpernickel, which can overwhelm the other flavors.
Conclusion
This perfect brown butter sage stuffing with sourdough has become my go-to recipe for every occasion, from Thanksgiving feasts to simple Sunday dinners. It’s one of those rare dishes that feels both special and approachable—like you’re serving something fancy, but you didn’t have to stress about it.
The nutty richness of the brown butter, the earthy warmth of the sage, and the satisfying chew of sourdough come together in a way that just works. I love that I can make it ahead, adapt it to different diets, and serve it alongside almost any main dish. It’s become the stuffing that my family requests by name now, and I have a feeling it might become that for your family too.
I’d love to hear how yours turns out! Try this recipe and let me know in the comments—did you add any twists? Did your family react the way my husband did? Share your photos and tag me so I can see your beautiful brown butter creations. Happy cooking, friends!
Pin This Recipe!
Perfect Brown Butter Sage Stuffing with Sourdough

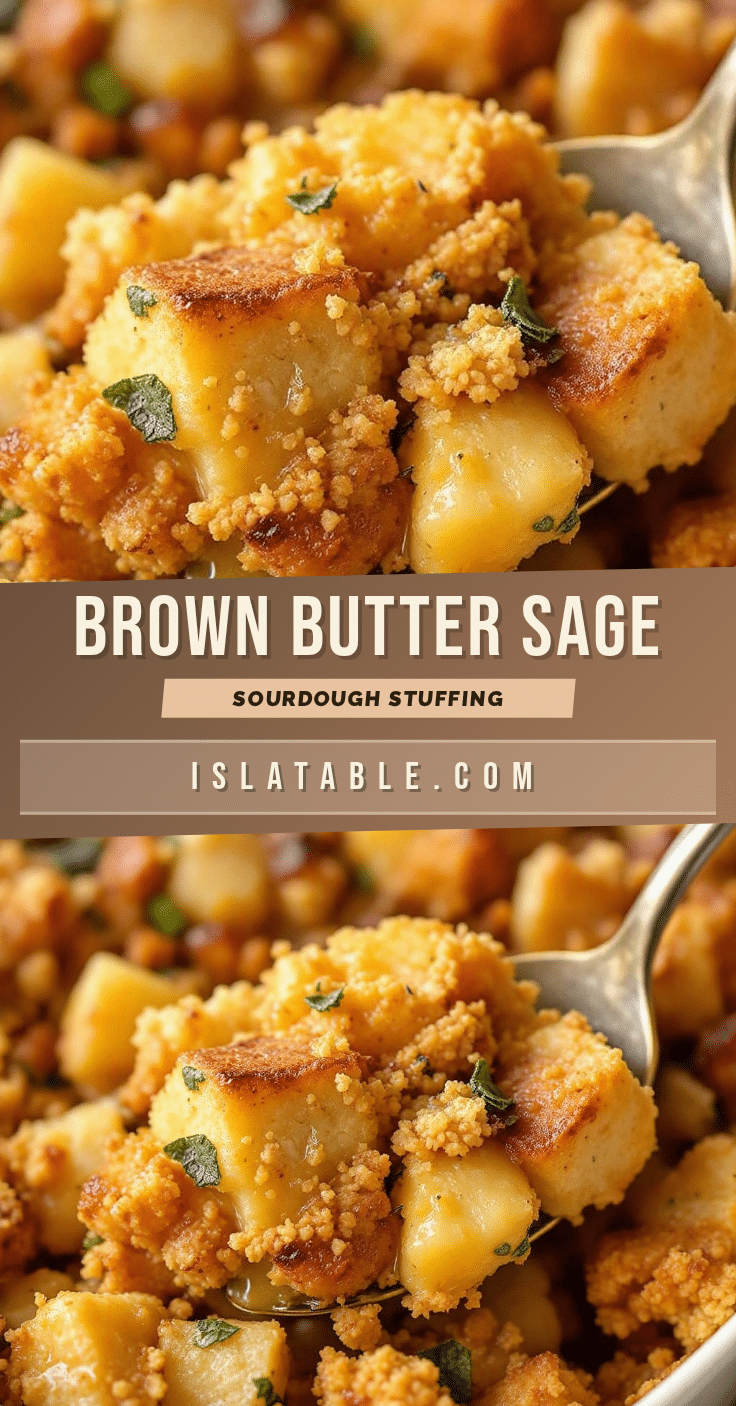
This brown butter sage stuffing with sourdough is a game-changer for holiday meals. The nutty richness from the brown butter, crisp edges of the sourdough, and earthy sage create a perfect texture and flavor that will earn you requests to bring it to every family gathering.
- Prep Time: 20 minutes
- Cook Time: 45 minutes
- Total Time: 1 hour 5 minutes
- Yield: 10 servings 1x
- Category: Side Dish
- Cuisine: American
Ingredients
- 1 large loaf sourdough bread (about 16–18 ounces), cut into 1-inch cubes
- 1/2 cup unsalted butter
- 1 large yellow onion, diced (about 2 cups)
- 3 celery stalks, diced (about 1 1/2 cups)
- 4 cloves garlic, minced
- 1/4 cup fresh sage leaves, chopped (about 15–20 leaves)
- 2 teaspoons fresh thyme leaves (or 1 teaspoon dried)
- 1 tablespoon fresh rosemary, finely chopped
- 2 1/2 cups low-sodium chicken or vegetable broth
- 2 large eggs, lightly beaten
- 1 teaspoon kosher salt (use 3/4 teaspoon if using Morton’s)
- 1/2 teaspoon black pepper, freshly ground
- 1/4 teaspoon nutmeg (optional)
- 1/2 cup dried cranberries (optional)
- 1/2 cup toasted pecans or walnuts (optional)
- 1 cup cooked Italian sausage or bacon (optional)
Instructions
- Preheat your oven to 375°F (190°C). Spread the sourdough cubes in a single layer on two baking sheets. Bake for 12-15 minutes, tossing halfway through, until the cubes are dry and lightly golden around the edges. Set aside to cool slightly.
- In a large skillet, melt the butter over medium heat. Swirl the pan occasionally as it melts. The butter will foam, then the foam will subside, and brown specks will form at the bottom. This takes about 5-7 minutes. When the butter smells nutty and the specks are amber-colored, remove from heat immediately and pour into a heat-safe bowl.
- Return the skillet to medium heat and add a tablespoon of olive oil. Add the diced onion and celery, cooking for 6-8 minutes until softened and translucent. Add the minced garlic, chopped sage, thyme, and rosemary, and cook for another minute until fragrant. Season with a pinch of salt and pepper. Remove from heat and let cool slightly.
- In a medium bowl, whisk together the chicken broth, beaten eggs, kosher salt, black pepper, and nutmeg if using. Make sure the eggs are fully incorporated.
- Place the toasted sourdough cubes in a large mixing bowl. Pour the cooked vegetable mixture over the bread cubes and toss gently. Drizzle about 3/4 of the brown butter over the bread and toss again. Reserve the remaining brown butter for brushing on top. Pour the broth mixture over everything and fold gently until all the bread cubes are evenly moistened. Let sit for 10 minutes so the bread can absorb the liquid.
- Preheat your oven to 375°F (190°C). Transfer the stuffing mixture to a greased 9×13 baking dish and spread evenly. Drizzle the reserved brown butter over the top. Cover with foil and bake for 25 minutes. Remove the foil and bake for another 20-25 minutes until the top is golden brown and crispy. The internal temperature should reach 165°F (74°C). Let rest for 5-10 minutes before serving.
Notes
Toast the bread cubes thoroughly to prevent soggy stuffing. Watch the brown butter carefully as it can go from perfect to burnt in about 30 seconds. Don’t overmix once liquid is added to avoid a gummy texture. Let the stuffing rest after baking for easier serving. For extra crispy edges, spread in a thinner layer or broil for the last 2-3 minutes. Can be assembled up to 24 hours ahead and refrigerated; add 10-15 minutes to covered baking time.
Nutrition
- Serving Size: 1 serving (about 1 c
- Calories: 285
- Sugar: 3
- Sodium: 520
- Fat: 14
- Saturated Fat: 8
- Carbohydrates: 32
- Fiber: 2
- Protein: 8
Keywords: brown butter sage stuffing, sourdough stuffing, Thanksgiving stuffing, holiday stuffing, homemade stuffing, sage stuffing, brown butter stuffing


