“Hey, you really gotta try this,” my friend texted me just as I was wrapping up a long, chaotic day. Honestly, I was skeptical — dessert boards always seemed so extra, like something reserved for fancy parties or Instagram photoshoots. But that evening, craving something easy yet a little special, I gave it a shot. What surprised me wasn’t just how quickly it came together, but how effortlessly it turned a simple night into a cozy, indulgent moment.
The mix of rich chocolate, fresh berries, and a few unexpected touches made it feel like I’d stumbled on a little secret. This dessert charcuterie board isn’t just a pretty face; it’s the kind of treat that invites you to slow down, savor, and maybe even share a laugh or two. Since that first try, I’ve found myself making it again and again — perfect for last-minute guests or when I just want something that feels both elegant and totally doable.
What stuck with me is how it balances the fuss-free with the fancy, without needing a culinary degree or hours in the kitchen. It’s truly a sweet setup that anyone can pull off, even if you’re usually the type to skip dessert altogether. So here’s the scoop on how to create your own elegant dessert charcuterie board with chocolate and berries — a little indulgence that comes with big smiles and zero stress.
Why You’ll Love This Elegant Dessert Charcuterie Board with Chocolate and Berries
After testing and tweaking this dessert charcuterie board recipe over a few weeks, I’m confident it hits the sweet spot between simple prep and wow-worthy presentation. It’s a dessert that feels luxurious but comes together faster than most traditional sweets, which is a total win when you’re juggling everything but the kitchen sink.
- Quick & Easy: Ready in under 20 minutes — no baking or complicated steps involved.
- Simple Ingredients: No need for fancy specialty items; most are pantry staples or fresh market finds.
- Perfect for Entertaining: Ideal for casual gatherings, romantic evenings, or even as a last-minute dessert for unexpected guests.
- Crowd-Pleaser: Balances sweet, tart, and rich flavors that kids and adults rave about alike.
- Unbelievably Delicious: The combination of luscious chocolate, juicy berries, and crunchy nuts or crackers makes every bite a treat.
What sets this recipe apart is the thoughtful layering of textures and flavors — from silky dark chocolate chunks to fresh berries bursting with natural sweetness. I like to add a sprinkle of sea salt on the chocolate to bring out that complex flavor contrast. Plus, swapping in a few homemade or favorite store-bought elements, like a sprinkle of toasted almonds or artisanal crackers, makes it feel personalized and extra special.
This isn’t just another dessert tray; it’s a small celebration on a board. Honestly, it’s the kind of recipe that makes you pause and savor the moment — whether that’s with a friend, family, or even just a quiet night in. If you’re into fuss-free desserts that impress without stress, this is your go-to.
What Ingredients You Will Need
This elegant dessert charcuterie board with chocolate and berries relies on simple, fresh ingredients that come together to create a stunning display of flavor and texture. Most of these should be easy to find, and many are likely already in your kitchen.
- Chocolate: Dark chocolate chunks or bars (70% cocoa recommended for a rich, slightly bitter contrast). I prefer Lindt or Ghirardelli for their smooth melt and flavor depth.
- Fresh Berries: A mix of strawberries (hulled and halved), blueberries, raspberries, and blackberries. Seasonal berries work great—summer berries are especially sweet and juicy.
- Cheeses: Soft cheeses like mascarpone or cream cheese spread in small bowls for creaminess; also consider a mild goat cheese for a tangy touch.
- Nuts: Toasted almonds, pecans, or pistachios add crunch and a toasty flavor. Lightly salt them for balance.
- Crackers & Cookies: A selection of buttery shortbread cookies, thin crispy crackers, or biscotti. I like to use gluten-free options sometimes, similar to those in my gluten-free cornbread muffins recipe experience.
- Dips & Extras: Honey or fruit preserves (like raspberry or apricot) for drizzling or spreading; a few sprigs of fresh mint or edible flowers for garnish.
Many of these ingredients can be swapped or adapted—use dairy-free cheese alternatives or coconut yogurt to keep it vegan-friendly. For a low-carb twist, you might pair with nuts and dark chocolate and skip the cookies, inspired by flavors from my keto coleslaw recipe pantry mindset.
Equipment Needed
- Serving Board: A large wooden or marble charcuterie board works best for arranging everything beautifully. If you don’t have one, a large platter or even a clean cutting board will do.
- Small Bowls: For dips like mascarpone, honey, or preserves—helps keep things tidy and adds visual interest.
- Sharp Knife: For slicing strawberries and chopping chocolate chunks evenly.
- Tongs or Small Forks: Useful for guests to pick up berries or nuts without mess.
- Spreading Knife: For smoothing cream cheese or mascarpone in bowls.
If you’re on a budget, don’t worry — simple plates or trays can work just fine, and small ramekins are inexpensive and multi-use. I’ve used a bamboo board from a local market that’s held up well and looks quite elegant after a quick wipe-down.
Preparation Method
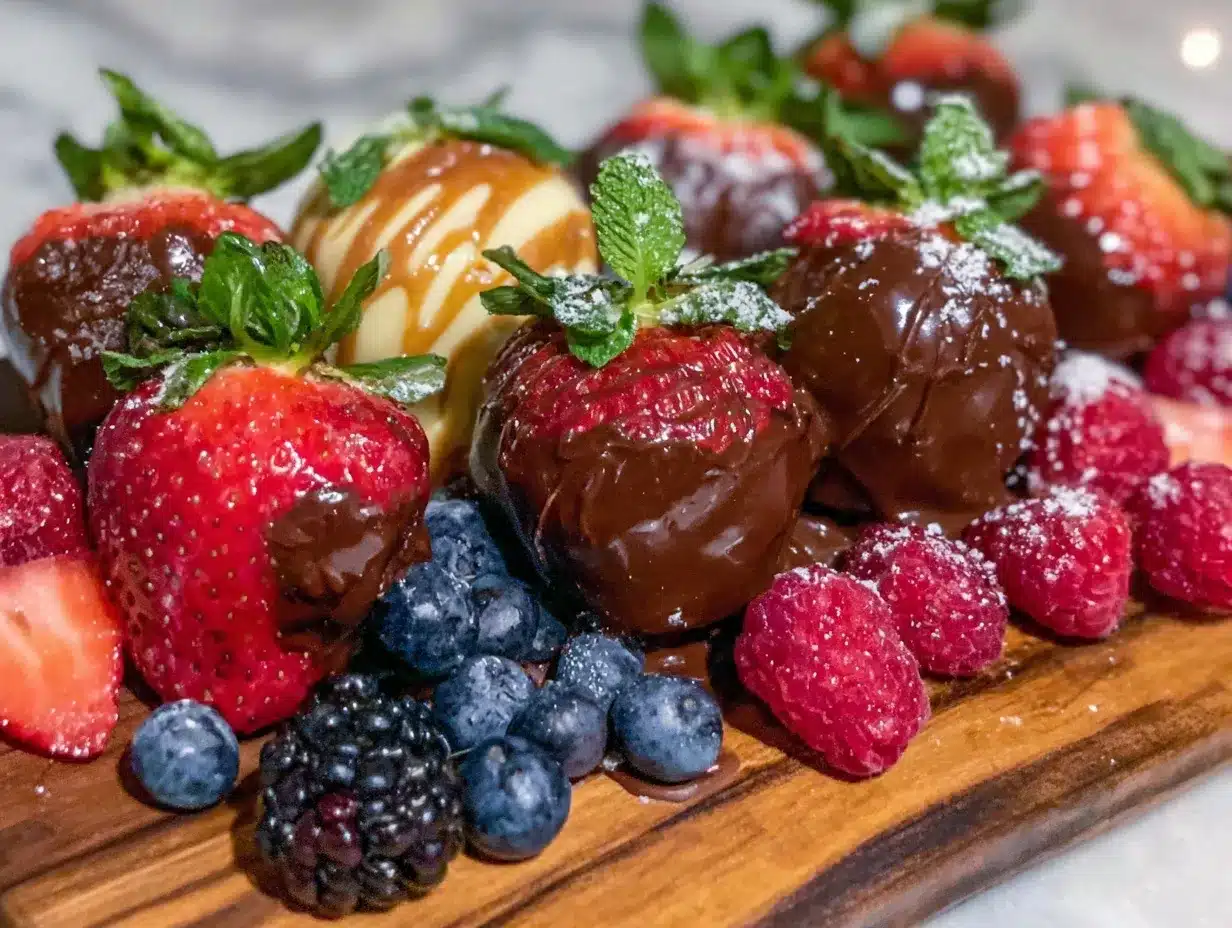
- Prep Your Ingredients (10 minutes): Rinse all berries gently and pat dry to avoid sogginess. Hull and halve strawberries for easy picking. Roughly chop the dark chocolate into bite-sized chunks.
- Toast Nuts (5 minutes): In a dry skillet over medium heat, toast your chosen nuts until fragrant and slightly golden—about 3 to 5 minutes. Stir frequently to prevent burning. Let cool.
- Arrange Small Bowls: Spoon mascarpone or cream cheese into small bowls. Drizzle a bit of honey or place a spoonful of fruit preserves in each bowl for dipping.
- Lay Out the Board: Start by placing the bowls off-center on your board or platter. Then, arrange chocolate chunks around them, spacing evenly.
- Add Berries: Cluster berries in small groups rather than scattered randomly — this creates visual appeal and makes it easier to pick.
- Scatter Nuts and Crackers: Fill in gaps with toasted nuts and your choice of cookies or crackers. Try to balance crunchy and soft textures across the board.
- Garnish: Finish with fresh mint sprigs or edible flowers for a pop of color and freshness.
- Final Touch: Optional sprinkle of flaky sea salt over chocolate pieces enhances flavor. Serve immediately or cover loosely with plastic wrap and refrigerate for up to 2 hours before guests arrive.
Tip: Don’t overcrowd the board—leave a little breathing room so each item stands out. If you like, you can add a small bowl of whipped cream or chocolate sauce for extra indulgence.
Cooking Tips & Techniques
Even though this dessert board is mostly assembly, a few tricks can make all the difference. When selecting chocolate, go for bars that melt smoothly but still hold their shape at room temperature. Breaking the chocolate into uneven chunks adds a rustic, inviting vibe.
Handling berries gently is key. Overwashing or squeezing them can lead to mushiness, so a light rinse and careful drying are essential. When toasting nuts, watch them closely—they can burn quickly but a slight golden hue brings out their best flavor.
Balancing textures is something I learned after a few attempts. The combination of creamy cheese, juicy berries, crunchy nuts, and crisp cookies keeps each bite interesting. Don’t forget a pinch of sea salt on the chocolate — it’s a small step that really wakes up the flavors.
Timing matters too: assembling the board shortly before serving keeps berries fresh and crackers crisp. If you want to save time, prep the components ahead but wait to arrange until just before guests arrive.
Variations & Adaptations
- Seasonal Twist: Swap berries for stone fruits like peach slices or cherries in summer, or pomegranate seeds and figs in fall and winter.
- Dietary Adjustments: Use dairy-free cream cheese or coconut yogurt for a vegan-friendly option, and pick gluten-free crackers if needed.
- Flavor Boost: Add a small bowl of nut butter or salted caramel sauce for dipping, or sprinkle cinnamon on the mascarpone for warmth.
- Chocolate Variety: Mix in white or milk chocolate pieces, or include chocolate-covered nuts for an extra touch.
- Personal Favorite: I once added a handful of toasted coconut flakes and a drizzle of balsamic reduction over the berries — surprisingly delicious and a nice contrast!
Serving & Storage Suggestions
Serve the dessert charcuterie board at room temperature so the chocolate is soft but not melted and the cheeses are creamy. It pairs wonderfully with a light sparkling wine or a berry-infused iced tea for a refreshing balance.
If you’re planning ahead, assemble the components but keep crackers and cookies separate until serving to maintain crunch. Store leftovers covered in the fridge for up to 2 days — though truthfully, it rarely lasts that long!
Reheat neither the chocolate nor the berries; simply bring the board to room temperature before serving again. Flavors tend to deepen after a few hours, especially if the honey or preserves have time to mingle with the cheeses and nuts.
Nutritional Information & Benefits
This elegant dessert charcuterie board offers a nice balance of indulgence and nutrition. Dark chocolate provides antioxidants and a mood boost, while fresh berries bring vitamins, fiber, and a natural sweetness that cuts down on added sugars.
Choosing nuts adds healthy fats and protein, making the dessert more satisfying. Using fresh, whole ingredients keeps it lighter than typical heavy desserts. If you opt for gluten-free or dairy-free components, it can fit many dietary preferences without sacrificing flavor.
Overall, it’s a dessert that feels like a treat but won’t leave you weighed down — something I appreciate on busy nights or after a big meal, similar to the lighter sides I include with dishes like the keto coleslaw.
Conclusion
This elegant dessert charcuterie board with chocolate and berries has become my go-to for moments when I want to impress without stress. It’s a recipe that invites creativity, suits all kinds of occasions, and honestly, just feels good to share. Make it your own by swapping in favorite chocolates, nuts, or fruits — the best part is how flexible and forgiving it is.
I love how it transforms a simple collection of treats into a centerpiece, making any gathering feel a little more special. If you try it, I’d love to hear how you customize your board or what new twists you discover. Here’s to sweet moments and good company!
Frequently Asked Questions about the Elegant Dessert Charcuterie Board with Chocolate and Berries
Can I prepare this dessert board ahead of time?
Yes! You can prep all the components a few hours in advance and store them separately. Assemble the board about 30 minutes before serving for the freshest look and texture.
What types of chocolate work best for this recipe?
Dark chocolate with around 70% cocoa is ideal for balancing sweetness and richness. You can also mix in milk or white chocolate pieces for variety.
Are there good substitutes for the fresh berries?
Absolutely. Seasonal fruits like sliced peaches, cherries, figs, or even pomegranate seeds work beautifully depending on the time of year.
How do I keep crackers from getting soggy on the board?
Keep crackers in a separate dish or add them last when guests arrive. If you must place them on the board, avoid placing them near juicy berries or wet dips.
Can this dessert board be made vegan?
Yes! Use dairy-free cream cheese or coconut yogurt and choose vegan chocolate. Swap traditional cookies for vegan or gluten-free options to suit your needs.
Pin This Recipe!
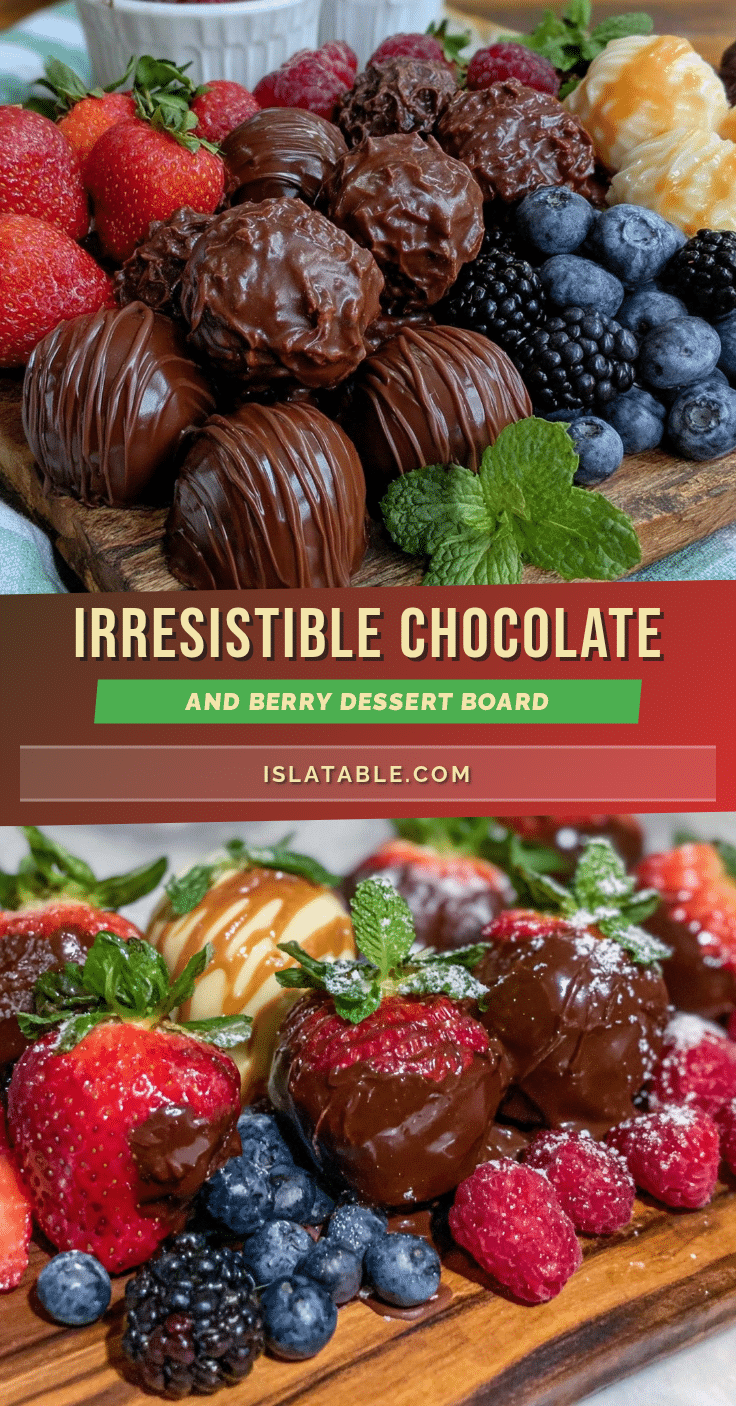
Elegant Dessert Charcuterie Board with Chocolate and Berries
A quick and easy dessert charcuterie board featuring rich dark chocolate, fresh berries, creamy cheeses, toasted nuts, and crunchy crackers. Perfect for impressing guests with minimal effort.
- Prep Time: 10 minutes
- Cook Time: 5 minutes
- Total Time: 15 minutes
- Yield: 6 servings
- Category: Dessert
- Cuisine: American
Ingredients
- Dark chocolate chunks or bars (70% cocoa recommended)
- Fresh berries: strawberries (hulled and halved), blueberries, raspberries, blackberries
- Soft cheeses: mascarpone or cream cheese, mild goat cheese (optional)
- Toasted nuts: almonds, pecans, or pistachios, lightly salted
- Crackers & cookies: buttery shortbread cookies, thin crispy crackers, biscotti (gluten-free options optional)
- Honey or fruit preserves (raspberry or apricot) for drizzling or spreading
- Fresh mint sprigs or edible flowers for garnish
Instructions
- Rinse all berries gently and pat dry to avoid sogginess. Hull and halve strawberries for easy picking. Roughly chop the dark chocolate into bite-sized chunks.
- Toast your chosen nuts in a dry skillet over medium heat until fragrant and slightly golden, about 3 to 5 minutes. Stir frequently to prevent burning. Let cool.
- Spoon mascarpone or cream cheese into small bowls. Drizzle a bit of honey or place a spoonful of fruit preserves in each bowl for dipping.
- Place the bowls off-center on your serving board or platter. Arrange chocolate chunks evenly around them.
- Cluster berries in small groups rather than scattered randomly to create visual appeal and ease of picking.
- Fill in gaps with toasted nuts and your choice of cookies or crackers, balancing crunchy and soft textures across the board.
- Garnish with fresh mint sprigs or edible flowers for a pop of color and freshness.
- Optionally sprinkle flaky sea salt over chocolate pieces to enhance flavor. Serve immediately or cover loosely with plastic wrap and refrigerate for up to 2 hours before serving.
Notes
Use dark chocolate bars that melt smoothly but hold shape at room temperature. Handle berries gently to avoid mushiness. Toast nuts carefully to avoid burning. Assemble board shortly before serving to keep berries fresh and crackers crisp. Optional additions include whipped cream, chocolate sauce, nut butter, or salted caramel sauce. For vegan or gluten-free versions, use dairy-free cheeses and vegan/gluten-free crackers.
Nutrition
- Serving Size: Approximately 1/6th
- Calories: 320
- Sugar: 15
- Sodium: 120
- Fat: 22
- Saturated Fat: 8
- Carbohydrates: 25
- Fiber: 5
- Protein: 5
Keywords: dessert charcuterie board, chocolate and berries, easy dessert, no bake dessert, entertaining dessert, quick dessert, elegant dessert


