The kitchen was quiet except for the soft hum of the refrigerator and the rhythmic tap of my knife against the cutting board. It was a Tuesday evening in late October, the kind where the sky goes dark too early and the air through the window carries that first real chill of autumn. I had a split chicken breast thawed in the fridge, a head of garlic that was starting to sprout, and a half-empty box of long-grain rice. Honestly, I was tired. Not the dramatic kind of tired you post about on social media, just the low-grade, bone-deep weariness of a week that had decided to be stubborn.
I didn’t want a recipe with multiple bowls or a sink full of dishes. I wanted something that would fill the kitchen with a good smell and leave me with dinner and maybe, just maybe, a little bit of leftover for lunch the next day. That’s when this one-pan garlic butter chicken and rice skillet was born. It wasn’t planned. It wasn’t tested three times in a row before I wrote it down. It was just me, a hot skillet, and the stubborn belief that simple food made with good butter is almost always the right answer.
And you know what? It worked. The rice soaked up all that garlicky, buttery goodness while the chicken stayed juicy on top. I ate it right out of the pan, standing at the counter, and I knew I had stumbled onto something worth sharing. This isn’t a fancy recipe. It’s the one you make when you need dinner to show up for you, not the other way around.
Why You’ll Love This Recipe
I have made this garlic butter chicken and rice skillet more times than I can count now, and every time, it delivers. Here is why this recipe has earned a permanent spot in my weeknight rotation.
- Truly One-Pan Cooking: Sear the chicken, sauté the aromatics, and cook the rice all in the same skillet. Minimal cleanup, maximum flavor. This is the kind of meal that makes you wonder why you ever bothered with multiple pots.
- Simple Pantry Ingredients: Chicken, rice, garlic, butter, broth, and a few seasonings. You probably have most of this in your kitchen right now. No specialty stores, no obscure spices.
- Perfect for Busy Weeknights: From start to finish, this comes together in about 40 minutes. Most of that time is hands-off while the rice simmers and the chicken finishes cooking.
- Crowd-Pleaser Across the Board: I have served this to picky kids, skeptical in-laws, and friends who usually prefer takeout. Every single person went back for seconds. It is one of those rare dishes that feels both indulgent and familiar.
- Unbelievably Comforting: The garlic butter infuses every grain of rice, and the chicken comes out tender and golden. It is the kind of meal that makes you slow down and actually taste what you are eating.
What sets this recipe apart from other one-pan chicken and rice dishes is the technique. I don’t just dump everything in and hope for the best. By searing the chicken first and toasting the rice in the garlic butter before adding the liquid, you build layers of flavor that make this taste like you spent hours in the kitchen. It is comfort food reimagined—simpler, faster, but with the same soul-soothing satisfaction that makes you close your eyes after the first bite.
What Ingredients You Will Need
This recipe relies on a handful of quality ingredients to deliver big flavor without the fuss. Here is everything you need and a few notes on what to look for.
- Chicken Thighs or Breasts: I prefer boneless, skinless chicken thighs for this recipe because they stay juicier and have more flavor. If you use chicken breasts, pound them to an even thickness so they cook evenly. About 1.5 pounds works well for a generous skillet. (I often use thighs from Bell & Evans—they are consistently good.)
- Garlic: A full head of garlic, minced. Do not skimp here. The garlic mellows as it cooks and creates that signature buttery flavor. Fresh garlic is non-negotiable for this recipe; the jarred stuff just won’t give you the same depth.
- Unsalted Butter: Use good-quality unsalted butter so you can control the salt level. Salted butter can make the dish too salty, especially since the broth also contains sodium. I reach for Kerrygold when I want something extra rich.
- Long-Grain White Rice: Basmati or jasmine rice works beautifully here. Do not use short-grain or sticky rice—they will turn mushy. Rinse the rice in a fine-mesh strainer until the water runs clear to remove excess starch. This is a small step that makes a big difference in texture.
- Chicken Broth: Low-sodium chicken broth is best so you can season to your taste. Homemade broth is wonderful if you have it, but a good quality store-bought brand like Swanson or Kitchen Basics works perfectly.
- Onion: One medium yellow onion, finely diced. It adds a savory backbone to the dish. You could use shallots for a milder flavor if you prefer.
- Dried Thyme and Paprika: Thyme adds an earthy, slightly floral note that pairs beautifully with garlic and butter. Paprika gives the chicken a lovely golden color and a subtle sweetness. Smoked paprika works well here too if you want a deeper flavor.
- Salt and Black Pepper: Essential for seasoning each layer. Use kosher salt for better control.
- Fresh Parsley: For garnish. It adds a pop of color and a fresh finish that cuts through the richness. Do not skip it—it makes the dish look and taste complete.
- Optional Add-Ins: A squeeze of lemon juice at the end brightens everything up. You can also toss in a cup of frozen peas during the last five minutes of cooking for a pop of green and sweetness.
The beauty of this ingredient list is its flexibility. If you have leftover roasted chicken, you can shred it and stir it in at the end. If you are out of thyme, dried oregano or rosemary work in a pinch. Just keep the garlic and butter as your non-negotiables—they are the heart of this dish.
Equipment Needed
One of the best things about this recipe is how little equipment it requires. Here is what you will need.
- A Large, Deep Skillet or Dutch Oven: A 12-inch skillet with a tight-fitting lid is ideal. Cast iron, stainless steel, or non-stick all work well. I use my Lodge cast iron skillet for this—it holds heat beautifully and gives the chicken a gorgeous sear. If you do not have a lid, a sheet of aluminum foil works in a pinch.
- Cutting Board and Chef’s Knife: For prepping the chicken, garlic, and onion. A sharp knife makes this step quick and safe.
- Measuring Cups and Spoons: For accurate measurements of rice, broth, and seasonings. Precision matters here to get the rice-to-liquid ratio right.
- Wooden Spoon or Silicone Spatula: For stirring the rice and scraping up the browned bits from the bottom of the pan. Those bits are pure flavor.
- Fine-Mesh Strainer: For rinsing the rice. This is a small tool that makes a noticeable difference in the final texture.
If you do not own a Dutch oven, a deep non-stick skillet with high sides works perfectly. The key is having enough surface area to sear the chicken without crowding and enough depth to hold the rice and liquid as they cook.
Preparation Method
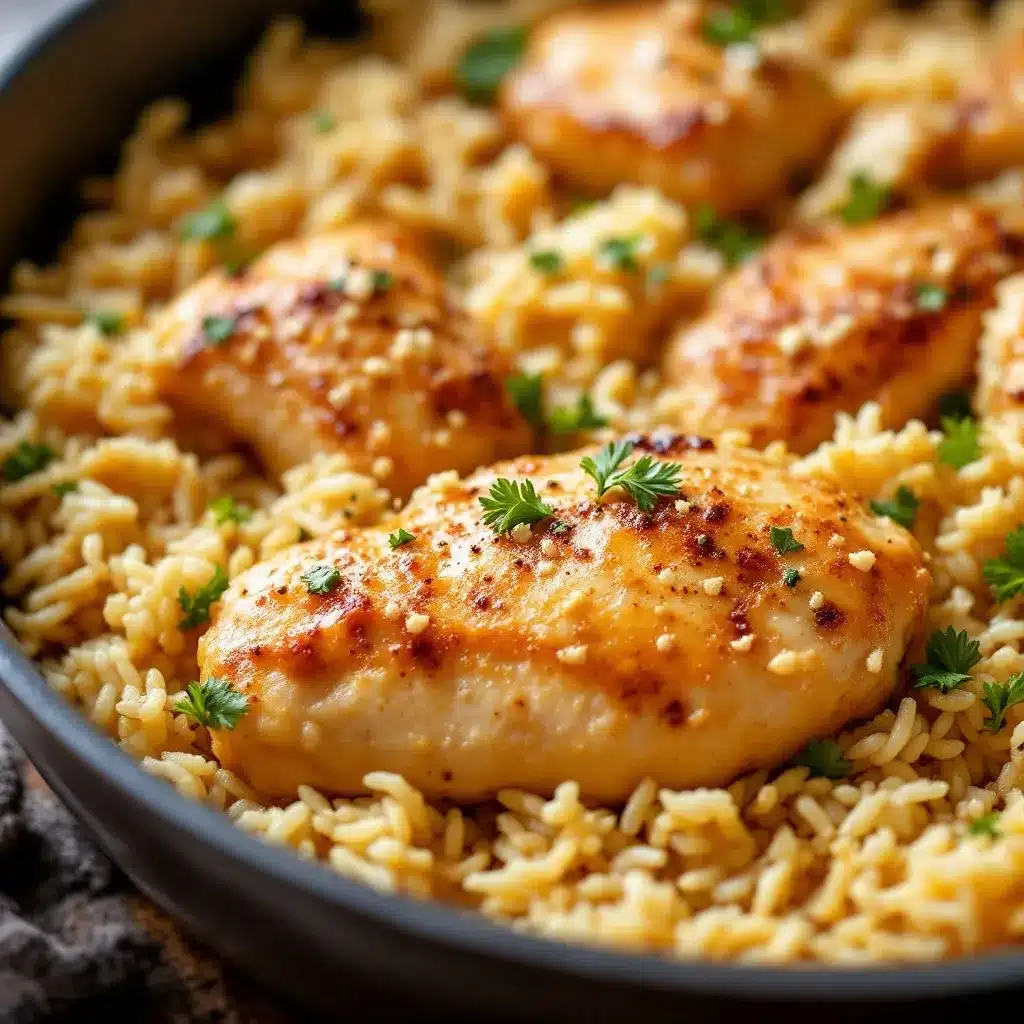
This recipe moves quickly once you start, so have all your ingredients prepped and measured before you turn on the heat. Trust me on this.
- Prep the Chicken: Pat the chicken thighs dry with paper towels. This is crucial for a good sear. Season generously on both sides with salt, black pepper, and 1 teaspoon of paprika. Set aside while you prep the other ingredients.
- Rinse the Rice: Place 1.5 cups of long-grain white rice in a fine-mesh strainer and rinse under cold running water until the water runs clear. This removes excess starch and prevents the rice from turning gummy. Shake off the excess water and set aside.
- Sear the Chicken: Place your skillet over medium-high heat and add 2 tablespoons of unsalted butter. Once the butter is melted and sizzling, carefully place the chicken thighs in the skillet in a single layer. Do not move them for 4-5 minutes—let them develop a deep golden crust. Flip and cook for another 3-4 minutes on the second side. The chicken will not be fully cooked through at this point, and that is fine. Transfer the chicken to a plate and set aside.
- Cook the Aromatics: Reduce the heat to medium. Add 1 more tablespoon of butter to the skillet. Once melted, add the diced onion and cook for 3-4 minutes, stirring occasionally, until softened and translucent. Add the minced garlic (about 6-8 cloves) and cook for 30 seconds, just until fragrant. Do not let the garlic burn—it will turn bitter.
- Toast the Rice: Add the rinsed rice to the skillet and stir to coat it in the garlic butter. Cook for 2 minutes, stirring constantly. The rice will start to smell nutty and toasty. This step is where a lot of the flavor builds, so do not rush it.
- Add the Liquid: Pour in 2.5 cups of low-sodium chicken broth and add 1 teaspoon of dried thyme. Stir everything together, scraping up any browned bits from the bottom of the pan. Bring the liquid to a gentle boil.
- Return the Chicken: Nestle the seared chicken thighs back into the skillet on top of the rice. Pour in any juices that have accumulated on the plate. The chicken should be mostly submerged in the liquid. Cover the skillet with a tight-fitting lid.
- Simmer: Reduce the heat to low and let the skillet simmer gently for 18-20 minutes. Do not lift the lid during this time—the steam is what cooks the rice evenly. Set a timer and walk away.
- Rest and Fluff: After 20 minutes, turn off the heat and let the skillet sit, still covered, for 5 minutes. This resting time allows the rice to absorb any remaining liquid and finish cooking without scorching. Remove the lid and fluff the rice gently with a fork. The chicken should be tender and cooked through (internal temperature of 165°F).
- Finish and Serve: Taste the rice and adjust seasoning with salt and pepper if needed. Sprinkle with fresh chopped parsley and a squeeze of lemon juice if you like. Serve directly from the skillet for maximum cozy effect.
One thing I learned the hard way: if your rice is still slightly undercooked after the resting time, sprinkle a tablespoon of broth or water over the top, cover, and let it sit on very low heat for another 5 minutes. Do not stir it too much or you will break the grains.
Cooking Tips & Techniques
Over the many times I have made this garlic butter chicken and rice skillet, I have picked up a few tricks that make a real difference. Here are the ones worth knowing.
Get the Sear Right: The golden crust on the chicken is not just for looks—it adds a deep, savory flavor to the entire dish. Make sure your skillet is hot before adding the chicken, and do not crowd the pan. If your skillet is not large enough, sear the chicken in two batches. Crowding lowers the pan temperature and steams the meat instead of browning it.
Toast the Rice Thoroughly: I used to skip this step because I was impatient. Do not be like me. Toasting the rice in the garlic butter for a full two minutes transforms the flavor from plain to nutty and aromatic. You will smell the difference.
Use a Timer and Trust It: The hardest part of this recipe is not lifting the lid while the rice simmers. I know it is tempting to peek, but every time you lift that lid, steam escapes and the cooking time becomes unpredictable. Set a timer for 18 minutes and walk away. The rice will be perfectly fluffy when you come back.
Adjust for Different Pans: If you are using a stainless steel skillet, you might need a splash more broth since these pans tend to evaporate liquid faster than cast iron or non-stick. Keep an extra 1/4 cup of broth on hand just in case.
My Biggest Failure: The first time I made this, I used jasmine rice without rinsing it. The result was a sticky, clumpy mess that looked more like risotto than fluffy rice. Rinsing is not optional—it is the difference between a beautiful skillet dinner and a sad bowl of starch.
Multitasking Strategy: While the chicken sears, prep your onion and garlic. While the rice simmers, wipe down your counters and set the table. This recipe gives you natural breaks where you can catch up on other tasks without feeling rushed.
Variations & Adaptations
This recipe is a fantastic base for experimentation. Here are a few variations I have tried and loved.
- Creamy Garlic Butter Chicken and Rice: After the rice has cooked, stir in 1/4 cup of heavy cream or full-fat coconut milk. It makes the dish richer and almost risotto-like in texture. My family requests this version most often.
- Vegetable-Packed Version: Add a cup of frozen peas and carrots during the last 5 minutes of cooking. You can also sauté sliced mushrooms along with the onion for an earthy depth. This turns the skillet into a complete one-pan meal with built-in veggies.
- Spicy Kick: Add 1/2 teaspoon of red pepper flakes along with the garlic, or use a pinch of cayenne pepper in the seasoning for the chicken. A drizzle of sriracha or chili crisp on top at the end works wonders too.
- Herb Swaps: If you do not have dried thyme, try dried rosemary (crushed between your fingers) or dried oregano. Fresh herbs like rosemary or sage can be added at the end for a brighter flavor.
- Dietary Adaptations: For a gluten-free version, this recipe is naturally gluten-free as written—just double-check your chicken broth label. For a dairy-free option, substitute the butter with a high-quality vegan butter or olive oil. The flavor will be different but still delicious.
- Different Protein: Boneless pork chops or turkey cutlets work beautifully in place of chicken. Adjust cooking times as needed based on thickness.
My personal favorite variation is the creamy version with a handful of spinach stirred in at the very end. The spinach wilts into the hot rice and adds color and nutrients without changing the flavor profile.
Serving & Storage Suggestions
This garlic butter chicken and rice skillet is best served warm, straight from the pan. The rice is at its fluffiest right after it rests, and the chicken is most tender.
Serving Suggestions: A simple side salad with a lemon vinaigrette is the perfect companion—the acidity cuts through the richness of the butter. Steamed green beans or roasted asparagus also pair beautifully. For a heartier meal, serve with crusty bread to soak up any extra garlic butter sauce at the bottom of the skillet.
Storage: Transfer any leftovers to an airtight container and refrigerate for up to 4 days. The rice will absorb more liquid as it sits, so do not be alarmed if it seems a bit drier the next day.
Reheating: The best way to reheat this is in a skillet over medium-low heat with a splash of chicken broth or water. Cover and let it steam for 3-4 minutes, stirring once. The microwave works in a pinch, but it tends to dry out the chicken. If you use the microwave, cover the bowl with a damp paper towel to add moisture.
Freezing: This dish freezes reasonably well for up to 2 months. Let it cool completely, then transfer to a freezer-safe container. Thaw overnight in the refrigerator before reheating. The texture of the rice will be slightly softer after freezing, but the flavor remains excellent.
Flavor Development: Honestly, this dish tastes even better the next day. The flavors have time to meld, and the garlic butter seems to penetrate every grain of rice overnight. I often make a double batch just so I have leftovers for lunch.
Nutritional Information & Benefits
Here is an approximate nutritional breakdown for one serving (based on 4 servings, using chicken thighs and unsalted butter).
- Calories: ~520
- Protein: 35g
- Fat: 22g
- Carbohydrates: 45g
- Fiber: 1g
- Sugar: 2g
- Sodium: 480mg (varies based on broth and added salt)
Health Benefits: Chicken thighs provide a good source of protein, iron, and B vitamins, which support energy metabolism. Garlic is known for its immune-supporting properties and anti-inflammatory compounds. When you use brown rice instead of white, you add fiber and magnesium to the dish. This meal is balanced and satisfying without being overly heavy.
Dietary Considerations: This recipe is naturally gluten-free and nut-free. For a lower-carb option, you can substitute the rice with cauliflower rice—just reduce the broth and cooking time significantly (about 10 minutes total). For a lower-fat version, use chicken breasts and reduce the butter to 2 tablespoons total.
I personally love that this meal feels indulgent but is made from whole, recognizable ingredients. It is the kind of dinner that fills you up without making you feel sluggish afterward.
Conclusion
This easy one-pan garlic butter chicken and rice skillet is proof that you do not need a long ingredient list or complicated techniques to make a dinner that feels special. It is the recipe I turn to on busy weeknights, lazy Sundays, and everything in between. The garlic butter infuses every bite, the rice stays fluffy, and the chicken comes out tender and golden every single time.
I hope you make this your own. Swap the herbs, add your favorite vegetables, or turn up the heat with some red pepper flakes. The beauty of a simple recipe like this is that it leaves room for your creativity. If you try it, I would love to hear how it turned out—drop a comment below or tag me in your photos. And if you love this kind of no-fuss cooking, you might also enjoy my quick sheet pan chicken fajitas or this healthy chicken zucchini boats for another easy weeknight win.
Go ahead, grab that skillet, and make yourself a meal that feels like a hug. You deserve it.
Frequently Asked Questions
Can I use brown rice instead of white rice?
Yes, but you will need to adjust the cooking time and liquid. Brown rice requires about 40-45 minutes of simmering and an additional 1/2 cup of broth. I recommend partially cooking the brown rice before adding the chicken back to the skillet to prevent the chicken from overcooking.
Why is my rice still crunchy after 20 minutes?
This usually happens if the heat was too low or the lid was lifted during cooking. Make sure your simmer is gentle but steady. If your rice is still crunchy, add 2 tablespoons of broth, cover, and cook on low heat for another 5 minutes. Also, ensure you are using long-grain rice—other varieties cook differently.
Can I make this recipe in an Instant Pot or slow cooker?
This recipe is designed for stovetop use, but you can adapt it. For an Instant Pot, use the sauté function for searing and toasting, then pressure cook on high for 5 minutes with a natural release. For a slow cooker, sear the chicken first, then cook on low for 3-4 hours—though the rice texture will be softer.
How do I prevent the chicken from drying out?
Using chicken thighs instead of breasts is the easiest fix. If you use breasts, pound them to an even thickness and do not overcook them. The residual heat from the resting period will finish cooking them gently. Also, do not skip the sear—it locks in moisture.
Can I double this recipe?
Absolutely, but you will need a larger skillet or Dutch oven. A 14-inch skillet or a 6-quart Dutch oven works well. Double all ingredients and increase the simmering time by about 5 minutes. Check the rice for doneness before serving.
Pin This Recipe!
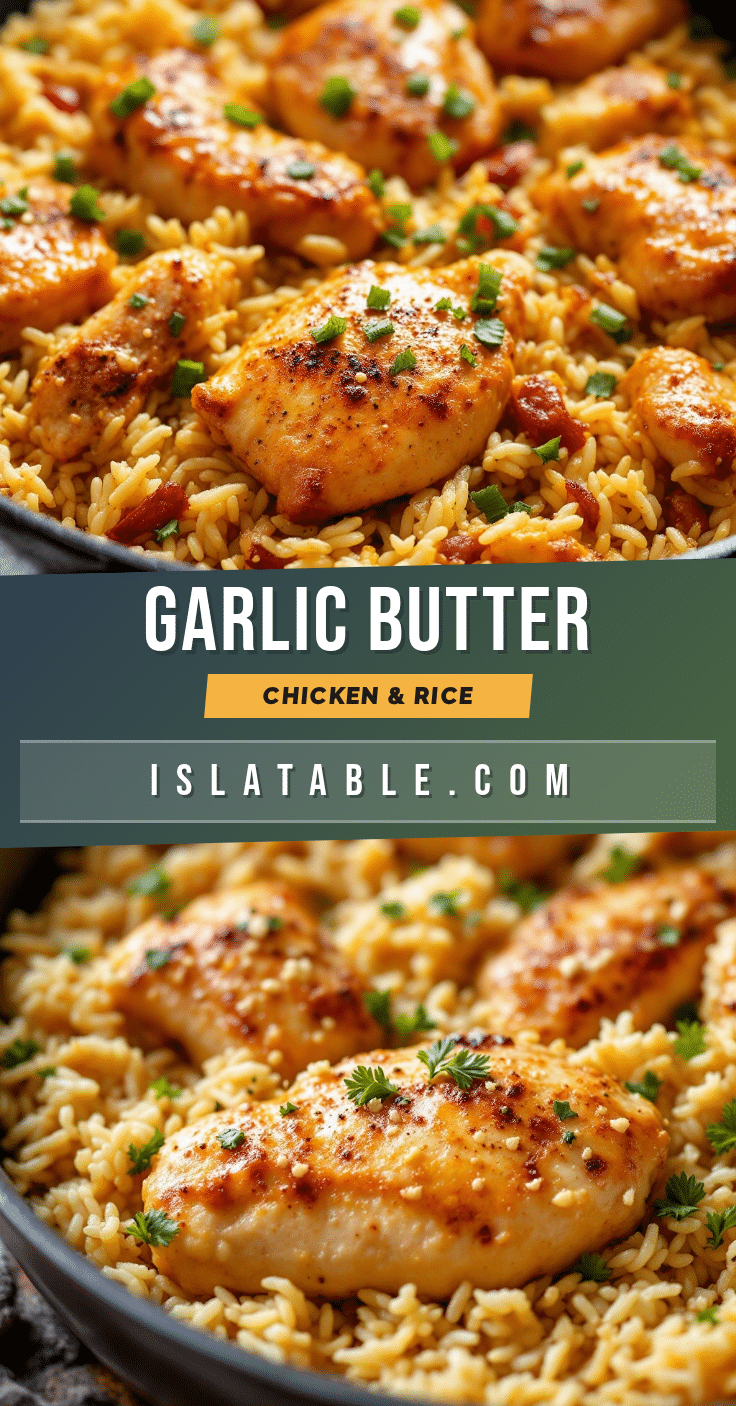
Easy One-Pan Garlic Butter Chicken and Rice Recipe

A simple, comforting one-pan meal featuring juicy chicken and fluffy rice infused with garlic butter. Perfect for busy weeknights, this recipe delivers big flavor with minimal cleanup.
- Prep Time: 10 minutes
- Cook Time: 30 minutes
- Total Time: 40 minutes
- Yield: 4 servings 1x
- Category: Main Course
- Cuisine: American
Ingredients
- 1.5 lbs boneless, skinless chicken thighs (or breasts, pounded to even thickness)
- 1 head garlic, minced (about 6–8 cloves)
- 3 tablespoons unsalted butter, divided
- 1.5 cups long-grain white rice (basmati or jasmine), rinsed until water runs clear
- 2.5 cups low-sodium chicken broth
- 1 medium yellow onion, finely diced
- 1 teaspoon dried thyme
- 1 teaspoon paprika
- Salt and black pepper, to taste
- Fresh parsley, chopped, for garnish
- Optional: lemon juice, frozen peas
Instructions
- Pat chicken thighs dry with paper towels. Season generously on both sides with salt, black pepper, and 1 teaspoon paprika.
- Rinse 1.5 cups long-grain white rice in a fine-mesh strainer under cold water until water runs clear. Shake off excess water and set aside.
- Place a large, deep skillet or Dutch oven over medium-high heat. Add 2 tablespoons unsalted butter. Once melted and sizzling, add chicken thighs in a single layer. Sear for 4-5 minutes until deep golden crust forms, then flip and cook 3-4 minutes. Transfer chicken to a plate (it will not be fully cooked).
- Reduce heat to medium. Add remaining 1 tablespoon butter. Add diced onion and cook 3-4 minutes until softened. Add minced garlic and cook 30 seconds until fragrant.
- Add rinsed rice to skillet. Stir to coat in garlic butter and cook for 2 minutes, stirring constantly, until rice smells nutty and toasty.
- Pour in 2.5 cups low-sodium chicken broth and add 1 teaspoon dried thyme. Stir, scraping up browned bits from bottom of pan. Bring to a gentle boil.
- Nestle seared chicken thighs back into skillet on top of rice. Pour in any accumulated juices. Cover with tight-fitting lid.
- Reduce heat to low and simmer gently for 18-20 minutes. Do not lift lid during this time.
- Turn off heat and let skillet sit, still covered, for 5 minutes. Remove lid and fluff rice gently with a fork. Chicken should be cooked through (internal temperature 165°F).
- Taste rice and adjust seasoning with salt and pepper if needed. Sprinkle with fresh chopped parsley and optional squeeze of lemon juice. Serve directly from skillet.
Notes
For best results, do not lift the lid while rice simmers. If rice is undercooked after resting, add 1 tablespoon broth, cover, and cook on low for 5 more minutes. Rinsing rice is essential to prevent gumminess. Leftovers keep refrigerated for up to 4 days; reheat in a skillet with a splash of broth.
Nutrition
- Serving Size: 1 serving (about 1.5
- Calories: 520
- Sugar: 2
- Sodium: 480
- Fat: 22
- Saturated Fat: 8
- Carbohydrates: 45
- Fiber: 1
- Protein: 35
Keywords: one-pan chicken and rice, garlic butter chicken, easy weeknight dinner, skillet chicken recipe, comfort food


