“Hey, did you bring the dessert?” That question usually sparks a mild panic in me during summer outings, especially when it’s a picnic. You know the drill — sticky, melty sweets that turn into a gooey mess under the sun, and me scrambling for napkins. I remember one particular afternoon at the park when I’d packed a traditional cream-based dessert, only to watch it slowly liquefy in its container. Not my finest moment. But that mishap led me down a path to creating what I now call my easy no-melt portable picnic desserts in Mason jars. Honestly, these little jars have saved countless sunny days, keeping dessert intact and delicious without any fuss or mess.
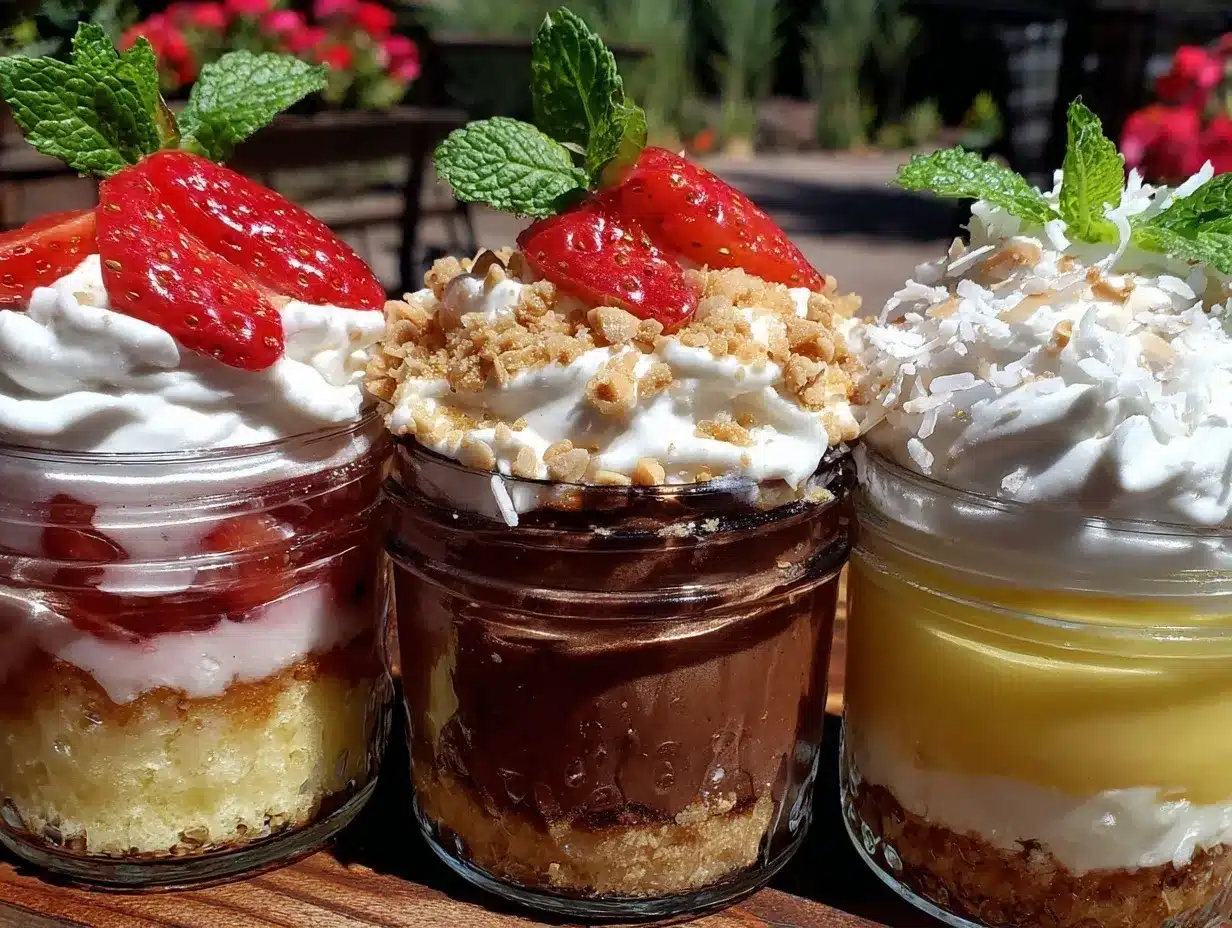
The charm of these desserts isn’t just in their portability but in how they bring a little homemade magic to outdoor meals without the usual sticky drama. Plus, there’s something oddly satisfying about peeling back a lid to reveal layers of creamy, fruity, and crunchy goodness, all neatly packed in a jar. It’s like a surprise picnic treat waiting to be enjoyed.
What’s stuck with me most about these easy no-melt portable picnic desserts in Mason jars is how they’ve become my go-to, whether it’s for an impromptu backyard hangout or a planned day at the lake. They’re as practical as they are tasty — no spills, no melting, just pure enjoyment that fits right into your bag. That quiet little win? It’s why I keep coming back to this recipe, again and again.
Why You’ll Love This Recipe
After making these easy no-melt portable picnic desserts in Mason jars more times than I can count, I can tell you exactly why they hold a special place in my picnic prep routine. These aren’t just your average desserts; they’re thoughtfully crafted to keep their cool and charm, no matter how hot it gets outside.
- Quick & Easy: Ready in under 20 minutes, making it perfect for last-minute plans or busy days when you just want to grab and go.
- Simple Ingredients: No need for fancy or hard-to-find items. You likely have most of these pantry staples on hand already.
- Perfect for Summer Picnics: Designed specifically to avoid melting or sogginess — so you get fresh, layered flavors without the mess.
- Crowd-Pleaser: Kids, adults, picky eaters — everyone seems to ask for seconds (or thirds!).
- Unbelievably Delicious: The combo of creamy layers, fresh fruit, and crunchy topping is just right — think of it as comfort food that’s cool and refreshing.
What sets this recipe apart is the clever layering and choice of ingredients that don’t break down or get watery, even hours after you’ve packed them. Unlike typical cream-heavy desserts that can get runny, these jars hold up beautifully thanks to a no-melt approach that uses whipped coconut cream or stabilized yogurt bases. Plus, adding a hint of citrus zest or a sprinkle of toasted nuts gives it that unexpected pop of flavor each time.
Honestly, it’s the kind of dessert that makes you pause and appreciate simple pleasures — the joy of eating outdoors, the ease of packing smart, and that moment when the lid comes off and you get to dig in. It’s just right for impressing guests without turning your picnic into a sticky situation.
What Ingredients You Will Need
This recipe uses simple, wholesome ingredients to deliver bold flavor and satisfying texture without the fuss. Most are pantry staples, and the fresh fruit can be swapped seasonally.
- Base Layer:
- 1 cup full-fat coconut cream (chilled, for a stable whipped topping)
- 2 tablespoons powdered sugar (adjust sweetness as preferred)
- 1 teaspoon vanilla extract (pure if possible for best flavor)
- Fruit Layer:
- 1 cup fresh mixed berries (strawberries, blueberries, raspberries; fresh is best but frozen works if drained well)
- 1 tablespoon lemon juice (freshly squeezed to brighten flavors)
- 1 teaspoon honey or maple syrup (optional, for extra sweetness)
- Crunchy Topping:
- ½ cup granola (choose your favorite brand, like Bear Naked or homemade for added crunch)
- 2 tablespoons chopped toasted almonds or pecans (adds a nice texture contrast)
- Optional Add-Ins:
- Shredded coconut (unsweetened, for a tropical hint)
- Mini dark chocolate chips (for a subtle indulgence that won’t melt easily)
- Chia seeds (for a nutritional boost and slight crunch)
For those who prefer a dairy alternative, swap coconut cream with Greek yogurt or a plant-based yogurt like almond or cashew variety. In summer, swapping berries for stone fruits like peaches or nectarines also works beautifully.
Equipment Needed
Making these easy no-melt portable picnic desserts in Mason jars doesn’t require anything fancy, which is part of the appeal.
- Mason jars (8-ounce size is ideal for single servings; wide-mouth jars make layering easier)
- Mixing bowls (one for whipping the cream or yogurt, another for prepping fruit)
- Electric mixer or whisk (an electric hand mixer speeds things up, but a strong whisk works fine too)
- Measuring cups and spoons (for precision, especially with sugar and lemon juice)
- Spatula (for folding and layering without deflating whipped cream)
- Small knife and cutting board (for chopping fruit and nuts)
If you don’t have Mason jars, small reusable containers or even clear plastic cups with lids are fine for portability. Personally, I like using glass jars because they’re sturdy and look charming, whether for a casual picnic or a more polished outdoor gathering. Just remember to handle glass carefully if you’re hiking or at a rough terrain spot.
Preparation Method
- Chill the Coconut Cream: Place the can of coconut cream in the fridge overnight or for at least 4 hours. This helps the cream separate and solidify, which is key for whipping. (If using yogurt, just keep it cold.) This step takes time but is crucial for that no-melt texture. Time: 4+ hours
- Prepare the Fruit: Wash the berries thoroughly and pat dry. Hull and slice strawberries if using. Toss the berries with lemon juice and honey (if you like it sweeter). Set aside to macerate slightly — this brings out their natural juices without making them soggy. Time: 10 minutes
- Whip the Coconut Cream: Scoop the solidified coconut cream into a mixing bowl, leaving the watery liquid behind. Add powdered sugar and vanilla extract. Whip using an electric mixer or whisk until soft peaks form. It should feel light and airy but hold shape. (Tip: If too soft, chill again briefly.) Time: 5-7 minutes
- Layer the Desserts: Spoon a generous layer of whipped coconut cream into each Mason jar (about ⅓ of the jar). Add a layer of the macerated berries on top. Then sprinkle a layer of granola mixed with chopped nuts. Repeat layering if your jar allows, finishing with a crunchy topping. Time: 10 minutes
- Seal and Chill: Put on the lid and refrigerate the jars for at least 30 minutes to let everything chill and meld. They’re ready to pack for your picnic or enjoy at home. Time: 30+ minutes
Watch out for watery fruit juices — draining excess liquid before layering keeps the dessert from becoming soggy. Also, layering gently prevents the whipped cream from deflating. When I first made this, I was too rough with the cream, and it lost its fluffiness, so take your time.
Cooking Tips & Techniques
Making a no-melt dessert that’s still creamy and fresh can feel tricky, but a few tricks make all the difference.
- Chilling is Key: The coconut cream must be very cold before whipping to get that fluffy texture. If it’s warm, it won’t whip properly and will be runny.
- Choose the Right Coconut Cream: Not all brands are created equal. I recommend Chaokoh or Aroy-D for their thicker consistency and clean taste, which really helps with stability.
- Don’t Skip the Lemon Juice: It brightens the fruit and prevents browning, especially if you swap in peaches or apples.
- Layer Gently: Use a spatula or spoon to place each layer carefully. This keeps the whipped cream airy and the layers distinct.
- Granola Timing: Add granola just before serving if you want it extra crunchy. If prepping ahead, mix granola and nuts right before layering to avoid sogginess.
- Try Stabilizing Yogurt: If you prefer dairy, mix Greek yogurt with a bit of gelatin or agar powder to help it hold shape longer in the heat.
Personally, I learned the hard way that leaving the dessert out too long in direct sun turns these jars into a sad puddle. Keep them chilled until it’s time to eat, or pack them in a cooler bag with ice packs.
Variations & Adaptations
This recipe flexes well depending on your taste or dietary needs. Here are some ways I’ve switched things up:
- Vegan & Dairy-Free: Stick with coconut cream and use maple syrup instead of honey. Add shredded coconut on top for extra texture.
- Low-Sugar Option: Use unsweetened coconut cream and rely on the natural sweetness of ripe fruit. Swap granola for toasted nuts and seeds only.
- Seasonal Fruits: Swap berries with chopped stone fruits in summer or cooked apples with cinnamon in fall. I love how peaches add a juicy sweetness that pairs beautifully with toasted pecans.
- Chocolate Lover’s Twist: Add a layer of cocoa powder mixed into the whipped cream or sprinkle mini chocolate chips with the granola.
- Kid-Friendly: Add a layer of cookie crumbs (like graham crackers or crushed vanilla wafers) for a fun crunch kids adore.
Once, I tried blending the fruit into a puree layer for a smoothie-style jar dessert, but it got a bit watery after a few hours — so I stick with whole or chopped fruit now for better texture.
Serving & Storage Suggestions
These no-melt desserts are best served chilled, right from the fridge or cooler. They look lovely with a small spoon tucked into each jar, perfect for easy, mess-free eating outdoors.
Pair them with light, fresh dishes like creamy chicken salad with sweet grapes or a crisp crispy broccoli salad with bacon crunch for a full picnic spread that balances savory and sweet.
Store any leftovers tightly sealed in the fridge for up to 2 days. Avoid freezing as it affects texture. To re-chill after transport, place jars in the fridge for 15-20 minutes before serving — the whipped layers regain their firmness nicely.
Flavors actually deepen after a few hours in the fridge, making these desserts even more satisfying if made in advance.
Nutritional Information & Benefits
Each jar packs a balanced mix of healthy fats, natural sugars, and fiber. The coconut cream provides a rich source of medium-chain triglycerides (MCTs), which some studies suggest may support energy and metabolism. Fresh berries contribute antioxidants and vitamin C, great for immune support.
The granola and nuts add crunch plus protein and healthy fats, making the dessert more filling. Using natural sweeteners keeps the sugar content moderate compared to many commercial treats.
This recipe is naturally gluten-free if you choose gluten-free granola, and dairy-free when using coconut cream, making it suitable for a range of dietary needs.
Conclusion
These easy no-melt portable picnic desserts in Mason jars have become my secret weapon for stress-free summer treats. They come together quickly, travel well, and taste like a little piece of sunshine in every bite. Whether you’re a picnic regular or just want a fuss-free dessert that won’t turn into a melty mess, these jars have you covered.
Feel free to tweak the fruit or crunch layers to suit your taste or what’s in season — that’s part of the fun. I keep coming back to this recipe because it fits so seamlessly into my busy life without sacrificing flavor or texture.
Give it a try next time you pack up for the outdoors — and if you love it, I’d be thrilled if you shared your own twists or stories below. Here’s to many more mess-free dessert moments!
FAQs
Can I prepare these desserts a day ahead?
Yes! Make them up to 24 hours in advance and keep refrigerated. Add granola just before serving if you want it extra crunchy.
What if I don’t have coconut cream?
You can use Greek yogurt or a plant-based yogurt, but for no-melt results, try stabilizing it with gelatin or agar agar.
Are these desserts suitable for kids?
Definitely. They’re sweet but not overly sugary, and you can customize toppings to suit children’s tastes.
Can I use other fruits besides berries?
Yes, stone fruits, mango, or even tropical fruits like pineapple work well. Just avoid watery fruits that release too much juice.
How should I carry these desserts to a picnic?
Keep them in a cooler bag with ice packs to stay chilled until ready to eat. Mason jars with tight lids prevent spills perfectly.
Pin This Recipe!
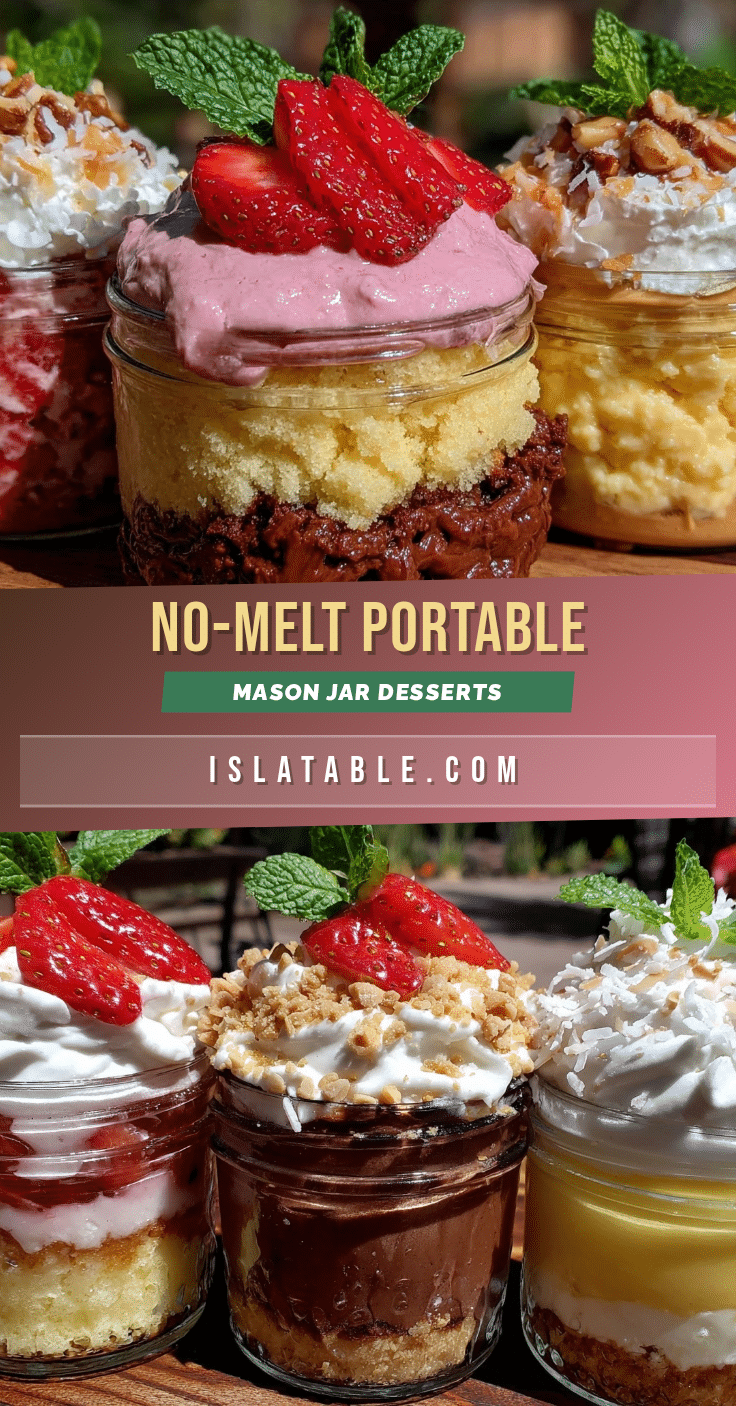
Easy No-Melt Portable Picnic Desserts in Mason Jars Perfect for Summer

These no-melt portable picnic desserts in Mason jars are quick to prepare, mess-free, and perfect for summer outings. They feature creamy coconut cream, fresh fruit, and crunchy granola layers that stay intact even in the heat.
- Prep Time: 20 minutes
- Cook Time: 0 minutes
- Total Time: 4 hours 20 minutes
- Yield: 4 servings 1x
- Category: Dessert
- Cuisine: American
Ingredients
- 1 cup full-fat coconut cream (chilled, for a stable whipped topping)
- 2 tablespoons powdered sugar (adjust sweetness as preferred)
- 1 teaspoon vanilla extract (pure if possible for best flavor)
- 1 cup fresh mixed berries (strawberries, blueberries, raspberries; fresh is best but frozen works if drained well)
- 1 tablespoon lemon juice (freshly squeezed to brighten flavors)
- 1 teaspoon honey or maple syrup (optional, for extra sweetness)
- ½ cup granola (choose your favorite brand or homemade)
- 2 tablespoons chopped toasted almonds or pecans
- Optional add-ins: shredded coconut (unsweetened), mini dark chocolate chips, chia seeds
Instructions
- Chill the coconut cream in the fridge overnight or for at least 4 hours to solidify.
- Wash and pat dry the berries. Hull and slice strawberries if using. Toss berries with lemon juice and honey or maple syrup if desired. Set aside to macerate for about 10 minutes.
- Scoop the solidified coconut cream into a mixing bowl, leaving watery liquid behind. Add powdered sugar and vanilla extract. Whip with an electric mixer or whisk until soft peaks form, about 5-7 minutes.
- Layer the dessert in Mason jars: spoon about one-third of the whipped coconut cream into each jar, add a layer of macerated berries, then sprinkle granola mixed with chopped nuts. Repeat layers if desired, finishing with crunchy topping.
- Seal jars with lids and refrigerate for at least 30 minutes before serving to let flavors meld and keep dessert chilled.
Notes
[‘Chill coconut cream thoroughly before whipping to achieve stable peaks.’, ‘Drain excess liquid from fruit to prevent sogginess.’, ‘Add granola just before serving for extra crunch if preparing in advance.’, ‘Use lemon juice to brighten fruit flavors and prevent browning.’, ‘For dairy alternatives, use Greek yogurt or plant-based yogurt stabilized with gelatin or agar agar.’, ‘Keep desserts chilled until serving to avoid melting.’, ‘Glass Mason jars are sturdy and charming but handle carefully during transport.’]
Nutrition
- Serving Size: 1 jar (approximately
- Calories: 280
- Sugar: 12
- Sodium: 50
- Fat: 18
- Saturated Fat: 14
- Carbohydrates: 22
- Fiber: 4
- Protein: 4
Keywords: no-melt dessert, picnic dessert, Mason jar dessert, coconut cream dessert, summer dessert, portable dessert, layered dessert, healthy dessert