The Tupperware container came back empty. Not just licked clean, but actually empty, like someone had washed it before returning it. That never happens. I’d sent my neighbor a batch of these no-bake granola bars after she mentioned her kids were surviving on packaged snacks during a particularly chaotic week. She texted me a photo of the empty container with the caption, “They asked if you could make more. And so did my husband.”
Honestly, I wasn’t surprised. I’d been tinkering with this recipe for months, trying to create something that actually tasted like a treat but didn’t leave you crashing an hour later. Most store-bought granola bars are just candy bars in disguise, right? And the “healthy” ones? Let’s just say they taste like cardboard sprinkled with regret. I wanted a bar that could hold its own in a lunchbox, survive a hike, and still make you reach for a second one without feeling guilty.
The trick ended up being simpler than I thought. A sticky, sweet base made from dates and honey, mixed with oats, nuts, and a pinch of salt. No baking, no fuss, and the whole thing comes together in about fifteen minutes. The hardest part is waiting for them to set in the fridge. These easy no-bake granola bars have become my go-to for busy mornings, post-workout refueling, and those 3 PM slumps when you need something to keep you going. They’re the kind of snack that makes you feel good about what you’re eating, and that’s a win in my book.
Why You’ll Love This Recipe
I’ve tested a lot of granola bar recipes over the years. Some fell apart the second you picked them up. Others were so hard they could double as a hockey puck. These easy no-bake granola bars hit that perfect sweet spot—chewy, sturdy, and packed with flavor. Here’s why they’ve earned a permanent spot in my kitchen:
- Quick & Easy: No oven required. You mix, press, chill, and slice. Total active time is about 15 minutes.
- Simple Ingredients: You probably have most of these in your pantry right now. Oats, peanut butter, honey, dates—no weird stuff.
- Perfect for Meal Prep: Make a batch on Sunday and you’ve got grab-and-go snacks for the whole week.
- Crowd-Pleaser: Kids love them, adults love them, and they’re great for school lunches or office snacks.
- Customizable: Swap the nuts, change the dried fruit, add chocolate chips—this recipe is a template, not a rulebook.
What really sets these bars apart is the texture. I spent weeks tweaking the ratio of wet to dry ingredients until I got that perfect chew. They’re not too sticky, not too crumbly, and they hold together beautifully even at room temperature. I’ve taken them on road trips, packed them in lunchboxes, and even brought them to a potluck where they disappeared faster than the brownies. That’s when you know you’ve got a winner.
What Ingredients You Will Need
This recipe uses simple, wholesome ingredients that work together to create a bar that’s both satisfying and nutritious. No complicated steps or hard-to-find items here—just real food that tastes great.
- Rolled Oats (2 cups / 180g): The backbone of these bars. Use old-fashioned rolled oats, not instant or steel-cut. They provide the perfect chewy texture and hold up well when pressed. I prefer Bob’s Red Mill for consistent quality.
- Creamy Peanut Butter (1/2 cup / 130g): Adds richness and helps bind everything together. Use natural peanut butter with no added sugar or oil for the best results. If your peanut butter is too runny, the bars might not set properly. Almond butter or sunflower seed butter work great as substitutes.
- Honey (1/3 cup / 110g): The natural sweetener that also acts as glue. Maple syrup works too, but honey gives a slightly thicker, stickier result. Local honey adds a nice floral note if you have it.
- Medjool Dates (1 cup, pitted / about 10-12 dates): These are the secret weapon. They add natural sweetness, moisture, and a caramel-like flavor that makes these bars taste indulgent. Make sure they’re soft and sticky—if they’re dry, soak them in warm water for 10 minutes before using.
- Mixed Nuts (1 cup / 120g): I use a combination of almonds and pecans, roughly chopped. They add crunch, healthy fats, and protein. Walnuts or cashews would also be delicious. Toast them lightly for extra flavor if you have time.
- Dried Fruit (1/2 cup / 80g): Dried cranberries or raisins work perfectly. They add little bursts of sweetness and chewy texture. Chopped dried apricots or cherries would be lovely too.
- Chia Seeds (2 tablespoons / 15g): Optional, but I love the extra fiber and omega-3s they bring. They also help absorb moisture and keep the bars from getting too sticky. Flax seeds or hemp seeds are good alternatives.
- Salt (1/4 teaspoon): A small amount balances the sweetness and makes all the flavors pop. Don’t skip it—it makes a real difference.
- Vanilla Extract (1 teaspoon): Adds warmth and depth. Pure vanilla extract is best, but imitation works in a pinch.
For ingredient selection, I recommend using a creamy peanut butter that’s well-stirred and at room temperature. If your peanut butter is cold, it won’t mix as smoothly. Also, look for Medjool dates that are plump and glossy—they’re easier to blend and taste much better than the drier Deglet Noor variety.
Equipment Needed
You don’t need a fancy kitchen to make these bars. Here’s what you’ll need:
- Food Processor: This is essential for breaking down the dates into a smooth paste. A high-speed blender might work, but a food processor is easier to scrape down and control. A 7-cup model is plenty for this recipe.
- 8×8-inch Baking Pan: The perfect size for thick, satisfying bars. If you only have a 9×9, your bars will be slightly thinner—just reduce the chill time by 15 minutes. Line it with parchment paper for easy removal.
- Parchment Paper: Non-negotiable. Without it, the bars will stick to the pan and you’ll be scraping them out in sad little pieces. Leave some overhang on the sides so you can lift the whole block out.
- Large Mixing Bowl: For combining all the ingredients. A glass or stainless steel bowl works best.
- Spatula or Wooden Spoon: For mixing and pressing the mixture into the pan. A silicone spatula is ideal for scraping every last bit.
- Measuring Cups and Spoons: Standard set for accurate measurements. I always level off dry ingredients with a knife for consistency.
If you don’t have a food processor, you can finely chop the dates by hand and mash them with a fork. It takes a bit more elbow grease, but it works. I’ve done it in a pinch when my food processor was in the dishwasher, and the bars turned out just fine—just a little more rustic in texture.
Preparation Method
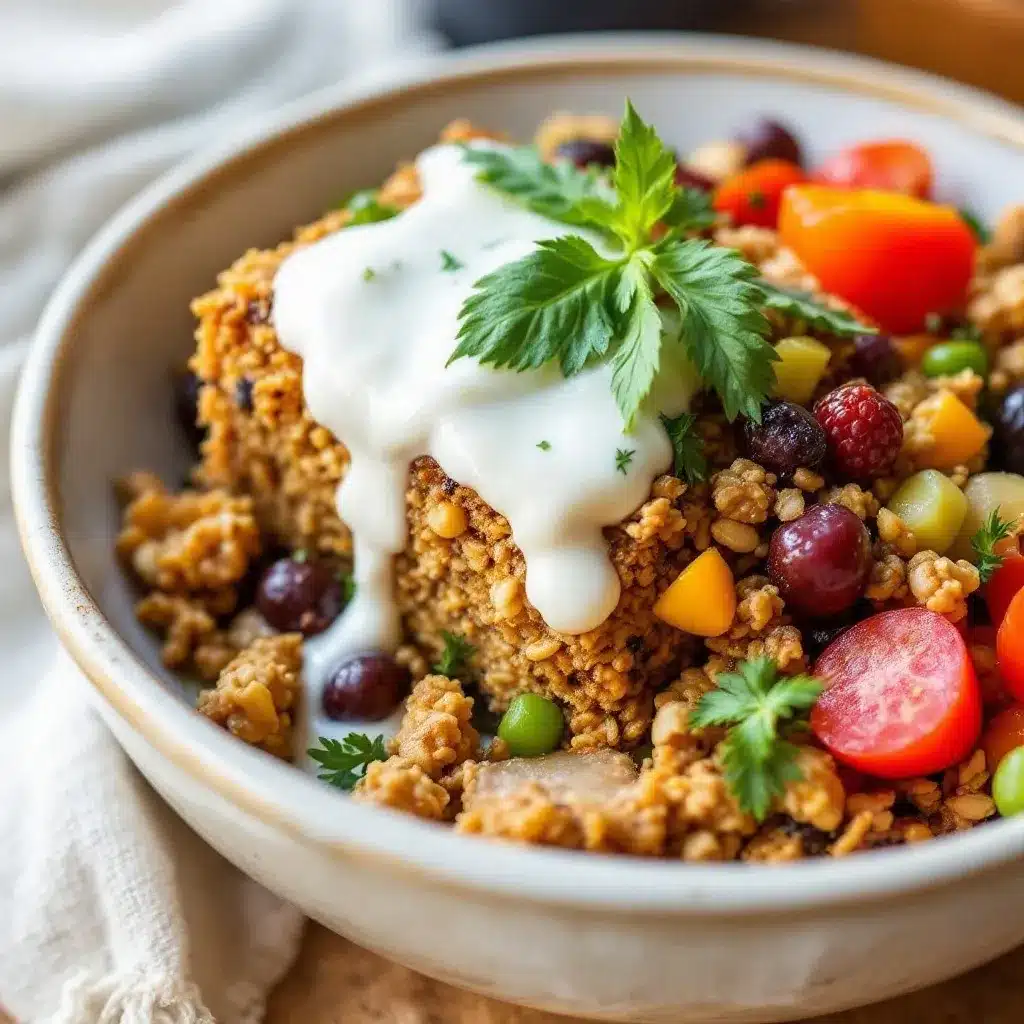
Making these easy no-bake granola bars is almost too simple. But follow these steps carefully, especially the pressing part, and you’ll get perfect bars every time.
- Prepare the pan. Line your 8×8-inch baking pan with parchment paper, leaving about 2 inches of overhang on two opposite sides. This creates handles that make lifting the finished bars out super easy. Set the pan aside.
- Process the dates. Place the pitted Medjool dates in your food processor. Pulse a few times to break them up, then let it run continuously until the dates form a smooth, sticky paste. This takes about 30-45 seconds. You might need to scrape down the sides once or twice. The paste should be uniform with no large chunks. If your dates are dry, add a teaspoon of warm water to help them blend.
- Warm the wet ingredients. In a small saucepan over low heat, combine the peanut butter and honey. Stir constantly until the mixture is smooth, warm, and well combined—about 2-3 minutes. Don’t let it boil. You just want it warm enough to mix easily with the other ingredients. Remove from heat and stir in the vanilla extract and salt.
- Combine the dry ingredients. In a large mixing bowl, combine the rolled oats, chopped nuts, dried fruit, and chia seeds (if using). Toss them together with a spatula so everything is evenly distributed.
- Bring it all together. Pour the warm peanut butter-honey mixture over the dry ingredients. Add the date paste in spoonfuls. Use a spatula to fold everything together until no dry spots remain. This takes some arm work—the mixture is thick and sticky. Make sure every oat is coated. The mixture should hold together when you squeeze a handful.
- Press firmly into the pan. Transfer the mixture to your prepared pan. This is the most important step. Press the mixture down as firmly as you can. Use the bottom of a measuring cup or a flat glass to really compact it. I like to place a piece of parchment paper over the top and press with my hands first, then use the measuring cup to get the edges and corners. The tighter you pack it, the better your bars will hold together. Spend a good 2-3 minutes on this step.
- Chill until firm. Place the pan in the refrigerator for at least 2 hours, or up to overnight. The bars need this time to set completely. Don’t rush it—if you try to cut them too soon, they’ll crumble. I usually make them in the evening and let them chill overnight.
- Slice and enjoy. Once fully chilled, lift the block out of the pan using the parchment overhang. Place it on a cutting board. Use a sharp knife to cut into 12 even bars. A serrated knife works best—it cuts through the nuts and dried fruit cleanly. Wipe the knife clean between cuts for neater edges. Store in an airtight container.
Troubleshooting tip: If your mixture seems too dry and crumbly, add another tablespoon of warm honey or a teaspoon of water. If it seems too wet and sticky, add a few more oats. The texture should be like a thick, sticky dough that holds together when pressed.
Cooking Tips & Techniques
I’ve made these easy no-bake granola bars more times than I can count, and I’ve learned a few things along the way. Here are my best tips for bar success:
Don’t skip the date paste. I tried making these bars with just honey and peanut butter once, and they fell apart completely. The dates are what give these bars their structure and that incredible chewy texture. They’re the unsung hero of this recipe.
Toast your nuts. This is a small step that makes a huge difference. Spread your chopped nuts on a baking sheet and toast them at 350°F for 5-7 minutes until fragrant. Let them cool completely before adding them to the mix. The toasty flavor elevates the whole bar from good to great.
Press with purpose. I cannot stress this enough. The number one reason homemade granola bars fall apart is that people don’t press them firmly enough into the pan. Use your body weight. Get in there. Imagine you’re making a sandcastle and you want it to survive the tide. That level of compression.
Let them chill completely. I know it’s tempting to sneak a piece after an hour, but trust me on this. The bars need a full 2 hours in the fridge to set properly. If you cut them too early, you’ll end up with granola crumbles—which are delicious as a yogurt topping, but not what we’re going for here.
Use room temperature ingredients. Cold peanut butter is harder to mix and can create lumps. Let it sit out for 15 minutes before starting. Same goes for the honey if it’s crystallized—warm it gently to make it pourable.
Keep a bowl of water nearby. When pressing the mixture into the pan, dip your spatula or measuring cup in water occasionally. The mixture is sticky, and this prevents it from clinging to your tools. It’s a simple trick that saves a lot of frustration.
Variations & Adaptations
One of the best things about this recipe is how flexible it is. Here are some variations I’ve tried and loved:
- Chocolate Chip: Fold in 1/2 cup of dark chocolate chips after the mixture is combined. The chocolate adds a touch of indulgence that makes these bars feel like dessert. I use mini chips so they distribute evenly.
- Trail Mix Style: Replace the mixed nuts and dried fruit with 1.5 cups of your favorite trail mix. I’ve used a mix with pepitas, dried cherries, and coconut flakes, and it was fantastic. Just make sure the trail mix doesn’t have chocolate that will melt into the warm mixture.
- Nut-Free Version: Swap the peanut butter for sunflower seed butter and replace the nuts with toasted pumpkin seeds or chopped sunflower seeds. This version is perfect for school lunches where nuts are restricted. The taste is slightly different but equally delicious.
- Coconut Lover’s: Add 1/2 cup of unsweetened shredded coconut to the dry ingredients. Toast it first for a deeper flavor. This pairs beautifully with dried mango or pineapple for a tropical twist.
- Protein-Packed: Add 2 scoops of your favorite vanilla or unflavored protein powder. You’ll need to increase the honey by a tablespoon or two to compensate for the dryness. This makes for an excellent post-workout snack.
I once made a batch with chopped crystallized ginger and dried apricots, and it was surprisingly good. The spicy-sweet combo was perfect for fall. Don’t be afraid to experiment—the base recipe is forgiving enough to handle most additions.
Serving & Storage Suggestions
These easy no-bake granola bars are best served cold or at room temperature. I personally love them straight from the fridge—they’re firmer and chewier that way. If you prefer a softer texture, let them sit out for 5-10 minutes before eating.
They pair beautifully with a cup of coffee or tea for a mid-morning snack. For a balanced breakfast, serve one bar alongside a fresh Whole30 compliant chicken avocado salad or a smoothie. They’re also great crumbled over yogurt with fresh berries for a quick parfait.
Storage: Keep the bars in an airtight container in the refrigerator for up to 2 weeks. Layer them between sheets of parchment paper so they don’t stick together. If you’re taking them on the go, wrap individual bars in plastic wrap or wax paper for easy grabbing.
Freezing: These bars freeze beautifully. Wrap each bar individually in plastic wrap, then place them in a freezer-safe bag or container. They’ll keep for up to 3 months. To thaw, just leave one at room temperature for 15 minutes, or pop it in the microwave for 10-15 seconds. I always keep a stash in the freezer for emergencies.
Flavor development: The flavors actually meld together and improve after a day or two in the fridge. The oats absorb more moisture, the dates soften further, and the whole bar becomes more cohesive. So if you can resist eating them immediately, they’ll be even better tomorrow.
Nutritional Information & Benefits
Here’s the approximate nutritional breakdown for one bar (based on 12 servings):
| Nutrient | Amount per Bar |
|---|---|
| Calories | 215 |
| Total Fat | 10g |
| Saturated Fat | 1.5g |
| Carbohydrates | 28g |
| Fiber | 4g |
| Sugar | 16g |
| Protein | 6g |
| Sodium | 85mg |
These bars are packed with nutritional benefits. The oats provide slow-burning complex carbohydrates for sustained energy, while the nuts and seeds contribute healthy fats and protein that keep you full. Dates are rich in fiber, potassium, and antioxidants—they’re nature’s candy, but with actual nutritional value. Chia seeds add omega-3 fatty acids and extra fiber for digestive health.
This recipe is naturally dairy-free and can be made gluten-free by using certified gluten-free oats. It’s also vegetarian and can be adapted to be vegan by using maple syrup instead of honey. If you’re watching your sugar intake, feel free to reduce the honey slightly, though the dates provide natural sweetness that’s hard to replace.
For a lighter option, try these alongside a fresh keto-friendly cobb salad for a satisfying lunch that won’t weigh you down. The combination of textures and flavors is surprisingly complementary.
Conclusion
These easy no-bake granola bars have honestly become a staple in my kitchen. They’re the kind of recipe that makes you feel like you’ve hacked the system—homemade snacks that are actually better than store-bought, with less sugar, more whole ingredients, and a fraction of the cost. Every time I make a batch, I’m reminded that healthy eating doesn’t have to be complicated or boring.
I love how forgiving this recipe is. You can swap ingredients based on what you have in your pantry, adjust the sweetness to your liking, and still end up with a bar that tastes like you put in way more effort than you actually did. That’s my favorite kind of cooking—the kind that makes you look like a rockstar with minimal effort.
Now I’d love to hear from you. Have you tried making these bars? Did you add any fun mix-ins? Maybe you turned them into a nut-free protein balls recipe for a different texture? Drop a comment below and let me know how they turned out. Your tweaks might inspire someone else to try something new. Happy snacking, friends!
Frequently Asked Questions
Can I use quick oats instead of rolled oats?
I don’t recommend it. Quick oats are more finely processed and will result in a mushier, less textured bar. Rolled oats provide the perfect chewy structure that holds these bars together. If rolled oats are all you have, they’ll work in a pinch, just expect a denser texture.
Why did my bars fall apart?
This usually happens for one of two reasons: you didn’t press the mixture firmly enough into the pan, or you didn’t let them chill long enough. Make sure you’re really compacting that mixture, and give them a full 2 hours in the fridge. If they’re still crumbly, try adding an extra tablespoon of honey next time to help bind everything together.
Can I make these without a food processor?
Absolutely. Finely chop the dates by hand, then mash them with a fork until they form a paste. It takes a bit more effort, but it works. Alternatively, you can soak the dates in warm water for 10 minutes to soften them, then mash them with a potato masher. The texture will be slightly chunkier, but still delicious.
How long do these bars last at room temperature?
They’re best stored in the refrigerator, but they’ll hold up at room temperature for about 2-3 days. If you’re packing them for a lunchbox or a hike, they’ll be fine for a day without refrigeration. Just keep them in a cool place away from direct sunlight. For longer storage, always refrigerate or freeze.
Can I use maple syrup instead of honey?
Yes, but with a caveat. Maple syrup is thinner than honey, so your mixture might be slightly wetter. To compensate, add an extra 2 tablespoons of oats or let the bars chill for an extra 30 minutes. The flavor will be a bit more subtle, but still lovely. For a vegan version, this is your best bet.
Pin This Recipe!
Easy No-Bake Granola Bars: Best Healthy Snack Recipe
These easy no-bake granola bars are chewy, sturdy, and packed with flavor. Made with simple ingredients like oats, peanut butter, honey, and dates, they come together in about 15 minutes and are perfect for busy mornings, post-workout refueling, or a healthy snack.
- Prep Time: 15 minutes
- Cook Time: 0 minutes
- Total Time: 2 hours 15 minutes (includes chilling time)
- Yield: 12 bars 1x
- Category: Snack
- Cuisine: American
Ingredients
- 2 cups (180g) rolled oats
- 1/2 cup (130g) creamy peanut butter
- 1/3 cup (110g) honey
- 1 cup (about 10–12 dates) pitted Medjool dates
- 1 cup (120g) mixed nuts (almonds and pecans, roughly chopped)
- 1/2 cup (80g) dried fruit (cranberries or raisins)
- 2 tablespoons (15g) chia seeds (optional)
- 1/4 teaspoon salt
- 1 teaspoon vanilla extract
Instructions
- Line an 8×8-inch baking pan with parchment paper, leaving about 2 inches of overhang on two opposite sides. Set aside.
- Place the pitted Medjool dates in a food processor. Pulse to break them up, then process until a smooth, sticky paste forms (about 30-45 seconds). Scrape down sides as needed.
- In a small saucepan over low heat, combine peanut butter and honey. Stir constantly until smooth and warm (about 2-3 minutes). Do not boil. Remove from heat and stir in vanilla extract and salt.
- In a large mixing bowl, combine rolled oats, chopped nuts, dried fruit, and chia seeds (if using). Toss to distribute evenly.
- Pour the warm peanut butter-honey mixture over the dry ingredients. Add the date paste in spoonfuls. Fold together with a spatula until no dry spots remain and the mixture holds together when squeezed.
- Transfer the mixture to the prepared pan. Press down very firmly using the bottom of a measuring cup or a flat glass. Spend 2-3 minutes compacting it well, especially in the edges and corners.
- Place the pan in the refrigerator for at least 2 hours, or overnight, until firm.
- Once fully chilled, lift the block out of the pan using the parchment overhang. Place on a cutting board and cut into 12 even bars using a sharp serrated knife. Store in an airtight container in the refrigerator.
Notes
Press the mixture firmly into the pan to prevent bars from falling apart. Chill for at least 2 hours before cutting. For best texture, use room temperature peanut butter and soft Medjool dates. If dates are dry, soak in warm water for 10 minutes before using. Bars can be stored in the refrigerator for up to 2 weeks or frozen for up to 3 months.
Nutrition
- Serving Size: 1 bar
- Calories: 215
- Sugar: 16
- Sodium: 85
- Fat: 10
- Saturated Fat: 1.5
- Carbohydrates: 28
- Fiber: 4
- Protein: 6
Keywords: no-bake granola bars, healthy snack, easy granola bars, homemade granola bars, no bake snack, granola bars with dates


