The October wind was rattling the kitchen window, and I had a bag of mini bell peppers sitting on the counter that I had bought with absolutely no plan. I was staring at them, then at the clock, realizing I had about thirty minutes before the first wave of trick-or-treaters arrived—and I had promised a friend I’d bring something to her pre-Halloween get-together. A quick, savory, vegetable-forward snack that also looked like it belonged at a spooky party. That’s when the idea hit me, quiet and simple: what if the peppers were the mummies? I grabbed the cream cheese, a block of mozzarella, and some olives. No dry ice, no elaborate props—just a snack that looked like it was wrapped up for the night. These Easy Mummy Stuffed Pepper Bites were born in a moment of genuine last-minute panic, and honestly? They were the first thing to disappear from the table. It’s the kind of recipe that proves you don’t need a lot of fuss to make something memorable.
Why You’ll Love This Recipe
I have made these little mummies for three different Halloween gatherings now, and they never fail to get that double-take reaction—people look, then they laugh, then they eat three in a row. Here is why they work so well:
- Quick & Easy: From fridge to table in about 25 minutes. No complicated wrapping techniques or fancy piping bags required.
- Simple Ingredients: You probably have cream cheese and bell peppers in your fridge right now. The rest is just a quick grocery run.
- Perfect for Halloween Parties: They look like little mummies but taste like a creamy, savory stuffed pepper. No candy overload here.
- Crowd-Pleaser: I have watched kids who swear they hate vegetables grab two of these. The creamy filling and the fun look do all the heavy lifting.
- Unbelievably Delicious: The sweetness of the roasted pepper against the tangy cream cheese and salty olive eyes is a genuinely good flavor combination—not just a gimmick.
What makes this recipe different from other Halloween appetizers is that it is actually something you want to eat. So many holiday snacks are all about the look and forget the taste. These bites deliver on both. They are the kind of thing you make because you want a reliable, delicious appetizer that happens to look adorable—not the other way around.
What Ingredients You Will Need
This recipe relies on a short list of fresh and pantry-friendly ingredients. The magic happens when the simple flavors come together, so quality matters more than quantity here.
- Mini sweet bell peppers (about 12-15): Look for peppers that are relatively straight and uniform in size. This makes them easier to fill and they sit flat on the baking sheet. I like the bags of mixed colors from the grocery store—orange, red, and yellow look great against the white “bandages.” Green peppers tend to be a bit more bitter, so I usually avoid them for this recipe.
- 8 oz cream cheese, softened: Full-fat cream cheese gives the best texture and flavor. Let it sit on the counter for about 20 minutes before mixing. If you are in a rush, you can microwave it for 10 seconds—just don’t overdo it or it gets runny.
- 1/2 cup shredded mozzarella cheese: This adds a little stretch and mild flavor to the filling. I recommend a block of low-moisture mozzarella that you shred yourself—it melts better and doesn’t have the anti-caking coating that pre-shredded bags often have.
- 1/4 cup sour cream: This keeps the filling creamy and adds a nice tang. Greek yogurt works as a substitute, but the filling will be slightly less rich.
- 1/4 teaspoon garlic powder: Don’t use fresh garlic here—it can be too sharp and it doesn’t distribute as evenly. Garlic powder gives a gentle background note.
- 1/4 teaspoon onion powder: Same logic as the garlic. It adds depth without overpowering the other flavors.
- Salt and black pepper to taste: Go easy on the salt because the cheese and olives already bring some sodium.
- 1 package (about 24) refrigerated breadstick dough (like Pillsbury): This is your mummy wrapping. One standard can of breadsticks gives you about 12 strips. You will need about 1.5 cans for a full batch of 12-15 peppers. You can also use pizza dough cut into thin strips, but the breadstick dough is the most consistent and easy to work with.
- 24-30 black olive slices (for the eyes): Use pre-sliced black olives from a can, or slice your own from whole pitted olives. Make sure they are dry—pat them with a paper towel so they stick to the cream cheese.
- Optional: Everything bagel seasoning or sesame seeds: A light sprinkle over the top adds a nice texture and makes them look a little more “finished” without ruining the mummy effect.
I have made these with dairy-free cream cheese and vegan mozzarella shreds for a friend who is lactose intolerant, and they turned out well—just be sure to use a brand that melts decently. The texture is slightly less creamy, but the flavor is still great.
Equipment Needed
You do not need any specialized Halloween cookie cutters or fancy tools for this recipe. Here is what you will actually use:
- Baking sheet: A standard half-sheet pan works perfectly. Line it with parchment paper for easy cleanup.
- Small mixing bowl: For the cream cheese filling.
- Sharp knife or kitchen shears: To cut the breadstick dough into thin strips. Shears are actually easier and faster for this job.
- Cutting board: For halving the peppers and slicing olives.
- Small spoon or piping bag: A small spoon works fine for filling the peppers, but a piping bag (or even a zip-top bag with the corner snipped off) makes it much faster and cleaner. I have used both, and the piping bag is worth the extra 30 seconds of effort.
- Toothpicks (optional): If your dough strips are loose, a toothpick can help hold them in place while baking. I have only needed them once, but it is good to know they are there.
Preparation Method
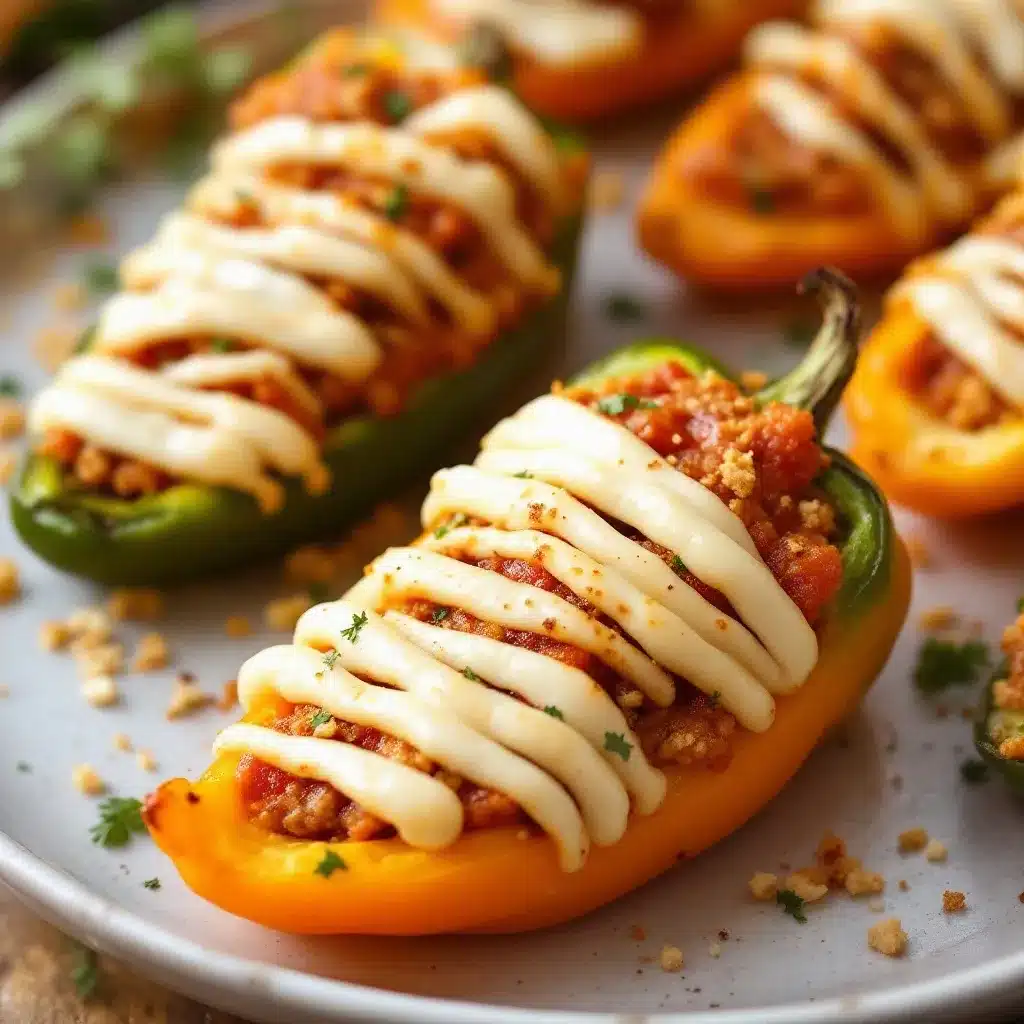
This is a straightforward recipe, but a few specific steps make the difference between mummies that look cute and mummies that look like a sad pile of dough. Follow these steps, and you will have a platter of adorable, delicious pepper bites.
- Preheat your oven to 375°F (190°C). Line a baking sheet with parchment paper. Do not skip the parchment—the dough can stick to a bare sheet, and you want these to come off cleanly.
- Prepare the peppers. Wash and dry the mini bell peppers. Slice each pepper in half lengthwise, from the stem end to the tip. Use a small spoon to scrape out the seeds and any white membranes. You want a clean, hollow “boat” for the filling. If the pepper halves are wobbly, you can trim a tiny sliver off the rounded side so they sit flat—but be careful not to cut through the bottom.
- Make the filling. In a small bowl, combine the softened cream cheese, shredded mozzarella, sour cream, garlic powder, onion powder, and a pinch of salt and pepper. Stir until everything is smooth and well combined. Taste it—it should be creamy and savory with a slight tang. Adjust the salt if needed.
- Fill the peppers. Spoon or pipe the cream cheese mixture into each pepper half, filling it level with the top. Do not overfill, or the filling will spill out when you wrap the dough. A slightly rounded top is fine, but keep it neat.
- Cut the dough strips. Open the can of breadstick dough. Separate the dough into individual breadsticks. Using a sharp knife or kitchen shears, cut each breadstick lengthwise into 3 or 4 thin strips. You want strips that are about 1/4 inch wide. They do not have to be perfectly uniform—mummies are supposed to look a little messy.
- Wrap the mummies. Take 2-3 dough strips and wrap them around each filled pepper half, crossing the strips over the middle to create the “bandage” look. Leave a small gap near the top of the pepper so you can see the filling—this is where the eyes will go. Do not wrap too tightly, or the dough will squeeze the filling out as it bakes. Leave the ends of the strips hanging loose on the bottom of the pepper—they will crisp up nicely.
- Add the eyes. Press two black olive slices into the exposed cream cheese filling at the top of each pepper. Press them in gently so they stay put during baking. If they do not stick, dab a tiny bit of cream cheese on the back of the olive first.
- Bake. Place the wrapped peppers on the prepared baking sheet, leaving about an inch of space between each one. Bake for 12-15 minutes, or until the dough is golden brown and puffed, and the filling is hot and bubbly. The peppers should be tender but still hold their shape.
- Cool slightly. Let the mummy bites rest on the baking sheet for 3-5 minutes before transferring them to a serving platter. The filling will be molten hot right out of the oven, so give it a minute to set up.
- Serve warm. These are best eaten within 15 minutes of coming out of the oven. The dough is crispiest when fresh, and the filling is at its creamiest.
Cooking Tips & Techniques
I have made these about six times now, and I have definitely learned a few things the hard way. Here is what I wish I had known from the start:
Do not overbake the dough. The first time I made these, I left them in the oven for 17 minutes because I wanted the dough extra crispy. The peppers got too soft and started collapsing, and the olive eyes sank into the filling. Stick to the 12-15 minute window. The dough should be golden, not dark brown.
Pat the olives dry. This sounds like a tiny detail, but wet olives will slide right off the cream cheese. I pat mine on a paper towel and let them air dry for a minute while I am wrapping the mummies. They stick much better that way.
Work with cold dough. If the breadstick dough gets too warm, it becomes sticky and hard to cut into thin strips. I keep the can in the fridge until the very last minute, and I work with half the dough at a time while keeping the rest in the fridge. It makes a huge difference.
Make the filling ahead of time. You can mix the cream cheese filling up to two days in advance and keep it in the fridge. Just let it soften at room temperature for 15 minutes before piping it into the peppers. This is a great time-saver if you are hosting a party.
Use a piping bag for the filling. I know it is an extra step, but a piping bag (or a sturdy zip-top bag with a corner snipped off) makes filling the peppers so much faster and cleaner. A spoon works, but you will inevitably get filling on the edges of the pepper, which makes the dough strips slide around. A piping bag keeps everything neat.
Variations & Adaptations
One of the best things about this recipe is how easily it adapts to different diets and flavor preferences. Here are a few variations I have tried and loved:
- Spicy Chorizo Mummies: Cook 1/4 cup of crumbled chorizo or spicy Italian sausage and mix it into the cream cheese filling. The smoky, spicy meat adds a whole new layer of flavor and makes these feel more like a hearty appetizer. I made this version for a football-watching party, and they were gone in minutes.
- Vegan Mummy Bites: Use a high-quality vegan cream cheese (I like Miyoko’s or Kite Hill) and vegan mozzarella shreds. The texture is slightly less creamy, but the flavor is still excellent. Make sure your breadstick dough is vegan—most Pillsbury varieties are, but check the label.
- Gluten-Free Option: Instead of breadstick dough, use gluten-free pizza dough or crescent roll dough. Roll it out thin and cut it into strips. The texture will be a little different, but the mummy look still works perfectly. I have also used thinly sliced zucchini as the “bandages” for a low-carb version, but that requires a longer bake time to soften the zucchini.
- Buffalo Chicken Mummies: Mix 1/4 cup of shredded cooked chicken and 2 tablespoons of buffalo sauce into the cream cheese filling. Top with a tiny drizzle of ranch or blue cheese dressing after baking. These are dangerously good.
- Breakfast Mummies: Fill the peppers with scrambled eggs, cheese, and crumbled bacon or sausage. Wrap with dough and bake. Serve with a side of salsa for a fun Halloween morning breakfast. I tried this for a Halloween brunch, and the kids thought it was hilarious.
Serving & Storage Suggestions
These mummy bites are best served warm, straight from the oven, when the dough is crispy and the filling is hot and creamy. Arrange them on a platter with a small bowl of marinara sauce or ranch dressing for dipping—the red sauce looks especially festive next to the mummies.
If you are making them for a party, you can assemble the mummies completely (minus the olive eyes) up to 4 hours in advance. Keep them covered in the refrigerator, and add the olives right before baking. This is my preferred method for entertaining—I prep everything in the afternoon, then pop them in the oven when guests arrive.
Storage: Leftover mummy bites will keep in an airtight container in the refrigerator for up to 3 days. The dough will soften as they sit, so they will not be as crispy as when they were fresh.
Reheating: To bring back some of the crispiness, reheat them in a 350°F oven for 5-7 minutes, or in an air fryer at 350°F for 3-4 minutes. The microwave will make the dough soggy, so I avoid it unless I am in a real hurry.
Freezing: You can freeze the assembled, unbaked mummies (without the olive eyes) for up to 2 months. Place them on a baking sheet and freeze until solid, then transfer to a freezer bag. Bake from frozen, adding 5-7 minutes to the bake time. Add the olive eyes after baking.
Nutritional Information & Benefits
These mummy bites are a relatively balanced appetizer. Each bite (based on a serving of two stuffed pepper halves) provides approximately:
- Calories: 180-220
- Protein: 7g
- Fat: 12g
- Carbohydrates: 14g
- Fiber: 2g
- Sugar: 4g
The mini bell peppers are an excellent source of vitamin C and vitamin A, and they provide a good amount of dietary fiber. The cream cheese and mozzarella add calcium and protein, making these more satisfying than a typical carb-heavy appetizer. If you use the dairy-free variation, you will reduce the saturated fat content, though the protein will be slightly lower.
For those watching their carbohydrate intake, you can skip the dough wrapping entirely and just serve the stuffed peppers as a keto-friendly option—they will still look festive, just without the mummy bandages. If you are looking for other low-carb options that are great for parties, you might enjoy these crispy keto bacon-wrapped jalapeño poppers.
Conclusion
These Easy Mummy Stuffed Pepper Bites are the kind of recipe that makes you look like you put in way more effort than you actually did. They are fun without being fussy, festive without being gimmicky, and genuinely delicious. Whether you are hosting a Halloween party, bringing a dish to a potluck, or just looking for a way to make a Tuesday night dinner feel a little more special, these little mummies deliver.
I love this recipe because it reminds me that the best party food does not have to be complicated—it just has to be thoughtful. A few simple ingredients, a little creativity, and suddenly you have a platter of food that makes people smile before they even take a bite. And then they take a bite, and they smile even bigger.
If you make these, I would love to hear how they turn out. Leave a comment below and let me know what variations you tried, or tag me in your photos if you share them online. And if you are looking for another crowd-pleasing appetizer that works for any gathering, do not miss this creamy dairy-free queso dip—it is the perfect companion for these mummies. Happy Halloween, and happy cooking!
Frequently Asked Questions
Can I make these mummy pepper bites ahead of time?
Yes, absolutely. You can assemble the mummies completely (minus the olive eyes) up to 4 hours in advance. Keep them covered in the refrigerator, add the eyes right before baking, and bake as directed. This is my go-to strategy for parties.
Can I use a different type of pepper?
You can, but mini sweet bell peppers are the best choice because they are the right size for a single bite and have a mild, sweet flavor. Larger bell peppers will need to be cut into smaller pieces, and the baking time will need to be adjusted. Spicy peppers like jalapeños will work, but the heat level will be much higher.
My dough strips keep sliding off the peppers. What am I doing wrong?
This usually happens when the cream cheese filling is too wet or when the dough is too warm. Make sure your cream cheese is softened but not runny, and try to keep the dough cold. Patting the pepper halves dry before filling them also helps the dough stick.
Can I freeze the baked mummy bites?
I do not recommend freezing them after baking, as the texture of the dough and peppers will suffer. However, you can freeze the assembled, unbaked mummies (without the olive eyes) for up to 2 months. Bake from frozen, adding 5-7 minutes to the bake time, and add the eyes after baking.
What can I serve with these for a complete Halloween party spread?
These mummies pair wonderfully with a variety of dips and snacks. A batch of vegan loaded nachos with creamy cashew cheese would make a fantastic companion dish. For a healthier option, consider a healthy keto Mexican cauliflower rice bowl as a side. And for dessert, something sweet like these soft gluten-free pretzel bites would be a fun, salty-sweet finish.
Pin This Recipe!
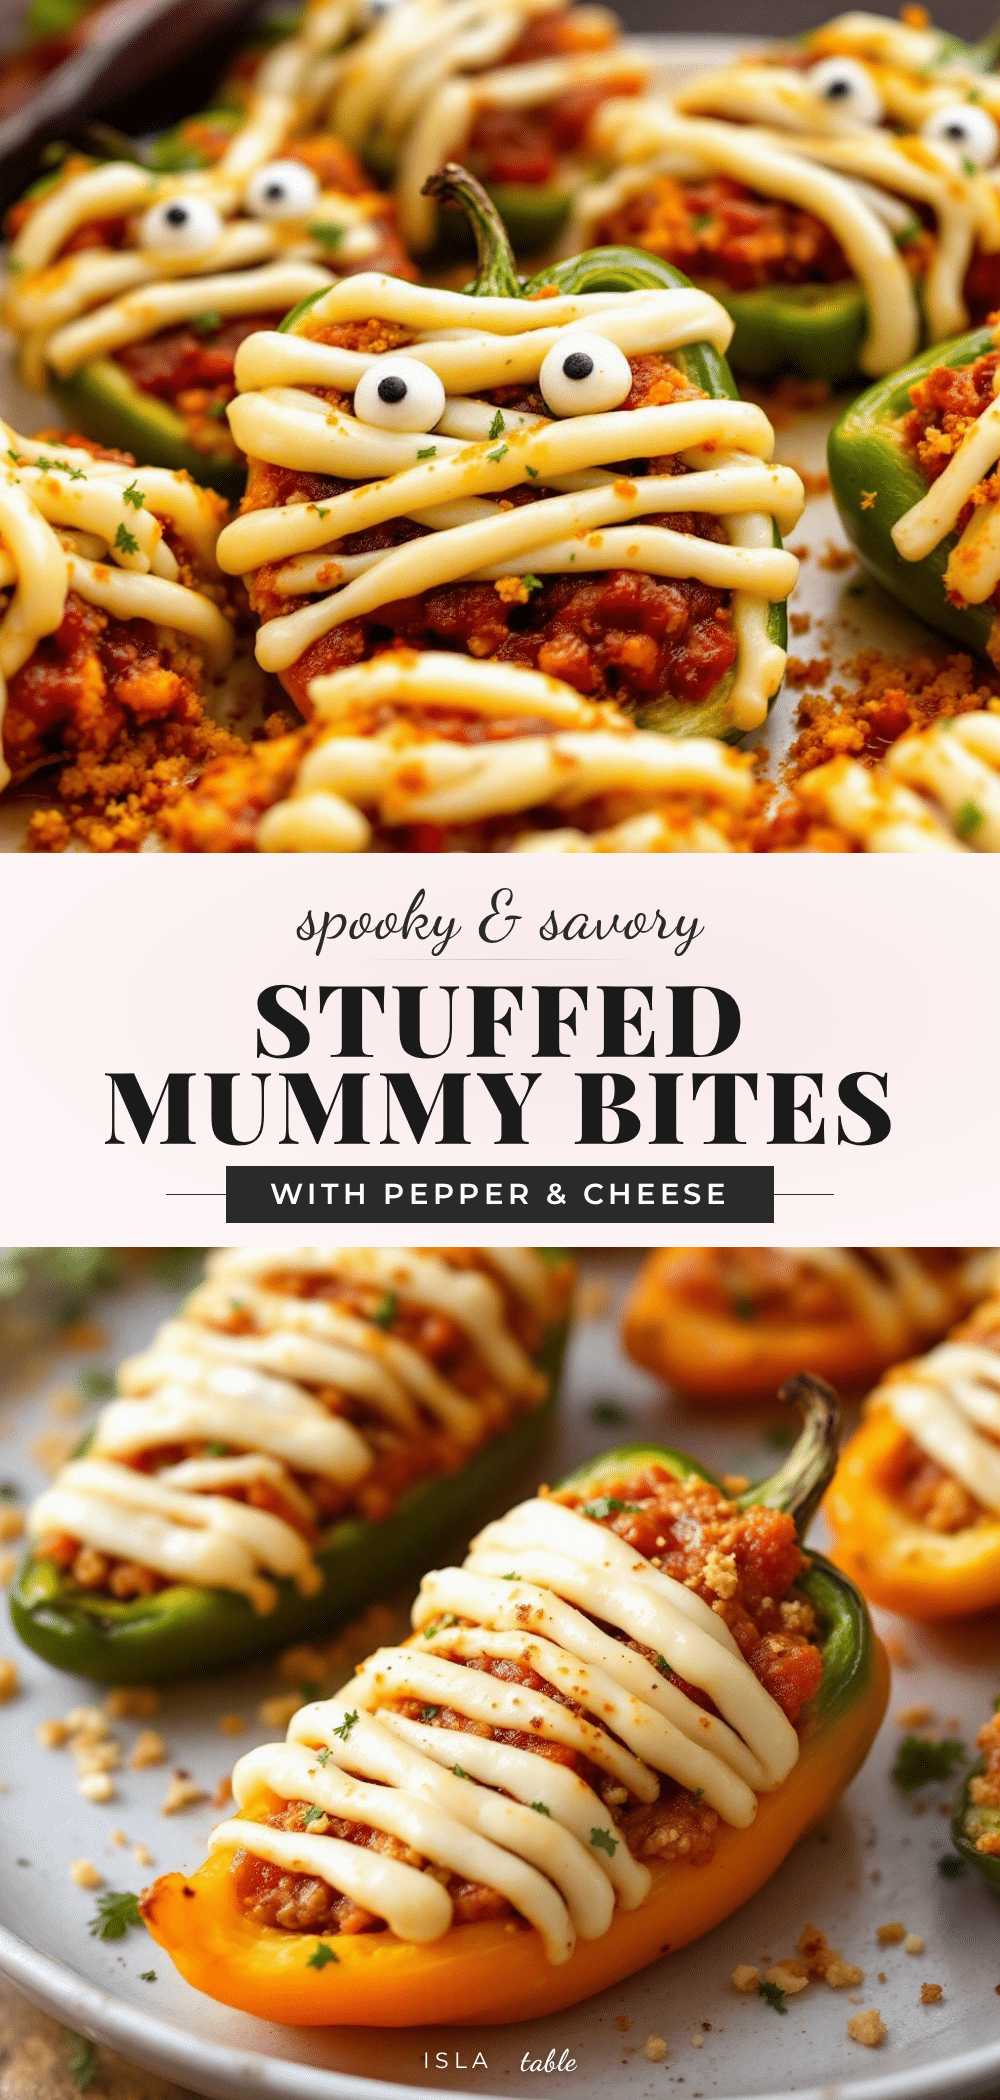
Easy Mummy Stuffed Pepper Bites: Best Halloween Appetizer Recipe
These Easy Mummy Stuffed Pepper Bites are a quick, savory, and vegetable-forward Halloween appetizer that looks like little mummies but tastes like a creamy, roasted stuffed pepper. Made with mini bell peppers, a tangy cream cheese filling, and wrapped in breadstick dough, they are a crowd-pleaser that disappears from the table in minutes.
- Prep Time: 10 minutes
- Cook Time: 15 minutes
- Total Time: 25 minutes
- Yield: 12-15 servings (2 stuffed pepper halves per serving) 1x
- Category: Appetizer
- Cuisine: American
Ingredients
- 12–15 mini sweet bell peppers
- 8 oz cream cheese, softened
- 1/2 cup shredded mozzarella cheese
- 1/4 cup sour cream
- 1/4 teaspoon garlic powder
- 1/4 teaspoon onion powder
- Salt and black pepper to taste
- 1 package (about 12) refrigerated breadstick dough (like Pillsbury), plus half of another package (about 6 more strips)
- 24–30 black olive slices
- Optional: Everything bagel seasoning or sesame seeds
Instructions
- Preheat your oven to 375°F (190°C). Line a baking sheet with parchment paper.
- Wash and dry the mini bell peppers. Slice each pepper in half lengthwise, from the stem end to the tip. Use a small spoon to scrape out the seeds and any white membranes. If the pepper halves are wobbly, trim a tiny sliver off the rounded side so they sit flat.
- In a small bowl, combine the softened cream cheese, shredded mozzarella, sour cream, garlic powder, onion powder, and a pinch of salt and pepper. Stir until smooth and well combined. Taste and adjust salt if needed.
- Spoon or pipe the cream cheese mixture into each pepper half, filling it level with the top. Do not overfill.
- Open the can of breadstick dough. Separate the dough into individual breadsticks. Using a sharp knife or kitchen shears, cut each breadstick lengthwise into 3 or 4 thin strips, about 1/4 inch wide.
- Take 2-3 dough strips and wrap them around each filled pepper half, crossing the strips over the middle to create the ‘bandage’ look. Leave a small gap near the top of the pepper for the eyes. Do not wrap too tightly. Leave the ends of the strips hanging loose on the bottom.
- Press two black olive slices into the exposed cream cheese filling at the top of each pepper. Press them in gently so they stay put during baking.
- Place the wrapped peppers on the prepared baking sheet, leaving about an inch of space between each one. Bake for 12-15 minutes, or until the dough is golden brown and puffed, and the filling is hot and bubbly.
- Let the mummy bites rest on the baking sheet for 3-5 minutes before transferring them to a serving platter.
- Serve warm. These are best eaten within 15 minutes of coming out of the oven.
Notes
Do not overbake the dough; stick to 12-15 minutes. Pat olives dry so they stick better. Work with cold dough to prevent stickiness. Filling can be made up to 2 days in advance. Use a piping bag for cleaner filling. For variations, try spicy chorizo, vegan, gluten-free, buffalo chicken, or breakfast mummies. Assemble up to 4 hours in advance (without olive eyes) and refrigerate. Leftovers keep in the fridge for up to 3 days; reheat in oven or air fryer for crispiness. Freeze unbaked mummies (without eyes) for up to 2 months.
Nutrition
- Serving Size: 2 stuffed pepper hal
- Calories: 180220
- Sugar: 4
- Sodium: 350
- Fat: 12
- Saturated Fat: 6
- Carbohydrates: 14
- Fiber: 2
- Protein: 7
Keywords: Halloween appetizer, mummy stuffed peppers, mini bell peppers, cream cheese stuffed peppers, easy Halloween recipe, party appetizer, spooky snack, vegetarian appetizer


