That deep, jewel-toned purple the syrup turns after simmering—honestly, that’s what I make this for. Everything else is secondary. It’s not just the color, though. It’s the way the liquid clings to the spoon, thick and almost syrupy, promising something potent and protective. I first made this Homemade Elderberry Ginger Syrup for Cold Season during a particularly brutal January, when it felt like everyone I knew was hacking and sniffling their way through the month. I was tired of the pharmacy aisle, tired of those neon-colored, artificially flavored syrups that taste more like a dare than a remedy. I wanted something real. Something I could trust.
I had a bag of dried elderberries sitting in my pantry (bought on a whim, as you do) and a knob of ginger that was starting to look a little desperate. I figured, why not? The first batch was a little too spicy, a little too tart, and I burned my tongue testing the temperature. But the second batch? That was the one. The ginger was warm without being aggressive, the elderberries gave it that deep, almost wine-like richness, and the honey smoothed everything into something you actually want to take by the spoonful. It felt like I had bottled a little bit of winter armor.
This isn’t a complicated recipe. It’s the kind of thing you can throw together on a Sunday afternoon while you’re doing other stuff—laundry, listening to a podcast, staring out the window. And when cold season rolls around, you’ll be glad you did. It’s become my go-to gift for friends who are feeling under the weather, a little jar of dark purple hope. It’s not a cure, obviously. But it’s something. And sometimes, that something is exactly what you need.
Why You’ll Love This Recipe
Look, I’ve tested a lot of elderberry syrups over the years. Some were too watery, some were so thick they felt like cough medicine, and a few were just… sad. This version? It’s the one I keep coming back to. Here’s why it works:
- Simple Ingredients, Maximum Impact : You don’t need a fancy herbalist’s pantry. Dried elderberries, fresh ginger, whole spices, honey, and water. That’s it. No weird additives, no preservatives, no high-fructose corn syrup pretending to be medicine.
- Actually Delicious : Let’s be real—most immune-boosting syrups taste like punishment. This one is genuinely good. The ginger adds a pleasant warmth, the cinnamon and cloves give it a cozy, almost chai-like depth, and the honey rounds everything out. You’ll actually look forward to taking it.
- Works for the Whole Family : It’s gentle enough for kids (over age one, due to the honey) and potent enough for adults. I keep a jar in the fridge for everyone in the house. It’s a one-size-fits-all approach to wellness that actually works.
- Budget-Friendly and DIY : A bottle of store-bought elderberry syrup can run you $15-$25. This recipe costs a fraction of that, and you control exactly what goes into it. Plus, you get the satisfaction of making it yourself. That counts for something.
- Perfect for Meal Prep : This syrup keeps for weeks in the fridge, so you can make a big batch at the start of cold season and have it ready to go. It’s like having a little insurance policy against the sniffles.
This recipe isn’t just about fighting off a cold. It’s about taking a small, proactive step for your health. It’s about having something warm and comforting on hand when you need it most. And honestly, it just makes you feel good knowing you made it yourself.
What Ingredients You Will Need
This recipe relies on a handful of powerful, immune-supporting ingredients. Each one plays a specific role, and together, they create a syrup that’s both effective and delicious. Here’s what you’ll need:
- Dried Elderberries (1 cup): The star of the show. Elderberries are packed with antioxidants and flavonoids, which are thought to help support the immune system. Look for dried, organic elderberries from a reputable source. I usually get mine from a local health food store or order them online. They should be dark purple, almost black, and smell slightly fruity.
- Fresh Ginger (2-3 inches, sliced): Ginger brings warmth and a little zing. It’s known for its anti-inflammatory properties and can help soothe a sore throat or settle an upset stomach. I prefer fresh ginger over dried for this recipe—it has a brighter, more pronounced flavor. No need to peel it, just give it a good scrub and slice it into thin coins.
- Cinnamon Sticks (2): Cinnamon adds a sweet, woody warmth that complements the tartness of the elderberries. It’s also a natural antimicrobial. I use Ceylon cinnamon if I can find it, but Cassia works just fine. The sticks are better than ground cinnamon here because they infuse the syrup without making it cloudy.
- Whole Cloves (1 teaspoon): Cloves are potent little things. They add a deep, slightly pungent flavor and are known for their antioxidant properties. A little goes a long way, so don’t overdo it. I’ve made that mistake before, and the syrup ended up tasting like a holiday candle.
- Raw Honey (1 cup): This is your sweetener and your preservative. Raw, unfiltered honey is best because it contains beneficial enzymes and probiotics that are often lost in processed honey. It also adds a lovely floral sweetness that balances the tartness of the elderberries. Do NOT give honey to children under one year old.
- Filtered Water (4 cups): The base of your syrup. Filtered water is best because it doesn’t have the chlorine or other chemicals that can interfere with the flavor. Tap water works in a pinch, but I find the syrup tastes cleaner with filtered.
Optional Add-Ins : Sometimes I’ll throw in a star anise for a subtle licorice note, or a few slices of dried orange peel for a citrusy lift. A pinch of turmeric can also add an extra anti-inflammatory boost, though it will change the color to a more orange-tinged purple. Feel free to experiment!
Equipment Needed
You don’t need any fancy equipment for this recipe. Chances are, you already have everything you need in your kitchen. Here’s the list:
- Medium-Sized Saucepan : A 2-3 quart saucepan is perfect. You want something with a heavy bottom to prevent scorching. I use my old stainless steel pot, and it works beautifully.
- Fine-Mesh Strainer or Cheesecloth : This is crucial for getting a smooth, clear syrup. A fine-mesh strainer works well, but if you want an extra-clear syrup, line it with a double layer of cheesecloth. I’ve used both, and honestly, the cheesecloth gives a slightly cleaner result.
- Glass Jar or Bottle for Storage : A 16-ounce glass jar with a tight-fitting lid is ideal. Make sure it’s clean and completely dry before you pour in the syrup. I like to use swing-top bottles because they look pretty in the fridge.
- Wooden Spoon or Silicone Spatula : For stirring. Nothing fancy.
- Measuring Cups and Spoons : For accurate measurements. I know I said this is forgiving, but it helps to start with the right ratios.
Pro Tip : If you don’t have a fine-mesh strainer, you can use a regular colander lined with a clean kitchen towel or a coffee filter. It takes a little longer, but it works. I learned this trick when I forgot my strainer at a friend’s house and needed to make a batch urgently.
Preparation Method
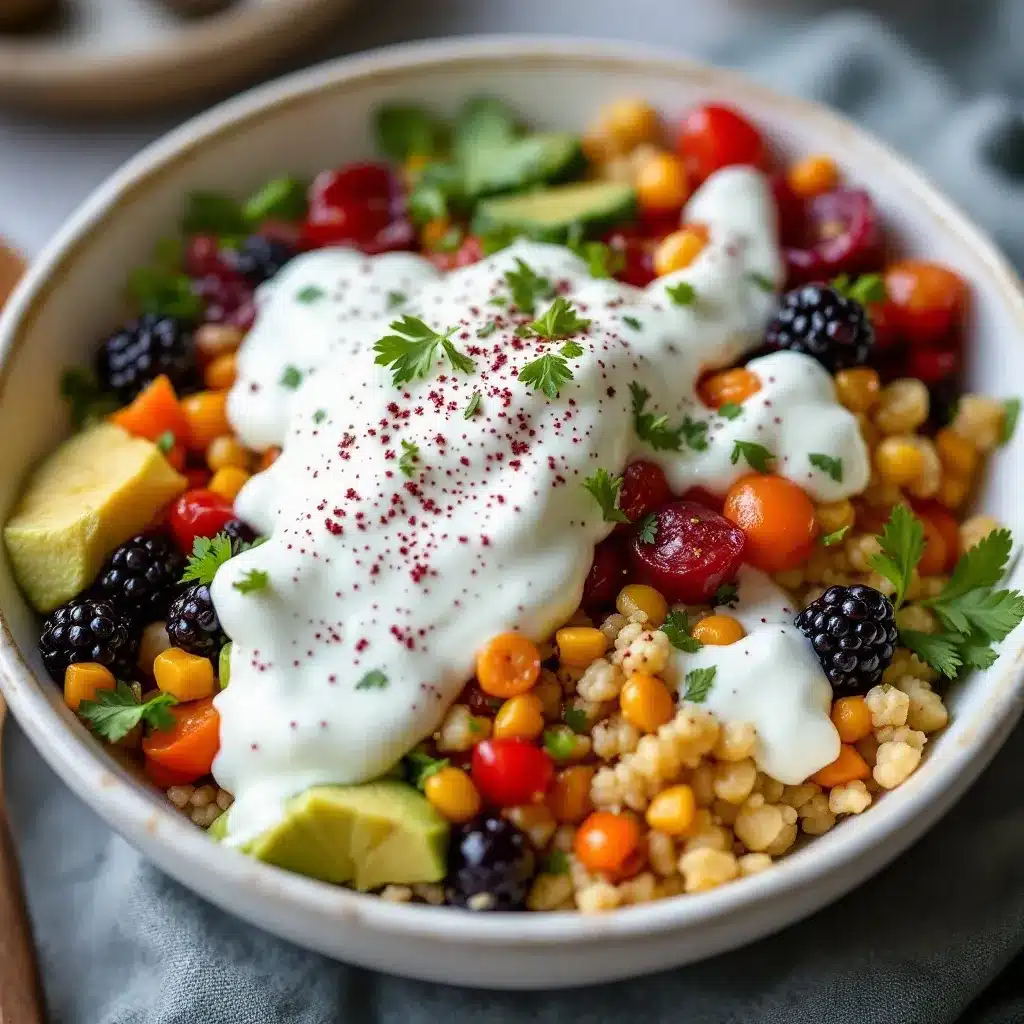
Making this syrup is almost meditative. It’s a slow, gentle process that fills your kitchen with the most incredible aroma. Here’s how to do it:
- Combine the Ingredients : In your medium saucepan, add the dried elderberries, sliced ginger, cinnamon sticks, whole cloves, and 4 cups of filtered water. Give everything a gentle stir. Don’t add the honey yet—that comes later.
- Bring to a Boil, Then Simmer : Place the saucepan over medium-high heat and bring the mixture to a boil. Once it’s boiling, reduce the heat to low and let it simmer gently. You want a gentle simmer, not a rolling boil. Bubbles should just barely break the surface. Let it simmer for 45 minutes to 1 hour. The liquid will reduce by about half, and the color will deepen to a rich, dark purple. Your kitchen will smell incredible at this point—like a warm, spicy hug.
- Mash the Berries (Optional but Recommended) : After the simmering time, use the back of your wooden spoon to gently mash the elderberries against the side of the pot. This releases more of their goodness and gives you a more potent syrup. Don’t go crazy—you’re not making a paste. Just a few gentle presses.
- Strain the Mixture : Place your fine-mesh strainer or cheesecloth-lined colander over a large bowl or a heatproof measuring cup. Carefully pour the hot liquid through the strainer. Let it drain completely. You can gently press on the solids with the back of a spoon to extract every last drop of that precious liquid. Resist the urge to squeeze too hard, though—you might push through some sediment and make the syrup cloudy. Discard the solids.
- Add the Honey : Let the strained liquid cool for about 10-15 minutes. It should be warm, but not hot. This is important because high heat can destroy the beneficial enzymes in raw honey. Once it’s cooled slightly, add the 1 cup of raw honey and stir until it’s completely dissolved. The warm liquid will help the honey incorporate smoothly.
- Bottle and Store : Pour the finished syrup into your clean, dry glass jar or bottle. Let it cool completely to room temperature before sealing the lid. Store it in the refrigerator. It will thicken slightly as it chills.
Sensory Cues : When it’s simmering, the liquid should look like a deep, dark purple that’s almost black. The aroma will be spicy and sweet, with the ginger cutting through clearly. When you strain it, the liquid should be a beautiful, clear jewel tone. When you add the honey, it should swirl in beautifully, turning the syrup a slightly lighter, more translucent purple.
Cooking Tips & Techniques
I’ve made this syrup more times than I can count, and I’ve learned a few things along the way. Here are my best tips for getting it right every time:
- Don’t Boil the Honey : This is the most important tip. Adding honey to boiling liquid will destroy its beneficial properties. Always let the strained liquid cool to warm before stirring in the honey. I’ve made this mistake exactly once, and the syrup was still tasty, but I knew I had lost some of the good stuff.
- Use a Gentle Simmer : A rolling boil will evaporate the liquid too quickly and can make the syrup bitter. A gentle simmer allows the flavors to meld and the water to reduce slowly. Think of it as a slow infusion, not a fast extraction.
- Adjust the Sweetness to Your Taste : Some people like their syrup sweeter, some prefer it more tart. Start with 3/4 cup of honey and taste it. You can always add more, but you can’t take it out. I personally like it on the less-sweet side so the ginger and elderberries can shine.
- Strain Twice for Extra Clarity : If you want a crystal-clear syrup, strain the liquid once through a fine-mesh strainer, and then again through a cheesecloth-lined strainer. It’s an extra step, but it makes a difference if you’re gifting the syrup or just want it to look pretty in the fridge.
- Label Your Jar : This sounds silly, but I’ve had moments where I forgot what was in the jar and ended up using elderberry syrup on my pancakes. (It was actually pretty good, but still.) A simple label with the date and contents saves you from confusion.
My Biggest Failure : I once tried to speed up the process by using a high heat and a shorter simmer time. The result was a thin, watery syrup that tasted more like spicy water than anything medicinal. It was a total waste of ingredients. Patience is key here. Don’t rush the simmer.
Variations & Adaptations
This recipe is a fantastic base for experimentation. Here are a few ways to make it your own:
- Spicy Kick : Add a small, dried chili pepper (like a bird’s eye or a chipotle) along with the other spices. It adds a subtle warmth that’s surprisingly good. I tried this once on a dare and ended up loving it.
- Citrus Boost : Add the zest and juice of one lemon or orange to the simmering mixture. The citrus adds a bright, fresh note that cuts through the richness of the elderberries. It’s especially nice if you’re feeling a little congested.
- Herbal Infusion : Add a few sprigs of fresh thyme or a couple of dried echinacea root pieces to the simmer. These herbs are also known for their immune-supporting properties and add a subtle earthy flavor.
- Low-Sugar Version : If you’re watching your sugar intake, you can reduce the honey to 1/2 cup and add a few drops of stevia to taste. The syrup won’t be as thick, but it will still be effective. You can also use a sugar-free maple-flavored syrup, but the flavor profile will change significantly.
- Kid-Friendly Version : Reduce the ginger to just 1 inch and omit the cloves. Kids can be sensitive to strong flavors, and this milder version is still effective. I’ve made this for my niece, and she takes it without a fuss.
Don’t be afraid to play around. The beauty of this recipe is that it’s incredibly forgiving. As long as you keep the basic ratio of elderberries to water to honey, you can customize the spices and add-ins to your heart’s content.
Serving & Storage Suggestions
This syrup is versatile, and how you serve it depends on what you need it for. Here are my favorite ways to use it:
- Daily Maintenance Dose : Take 1 tablespoon (for adults) or 1 teaspoon (for kids) straight from the jar. I like to take it first thing in the morning, almost like a daily vitamin. It’s a nice, warming way to start the day.
- Soothing Hot Tonic : Add 1-2 tablespoons to a mug of hot water. It makes a delicious, comforting tea that’s perfect for a sore throat or when you’re feeling chilly. Add a squeeze of lemon for an extra vitamin C boost.
- Cold-Season Booster : If you feel a cold coming on, increase the dose to 1 tablespoon every 3-4 hours. I find it helps shorten the duration and severity of symptoms. It’s not a magic bullet, but it definitely helps.
- In Smoothies : Add a tablespoon to your morning smoothie for an extra immune boost. It pairs well with berry and banana-based smoothies. The flavor is subtle enough that it won’t overpower the other ingredients.
- As a Pancake Topper : Okay, this is a little unconventional, but it’s delicious. Drizzle it over pancakes or waffles instead of maple syrup. The spicy, fruity flavor is surprisingly good with breakfast.
Storage : Keep the syrup in a sealed glass jar in the refrigerator. It will last for 2-3 months. If you see any mold or fermentation (bubbles, off-smell), discard it immediately. I’ve never had that happen, but it’s always good to be cautious. For longer storage, you can freeze the syrup in an ice cube tray and pop out a cube as needed. It will keep in the freezer for up to 6 months.
Nutritional Information & Benefits
While this syrup is not a substitute for medical advice, it is packed with ingredients that are traditionally used to support the immune system. Here’s a quick breakdown:
- Elderberries : Rich in antioxidants, particularly anthocyanins, which give them their deep purple color. These compounds are thought to help reduce inflammation and support the immune system.
- Ginger : Contains gingerol, a bioactive compound with powerful anti-inflammatory and antioxidant effects. It’s also known to help soothe nausea and digestive upset.
- Cinnamon : Packed with antioxidants and has anti-inflammatory properties. It can also help regulate blood sugar levels.
- Cloves : High in antioxidants and have antimicrobial properties. They’re also a good source of manganese.
- Raw Honey : Contains beneficial enzymes, antioxidants, and prebiotics. It can help soothe a sore throat and suppress coughing.
Estimated Nutritional Information (per 1 tablespoon serving):
| Nutrient | Amount |
|---|---|
| Calories | 35-45 |
| Total Carbohydrates | 10-12g |
| Sugars | 9-11g (from honey) |
| Vitamin C | Trace amounts |
Dietary Considerations : This recipe is naturally gluten-free, dairy-free, and nut-free. It is NOT suitable for children under one year old due to the honey content. If you have diabetes or are on a sugar-restricted diet, use the low-sugar variation mentioned above and monitor your blood sugar levels.
Conclusion
Look, I’m not saying this Homemade Elderberry Ginger Syrup for Cold Season is going to cure the common cold. But I am saying it’s a comforting, delicious, and proactive way to support your body during the months when everyone around you is sniffling. It’s a small act of self-care that takes less than an hour to prepare and pays dividends all winter long.
I love that this recipe is so adaptable. You can make it your own by tweaking the spices, adjusting the sweetness, or adding your favorite immune-boosting herbs. It’s a recipe that grows with you. And honestly, there’s something deeply satisfying about reaching into your own fridge for a jar of something you made with your own hands, knowing exactly what’s in it.
If you give this recipe a try, I’d love to hear how it goes. Did you add any extra spices? Did you use it to make a hot tonic? Drop a comment below and let me know. And if you’re looking for more ways to boost your wellness routine, you might also enjoy this healthy immunity-boosting elderberry lemonade recipe for a refreshing twist. Or, for a gut-healthy option, check out this fresh probiotic fruit water kefir recipe. Stay healthy, my friends!
Frequently Asked Questions
Can I use fresh elderberries instead of dried?
Yes, you can, but you’ll need to adjust the quantity. Use about 2 cups of fresh elderberries in place of 1 cup of dried. Keep in mind that fresh elderberries have a shorter shelf life and should be used immediately. Also, never eat raw elderberries—they can cause digestive upset. Always cook them first.
How long does this syrup last in the fridge?
Properly stored in a sealed glass jar in the refrigerator, this syrup will last for 2-3 months. The honey acts as a natural preservative. If you notice any mold, off-smells, or fermentation (bubbles), discard it immediately. When in doubt, throw it out.
Can I use a different sweetener instead of honey?
Absolutely. You can use maple syrup, agave nectar, or even a sugar-free sweetener like stevia or monk fruit. Keep in mind that the consistency and flavor will change. Maple syrup will give it a slightly different flavor profile, while stevia will make it less thick. Adjust the amount to your taste.
Is this syrup safe for children?
Yes, for children over one year old. Do NOT give honey to infants under one year due to the risk of botulism. For older kids, you can reduce the ginger and omit the cloves to make it more palatable. Start with a smaller dose (1/2 to 1 teaspoon) to see how they tolerate it.
Can I take this syrup if I’m pregnant or breastfeeding?
While the ingredients in this syrup are generally considered safe in food amounts, it’s always best to consult with your healthcare provider before taking any herbal remedies during pregnancy or while breastfeeding. They can give you personalized advice based on your specific situation.
Pin This Recipe!
Easy Homemade Elderberry Ginger Syrup for Cold Season
A comforting, immune-supporting syrup made with dried elderberries, fresh ginger, and warm spices, sweetened with raw honey. Perfect for cold season, this DIY syrup is delicious and budget-friendly.
- Prep Time: 10 minutes
- Cook Time: 45 minutes
- Total Time: 55 minutes
- Yield: 16 servings 1x
- Category: Condiment
- Cuisine: American
Ingredients
- 1 cup dried elderberries
- 2–3 inches fresh ginger, sliced
- 2 cinnamon sticks
- 1 teaspoon whole cloves
- 1 cup raw honey
- 4 cups filtered water
Instructions
- In a medium saucepan, combine the dried elderberries, sliced ginger, cinnamon sticks, whole cloves, and 4 cups of filtered water. Stir gently.
- Bring the mixture to a boil over medium-high heat, then reduce the heat to low and let it simmer gently for 45 minutes to 1 hour, until the liquid has reduced by about half and turned a deep, dark purple.
- Optional: Gently mash the elderberries against the side of the pot with the back of a wooden spoon to release more flavor.
- Strain the mixture through a fine-mesh strainer or cheesecloth-lined colander into a large bowl or heatproof measuring cup. Press gently on the solids to extract all the liquid. Discard the solids.
- Let the strained liquid cool for 10-15 minutes until warm but not hot. Stir in the raw honey until completely dissolved.
- Pour the syrup into a clean, dry glass jar or bottle. Let it cool completely to room temperature before sealing. Store in the refrigerator.
Notes
Do not add honey to boiling liquid as high heat can destroy its beneficial enzymes. Let the strained liquid cool to warm before adding honey. For a clearer syrup, strain twice. This syrup is not suitable for children under one year old due to honey content. Store in the refrigerator for 2-3 months or freeze in ice cube trays for up to 6 months.
Nutrition
- Serving Size: 1 tablespoon
- Calories: 40
- Sugar: 10
- Carbohydrates: 11
Keywords: elderberry syrup, ginger syrup, immune booster, cold season, homemade syrup, elderberry recipe, honey syrup


