I want marshmallow fluff right now and have everything except the specific orange and black sprinkles that make these ghost pops look spooky. It is 4:30 PM on a Tuesday, and the house is quiet in that dangerous way where kids are plotting something. I need a distraction that involves sugar, structure, and zero cooking heat. Honestly, I am not interested in baking a cake. I am not interested in chopping vegetables or worrying about whether the cauliflower rice bowl will get soggy by dinner time. I just need something that holds its shape and looks like it belongs on a haunted plantation.
This is where Easy Halloween Rice Krispie Ghost Pops come in. They are the culinary equivalent of a deep breath. You know that feeling when you walk into a kitchen and the air smells like vanilla and burnt sugar? That is the goal here. It is simple, it is fast, and it requires almost no cleanup if you line your bowl with parchment paper like a sensible person. The magic isn’t in the technique; it is in the transformation. You take a sticky, hot mess and turn it into a cute little floating spirit that kids will fight over before it hits the plate.
I tried making them last year and ended up with a pile of orange blobs because I was impatient. This year, I slowed down. I used the right ratio of marshmallows. I let the mixture cool just enough to handle without melting my fingers off. The result was a batch of perfect, stiff ghosts that stood up tall on their sticks. They are the kind of treat that makes you feel like a hero for five minutes, which is exactly what I need right now. Let’s get sticky.
Why You’ll Love This Recipe
These treats are not just about the spooky factor, though they definitely deliver on the aesthetic. They are about control in a chaotic season. When you are planning Halloween parties, school drop-offs, or just trying to keep the peace during a sugar rush, you need a recipe that is forgiving. This Easy Halloween Rice Krispie Ghost Pops recipe is forgiving. It is robust. It does not care if you press the marshmallows a little too hard or if the cereal breaks a few pieces. It still works.
- Quick & Easy: You can have these done from start to finish in under twenty minutes. The marshmallow melts in five, the cereal mixes in two, and the shaping takes the rest. It is perfect for last-minute guests or when the kids come home from school screaming for snacks.
- Simple Ingredients: You likely have everything in your pantry right now. Rice Krispies, marshmallows, butter, and white chocolate. No fancy grocery trips needed. No obscure spices that you will use once and then forget about in the back of the cupboard.
- Perfect for Halloween: These are the ultimate seasonal treat. They are cute enough for a classroom party but fun enough for a late-night viewing marathon. They fit the theme without feeling childish, which is a tricky balance.
- Crowd-Pleaser: Kids love the stick. Adults love the nostalgia. Everyone loves the white chocolate coating. It is a universal win. I have served these at work potlucks and watched them disappear faster than the good coffee.
- Unbelievably Delicious: The texture is key here. You want that crisp exterior from the rice cereal and the chewy, gooey center. The white chocolate adds a sweet, creamy contrast that balances the crunch perfectly. It is comfort food with a twist.
What makes this recipe different from the rest is the attention to the “pop” aspect. Most recipes just make bars. This one uses lollipop sticks to create individual portions that are easy to handle and share. It also uses a simple dipping technique that ensures full coverage without making the treat too heavy. It is the kind of detail that separates a good snack from a memorable one.
What Ingredients You Will Need
This recipe relies on pantry staples to create a structure that is both crispy and chewy. The beauty of these ghost pops is that the ingredient list is short, which means there are fewer things that can go wrong. You are building a base of cereal bound by a sweet, buttery marshmallow binder, then coating it in white chocolate for that spooky white finish. Here is what you need to gather.
- Rice Krispies Cereal: Six cups of original Rice Krispies. This is the structural backbone. Do not substitute with puffed wheat or puffed rice unless you want a different texture. The flat shape of the rice cereal helps the ghosts hold their shape. If you need a gluten-free option, look for certified gluten-free crispy rice cereal, though the texture might be slightly more fragile.
- Mini Marshmallows: One 10-ounce bag of mini marshmallows. I recommend using mini marshmallows over large ones because they melt more evenly and quickly. Large marshmallows can leave hard centers if you are not careful. Brands like Jet-Puffed work well, but any standard brand will do.
- Unsalted Butter: Three tablespoons of unsalted butter. This adds richness and helps the marshmallows melt smoothly. It also prevents the mixture from sticking to your hands too much. Salted butter can work in a pinch, but you would need to reduce any added salt elsewhere, which there isn’t any anyway.
- White Chocolate Chips: Two cups of white chocolate chips. I prefer using chips over bars because they contain stabilizers that help them melt into a smooth, consistent coating. Brands like Ghirardelli or Toll House are reliable. For a dairy-free version, use dairy-free white chocolate chips, though be aware the melt might be slightly different.
- Food Coloring Gel: Orange and black gel food coloring. Gel coloring is essential here. Liquid food coloring will make the white chocolate too thin and might cause it to seize. Gel colors are concentrated, so you only need a tiny amount. If you do not have gel, you can use paste coloring, but avoid liquid.
- Eyes and Mouth Decors: Mini candy eyes and small black dots or edible markers. The eyes are what give the ghost its personality. You can use regular mini candy eyes or make your own with white frosting and black gel. The mouth is optional but adds a lot of character.
- Lollipop Sticks: Wooden or plastic lollipop sticks. Make sure they are long enough to handle easily. Wooden sticks are traditional, but plastic ones are easier to clean up if you plan to reuse them (though I doubt you will).
Keep in mind that the quality of your white chocolate will affect the final result. Cheap chocolate often contains more fillers and can result in a dull, grainy coating. Spend a few extra dollars on decent chips, and your ghosts will shine.
Equipment Needed
You do not need a lot of fancy tools for this. In fact, the simpler the equipment, the better. Here is what you will need to get the job done efficiently.
- Large Microwave-Safe Bowl: A bowl that is at least 4 quarts in size. The marshmallow mixture expands when it melts, so you need room to stir without making a mess. Glass or ceramic bowls work best because they heat evenly.
- Silicone Spatula: A sturdy silicone spatula is essential for stirring the melting marshmallows. It scrapes the sides of the bowl effectively and handles the heat well. Wooden spoons can work but might get stuck in the sticky mixture.
- Large Baking Sheet: A standard half-sheet pan lined with parchment paper or a silicone baking mat. You will place the shaped ghosts on this to set. Parchment paper is easier for cleanup, but a silicone mat is reusable and provides a non-stick surface that is great for sticky treats.
- Microwave: You will use the microwave to melt the marshmallows and butter. If you prefer stovetop melting, you will need a double boiler setup, but the microwave is faster and easier for most home cooks.
- Small Microwave-Safe Mugs: You will need two small mugs or ramekins for melting the white chocolate and adding the food coloring. This allows you to work on both colors simultaneously without cross-contamination.
- Tweezers: A pair of tweezers is helpful for placing the mini candy eyes precisely. It saves your fingers from getting sticky and allows for better placement than using your fingertips.
If you do not have a microwave, you can melt the marshmallows and butter in a saucepan over low heat, stirring constantly. However, this requires more attention and risks burning the mixture if the heat is too high. The microwave method is more forgiving for beginners.
Preparation Method
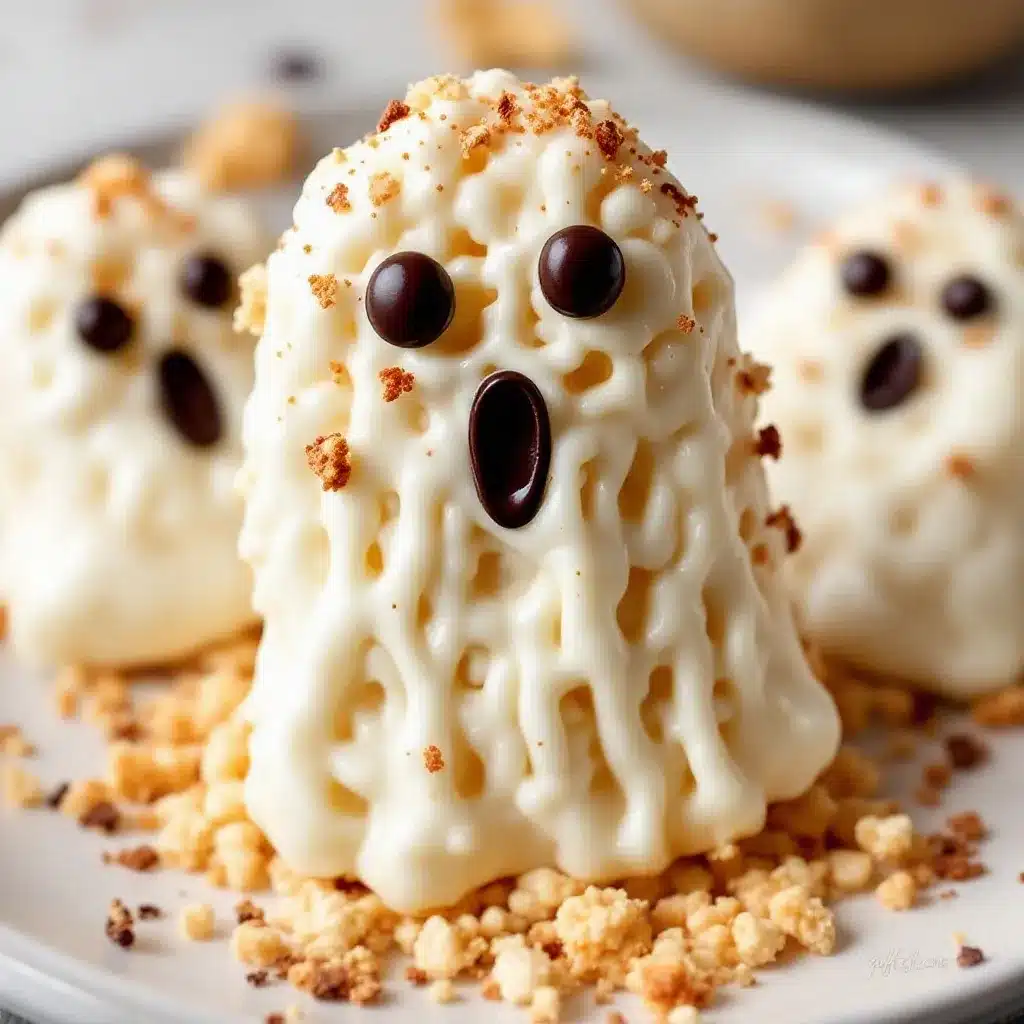
- Melt the Marshmallow Mixture: Start by combining the three tablespoons of unsalted butter and the one bag of mini marshmallows in your large microwave-safe bowl. Microwave on high for one minute. Remove the bowl and stir vigorously. The mixture will look clumpy and incomplete. Microwave for another 30 seconds and stir again. Repeat in 15-second intervals, stirring after each, until the mixture is smooth and glossy. This should take about 2 to 3 minutes total. Be careful not to overheat, or the marshmallows will become tough and chewy rather than smooth. (Time: 3 minutes)
- Combine with Cereal: Immediately add the six cups of Rice Krispies cereal to the melted marshmallow mixture. Use your silicone spatula to fold the cereal into the marshmallows. You want every piece of cereal to be coated. This might take a minute or two of folding. If the mixture is too sticky to handle, you can use wet hands to press it together, but try to stick to the spatula for the best consistency. (Time: 2 minutes)
- Shape the Ghosts: Take a large spoonful of the mixture (about 1/4 cup) and place it on your prepared baking sheet. Use your spatula or wet hands to shape it into a rough dome or ghost shape. It does not need to be perfect, but try to make it wider at the bottom and narrower at the top. Insert a lollipop stick into the base of each ghost, pressing it in firmly so it stays upright. You should get about 10 to 12 pops depending on the size. (Time: 5 minutes)
- Melt the White Chocolate: Divide the two cups of white chocolate chips into two small microwave-safe mugs. Microwave one mug in 30-second intervals, stirring between each, until smooth. This is your base white chocolate. Microwave the second mug in 30-second intervals until smooth. This is your base for coloring. (Time: 3 minutes)
- Color the Chocolate: Add a few drops of orange gel food coloring to one mug of melted white chocolate and stir until fully incorporated. Add a few drops of black gel food coloring to the other mug and stir. You want vibrant colors, so add more gel if needed. The chocolate should be thin enough to dip but not so thin that it runs off immediately. If it is too thick, add a tiny drop of vegetable oil to thin it out. (Time: 2 minutes)
- Dip the Ghosts: Hold a ghost pop by the stick and dip it into the white chocolate. If you want orange ghosts, dip them in the orange chocolate. If you want white ghosts, dip them in the plain white chocolate. Lift it out and let the excess drip off for a few seconds. Place it back on the baking sheet. You can also dip them halfway for a “dripping” effect if you prefer. (Time: 5 minutes)
- Add Details: While the chocolate is still wet, use tweezers to place the mini candy eyes on the ghost. For the mouth, you can use a toothpick dipped in black food coloring or a small black candy dot. If you are using the orange chocolate, you might want to add black details to the orange ghost to make it look like a jack-o’-lantern ghost. Place the decorated pops back on the sheet. (Time: 5 minutes)
- Set the Pops: Allow the pops to set at room temperature for about 15 to 20 minutes. You can place them in the refrigerator to speed up the process, but be aware that condensation can form if you take them out too quickly. Once the chocolate is hard to the touch, they are ready to eat or store. (Time: 20 minutes)
Cooking Tips & Techniques
One of the biggest mistakes people make with Rice Krispie treats is over-stirring the marshmallow mixture. Once you add the cereal, stop stirring as soon as it is coated. Over-mixing can break down the cereal and make the final product dense and hard. You want that airy, crispy texture.
Another tip is to keep your workspace clean. Marshmallow residue is a nightmare to clean up once it dries. Line your counter with parchment paper or a silicone mat before you start. This way, you can just lift the paper and throw it away when you are done. It saves you from scrubbing countertops for hours.
When dipping the ghosts, work quickly. White chocolate sets fast, especially if your kitchen is cool. If the chocolate starts to thicken while you are dipping, microwave it for 5 seconds to thin it out again. Do not add extra chips to the melting chocolate, as this will change the consistency and make it grainy.
If you are making these for a party, consider making them the day before. This gives the chocolate time to fully set and harden, making them easier to handle and transport. They also taste better the next day as the flavors have had time to meld together.
Variations & Adaptations
While the classic white ghost is the most popular, there are many ways to customize these treats. Here are a few ideas to try.
- Pumpkin Ghosts: Use orange gel food coloring for the entire marshmallow mixture before shaping. Then, dip them in white chocolate and add black details to make them look like pumpkins. This is a fun twist for those who want more color.
- Gluten-Free Option: Use certified gluten-free crispy rice cereal. Make sure your marshmallows and white chocolate are also certified gluten-free, as some brands may have cross-contamination warnings. The taste and texture will be very similar to the original.
- Dairy-Free Version: Use dairy-free butter and dairy-free white chocolate chips. There are many excellent dairy-free chocolate brands available now that melt well and taste great. This makes the treats suitable for those with dairy allergies or lactose intolerance.
- Low-Sugar Option: Use sugar-free marshmallows and sugar-free white chocolate chips. Note that the texture may be slightly different, as sugar-free marshmallows can be less sticky. You may need to press the mixture more firmly to ensure it holds together.
I once tried making these with colored cereal, and it was a disaster. The colors bled into the white chocolate and made a muddy mess. Stick to the classic white or orange/black theme for the best visual impact.
Serving & Storage Suggestions
These ghost pops are best served at room temperature. If you store them in the refrigerator, let them come to room temperature before serving to avoid condensation and a soggy coating. They are perfect for Halloween parties, school trick-or-treat exchanges, or as a spooky dessert after dinner.
To store them, place them in an airtight container at room temperature. They will keep for up to one week. If you live in a hot or humid climate, store them in the refrigerator, but be sure to let them come to room temperature before serving to prevent sweating. Do not freeze them, as the texture of the marshmallow can become chewy and unpleasant after freezing and thawing.
For presentation, arrange the ghost pops in a clear glass vase or a black bucket for a spooky display. You can also wrap them in cellophane bags and tie them with black ribbon for a cute gift idea. They are a great way to share the Halloween spirit with neighbors or friends.
Nutritional Information & Benefits
While these treats are definitely on the indulgent side, they are a fun way to enjoy a classic dessert. Each ghost pop contains approximately 150-200 calories, depending on the size and the amount of chocolate used. The primary sources of calories are the sugar in the marshmallows and white chocolate, and the carbohydrates from the rice cereal.
They are not particularly high in protein or fiber, so they are best enjoyed as an occasional treat rather than a daily snack. However, they do provide a quick burst of energy, which can be helpful for active kids or anyone needing a pick-me-up during the busy Halloween season.
For those with dietary restrictions, remember to check the labels of your ingredients. Some marshmallows contain gelatin, which is not vegetarian. If you are looking for a healthier alternative, consider using less white chocolate or opting for dark chocolate, which has less sugar and more antioxidants.
Conclusion
Making Easy Halloween Rice Krispie Ghost Pops is a simple, fun, and rewarding activity that brings a little bit of magic to your kitchen. It is a recipe that requires minimal effort but delivers maximum impact, making it perfect for busy parents and hobby cooks alike. The combination of crispy cereal, chewy marshmallow, and sweet white chocolate is a classic that never fails to please.
I encourage you to try this recipe and make it your own. Experiment with different colors, decorations, and shapes to create a batch that is uniquely yours. Whether you stick to the traditional white ghosts or go wild with orange and black designs, the result will be a delicious treat that is sure to be a hit at any Halloween gathering.
So, grab your spatula and let’s get spooky. I would love to see your creations! Share your photos and stories in the comments below, and let me know how your ghost pops turned out. Happy Halloween, and happy cooking!
FAQs
Can I use large marshmallows instead of mini marshmallows?
It is not recommended. Mini marshmallows melt more evenly and quickly, resulting in a smoother mixture. Large marshmallows can leave hard centers and take longer to melt, which can lead to overcooked butter or uneven texture.
How do I prevent the white chocolate from seizing?
Seizing usually happens when water gets into the chocolate. Make sure your bowls and utensils are completely dry. Also, melt the chocolate in short intervals (15-30 seconds) and stir frequently to ensure even heating without overheating.
Can I make these treats ahead of time?
Yes, you can make them up to a week in advance. Store them in an airtight container at room temperature. If you live in a hot climate, store them in the refrigerator, but bring them to room temperature before serving to prevent condensation.
What if I don’t have gel food coloring?
You can use paste food coloring, but avoid liquid food coloring as it can thin out the chocolate and cause it to seize. If you only have liquid coloring, use a very small amount and be prepared for a thinner coating.
Can I use this recipe for other holidays?
Absolutely! You can change the colors and decorations to fit any holiday. Use green and black for St. Patrick’s Day, red and green for Christmas, or orange and black for Halloween. The base recipe is very versatile.
Pin This Recipe!
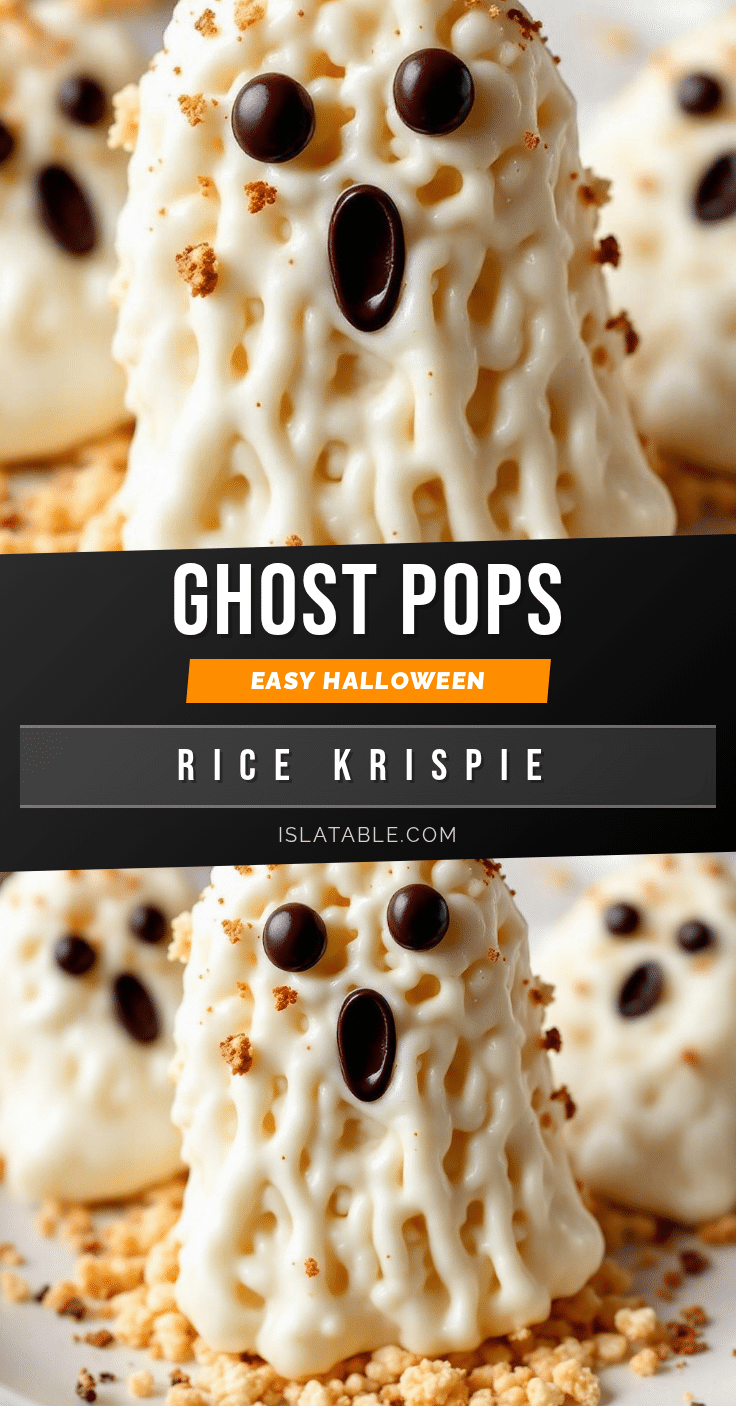
Easy Halloween Rice Krispie Ghost Pops: 5-Minute Treats
These spooky yet simple Rice Krispie Ghost Pops are a quick, no-bake Halloween treat that combines crispy cereal, chewy marshmallows, and a sweet white chocolate coating. Perfect for parties or last-minute snacks, they are easy to make and fun to decorate.
- Prep Time: 10 minutes
- Cook Time: 5 minutes
- Total Time: 35 minutes
- Yield: 10-12 servings 1x
- Category: Dessert
- Cuisine: American
Ingredients
- 6 cups original Rice Krispies cereal
- 10-ounce bag mini marshmallows
- 3 tablespoons unsalted butter
- 2 cups white chocolate chips
- Orange gel food coloring
- Black gel food coloring
- Mini candy eyes
- Small black dots or edible markers for mouths
- Wooden or plastic lollipop sticks
Instructions
- Combine butter and mini marshmallows in a large microwave-safe bowl. Microwave on high for 1 minute, stir, then continue in 15-30 second intervals, stirring after each, until smooth and glossy (approx. 2-3 minutes total).
- Immediately add Rice Krispies cereal to the melted marshmallow mixture. Fold with a silicone spatula until every piece is coated.
- Take about 1/4 cup of the mixture and shape it into a rough dome or ghost shape on a parchment-lined baking sheet. Insert a lollipop stick into the base firmly.
- Divide white chocolate chips into two small microwave-safe mugs. Microwave in 30-second intervals, stirring until smooth.
- Add orange gel food coloring to one mug and black gel food coloring to the other, stirring until fully incorporated. Thin with a drop of vegetable oil if necessary.
- Dip each ghost pop into the white or colored chocolate, letting excess drip off before placing back on the baking sheet.
- While the chocolate is wet, use tweezers to place mini candy eyes and add mouth details with black dots or markers.
- Allow the pops to set at room temperature for 15-20 minutes until the chocolate is hard.
Notes
Use mini marshmallows for even melting. Gel food coloring is essential to prevent seizing the white chocolate. Do not over-stir the cereal mixture to maintain a crispy texture. Store in an airtight container at room temperature for up to one week. Avoid freezing as it alters the marshmallow texture.
Nutrition
- Serving Size: 1 ghost pop
- Calories: 175
- Sugar: 18
- Sodium: 120
- Fat: 8
- Saturated Fat: 5
- Carbohydrates: 24
- Protein: 2
Keywords: Halloween, Rice Krispie Treats, No-Bake, Kids Snacks, Ghost Pops, White Chocolate, Easy Dessert, Party Food


