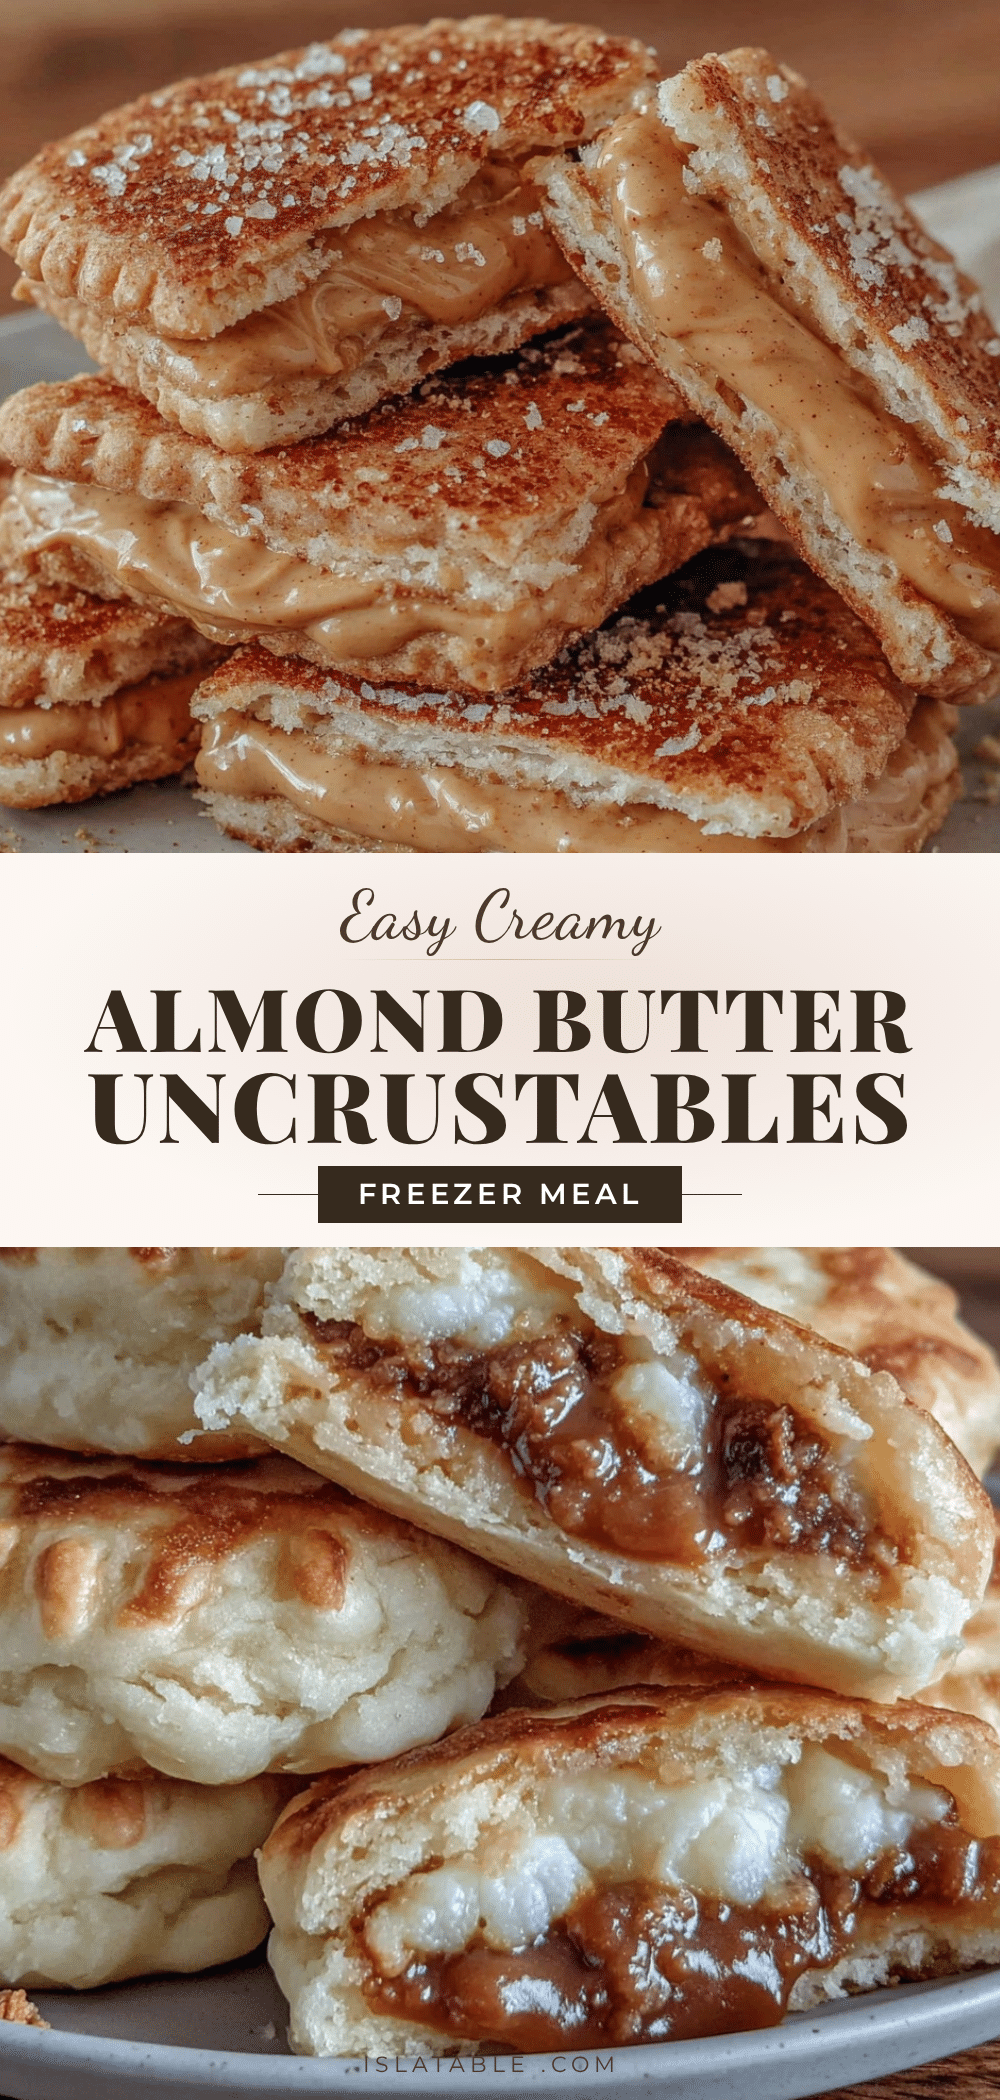
That soft, slightly sticky texture of almond butter spreading slowly onto pillowy bread — the kind that lingers on your fingertips before you even take a bite — still takes me straight back to quiet Saturday mornings in my small kitchen. It’s a memory stitched with the hum of the toaster, the faint rustle of wax paper, and the gentle warmth of sunlight filtering through the window. Somehow, the idea of making Easy Creamy Almond Butter DIY Uncrustables came from a restless afternoon when I wanted a fuss-free lunch that felt both nostalgic and a little bit special.
I remember the first time I tried to replicate those perfectly sealed, crustless sandwiches from the store. The tricky part was getting the almond butter just creamy enough to spread smoothly without tearing the bread, and sealing the edges so that nothing oozed out during lunch. It took a little practice (and a couple of crumbs on the counter), but eventually, I landed on a process that worked every time. Since then, these homemade uncrustables have become my go-to for packed lunches and quick snacks — especially when I want something a little more wholesome and homemade than the usual peanut butter sandwich.
There’s something quietly satisfying about biting into one of these sandwiches, knowing you made it yourself. No mystery ingredients or weird preservatives, just simple, creamy almond butter hugged by soft bread with no crust in sight. If you’re looking for a lunchbox hero that’s easy, tasty, and a bit nostalgic, this recipe might just become your new favorite, too.
Why You’ll Love This Recipe
Honestly, this Easy Creamy Almond Butter DIY Uncrustables recipe is a little gem for anyone who loves simple, no-fuss lunches that don’t compromise on flavor or texture. Over the years, I’ve tweaked and tested this recipe to nail the perfect balance of creaminess and ease, and here’s why it stands out:
- Quick & Easy: Whip these sandwiches up in about 15 minutes — perfect for busy mornings or prepping ahead for the week.
- Simple Ingredients: You likely have everything in your pantry already — no need for fancy or hard-to-find items.
- Perfect for Lunchboxes: Great for school lunches, office snacks, or a quick bite on the go without mess or fuss.
- Crowd-Pleaser: Kids, adults, and even picky eaters seem to love the smooth almond butter filling and crustless bread.
- Unbelievably Delicious: The creamy almond butter, lightly sweetened and sandwiched in soft bread, is a comforting combo that feels special yet familiar.
This recipe isn’t just another almond butter sandwich—it’s a little culinary hack to get that perfect, sealed pocket of creamy goodness. I’ve found that using a gentle pressing technique and just the right bread makes all the difference. It’s the kind of lunch that makes you pause and smile after the first bite, the kind that’s both comforting and a little fun to eat. Plus, it’s a great alternative if you want to avoid the usual peanut butter or jam options. If you’re into easy homemade recipes like these, you might also enjoy the easy gluten-free cornbread muffins or the healthy keto coleslaw recipe with creamy sugar-free dressing that pair beautifully for a balanced lunch.
What Ingredients You Will Need
This recipe uses simple, wholesome ingredients to deliver that perfect creamy almond butter filling and soft, crustless bread exterior without any fuss. Most are pantry staples or easy to find, and you can swap a few things out depending on what you have on hand.
- Almond Butter: Creamy style works best for easy spreading. I usually pick a trusted brand like Justin’s or Barney Butter for smooth texture and rich flavor.
- Honey or Maple Syrup: Just a teaspoon or two to add a touch of sweetness that balances the almond butter nicely (optional but highly recommended).
- Soft White Bread: Use sandwich bread with a tender crumb and thin crusts. For best results, choose fresh bread or slightly stale bread that’s easy to work with.
- Butter or Margarine: A small amount to lightly spread on the bread before adding almond butter helps the bread seal and prevents sogginess (optional).
- Wax Paper or Parchment Paper: For wrapping the finished uncrustables to keep them fresh and mess-free.
If you want to tweak the recipe, almond butter can be swapped with peanut butter or sunflower seed butter for allergy-friendly choices. Using gluten-free bread or sandwich thins works well, too, if you prefer a gluten-free or lighter option. For a little extra fun, try stirring in a pinch of cinnamon or a few mini chocolate chips into the almond butter for a sweet twist. In summer, fresh sliced strawberries or bananas inside make a delightful seasonal variation.
Equipment Needed
You don’t need much to make these Easy Creamy Almond Butter DIY Uncrustables, but a few basic kitchen tools make the process smooth:
- Bread Knife: For trimming crusts neatly, if your bread isn’t pre-sliced crustless.
- Spoon or Butter Knife: To spread almond butter evenly and honey or syrup if using.
- Round Cookie Cutter or Sandwich Press: A 3.5 to 4-inch diameter cutter is ideal for shaping sandwiches. If you don’t have one, a small bowl or cup with a sharp edge works in a pinch.
- Wax or Parchment Paper: For wrapping and storing your uncrustables.
I’ve found that investing in a quality sandwich cutter pays off since it seals the edges well, keeping the filling snug inside. If you’re on a budget, just a simple round cutter or even cutting squares and pressing edges with a fork can work. Cleaning the tools right after use prevents almond butter residue buildup—trust me, it’s easier than scrubbing dried sticky spots later!
Preparation Method

- Prepare the Bread: Remove the crusts from your slices of bread using a bread knife or by hand. Lay them flat on your workspace. (About 5 minutes)
- Mix the Filling: In a small bowl, combine 1 cup (240 ml) of creamy almond butter with 1 to 2 teaspoons (5-10 ml) of honey or maple syrup. Stir until smooth and evenly blended. (2 minutes)
- Optional Butter Layer: Lightly spread softened butter or margarine on one side of each bread slice. This helps seal the sandwich and prevents sogginess. (3 minutes)
- Spread Almond Butter: Evenly spread about 2 tablespoons (30 g) of the almond butter mixture on the unbuttered side of half the bread slices. Be careful to leave about a ½-inch (1.25 cm) border around the edges to help with sealing. (5 minutes)
- Seal the Sandwich: Place the remaining bread slices, buttered side down, on top of the almond butter-spread slices. Press gently to adhere. Use a round cookie cutter or sandwich press to cut out your uncrustables, pressing firmly to seal the edges. (5 minutes)
- Wrap and Store: Wrap each sandwich in wax or parchment paper. Store in an airtight container or zip-top bag. These keep well in the fridge for up to 3 days or can be frozen for longer storage. (2 minutes)
Some tips: If your bread feels too dry, a quick spritz of water on the crust edges before pressing helps create a better seal. Avoid overfilling with almond butter to prevent leaks, and press firmly but gently to keep the bread intact. When freezing, thaw in the fridge or at room temperature before eating for the best texture.
Cooking Tips & Techniques
Making perfect homemade uncrustables might seem straightforward, but a few key tricks make all the difference. Here’s what I’ve learned from trial and error over many lunches:
- Choose the Right Bread: Soft, fresh white bread works best. Avoid dense or artisanal breads with tough crusts—they don’t seal as well.
- Spread Evenly: Make sure almond butter is smooth and spread evenly without thick globs. If it’s too thick, warm it slightly to loosen.
- Seal Smart: Press edges firmly with a cookie cutter or sandwich press to avoid filling leaks. Moistening bread edges slightly can improve sealing.
- Don’t Overfill: Too much filling makes sealing tricky and messier. Stick to about 2 tablespoons per sandwich.
- Freeze for Best Texture: Freezing helps the sandwiches hold their shape and makes them easier to pack for lunches.
One mistake I made early on was rushing the pressing step, which led to filling oozing out and sad, crumbly sandwiches. Also, spreading almond butter straight from the fridge can tear the bread, so warming it up a bit helps. Multitasking by prepping several sandwiches at once saves time, and wrapping them individually keeps everything neat in the lunchbox. For consistency, I always use the same brand of bread and almond butter—it’s a little quirk, but it works for me!
Variations & Adaptations
This recipe is super adaptable, so you can mix it up depending on dietary needs, flavor preferences, or what’s in season:
- Nut-Free Version: Swap almond butter for sunflower seed butter or soy nut butter to avoid nuts entirely.
- Fruit Filling: Add a thin layer of your favorite jam or sliced fresh fruit like bananas or strawberries inside the sandwich for a fruity twist.
- Gluten-Free Option: Use gluten-free sandwich bread or wraps to make this recipe safe for gluten-sensitive eaters.
- Sweet & Spicy: Mix a pinch of cinnamon or cayenne pepper into the almond butter for a subtle kick.
- Vegan Adaptation: Skip the butter spread or use a plant-based alternative to seal the bread edges.
Personally, I love adding a sprinkle of chia seeds inside for a little crunch and nutrition boost. When summer rolls around, swapping in fresh berries instead of syrup creates a fresher, lighter flavor. If you want a warm version, try gently toasting the sealed sandwiches in a pan for a crispy, melty treat (just like grilled cheese but with almond butter!).
Serving & Storage Suggestions
These Easy Creamy Almond Butter DIY Uncrustables shine best when served chilled or at room temperature. They’re perfect for lunchboxes and picnics and travel well without fuss.
- Serving: Unwrap and serve as is, or pair with crunchy carrot sticks, apple slices, or a small cup of yogurt for a balanced meal.
- Storage: Store wrapped sandwiches in an airtight container in the refrigerator for up to 3 days. For longer storage, freeze them individually wrapped for up to 2 months.
- Reheating: Thaw frozen sandwiches in the fridge overnight or at room temperature for about an hour before eating. If you like, warm briefly in a toaster oven for a cozy treat.
- Flavor Development: Almond butter filling holds up nicely over time without sogginess, but fresh bread always tastes best. Freezing helps preserve texture and flavor.
Pair these sandwiches with a refreshing drink like homemade sugar-free lemonade or a creamy smoothie for a complete lunch experience. They’re also a hit at potlucks or casual gatherings where easy, handheld snacks are welcome.
Nutritional Information & Benefits
Each Easy Creamy Almond Butter DIY Uncrustables sandwich contains approximately 250-300 calories, depending on bread and almond butter brands. They provide a good source of healthy fats, protein, and fiber, making them more satisfying than your average sandwich. Almond butter is rich in vitamin E, magnesium, and antioxidants, supporting heart health and sustained energy.
This recipe can be made gluten-free and dairy-free with simple swaps, making it accessible to various dietary needs. Just watch for added sugars if you’re managing blood sugar levels. Personally, I appreciate how this sandwich combines wholesome ingredients without excess additives, fitting well into a balanced, mindful eating routine.
Conclusion
Easy Creamy Almond Butter DIY Uncrustables are a small but satisfying way to make your lunches a little more thoughtful and homemade without extra hassle. Their soft texture, subtle sweetness, and mess-free design make them perfect for busy days and on-the-go meals. I love this recipe because it brings back that simple joy of childhood snacks but with a grown-up twist that I can feel good about.
Feel free to customize the filling, bread, and add-ins to fit your taste and lifestyle. I’d love to hear how you make these your own, so drop a comment below if you try them! Whether you’re packing for school, work, or just craving a quick snack, these uncrustables have got you covered with comfort and ease.
FAQs
Can I use crunchy almond butter instead of creamy?
You can, but crunchy almond butter might tear the bread and make sealing trickier. If you prefer crunchy, try smoothing it a bit or mixing with a little honey for easier spreading.
What’s the best bread to use for DIY uncrustables?
Soft white sandwich bread with thin crusts works best. Avoid thick, dense, or artisanal breads as they don’t seal well and can be harder to cut.
How long can I store these sandwiches in the freezer?
Wrapped tightly, they last up to 2 months frozen. Thaw in the fridge overnight or at room temperature before serving.
Can I add jam or jelly inside the sandwiches?
Absolutely! A thin layer of jam or jelly pairs wonderfully with almond butter. Just be mindful of extra moisture that can affect sealing.
Are these sandwiches suitable for school lunches?
Yes, they’re perfect for school lunches since they’re mess-free, easy to eat, and store well. Wrapping each sandwich individually helps keep things tidy.
Pin This Recipe!
Easy Creamy Almond Butter DIY Uncrustables Recipe for Perfect Lunches
A simple, no-fuss recipe for homemade creamy almond butter uncrustables that are perfect for lunchboxes, quick snacks, and nostalgic comfort food.
- Prep Time: 15 minutes
- Cook Time: 0 minutes
- Total Time: 15 minutes
- Yield: 6 sandwiches 1x
- Category: Lunch, Snack
- Cuisine: American
Ingredients
- 1 cup creamy almond butter
- 1 to 2 teaspoons honey or maple syrup (optional)
- Soft white sandwich bread, crusts removed
- Butter or margarine, softened (optional)
- Wax paper or parchment paper for wrapping
Instructions
- Remove the crusts from your slices of bread using a bread knife or by hand. Lay them flat on your workspace. (About 5 minutes)
- In a small bowl, combine 1 cup (240 ml) of creamy almond butter with 1 to 2 teaspoons (5-10 ml) of honey or maple syrup. Stir until smooth and evenly blended. (2 minutes)
- Lightly spread softened butter or margarine on one side of each bread slice. This helps seal the sandwich and prevents sogginess. (3 minutes)
- Evenly spread about 2 tablespoons (30 g) of the almond butter mixture on the unbuttered side of half the bread slices. Leave about a ½-inch (1.25 cm) border around the edges to help with sealing. (5 minutes)
- Place the remaining bread slices, buttered side down, on top of the almond butter-spread slices. Press gently to adhere. Use a round cookie cutter or sandwich press to cut out your uncrustables, pressing firmly to seal the edges. (5 minutes)
- Wrap each sandwich in wax or parchment paper. Store in an airtight container or zip-top bag. Keep in the fridge for up to 3 days or freeze for longer storage. (2 minutes)
Notes
If bread feels too dry, spritz edges with water before pressing to improve sealing. Avoid overfilling with almond butter to prevent leaks. Warming almond butter slightly helps spreading and prevents tearing bread. Freezing sandwiches helps maintain shape and texture. Variations include using sunflower seed butter for nut-free, adding jam or fresh fruit for flavor, or using gluten-free bread.
Nutrition
- Serving Size: 1 sandwich
- Calories: 275
- Sugar: 5
- Sodium: 150
- Fat: 18
- Saturated Fat: 2
- Carbohydrates: 22
- Fiber: 4
- Protein: 7
Keywords: almond butter, uncrustables, DIY sandwiches, lunchbox, creamy almond butter, easy snack, homemade sandwich


