Third time this week I’ve found myself standing at the stove, flipping tiny tortilla triangles in a hot pan, and honestly, I’m not mad about it. The first time was a desperate Tuesday morning—10 minutes before the bus, a half-empty block of cheddar, and a kid who suddenly decided sandwiches were “boring.” I folded, pressed, sliced, and tossed them into a lunchbox without a second thought. The second time was intentional, with a little more butter and a little less panic. By the third round, I was taking notes. There’s something about these crispy little dippers that hits a different nerve—not just for the kid, but for me, too.
They’re not fancy. They’re not complicated. But watching that lunchbox come back empty—not a single crumb left—feels like a small victory. And if you’ve ever packed a lunch that came home uneaten, you know exactly what I mean. These Easy Cheese Quesadilla Dippers for Kids’ Lunchboxes are the kind of thing you make once, forget about, and then remember with relief when you’re in a pinch again.
Honestly, I think the real magic is in the dipping. Something about the sauce—or even just a little cup of salsa—makes these feel like a treat, not just a lunch. And that’s the trick, isn’t it? Making something that feels fun but still fills them up without a fight.
Why You’ll Love This Recipe
Let’s be real—getting a lunchbox right is a whole parenting skill. These Easy Cheese Quesadilla Dippers for Kids’ Lunchboxes aren’t just another idea; they’re a tested, mom-approved solution that actually works.
- Quick & Easy: From fridge to lunchbox in under 10 minutes. Seriously. You can make these while your coffee brews.
- Simple Ingredients: You probably already have tortillas and cheese in your kitchen. No fancy trips to the store required.
- Perfect for Busy Mornings: These are a lifesaver when you’re running late and need something fast that isn’t a granola bar again.
- Crowd-Pleaser: Picky eaters actually eat these. I’ve tested this on my own kids and their friends—they disappear.
- Unbelievably Delicious: The crispy outside, the gooey cheese inside—it’s the kind of simple comfort food that makes everyone happy.
What makes these different from just a regular quesadilla? It’s the dipper shape. Kids love anything they can pick up and dunk. It turns lunch into an activity, not a chore. And honestly, it makes packing feel less like a grind and more like a win. If you’re looking for more easy lunch ideas that actually get eaten, you might also love these nut-free protein balls for a quick snack boost.
This isn’t just a recipe—it’s a little peace of mind. Knowing you’ve packed something they’ll actually eat, something that’s not too messy, and something that comes together without stress? That’s worth more than a few minutes of prep time.
What Ingredients You Will Need
This recipe uses simple, everyday ingredients that come together to create something way more than the sum of their parts. No weird stuff here—just pantry basics that work.
- Flour tortillas (8-inch) – I prefer Mission or Guerrero brand for flexibility. They fold without cracking. You can use corn tortillas for a gluten-free option, but they’re a little smaller and stiffer.
- Shredded cheddar cheese (1 cup) – Sharp cheddar gives the best flavor, but mild works too. Pre-shredded is fine in a pinch, but freshly shredded melts smoother. Look for block cheese and grate it yourself for that extra creamy texture.
- Mozzarella cheese (½ cup) – Adds that stretchy, gooey pull kids love. Part-skim works great.
- Butter (2 tablespoons, softened) – Unsalted is best so you control the salt. Spread it thin on the outside of the tortillas for that golden, crispy finish.
- Salsa (for dipping) – Use mild or medium based on your kid’s tolerance. I like Pace or a homemade version when I have time.
- Sour cream (optional, for dipping) – Adds a cool, creamy contrast. Greek yogurt works as a swap if you want extra protein.
- Optional add-ins: – A sprinkle of garlic powder, a pinch of cumin, or even some finely chopped spinach (they won’t notice) can boost flavor and nutrition.
For a dairy-free version, use vegan cheddar shreds and a plant-based butter. The texture won’t be exactly the same, but it still gets crispy and satisfying. If you’re feeling adventurous, try adding some cooked black beans or shredded chicken for extra staying power—perfect for older kids who need more fuel.
Equipment Needed
You don’t need a fancy kitchen to make these Easy Cheese Quesadilla Dippers for Kids’ Lunchboxes. Just a few basics you probably already own.
- Non-stick skillet or griddle – An 8-inch or 10-inch pan works best. I’ve used a cast iron too, but it needs a little more butter to prevent sticking.
- Spatula – A thin, flexible spatula makes flipping these dippers easy without breaking them.
- Sharp knife or pizza cutter – For slicing the quesadilla into dipper strips. A pizza cutter is quicker and gives cleaner edges.
- Cutting board – Any standard board works. I prefer wood because it’s gentle on knives.
- Small bowl for dipping sauce – A little ramekin or silicone cup fits perfectly in a lunchbox.
- Lunchbox container – A bento-style box or a small thermos keeps the dippers warm and separate from the sauce.
If you don’t have a non-stick skillet, a well-seasoned cast iron pan works with a little extra butter. Just watch the heat—cast iron retains heat longer, so medium-low is your friend. Budget tip: a basic non-stick pan from a discount store does the job perfectly. You don’t need to spend big for good results.
Preparation Method

Let’s make these dippers. I’ll walk you through every step so you get perfect results even on a rushed morning.
- Prep your ingredients. Grate your cheese if you’re using block cheese. I like to mix the cheddar and mozzarella together in a small bowl. Soften your butter slightly so it spreads easily—microwave it for 5 seconds if needed, but don’t melt it.
- Assemble the quesadilla. Lay one tortilla flat on a cutting board. Sprinkle about ½ cup of the cheese mixture evenly over half of the tortilla, leaving a small border around the edge. Fold the other half over to create a half-moon shape. Press down gently to help it stick.
- Butter the outside. Spread a thin layer of softened butter on the top side of the folded tortilla. Don’t skip this—it’s what gives you that golden, crispy crust. Flip it over and butter the other side too.
- Heat the pan. Place your non-stick skillet over medium heat. Let it warm up for about 30 seconds. You want it hot but not smoking—if it sizzles when you add the tortilla, you’re good.
- Cook the quesadilla. Place the buttered quesadilla in the pan. Cook for 2-3 minutes on the first side, until golden brown and crispy. Use your spatula to peek underneath—if it’s not brown yet, give it another 30 seconds. Flip carefully and cook the other side for another 2 minutes. The cheese should be fully melted and oozing a little at the edges.
- Let it rest. Transfer the cooked quesadilla to a cutting board. Let it sit for 1-2 minutes. This step is important—if you cut it too soon, the cheese will spill out everywhere and you’ll lose that perfect dipper shape.
- Slice into dippers. Using a pizza cutter or sharp knife, cut the quesadilla into 4-6 strips, depending on how big you want them. I usually go for about 1-inch wide strips—perfect for little hands to grab and dip.
- Pack for lunch. Let the dippers cool slightly before packing. Place them in a lunchbox container with a small cup of salsa or sour cream on the side. If you’re packing them warm, use a thermos to keep them from getting soggy.
Pro tip: If you’re making multiple quesadillas, keep the cooked ones warm in a 200°F oven on a baking sheet while you finish the rest. This keeps them crispy until lunchtime.
Cooking Tips & Techniques
After making these Easy Cheese Quesadilla Dippers for Kids’ Lunchboxes more times than I can count, I’ve learned a few tricks that make a real difference.
Don’t overload the cheese. I know it’s tempting, but too much cheese makes the quesadilla hard to flip and can cause it to burst open. Stick to about ½ cup total per tortilla—enough to be gooey but not messy.
Medium heat is your friend. High heat burns the outside before the cheese melts. Low heat makes them soggy. Medium heat gives you that perfect golden crust with fully melted cheese inside. Trust the process.
Let them rest before cutting. This was a hard lesson for me. I used to cut them immediately and ended up with a cheesy mess on the cutting board. Waiting 2 minutes lets the cheese set just enough to hold its shape when sliced.
Make ahead and reheat. You can cook these the night before and reheat them in a dry skillet for 30 seconds per side in the morning. They won’t be quite as crispy as fresh, but they’re still delicious. Avoid the microwave—it makes them rubbery.
Keep them warm in a thermos. If your kid likes warm lunches, pack the dippers in a pre-warmed thermos. Pour hot water in, let it sit for 5 minutes, dump it out, then add the dippers. They stay warm until lunchtime without getting soggy.
I once forgot to butter the outside of a quesadilla and ended up with a pale, sad-looking dipper. Never again. That butter is non-negotiable for that golden, crispy finish you see in pictures.
Variations & Adaptations
These Easy Cheese Quesadilla Dippers for Kids’ Lunchboxes are endlessly customizable. Here are a few ways I’ve adapted them for different tastes and needs.
- Protein-Packed Dippers: Add ¼ cup of shredded cooked chicken or black beans to the cheese before folding. My kids love the chicken version—it keeps them full until after school.
- Veggie-Loaded Dippers: Finely chop some spinach, bell peppers, or zucchini and mix them into the cheese. The trick is to chop them really small so they blend in. My daughter didn’t even notice the spinach until I told her.
- Dairy-Free Dippers: Use vegan cheddar shreds and a plant-based butter. I’ve tried Daiya and Follow Your Heart—both melt decently, though the texture is slightly different. Still crispy and good.
- Gluten-Free Dippers: Swap flour tortillas for corn tortillas or gluten-free wraps. Corn tortillas are smaller, so you’ll need to make more. They’re also a little firmer, but still delicious.
- Spicy Dippers: Add a pinch of cayenne or some finely chopped jalapeños to the cheese. This is more for grown-up lunchboxes, but older kids might like the kick.
- Sweet & Savory Dippers: Try a drizzle of honey or a sprinkle of cinnamon sugar on the outside before cooking. It sounds weird, but the combo of salty cheese and sweet crunch is surprisingly good.
My personal favorite variation is the chicken and black bean version—it’s like a mini burrito in dipper form. I often make a double batch and freeze half for busy mornings. If you’re into meal prep, these healthy meal prep salmon bowls are another great option for your own lunches.
Serving & Storage Suggestions
These dippers are best served warm, but they’re still tasty at room temperature—perfect for lunchboxes that sit in a backpack until noon.
Serving temperature: I pack them warm in a thermos when I can. If they cool down, they’re still good, just less crispy. Pair them with a small cup of salsa, sour cream, or even guacamole for dipping. My kids also love them with a side of apple slices or carrot sticks for a balanced lunch.
Complementary dishes: These dippers go great with a simple fruit salad, some cucumber slices, or a handful of grapes. For a heartier lunch, add a fresh keto-friendly cobb salad on the side—though that’s more for you than the kids.
Storage instructions: Store leftover dippers in an airtight container in the refrigerator for up to 3 days. They’ll lose some crispiness but still taste good. To reheat, warm them in a dry skillet over medium heat for 30-60 seconds per side. The microwave works in a pinch, but they’ll be soft, not crispy.
Freezer tips: You can freeze cooked dippers for up to 2 months. Let them cool completely, then layer them between sheets of parchment paper in a freezer-safe bag. To reheat, pop them straight from the freezer into a hot skillet for 2-3 minutes per side. They come out almost as good as fresh.
Flavor development: Honestly, these are best fresh. The cheese gets a little firmer after refrigeration, but they’re still enjoyable. I’ve never noticed the flavor changing much over time—it’s pretty straightforward comfort food.
Nutritional Information & Benefits
Here’s a rough estimate for one serving (about 4-5 dippers with 2 tablespoons of salsa):
- Calories: 280-320
- Protein: 12-15g
- Carbohydrates: 24-28g
- Fat: 16-20g
- Fiber: 2-3g
- Sugar: 2-4g
- Sodium: 450-550mg
Health benefits: Cheese provides calcium and protein, which are essential for growing kids. The tortillas offer carbohydrates for energy—perfect for a school day. If you add chicken or beans, you boost the protein and fiber content, making this a more balanced meal.
Dietary considerations: This recipe can be made gluten-free with corn tortillas and dairy-free with vegan cheese. It’s naturally vegetarian. For a lower-sodium option, use low-sodium cheese and skip the added salt.
Potential allergens: Contains dairy (cheese, butter) and gluten (tortillas). Check your tortilla labels for hidden allergens. The vegan version eliminates dairy but may still contain gluten.
Personal perspective: I’m not one to stress over every gram of nutrition, but I feel good knowing these dippers have real ingredients and actual protein. They’re not health food, but they’re a heck of a lot better than a packaged snack or a fast-food lunch.
Conclusion
These Easy Cheese Quesadilla Dippers for Kids’ Lunchboxes have become a staple in our house for a reason. They’re fast, simple, and—most importantly—they actually get eaten. No more coming home with a full lunchbox and a sad feeling. Just empty containers and happy kids.
I love that this recipe is flexible. You can tweak it based on what’s in your fridge, what your kid likes, or what you have time for. It’s not a rigid thing—it’s a starting point. Add some chicken, swap the cheese, change up the dip. Make it yours.
If you try these, I’d love to hear how they turned out. Did your kids dip them in salsa? Ketchup? Something weird? Drop a comment below or tag me in your lunchbox photos. And if you’ve got your own twist on these dippers, share it—I’m always looking for new ideas. Until next time, happy lunch packing!
Frequently Asked Questions
Can I make these quesadilla dippers ahead of time?
Yes! You can cook them the night before and reheat them in a dry skillet for 30 seconds per side in the morning. They’re also freezer-friendly for up to 2 months.
What’s the best cheese for quesadilla dippers?
Sharp cheddar gives the best flavor, but mozzarella adds that stretchy texture. I recommend a 50/50 mix of both for the perfect balance of taste and melt.
How do I keep the dippers from getting soggy in a lunchbox?
Let them cool slightly before packing, and use a thermos if you want them warm. Keep the dipping sauce in a separate container to prevent sogginess.
Can I use corn tortillas instead of flour?
Absolutely. Corn tortillas are smaller and a bit firmer, but they work great for a gluten-free option. Just adjust the cooking time slightly—they may brown faster.
What dipping sauces go best with these dippers?
Salsa and sour cream are classics. My kids also love them with guacamole, ranch dressing, or even a little ketchup (don’t judge—it works).
Pin This Recipe!
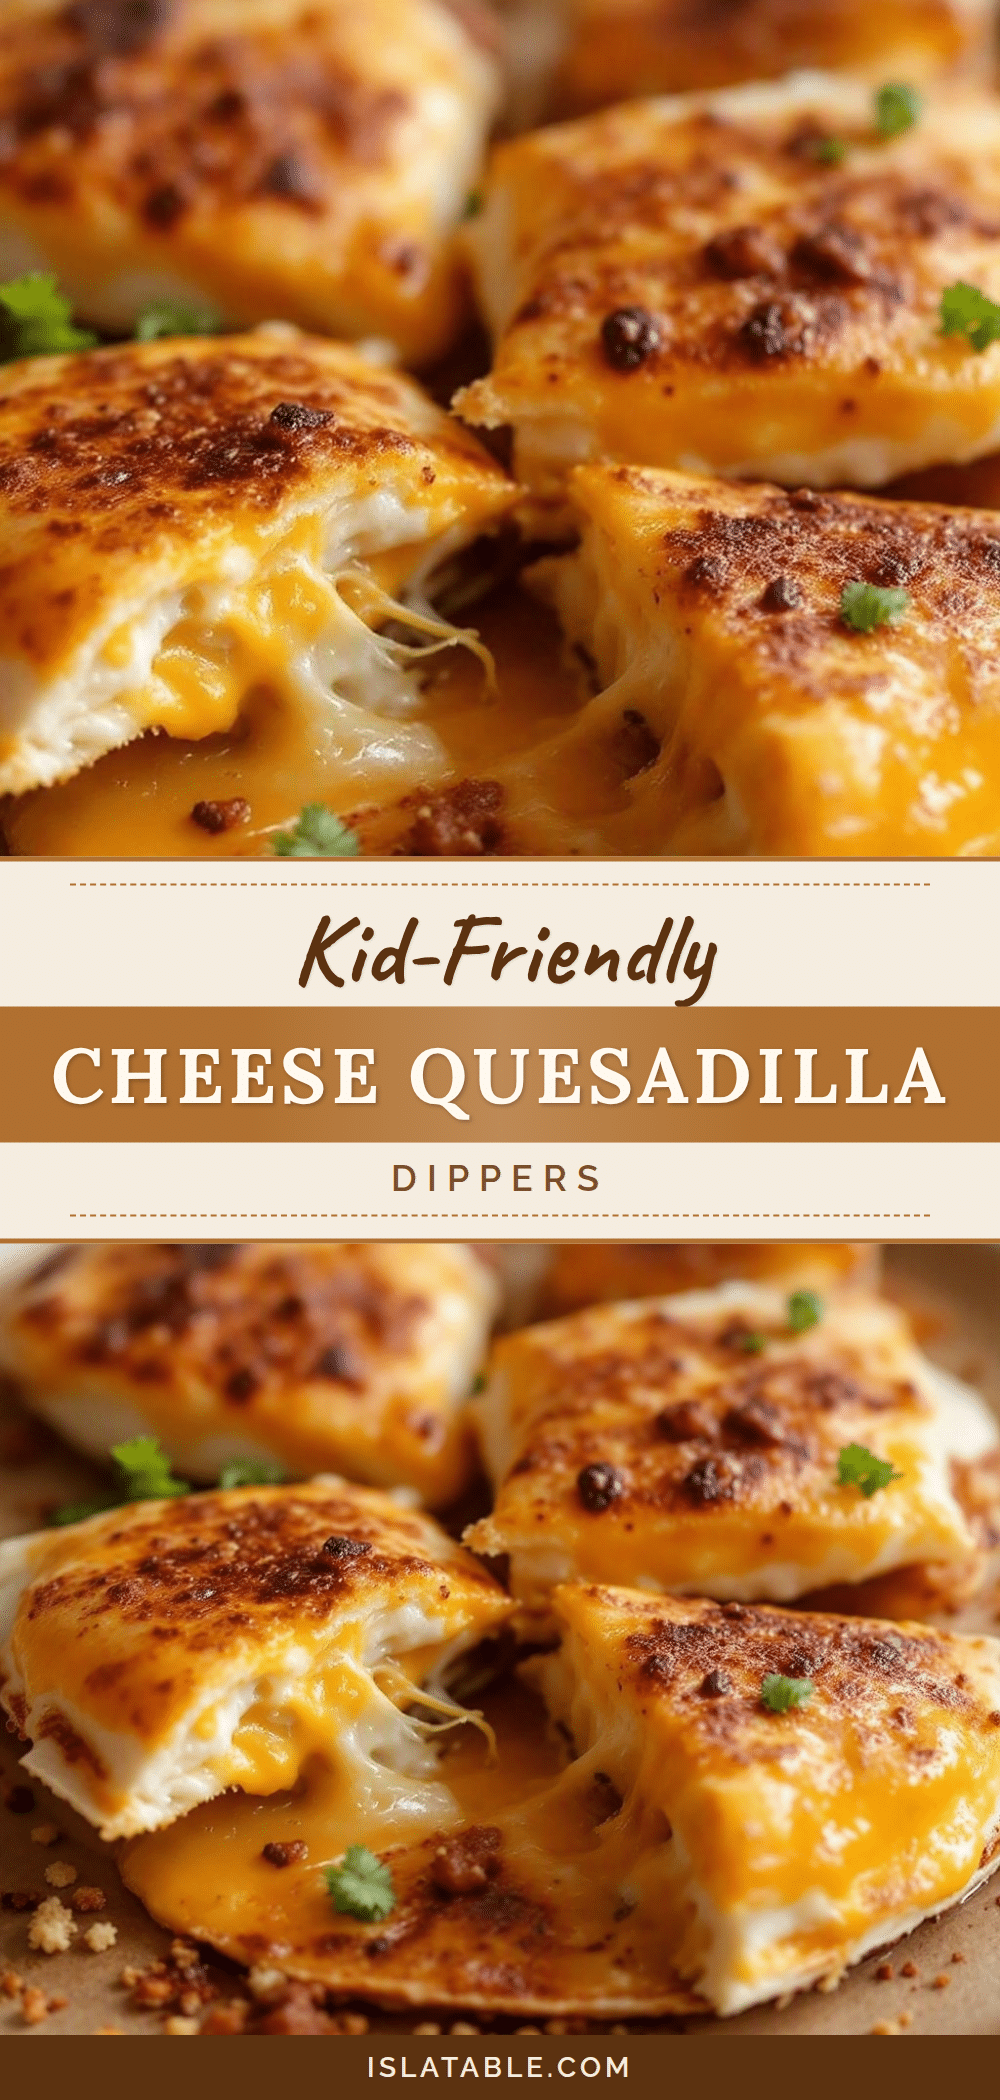
Easy Cheese Quesadilla Dippers: Best Kids Lunchbox Idea

These crispy, cheesy quesadilla dippers are a quick and easy lunchbox solution that kids love. Made with simple ingredients and ready in under 10 minutes, they’re perfect for busy mornings and picky eaters.
- Prep Time: 5 minutes
- Cook Time: 6 minutes
- Total Time: 11 minutes
- Yield: 4 servings 1x
- Category: Lunch
- Cuisine: Mexican-American
Ingredients
- 4 (8-inch) flour tortillas
- 1 cup shredded cheddar cheese
- ½ cup shredded mozzarella cheese
- 2 tablespoons unsalted butter, softened
- Salsa (for dipping)
- Sour cream (optional, for dipping)
- Optional: garlic powder, cumin, finely chopped spinach, cooked black beans, shredded chicken
Instructions
- Prep your ingredients: Grate cheese if using block cheese; mix cheddar and mozzarella together. Soften butter slightly.
- Assemble the quesadilla: Lay one tortilla flat. Sprinkle about ½ cup cheese mixture over half of the tortilla, leaving a small border. Fold the other half over to create a half-moon shape. Press down gently.
- Butter the outside: Spread a thin layer of softened butter on the top side of the folded tortilla. Flip and butter the other side.
- Heat the pan: Place a non-stick skillet over medium heat for about 30 seconds until hot but not smoking.
- Cook the quesadilla: Place buttered quesadilla in the pan. Cook for 2-3 minutes per side until golden brown and crispy, and cheese is melted.
- Let it rest: Transfer cooked quesadilla to a cutting board and let sit for 1-2 minutes before slicing.
- Slice into dippers: Using a pizza cutter or sharp knife, cut the quesadilla into 4-6 strips (about 1-inch wide).
- Pack for lunch: Let dippers cool slightly. Place in a lunchbox container with a small cup of salsa or sour cream on the side.
Notes
For best results, use medium heat and let quesadillas rest before cutting to prevent cheese from spilling. Make ahead and reheat in a dry skillet. Freeze for up to 2 months. For gluten-free, use corn tortillas; for dairy-free, use vegan cheese and plant-based butter.
Nutrition
- Serving Size: 4-5 dippers with 2 t
- Calories: 300
- Sugar: 3
- Sodium: 500
- Fat: 18
- Saturated Fat: 10
- Carbohydrates: 26
- Fiber: 2.5
- Protein: 13.5
Keywords: quesadilla dippers, kids lunchbox, easy lunch, cheese quesadilla, quick lunch, kid-friendly, lunchbox ideas


