The house was finally quiet. The kids were asleep. The Halloween decorations were still in a box by the door, waiting for a weekend that never came. I stared at the orange, yellow, and white triangles scattered like confetti from a party that ended hours ago. You know that feeling? That mix of annoyance and sudden, desperate creativity? I wasn’t going to sweep them up. I was going to use them.
I grabbed a bag of white chocolate chips from the back of the pantry, the ones I bought for a craft project three years ago and forgot about. Honestly, they looked a little dull, but they would do. I melted them in the microwave in thirty-second bursts, stirring like my life depended on it. The smell of sweet, milky chocolate filled the kitchen, cutting through the stale air of a late-night cleaning session. It felt like a small victory.
I poured the melted chocolate onto a parchment-lined baking sheet. It spread out unevenly, lumpy and imperfect. That was fine. This wasn’t about perfection; it was about salvage. I scattered the candy corn over the top, pressing them down just a little so they’d stick. Then, I drizzled orange food coloring mixed with a tiny bit of vegetable oil over the whole thing. It swirled into a weird, marbled mess. I didn’t care. It looked festive. It looked like Halloween, even if it was just a Tuesday night.
I stuck it in the fridge for twenty minutes. When I pulled it out, the chocolate had hardened into a brittle sheet. I broke it into jagged pieces. The first bite was crunchy, sweet, and nostalgic. It tasted like a gas station treat from 1998, but better. Richer. Mine had texture. Mine had purpose. That’s when I knew this wasn’t just a way to use up leftover candy. It was a recipe that would save me from waste and boredom. I didn’t plan to share it. But then my neighbor’s kid asked for a piece the next day, and the rest is history.
Why You’ll Love This Easy Candy Corn Fudge Bark
Let’s be real for a second. Most Halloween treats are either too healthy to enjoy or so full of artificial dye that you feel guilty after eating one piece. This candy corn fudge bark sits in that perfect middle ground. It’s not complicated, and it doesn’t require a degree in confectionery science to make. I’ve tested this recipe more times than I can count, mostly because I keep making it for random office parties and last-minute playdate snacks. Here is why it works so well:
- Quick & Easy: You can have this ready in under 30 minutes. Seriously. The melting and setting time is the only wait, and that’s mostly hands-off. It’s perfect for when you need a treat fast but don’t want to run to the store.
- Simple Ingredients: You likely have everything you need right now. White chocolate, candy corn, and maybe some orange sprinkles or food coloring. No fancy pantry items. No expensive specialty flours. Just basic sweets.
- Perfect for Trick-or-Treaters: If you are hosting kids this season, this is gold. It’s individual portions already broken into pieces. No cutting required. Just toss a handful in a bowl and hand it out. It feels homemade, which parents love, but it’s sweet enough for the kids.
- Crowd-Pleaser: I’ve served this to picky eaters and dessert lovers alike. The texture contrast between the hard candy corn and the smooth chocolate is satisfying. It’s not just sweet; it’s crunchy too. People stop asking for seconds when they are too busy chewing.
- Unbelievably Delicious: It tastes like childhood. But the white chocolate adds a creamy richness that standard fudge lacks. It’s not cloying because the candy corn breaks up the sweetness. It’s balanced in a way that feels accidental but is actually just right.
What makes this different from other bark recipes? It’s the simplicity. You don’t need to temper chocolate. You don’t need a candy thermometer. You don’t need to worry about humidity ruining your batch. It’s forgiving. If you burn it slightly, it still tastes good. If you use dark chocolate, it still works. This recipe is your best version because it removes the stress from dessert making. It’s comfort food reimagined for busy weeks. It’s the kind of treat that makes you feel like a hero for five minutes of prep time.
What Ingredients You Will Need
This recipe relies on the holy trinity of Halloween desserts: white chocolate, candy corn, and a touch of color. The beauty here is that the ingredients are pantry staples for many people, especially this time of year. You don’t need high-end Belgian chocolate or artisanal candy. You need what works, and what is easy to find. I like to keep it simple because complicated ingredients often lead to complicated results. Let’s look at what you need to make this magic happen.
- White Chocolate Chips: I recommend using a standard bag of semi-sweet white chocolate chips, like Ghirardelli or Nestlé Toll House. They melt smoothly and have a consistent fat content that helps the bark set properly. Avoid white chocolate baking bars unless you know how to temper them, as they can seize up easily. You’ll need about 12 ounces (340 grams).
- Candy Corn: Obviously, the star of the show. Standard bag size is fine. I usually use about 1 cup (100 grams). Look for fresh candy corn if you can; older pieces can get stale and chewy, which ruins the crunch. If you can’t find candy corn, you could use white chocolate chips and orange sprinkles, but the texture changes.
- Orange Food Coloring: Gel food coloring is best because it doesn’t add liquid. Liquid coloring can cause the chocolate to seize. If you don’t have gel, a few drops of liquid works, but you’ll need to be careful not to add too much. Just a little goes a long way. You only need enough to create a marbled effect.
- Vegetable Oil: A teaspoon or two of neutral oil helps thin the food coloring so it drizzles easily. It also helps the colors swirl into the chocolate without creating hard clumps of dye.
- Parchment Paper: This is non-negotiable. Do not use wax paper. Wax paper will stick to the chocolate, and you will lose half your bark when you try to lift it. Parchment paper is cheap insurance. Get a large sheet to line your baking pan.
- Optional: Orange Sprinkles: For extra festivity, I sometimes add orange jimmies on top. They add a nice visual pop and a tiny bit of crunch. If you want to keep it classic, skip this. If you want it to look like it came from a bakery, add them.
Substitution note: If you want to make this dairy-free, you can use dairy-free white chocolate chips. However, be aware that they often melt differently and may not set as firmly. You might need to chill it longer. For a nut-free option, just ensure your chocolate chips are processed in a nut-free facility, which most major brands are now. This recipe is naturally gluten-free, which is a huge bonus for inclusive parties.
Equipment Needed
You don’t need a lot of fancy gear for this. If you have the basics, you’re good to go. Here is what you’ll need:
- Microwave-Safe Bowl: A large glass or ceramic bowl works best. It needs to be big enough to hold the chocolate as it melts and expands slightly. I use a 4-cup measuring bowl. If you don’t have one, a large mixing bowl works.
- Microwave: Standard settings are fine. You don’t need a high-power one, but consistency is key. Low power prevents burning.
- Spatula: A silicone spatula is ideal because it scrapes the bowl clean. You want to get every bit of chocolate out. A wooden spoon works, but it’s harder to clean.
- Baking Sheet: A standard 9×13 inch pan is perfect. It gives you a large surface area for thin bark. If you only have a smaller pan, the bark will be thicker, which is fine. Just adjust your expectations for breaking it.
- Parchment Paper: As mentioned, this is crucial. Have it ready before you start melting.
Personal tip: I once tried using a metal bowl in the microwave because I was in a rush. Bad idea. It sparked. Stick to glass or ceramic. Also, if you have a microwave that heats unevenly, rotate the bowl halfway through melting. My old microwave always had a cold spot in the back, so I learned to give it a quarter turn every 30 seconds. It saved my chocolate.
Preparation Method
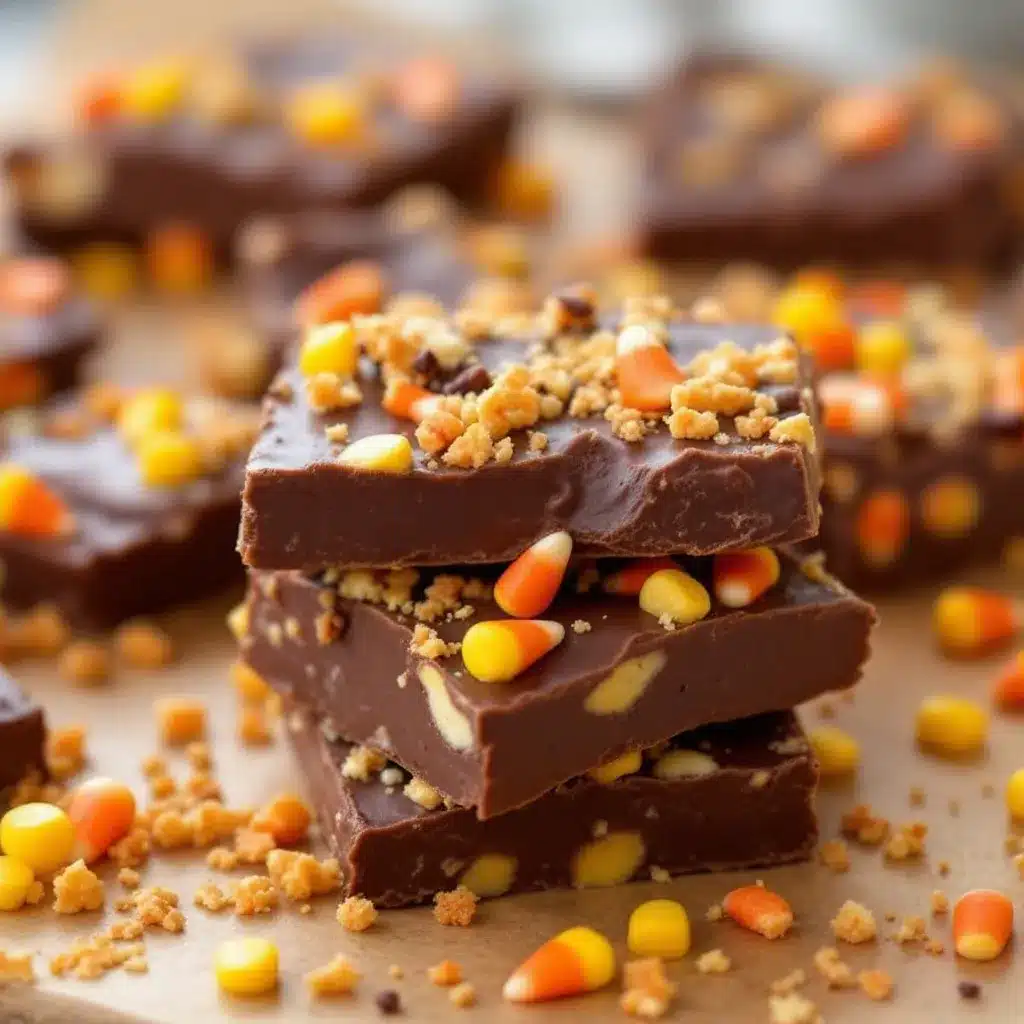
Making this bark is straightforward, but there are a few tricks to keep it smooth and beautiful. Follow these steps carefully, and you’ll have a perfect batch every time. The process is fast, so have your parchment paper ready before you start.
- Prepare Your Pan: Line your 9×13 inch baking sheet with parchment paper. Make sure the paper lies flat. If it curls up, weigh down the corners with a small bowl for a minute. You want a smooth surface. This step takes about 2 minutes. (Time estimate: 2 mins)
- Melt the Chocolate: Place the white chocolate chips in your microwave-safe bowl. Microwave on high for 30 seconds. Remove and stir vigorously with your spatula. The chocolate should be mostly melted but still have some lumps. Stirring helps distribute the heat. Microwave for another 15-20 seconds. Stir again. Repeat until the chocolate is smooth and glossy. Do not overheat. If it looks like it’s starting to separate, stop. Total melting time should be around 1-2 minutes. (Time estimate: 2 mins)
- Pour and Spread: Pour the melted chocolate onto the prepared parchment paper. Use your spatula to spread it out into an even layer. Try to get it to the edges. It doesn’t need to be perfect, but a uniform thickness helps it break evenly. If you have clumps of unmelted chocolate, keep stirring until they dissolve. (Time estimate: 2 mins)
- Add the Candy Corn: Immediately sprinkle the candy corn over the warm chocolate. Do this while the chocolate is still soft. Press them down gently with the back of your spoon. You want them embedded, not just sitting on top. This prevents them from rolling off later. Use about 1 cup of candy corn. (Time estimate: 2 mins)
- Create the Marbled Effect: In a small cup, mix a few drops of orange food coloring with a teaspoon of vegetable oil. Use a toothpick or a small spoon to drizzle this mixture over the chocolate and candy corn. Use a skewer or toothpick to swirl the colors together. Don’t overmix. You want distinct swirls of orange, not a solid orange mess. This step is where you get creative. (Time estimate: 3 mins)
- Set the Bark: Place the baking sheet in the refrigerator. Let it chill for at least 30 minutes. You can speed this up by putting it in the freezer for 15 minutes, but watch it closely. You want the chocolate to be firm to the touch. If it’s still soft, give it more time. (Time estimate: 30 mins chilling)
- Break and Serve: Once firm, lift the parchment paper out of the pan. Place it on a cutting board. Break the bark into irregular pieces with your hands. It should snap cleanly. If it crumbles, it might be too thin. If it bends, it needs more time in the fridge. Arrange the pieces on a platter. (Time estimate: 5 mins)
Troubleshooting: If the chocolate seizes (becomes grainy and hard), it likely got water in it. Unfortunately, you can’t fix seized chocolate. Start over, but make sure your bowl and utensils are completely dry. If the candy corn sticks out too much, you didn’t press them down enough. Next time, use more pressure.
Cooking Tips & Techniques
Even simple recipes have pitfalls. I’ve made this bark enough times to know where things can go wrong. Here are some pro tips to ensure success.
Watch the Heat: White chocolate is delicate. It burns easily. If you use a microwave, low power is your friend. I usually use 50% power for longer intervals. It takes a bit longer, but the result is smoother. If you use a double boiler on the stove, keep the water at a gentle simmer, not a rolling boil. Steam can ruin the texture.
Don’t Skip the Stir: Stirring is not optional. It distributes the heat and prevents hot spots. If you leave the chocolate sitting in the microwave, the edges will burn while the center stays solid. Constant stirring ensures a silky texture.
Work Fast: White chocolate sets quickly as it cools. Once you pour it onto the pan, you have about 5 minutes to add toppings and swirl colors. After that, it starts to firm up, and the candy corn won’t stick. If you’re slow, work in batches. Melt half, pour half, then melt the rest.
Color Control: When mixing the food coloring, start with less. You can always add more, but you can’t take it out. A little orange goes a long way in white chocolate. Too much dye can make the chocolate taste bitter or metallic. Gel colors are safer because they are concentrated.
Storage Matters: Keep the bark in an airtight container. Humidity is the enemy. If the air is moist, the candy corn will absorb water and become chewy. Store it in a cool, dry place. If your kitchen is warm, keep it in the fridge.
Variations & Adaptations
While the classic orange and white version is iconic, there are plenty of ways to tweak this recipe. Here are a few ideas I’ve tried:
- Ghost Version: Skip the orange color. Use white chocolate and white chocolate chips or marshmallow ghosts for toppings. It looks spooky and elegant. Great for a minimalist Halloween party.
- Green Witch: Use green food coloring instead of orange. Add chocolate-covered espresso beans for a “witch’s brew” look. It’s bitter and sweet, which adults love.
- Gluten-Free: This recipe is naturally gluten-free, but always check your candy corn label. Some brands use corn syrup and starch, which are GF, but cross-contamination can happen. Stick to trusted brands like Y&S or Brach’s if you are celiac.
- Dairy-Free: Use dairy-free white chocolate chips. Note that they may not set as hard. Add a tablespoon of coconut oil to help them firm up in the fridge.
- Spicy Kick: Add a pinch of cayenne pepper to the white chocolate before pouring. It sounds weird, but the heat contrasts nicely with the sweetness. It’s a fun twist for adult parties.
I once tried adding pumpkin spice mix to the chocolate. It was okay, but the texture got gritty. I wouldn’t recommend dry spices unless they are very fine. Stick to color changes or topping swaps for best results.
Serving & Storage Suggestions
This bark is best served at room temperature. If it’s too cold, the chocolate becomes hard and brittle. If it’s too warm, it gets soft and sticky. Aim for a cool room, around 68°F (20°C).
Presentation: Serve it on a black slate board for contrast. Or use a clear glass bowl to show off the colors. It looks great in mason jars tied with orange ribbon. If you are giving it as a gift, use small cellophane bags tied with twine. It’s cheap and festive.
Storage: Store in an airtight container at room temperature for up to 1 week. If your kitchen is hot, store it in the fridge for up to 2 weeks. Let it come to room temperature before serving to avoid condensation. Do not freeze it, as the candy corn can become icy and lose its crunch.
Reheating: You don’t need to reheat this. Just let it sit out for 10 minutes if it’s been in the fridge. Flavors develop slightly over the first day as the chocolate and candy corn meld together. It’s often better on day 2 than day 1.
Nutritional Information & Benefits
Let’s be honest: this is a treat. It’s not a health food. White chocolate is high in sugar and fat. Candy corn is mostly sugar. However, it’s a controlled portion. A small piece satisfies a sweet tooth without needing a whole dessert plate.
Each piece (approx. 1 ounce) contains about 150 calories, 10g of sugar, and 8g of fat. It has no fiber or protein. It’s a pure energy boost. For dietary considerations, it is gluten-free and nut-free (if you choose the right chocolate). It is not suitable for diabetics or those on low-sugar diets. Enjoy it in moderation as a special occasion treat. It’s about the joy of the season, not the nutrition label.
Conclusion
This Easy Candy Corn Fudge Bark is more than just a snack. It’s a way to embrace the chaos of the holidays and turn it into something sweet. It’s quick, it’s fun, and it tastes like nostalgia. I hope you try it and make it your own. Add your own colors, your own toppings, your own twists. That’s the beauty of simple recipes. They are blank canvases.
Share your creations with me! Tag me on social media or leave a comment below. I love seeing how you adapt this recipe. Whether you make it for kids, for parties, or just for yourself, I hope it brings a little bit of Halloween magic to your kitchen. Happy treating!
Frequently Asked Questions
Can I use milk chocolate instead of white chocolate?
Yes, you can. However, the color contrast will be less dramatic. Milk chocolate is darker, so the orange swirls won’t show up as well. The taste will be richer and less sweet, which some people prefer. Just adjust your expectations for the visual appeal.
How long does the candy corn stay fresh?
The candy corn itself stays fresh for months. However, once it’s in the bark, the white chocolate can absorb moisture from the air over time. This might make the candy corn slightly chewy after a week. For best texture, eat it within 5-7 days.
Can I make this without a microwave?
Absolutely. Use a double boiler. Fill a saucepan with an inch of water and bring it to a simmer. Place a heatproof bowl on top with the chocolate chips. Stir occasionally until melted. This method gives you more control and prevents burning.
Is this recipe kid-friendly?
Yes, very. Kids love the colors and the crunch. It’s easy for them to help with sprinkling the candy corn and swirling the colors. Just supervise the microwave use. It’s a great activity for a rainy Halloween afternoon.
Why did my chocolate seize?
Chocolate seizes when it comes into contact with even a tiny amount of water. Make sure your bowl, spatula, and hands are completely dry. Also, avoid covering the bowl with plastic wrap while melting, as condensation can drip into the chocolate. If it seizes, you can try adding a teaspoon of hot water and stirring vigorously, but it often doesn’t work. It’s better to start over.
Pin This Recipe!
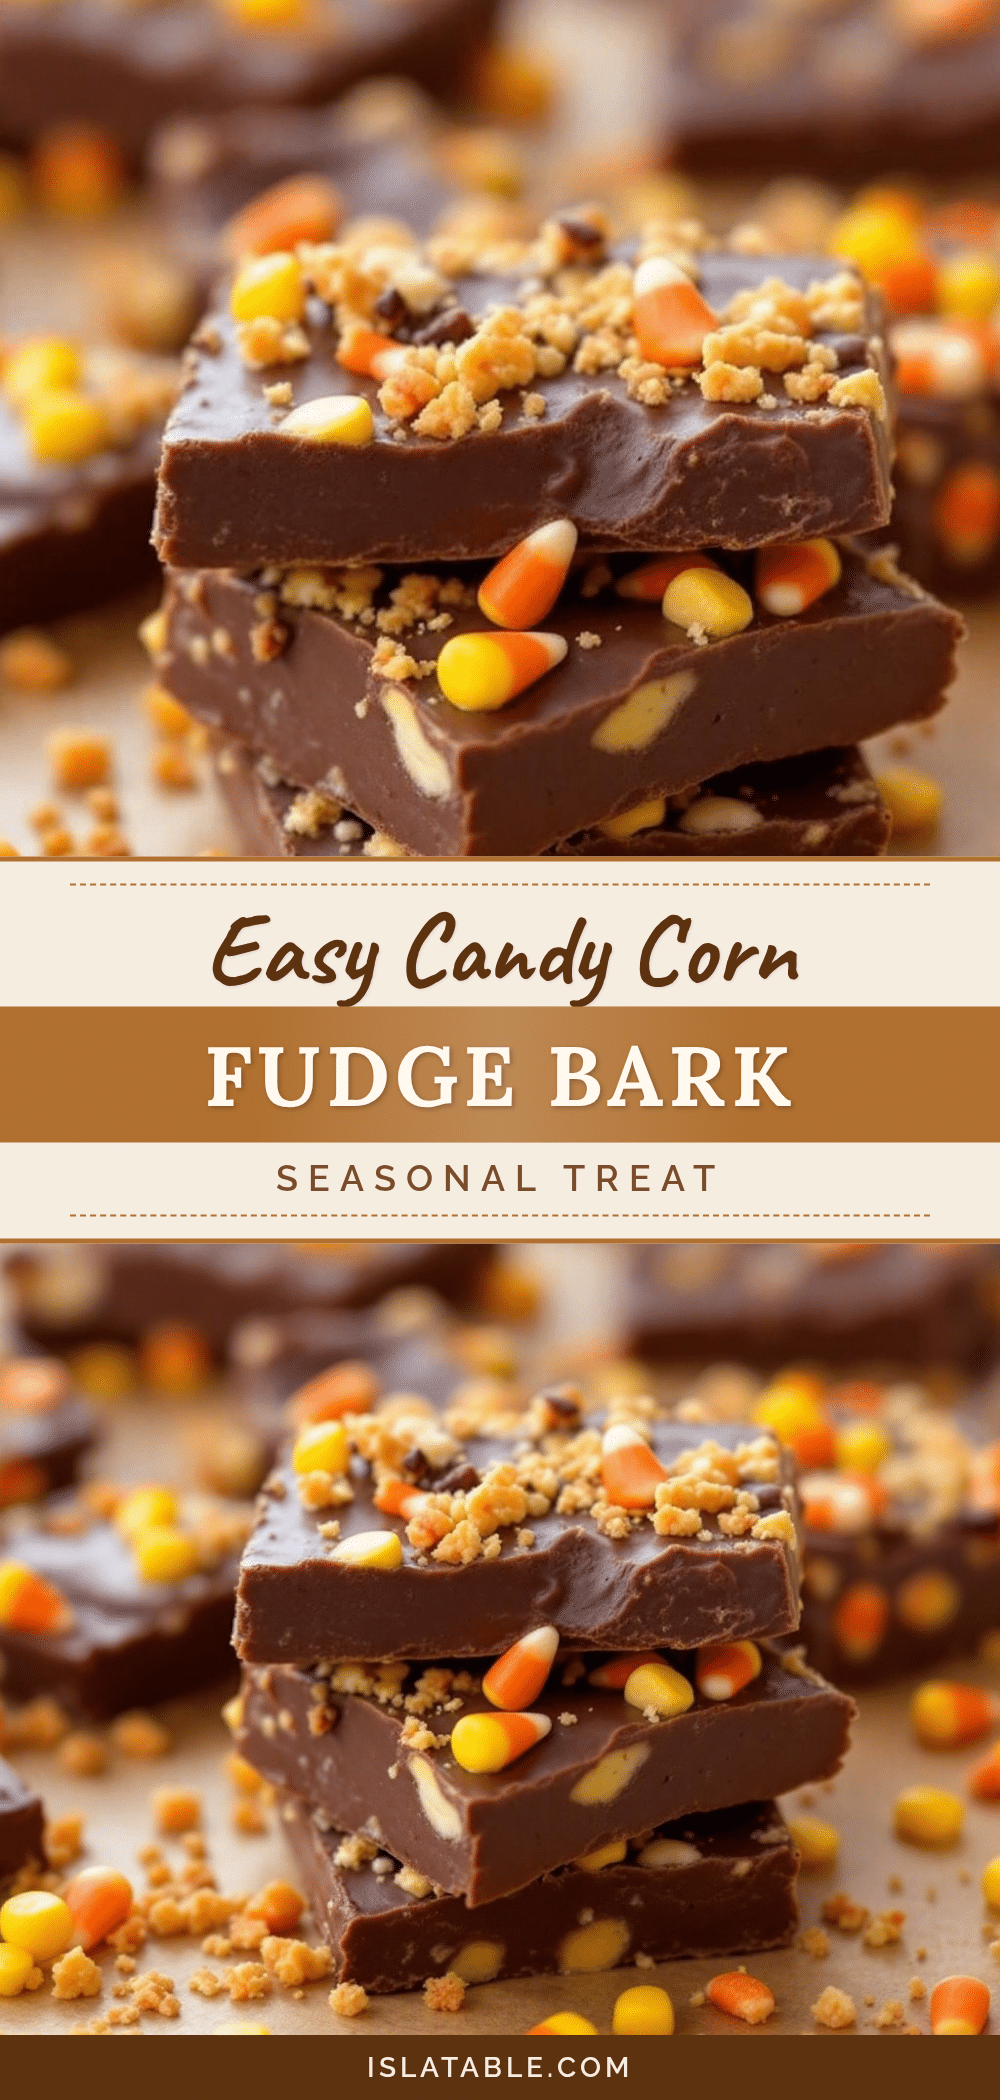
Easy Candy Corn Fudge Bark
A quick and easy Halloween treat made by melting white chocolate, pressing in candy corn, and swirling in orange food coloring for a festive, crunchy bark.
- Prep Time: 10 minutes
- Cook Time: 0 minutes
- Total Time: 40 minutes
- Yield: Approximately 12-15 pieces 1x
- Category: Dessert
- Cuisine: American
Ingredients
- 12 ounces (340 grams) white chocolate chips
- 1 cup (100 grams) candy corn
- A few drops orange gel food coloring
- 1–2 teaspoons vegetable oil
- Parchment paper
- Optional: Orange sprinkles
Instructions
- Line a 9×13 inch baking sheet with parchment paper.
- Place white chocolate chips in a microwave-safe bowl. Microwave on high for 30 seconds, stir, then microwave in 15-20 second intervals until smooth and glossy. Do not overheat.
- Pour melted chocolate onto the prepared parchment paper and spread into an even layer.
- Immediately sprinkle candy corn over the warm chocolate and press down gently to embed them.
- Mix orange food coloring with vegetable oil. Drizzle over the chocolate and swirl with a toothpick or skewer to create a marbled effect.
- Refrigerate for at least 30 minutes (or freeze for 15 minutes) until the chocolate is firm.
- Lift the parchment paper out and break the bark into irregular pieces. Serve.
Notes
Ensure all equipment is completely dry to prevent the chocolate from seizing. White chocolate burns easily, so stir frequently and use low power if your microwave is strong. Store in an airtight container at room temperature for up to 1 week. Do not freeze as it may affect the candy corn texture.
Nutrition
- Serving Size: 1 piece (approx. 1 o
- Calories: 150
- Sugar: 10
- Sodium: 15
- Fat: 8
- Saturated Fat: 5
- Carbohydrates: 18
- Protein: 1
Keywords: Halloween, candy corn, fudge bark, white chocolate, easy dessert, no-bake, gluten-free, party snack


