For a while, I just accepted that starting a sourdough starter wasn’t going to be straightforward or something I could really get the hang of without a kitchen full of fancy tools. I’d peeked at recipes and thought, “Sure, it sounds nice, but it’s probably too tricky for me.” The idea of cultivating wild yeast from flour and water seemed a little mystical, like some ancient ritual reserved for bakers with years of experience. But honestly, what stuck with me was the craving for that tangy, chewy bread that only a true sourdough can deliver—a flavor and texture that just can’t be faked with store-bought yeast.
One morning, while scribbling notes in my kitchen, I realized I’d been overcomplicating it. I started thinking about what if it didn’t have to be that mysterious, and what if feeding the starter each day could fit into my routine instead of feeling like a chore? That’s when I began jotting down a simple, day-by-day process for nurturing a sourdough starter that anyone could follow—even if you’re just starting out and don’t own a fancy bread maker or a ton of kitchen gadgets.
The smell of the starter bubbling gently on the counter, the little air pockets forming after each feeding, and the quiet patience it asks for—it all became a kind of calm in my busy days. I kept notes, tweaked the timing, and learned what to watch for (and what to ignore). This easy beginner sourdough starter guide with day-by-day feeding tips isn’t about magic—it’s about steady, simple care that anyone can manage. It stuck with me because it removes the guesswork and makes sourdough feel like something you can actually do at home without stress or fuss.
Why You’ll Love This Recipe
After testing this easy beginner sourdough starter guide myself, I can say it’s a solid choice for anyone looking to get into home baking without feeling overwhelmed. Whether you’re juggling work, family, or just don’t want a recipe that demands constant attention, this method respects your time and space.
- Quick & Easy: The daily routine takes just a few minutes, making it perfect for busy days or when you’re starting to build your baking confidence.
- Simple Ingredients: Flour and water—that’s really all you need. No weird additives or special yeast types, just basics you already have in your pantry.
- Perfect for Beginners: This guide breaks down feeding and care into clear, manageable steps, so you won’t feel lost at any point.
- Crowd-Pleaser: Once your starter is ready, you’ll be able to bake loaves that impress friends and family with that authentic tang and open crumb.
- Unbelievably Reliable: The feeding schedule and tips are based on actual trial and error, so you avoid common pitfalls that trip up new bakers.
This sourdough starter isn’t just another recipe floating around the internet—it’s the kind that leads you to a loaf you close your eyes to savor. It’s comforting, approachable, and the foundation for countless homemade breads, from simple sandwich loaves to rustic artisan crusts. Plus, if bread making is new to you, mastering this starter will give you a sense of accomplishment that makes every bite taste even better.
What Ingredients You Will Need
This recipe uses simple, wholesome ingredients to get your sourdough starter going strong. No fancy stuff—just flour, water, and a bit of patience. Most of these are pantry staples, and you can easily find substitutions if needed.
- Unbleached all-purpose flour: About 120 grams (1 cup). I recommend using good-quality brands like King Arthur for consistent results.
- Whole wheat flour: 30 grams (¼ cup). This adds extra wild yeast and nutrients to kickstart fermentation.
- Filtered or bottled water: 120 ml (½ cup), room temperature. Chlorine in tap water can slow down fermentation, so filtered water is best.
- Jar or container: Big enough to hold your starter and allow room for growth (about 1-liter capacity).
Substitution tips: You can use rye flour instead of whole wheat for a different flavor profile, or swap all-purpose with bread flour for a stronger gluten network. For gluten-free options, this starter isn’t ideal, but I’ve seen bakers experiment with gluten-free flours if you want to try your luck.
Seasonal note: In warmer months, your starter may bubble faster, so keep an eye on it. During colder seasons, it might take a bit longer to show activity, but that’s normal.
Equipment Needed
- Glass or plastic jar with a loose-fitting lid: I prefer glass because it doesn’t retain odors and lets you see the bubbling action.
- Kitchen scale: For accuracy in measuring flour and water, though measuring cups work if you don’t have one.
- Spoon or spatula: To mix the starter daily.
- Rubber band or marker: To mark the starter’s height and track growth.
You don’t need anything fancy like a sourdough crock or proofing basket at this stage. A simple jar on the countertop does the trick. If you want a budget-friendly option, reuse a clean jam jar or a Mason jar you have around.
Pro tip: Avoid metal containers for feeding and storing starter as it can react with the acidity. Also, keeping your tools clean but not sterilized helps maintain the right balance of microbes.
Preparation Method
-
Day 1 – Mix your starter: Combine 120g (1 cup) unbleached all-purpose flour, 30g (¼ cup) whole wheat flour, and 120ml (½ cup) filtered water in your jar. Stir until there are no dry patches. The mixture should be thick but stirrable, like a thick pancake batter.
Note: It’s normal for the mixture to feel dense at this point. Cover loosely with a lid or cloth and leave it at room temperature (around 70°F/21°C) for 24 hours. -
Day 2 – Check for bubbles: You might see no bubbles yet or just a few tiny ones. It’s okay if it looks the same. Stir the mixture once or twice during the day to introduce air.
Tip: Keep the jar in a warm spot away from direct sunlight. Too cold and it’ll take longer to wake up. -
Day 3 – First feeding: Discard half of your starter (about 120g) and add 60g (½ cup) all-purpose flour and 60ml (¼ cup) filtered water. Stir well until combined.
Watch for: Bubbles, a sour smell (like yogurt or mild vinegar), and rise in volume within 6-8 hours after feeding. -
Day 4 – Second feeding: Repeat the discard and feed process: discard half, then add 60g flour and 60ml water. By now, the starter should be more active, with bubbles and a noticeable rise.
Tip: If it smells unpleasantly foul or has pink/red tints, start fresh. -
Day 5 – Observe activity: Your starter should double in size within 4-6 hours of feeding and smell tangy but pleasant. If not, keep feeding daily with the same discard method.
Note: Some starters take a week or more depending on temperature and flour type. -
Day 6 and beyond – Regular feedings: Once your starter doubles predictably, you can reduce feedings to once every 12 or 24 hours depending on your baking schedule. Store it in the fridge if you won’t bake regularly, feeding once a week.
Personal tip: I keep mine by the window where it gets indirect light, which seems to keep it lively.
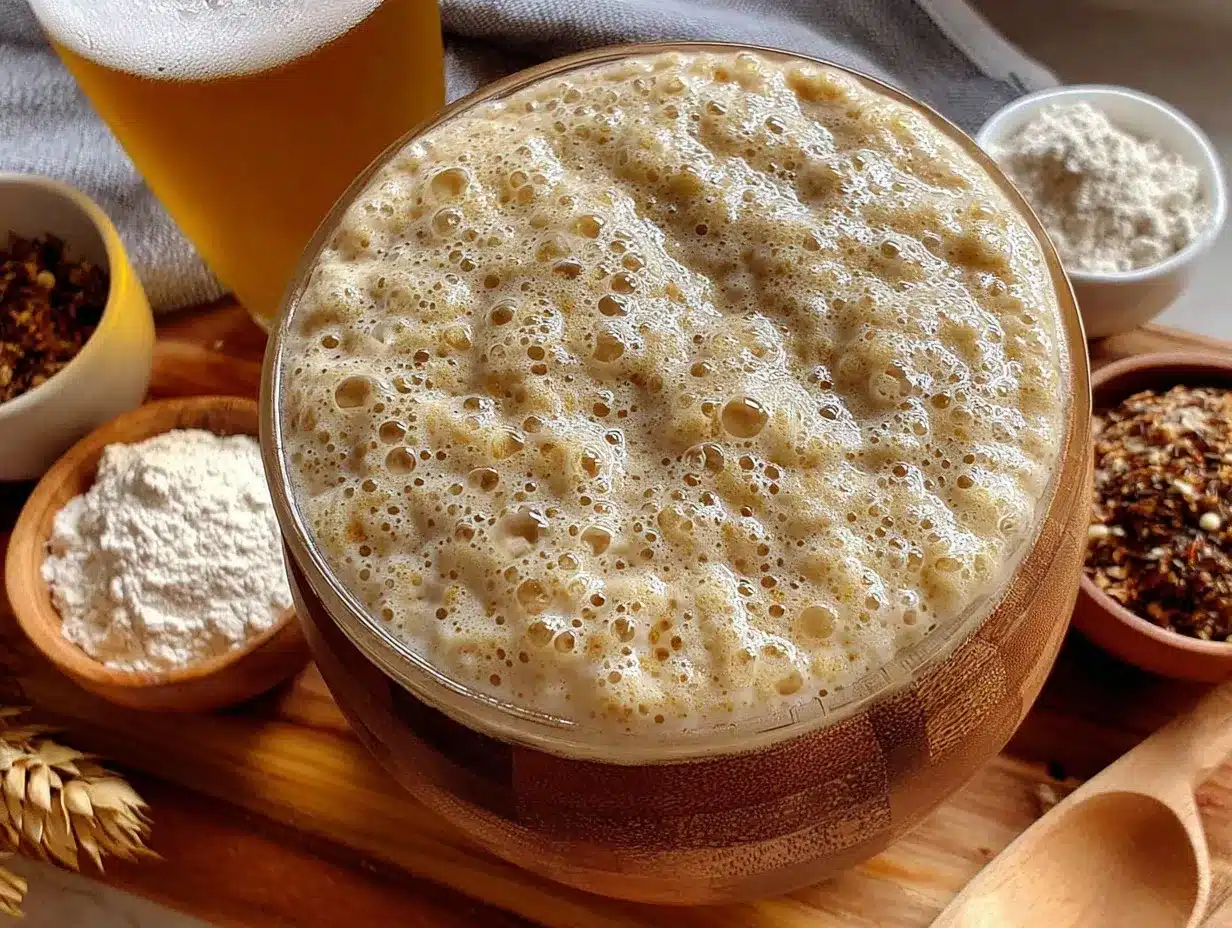
Throughout, watch for the starter’s texture — it should be bubbly, elastic, and smell pleasantly sour, never moldy or off-putting.
Cooking Tips & Techniques
Getting a sourdough starter going isn’t always smooth sailing, but a few tricks can help you avoid common headaches.
- Patience is key: It’s tempting to rush, but starters take time to develop a stable colony of yeast and bacteria.
- Don’t skip discarding: Removing half the starter before feeding prevents it from growing too big and diluting its strength.
- Watch the temperature: Warm spots speed up fermentation, but too hot can kill the starter. Around 70°F (21°C) is ideal.
- Use consistent flour: Switching types mid-way can throw off your starter’s balance.
- Mix well: Incorporate air when stirring, but don’t overdo it—too vigorous shaking can damage the yeast.
- Clean tools: Use non-metal utensils and jars. I learned the hard way that metal can react with the acid and change the flavor.
Once you’ve got your starter bubbling reliably, it’s satisfying to see how it transforms from a simple mixture into the foundation for delicious homemade bread. If you want some inspiration for what to bake next, you might enjoy my gluten-free cornbread muffins or the vegan baked beans with maple syrup that pair beautifully with fresh bread.
Variations & Adaptations
Once you’ve got the basics down, you can tweak your sourdough starter to suit your preferences and kitchen conditions.
- Whole grain starter: Use 100% whole wheat or rye flour for a more robust, tangy flavor and faster fermentation.
- Hydration adjustments: Some bakers prefer a thicker starter (less water) or a thinner one (more water) depending on the bread recipe you plan to use.
- Feeding frequency: If your kitchen is colder, feed your starter twice daily to keep it lively. Warmer kitchens might only need feeding once a day or every other day.
- Gluten-free attempts: Though tricky, some have success using gluten-free flours like brown rice or sorghum, but expect slower activity and different texture.
Personally, I once tried a rye-heavy starter that developed a deeper flavor but needed more frequent feedings to stay active. It was fun to experiment, but for daily baking, I stick with the all-purpose and whole wheat mix.
Serving & Storage Suggestions
Your starter is the heart of countless sourdough recipes, but storing and maintaining it properly keeps it healthy for the long haul.
- Serving temperature: Before baking, bring your starter to room temperature and feed it to ensure it’s at peak activity.
- Complementary dishes: Fresh sourdough bread pairs wonderfully with simple meals like roasted chicken, salads, or even dishes like the healthy keto coleslaw for a refreshing crunch.
- Storage: Keep your starter covered loosely in the fridge if you bake less often. Feed it weekly to keep it alive.
- Reheating: When ready to bake, take the starter out a day ahead, feed it, and let it bubble up at room temperature.
- Flavor development: The longer your starter matures, the more complex its flavor becomes, so don’t be discouraged if it’s mild at first.
Nutritional Information & Benefits
Sourdough starters themselves are low in calories and mainly act as a natural leavening agent. The fermentation process improves the digestibility of bread and may reduce phytic acid, which can bind minerals in grains.
Key benefits of sourdough baking include:
- Improved gut health due to natural probiotics in the starter.
- Lower glycemic index compared to regular bread.
- Better nutrient availability from whole grains.
For those avoiding gluten, sourdough is sometimes easier to tolerate, although it is not gluten-free. This starter recipe is dairy-free and vegan, fitting well into many dietary lifestyles.
From a personal wellness perspective, I find that baking sourdough connects me to my food in a way that processed bread just doesn’t, making the effort feel worthwhile beyond the taste.
Conclusion
Getting your sourdough starter going doesn’t have to be complicated or intimidating. With this easy beginner sourdough starter guide and day-by-day feeding tips, you can build a thriving starter that suits your pace and kitchen. It’s all about simple ingredients, steady care, and a little patience (which pays off in big flavor).
Whether you customize your starter with different flours or adjust feeding schedules to fit your lifestyle, this guide gives you a solid foundation. I’ve loved how this starter routine became a quiet ritual in my kitchen, turning baking into something joyful and satisfying.
If you try it out, I’d love to hear how it goes and what variations you come up with. There’s a special kind of pride in pulling a loaf from your own oven, and this starter is your first step there. Happy baking!
FAQs
How long does it take to make a sourdough starter?
Typically, 5 to 7 days of daily feedings are needed for your starter to become active and bubbly enough for baking. Sometimes it can take a bit longer depending on temperature and flour type.
Can I use tap water for my starter?
It’s best to use filtered or bottled water since chlorine in tap water can hinder the fermentation process. If you must use tap water, let it sit out for a few hours to allow chlorine to evaporate.
What does it mean if my starter smells bad or has pink spots?
A healthy starter smells tangy or mildly sour but never rotten or foul. Pink or orange spots indicate contamination, and it’s safest to discard and start fresh.
How often should I feed my starter once it’s established?
If kept at room temperature, feeding once every 12 to 24 hours works well. In the refrigerator, feeding once a week is enough to keep it alive.
Can I use gluten-free flour to make a sourdough starter?
Gluten-free starters are tricky and often less reliable. This guide uses wheat-based flours, which provide the gluten and wild yeast needed for a strong starter.
Pin This Recipe!
Easy Beginner Sourdough Starter Guide with Day-by-Day Feeding Tips
A simple, step-by-step guide to creating and maintaining a sourdough starter using basic ingredients and minimal equipment, perfect for beginners.
- Prep Time: 5 minutes daily
- Cook Time: 0 minutes
- Total Time: 5 to 7 days of daily feedings
- Yield: 1 starter batch (about 1 liter capacity) 1x
- Category: Baking
- Cuisine: American
Ingredients
- 120 grams (1 cup) unbleached all-purpose flour
- 30 grams (1/4 cup) whole wheat flour
- 120 ml (1/2 cup) filtered or bottled water, room temperature
Instructions
- Day 1 – Mix your starter: Combine 120g (1 cup) unbleached all-purpose flour, 30g (1/4 cup) whole wheat flour, and 120ml (1/2 cup) filtered water in your jar. Stir until there are no dry patches. The mixture should be thick but stirrable, like a thick pancake batter. Cover loosely with a lid or cloth and leave at room temperature (around 70°F/21°C) for 24 hours.
- Day 2 – Check for bubbles: You might see no bubbles yet or just a few tiny ones. Stir the mixture once or twice during the day to introduce air. Keep the jar in a warm spot away from direct sunlight.
- Day 3 – First feeding: Discard half of your starter (about 120g) and add 60g (1/2 cup) all-purpose flour and 60ml (1/4 cup) filtered water. Stir well until combined. Watch for bubbles, a sour smell, and rise in volume within 6-8 hours after feeding.
- Day 4 – Second feeding: Repeat the discard and feed process: discard half, then add 60g flour and 60ml water. The starter should be more active with bubbles and a noticeable rise. If it smells foul or has pink/red tints, start fresh.
- Day 5 – Observe activity: Starter should double in size within 4-6 hours of feeding and smell tangy but pleasant. If not, keep feeding daily with the same discard method.
- Day 6 and beyond – Regular feedings: Once your starter doubles predictably, reduce feedings to once every 12 or 24 hours depending on your baking schedule. Store in the fridge if not baking regularly, feeding once a week.
Notes
Avoid metal containers to prevent reaction with acidity. Keep tools clean but not sterilized. Use filtered or bottled water to avoid chlorine. Maintain starter at around 70°F (21°C) for best results. Discard half the starter before feeding to maintain strength. If starter smells foul or shows pink/red spots, discard and start fresh.
Nutrition
- Serving Size: Starter amount suffi
- Carbohydrates: 100
- Fiber: 3
- Protein: 12
Keywords: sourdough starter, beginner sourdough, sourdough feeding, homemade starter, wild yeast, bread baking, easy sourdough


