The smell hit me first. Not the nice, buttery smell you see in movies, but that sharp, nutty warning that something was about to burn if I didn’t act fast. I was standing there in my pajamas, spoon in hand, trying to salvage the browning butter before it turned into a bitter mess. It was 7:30 PM on a Tuesday. Dinner had been a disaster, the dishwasher was leaking, and the only thing keeping my sanity together was the promise of something sweet.
I didn’t have a plan. I didn’t have a recipe card. I just had leftover flour, a bag of chocolate chips that had seen better days, and a desperate need for comfort. You know how it goes when you’re running on fumes. You stop measuring and start feeling. I dumped the browned butter into a bowl, whisked in the sugar until it felt gritty, and tossed in the eggs. It was chaotic. It was messy. And honestly? It was perfect.
The dough came together in minutes, thick and sticky, smelling like caramelized toast and heaven. I scooped rough balls onto the sheet, threw them in the oven, and waited. That waiting period is the worst part of baking, isn’t it? You stare at the window, watching the cookies spread and puff up, wondering if you burned them or if they’re actually edible.
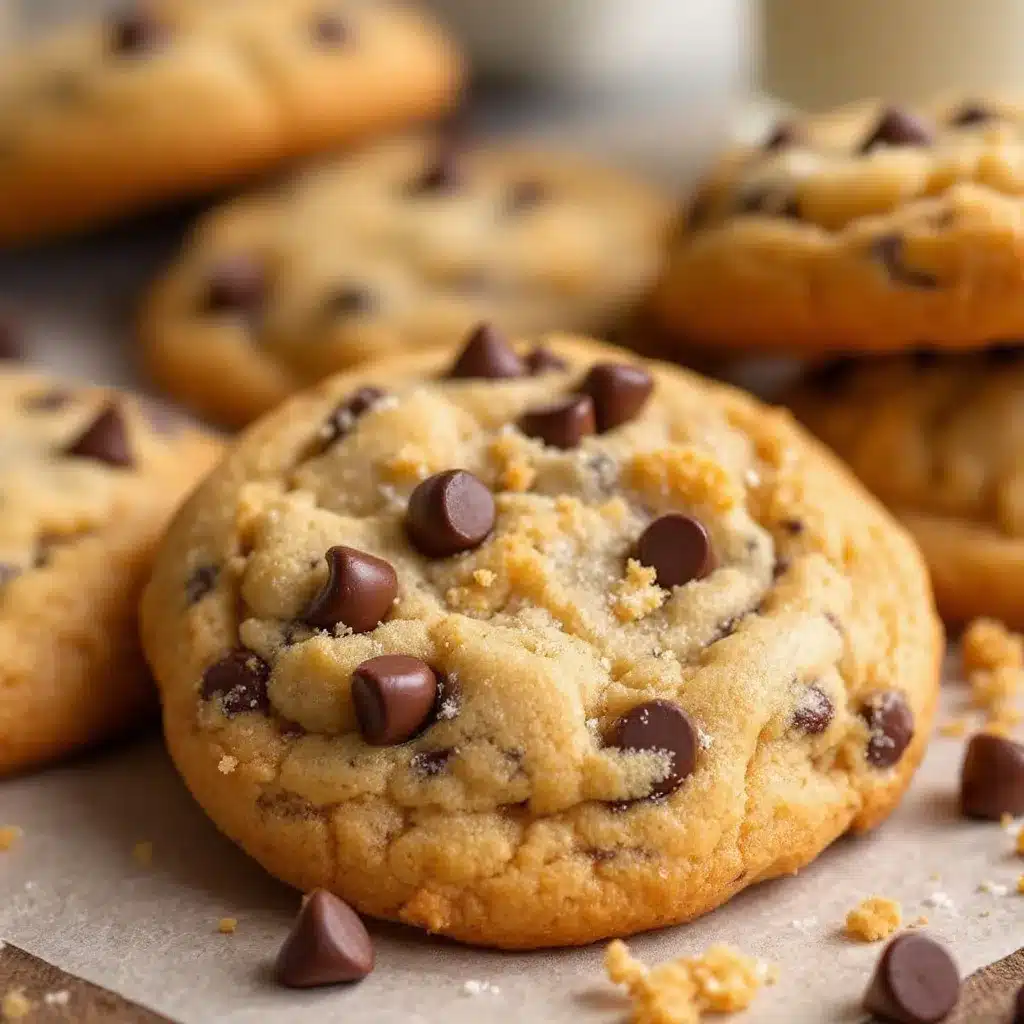
When I pulled that tray out, the edges were dark gold, almost bronze. The centers looked soft and underdone, which is exactly how you want them. I let them cool for a minute—two minutes if you have willpower, which I didn’t—and took a bite. The crunch gave way to a chewy, fudgy center with deep, complex flavors that regular butter cookies just don’t have. It wasn’t just a cookie. It was a hug in food form.
I’ve made them hundreds of times since that night. Sometimes I add sea salt. Sometimes I use dark chocolate. But the core remains the same. It’s the one recipe that saves me when everything else goes wrong. It’s reliable, it’s delicious, and it’s surprisingly easy to make even when your kitchen is a mess. If you’re looking for a treat that feels fancy but is actually just honest, simple baking, this is it. These crispy chewy brown butter chocolate chip cookies are my go-to for a reason. They stick with you.
Why You’ll Love This Recipe
Let’s be real for a second. There are a million chocolate chip cookie recipes out there. You could spend years trying them all and still not find the one that makes you stop mid-chew and close your eyes. This one is different. It’s not just sugar and flour. It’s about depth. It’s about that nutty, toasty flavor that comes from actually taking the time to brown the butter. It’s the kind of recipe that makes you feel like a pro baker, even if you’re just a reluctant cook improvising in your kitchen.
Here is why this recipe earns its spot in your rotation:
* **Quick & Easy**: Despite the fancy steps, this comes together in under 30 minutes of active time. The browning butter takes a few minutes, but the rest is just mixing and baking. Perfect for busy weeknights or when you need a sweet fix fast.
* **Simple Ingredients**: You don’t need a specialty grocery store run. Flour, butter, sugar, eggs, chocolate chips. You likely have everything in your pantry right now. It’s wholesome, simple, and satisfying.
* **Perfect for Any Occasion**: Whether you’re hosting a dinner party, need a treat for the kids, or just want a midnight snack, these fit the bill. They are great for potlucks because they travel well, or for cozy nights in with a glass of cold milk.
* **Crowd-Pleaser**: I’ve served these to picky eaters, food critics, and toddlers. They all love them. The texture contrast is universal. Everyone agrees that crispy edges and chewy centers are the best combination.
* **Unbelievably Delicious**: The brown butter changes everything. It adds a nutty, almost butterscotch flavor that regular melted butter can’t touch. It’s next-level comfort food.
What makes this recipe stand out from the rest is the technique. Most people just melt their butter. We’re browning it. This process caramelizes the milk solids, creating deep, complex flavors. It’s a small step that makes a huge difference. It’s not just another chocolate chip cookie. It’s your best version. It’s the kind that makes you feel like you’ve cracked the code on baking.
This isn’t just about feeding people. It’s about creating a moment. It’s the smell that fills the house and makes everyone gather in the kitchen. It’s the satisfaction of pulling a tray out that looks perfect. It’s comfort food reimagined—richer, deeper, but with the same soul-soothing satisfaction you grew up with. Perfect for impressing guests without stress, or turning a simple evening into something memorable.
What Ingredients You Will Need
This recipe uses simple, wholesome ingredients to deliver bold flavor and satisfying texture without the fuss. The magic is in the quality of the butter and the balance of sugars. You don’t need anything fancy, but do pay attention to the details. Freshness matters. Quality matters. Here is what you need to get started.
**For the Dough Base**
* **Unsalted Butter**: 1 cup (2 sticks / 226g), unsalted. This is the star. We need to brown it, so use high-quality butter. I recommend brands like Kerrygold or Plugrá for their high butterfat content and clean flavor. Salted butter can work, but you’d need to reduce the added salt in the recipe, which complicates things. Stick to unsalted for control.
* **All-Purpose Flour**: 2 ¼ cups (280g). Don’t skimp on the flour. It provides the structure. If you’re gluten-free, you can swap this for a 1:1 gluten-free flour blend, but the texture might be slightly different.
* **Baking Soda**: 1 teaspoon. Fresh baking soda is key for that lift and spread. If it’s been sitting in your cupboard for years, toss it and buy a new box. It loses potency over time.
* **Salt**: 1 teaspoon fine sea salt. This is crucial. It balances the sweetness and enhances the chocolate flavor. Don’t skip it, even if you like sweet cookies. The salt makes the sweet taste better.
* **Eggs**: 2 large eggs, room temperature. Room temperature eggs emulsify better into the butter and sugar mixture. Cold eggs can cause the butter to seize up, leading to a greasy cookie.
* **Vanilla Extract**: 2 teaspoons pure vanilla extract. Avoid the imitation stuff. It tastes chemical. Pure vanilla adds that warm, floral note that ties everything together.
**For the Sweetness and Texture**
* **Granulated Sugar**: ¾ cup (150g). This helps create the crispy edges. It spreads more than brown sugar.
* **Dark Brown Sugar**: 1 ½ cups (300g), packed. This is what gives you the chew. It contains molasses, which adds moisture and flavor. The darker the brown sugar, the more intense the flavor. I like using a dark brown sugar for a deeper, caramel-like taste.
**For the Mix-Ins**
* **Semi-Sweet Chocolate Chips**: 2 cups (340g). I prefer high-quality chips like Ghirardelli or Valrhona. They melt better and have a richer chocolate flavor. You can also use chunks of a chocolate bar for a more rustic, artisanal look.
* **Flaky Sea Salt**: For sprinkling on top after baking. This is optional but highly recommended. The crunch of the salt flakes against the soft cookie is addictive.
**Substitution Notes**
* **Gluten-Free**: Use a high-quality 1:1 gluten-free flour blend. Ensure it contains xanthan gum, or add ½ teaspoon if it doesn’t.
* **Dairy-Free**: Swap the butter for a high-quality vegan butter stick (not tub margarine). Note that the browning process might behave slightly differently, so watch it closely.
* **Nut-Free**: This recipe is naturally nut-free, but always check your chocolate chips and flour for cross-contamination warnings if you have severe allergies.
Equipment Needed
You don’t need a lot of fancy gear to make these cookies, but having the right tools makes the process smoother and the results more consistent. Here is what you’ll need.
* **Large Saucepan**: This is essential for browning the butter. A light-colored stainless steel or enamel-coated pan is best because you can see the color change clearly. Dark pans hide the browning, and you might burn the butter without realizing it. A non-stick pan works too, but you lose some visual cues.
* **Mixing Bowls**: Two medium-sized bowls. One for the wet ingredients and one for the dry. Glass or ceramic bowls are nice because they don’t retain heat, but plastic works fine too.
* **Whisk**: A sturdy whisk is better than a spoon for creaming the butter and sugars together. It incorporates air and ensures everything is smooth.
* **Silicone Spatula**: For scraping down the sides of the bowl and folding in the chocolate chips. Silicone is flexible and gets into the corners better than rubber.
* **Baking Sheets**: Rimless half-sheet pans are ideal because they promote even airflow. If you only have rimmed sheets, that’s fine, but you might need to rotate them halfway through baking.
* **Parchment Paper**: Always line your baking sheets with parchment paper. It prevents sticking and makes cleanup a breeze. It also helps the cookies bake evenly.
* **Wire Cooling Rack**: Essential for stopping the cooking process once the cookies come out of the oven. If you leave them on the hot pan, they’ll continue to cook and become tough.
* **Measuring Cups and Spoons**: Precision matters in baking. Use standard measuring cups for dry ingredients and liquid measuring cups for wet ones. Level off the flour with a knife for accurate measurements.
**Budget-Friendly Tips**
You don’t need expensive equipment. A standard saucepan and a whisk will do the job. If you don’t have a wire rack, you can let the cookies cool directly on the baking sheet for 5 minutes, then transfer them to a clean counter or plate. The most important investment is good butter and quality chocolate chips. The rest is basic kitchen stuff you probably already have.
Preparation Method
Making these cookies is straightforward, but it requires attention. Here is exactly how to do it, step by step.
1. **Brown the Butter (5 minutes)**: Place the butter in your large saucepan over medium heat. Stir constantly with a wooden spoon or spatula. The butter will melt, then foam up. As the foam subsides, you’ll see brown specks forming at the bottom. The smell will change from milky to nutty and toasted. This takes about 3-5 minutes. As soon as it smells like hazelnuts and turns a deep amber color, remove it from the heat immediately. Pour it into a heat-proof bowl to stop the cooking. Let it cool for 10 minutes.
2. **Mix Wet Ingredients (2 minutes)**: To the cooled brown butter, add the granulated sugar, brown sugar, eggs, and vanilla extract. Whisk vigorously for about 1-2 minutes. The mixture should look glossy and slightly thickened. This step is crucial for developing the chewy texture. Don’t rush it.
3. **Combine Dry Ingredients (1 minute)**: In a separate bowl, whisk together the flour, baking soda, and salt. Make sure there are no lumps of baking soda. This ensures even distribution.
4. **Combine Wet and Dry (2 minutes)**: Pour the dry ingredients into the wet mixture. Use a spatula to fold them together. Stop as soon as no streaks of flour remain. Overmixing at this stage can develop gluten and make the cookies tough. The dough will be thick and sticky.
5. **Add Chocolate Chips (1 minute)**: Fold in the chocolate chips. If you want a mix of textures, add some chopped chocolate bars along with the chips. Ensure they are evenly distributed.
6. **Chill the Dough (Optional but Recommended, 30 minutes)**: If you have time, chill the dough in the refrigerator for 30 minutes to an hour. This solidifies the butter, which helps the cookies hold their shape and develop deeper flavors. If you’re in a rush, you can skip this, but the cookies may spread more.
7. **Preheat Oven and Prepare Sheets (5 minutes)**: Preheat your oven to 375°F (190°C). Line two baking sheets with parchment paper.
8. **Scoop Cookies (5 minutes)**: Use a cookie scoop or a tablespoon to portion the dough onto the baking sheets. Leave about 2 inches between each cookie because they will spread. Aim for uniform sizes so they bake evenly.
9. **Bake (10-12 minutes)**: Place the sheets in the oven. Bake for 10-12 minutes. The edges should be golden brown and set, while the centers still look soft and slightly underbaked. They will firm up as they cool. Do not overbake them, or they will be crisp all the way through.
10. **Cool and Serve (15 minutes)**: Remove the sheets from the oven. Let the cookies cool on the pan for 5 minutes. Then transfer them to a wire rack to cool completely. Sprinkle with flaky sea salt if desired. Enjoy warm or at room temperature.
Cooking Tips & Techniques
Browning butter is the most critical step, and it’s also the most prone to error. Here is how to get it right every time.
* **Watch the Color, Not Just the Time**: Every stove is different. Some burn butter faster than others. Trust your nose. The smell of toasted nuts is the best indicator. If you see smoke, it’s already too late.
* **Don’t Walk Away**: This is the #1 mistake. I’ve burned multiple batches because I stepped away to answer the phone. Stay by the stove. Stir constantly. It’s only a few minutes.
* **Cool the Butter**: After browning, let the butter cool before adding the eggs. If the butter is too hot, it will scramble the eggs. This ruins the emulsion and leads to greasy cookies.
* **Don’t Overmix the Dough**: Once you add the flour, mix just until combined. Overworking the dough develops gluten, which makes cookies tough and cakey instead of chewy.
* **Uniform Sizing**: Use a cookie scoop for even baking. If you make some cookies huge and some tiny, the small ones will burn before the large ones are cooked.
* **Underbake Slightly**: Pull the cookies out when the centers still look soft. They will continue to cook on the hot pan. This ensures a chewy interior.
* **Chill for Flavor**: Chilling the dough for 24 hours (yes, really) can deepen the flavor even more. The flour hydrates fully, and the flavors meld. But 30 minutes is enough for a noticeable difference.
**Common Mistakes to Avoid**
* **Using Margarine**: Margarine has a high water content and additives that don’t brown the same way. It leads to flat, greasy cookies. Use real butter.
* **Skipping the Salt**: Salt is not just for flavor. It balances the sweetness and enhances the chocolate. Without it, the cookies taste one-dimensional.
* **Baking on Dark Pans**: Dark pans absorb more heat and can burn the bottoms of the cookies. If you use dark pans, reduce the oven temperature by 25°F.
Variations & Adaptations
This base recipe is versatile. Here are some ways to change it up based on your preferences or dietary needs.
* **White Chocolate Macadamia**: Swap the semi-sweet chocolate chips for white chocolate chips and add 1 cup of toasted macadamia nuts. The nutty butter pairs beautifully with the sweet white chocolate and buttery nuts.
* **Peanut Butter Swirl**: Add ½ cup of peanut butter to the wet mixture before adding the flour. The nuttiness complements the brown butter even more.
* **Oatmeal Raisin**: Add 1 cup of old-fashioned oats and ½ cup of raisins. The oats add chewiness and heartiness. This is a great breakfast cookie option.
* **Matcha Green Tea**: Add 1 tablespoon of matcha powder to the dry ingredients. The earthy green tea flavor contrasts nicely with the sweet chocolate chips.
* **Gluten-Free**: Use a 1:1 gluten-free flour blend. Ensure it has xanthan gum. The texture will be slightly more delicate, so handle the dough gently.
* **Vegan**: Use vegan butter sticks and dairy-free chocolate chips. The browning process might be slightly different, so watch closely. The texture may be less chewy but still delicious.
**Personal Variation**
I love adding a pinch of smoked paprika to the dough. It adds a subtle smokiness that enhances the brown butter flavor. It’s a weird combo, but it works. Try it if you like bold flavors.
Serving & Storage Suggestions
These cookies are best served slightly warm, fresh out of the oven. They pair well with a cold glass of milk, a cup of coffee, or a scoop of vanilla ice cream. The contrast of hot cookie and cold ice cream is classic for a reason.
**Storage**
* **Room Temperature**: Store cookies in an airtight container at room temperature for up to 5 days. Place a slice of bread in the container to keep them soft. The bread will dry out, but the cookies will stay chewy.
* **Freezer**: You can freeze the dough balls for up to 3 months. Bake them straight from frozen, adding 1-2 minutes to the bake time. Or freeze baked cookies for up to 2 months. Thaw at room temperature before eating.
* **Reheating**: To restore freshness, microwave a cookie for 10-15 seconds. It will be soft and gooey again.
**Flavors Over Time**
The flavors of brown butter cookies actually improve after a day or two. The moisture redistributes, and the flavors meld together. They might be slightly crisper the next day, but the taste is deeper.
Nutritional Information & Benefits
Here is an approximate nutritional breakdown per cookie (assuming 24 cookies):
* **Calories**: 220
* **Fat**: 12g
* **Carbohydrates**: 28g
* **Fiber**: 1g
* **Sugar**: 18g
* **Protein**: 3g
**Health Benefits**
While these are definitely a treat, there are some nutritional benefits to the ingredients. Eggs provide high-quality protein and choline, which is good for brain health. Butter contains fat-soluble vitamins like A, D, E, and K. Dark chocolate chips (if used) have antioxidants. However, these are still high in sugar and calories, so enjoy in moderation.
**Dietary Considerations**
* **Gluten-Free**: Use a gluten-free flour blend.
* **Nut-Free**: Naturally nut-free, but check labels.
* **Dairy-Free**: Use vegan butter and dairy-free chocolate.
**Personal Wellness Perspective**
I view these cookies as a comfort food, not a health food. They are meant to be enjoyed mindfully. A few cookies with a cup of tea is a perfect break. Balance is key. Don’t stress about the calories; enjoy the experience.
Conclusion
These crispy chewy brown butter chocolate chip cookies are worth the effort. They are simple, but the result is sophisticated and deeply satisfying. The brown butter adds a level of flavor that regular butter just can’t match. It’s a small step that makes a big difference.
I love this recipe because it’s forgiving. You don’t need to be a perfect baker to make them. You just need to pay attention to the butter. And the reward is huge. Soft, chewy centers, crispy edges, and a nutty, caramelized flavor that keeps you coming back for more.
Try this recipe and let me know how it turns out. Did you add sea salt? Did you chill the dough? I love hearing about your adaptations. Share your photos on social media and tag me. Let’s make baking a community thing.
And if you need a side dish to go with your cookies, check out this easy gluten-free cornbread muffins or this healthy keto coleslaw for a complete meal.
Enjoy every bite. You’ve earned it.
FAQs
Can I use salted butter instead of unsalted?
Yes, but you need to reduce the added salt in the recipe. If you use salted butter, omit the 1 teaspoon of salt called for in the ingredients. Otherwise, the cookies will be too salty.
Why did my cookies spread too much?
This usually happens if the butter was too warm when mixed with the sugar, or if the dough wasn’t chilled. Make sure the browned butter is cooled to room temperature before adding the eggs. Chilling the dough for 30 minutes helps solidify the butter and prevents excessive spreading.
Can I freeze the cookie dough?
Absolutely. Scoop the dough onto a baking sheet and freeze until solid. Then transfer the dough balls to a freezer bag. They will keep for up to 3 months. Bake them straight from frozen, adding 1-2 minutes to the bake time.
How do I get crispy edges and chewy centers?
The key is the ratio of sugars and the baking time. Granulated sugar promotes crispiness, while brown sugar promotes chewiness. Don’t overbake the cookies. Pull them out when the edges are set but the centers still look soft. They will firm up as they cool.
Can I add nuts to this recipe?
Yes, toasted pecans or walnuts pair beautifully with brown butter. Add 1 cup of chopped nuts to the dough along with the chocolate chips. Toasting the nuts first enhances their flavor.
Pin This Recipe!
Crispy Chewy Brown Butter Chocolate Chip Cookies

These cookies feature deep, nutty flavors from browned butter, resulting in crispy edges and soft, chewy centers. A reliable, comforting recipe that is surprisingly easy to make with simple pantry ingredients.
- Prep Time: 15 minutes
- Cook Time: 12 minutes
- Total Time: 27 minutes
- Yield: 24 cookies 1x
- Category: Dessert
- Cuisine: American
Ingredients
- 1 cup (2 sticks / 226g) unsalted butter
- 2 ¼ cups (280g) all-purpose flour
- 1 teaspoon baking soda
- 1 teaspoon fine sea salt
- 2 large eggs, room temperature
- 2 teaspoons pure vanilla extract
- ¾ cup (150g) granulated sugar
- 1 ½ cups (300g) dark brown sugar, packed
- 2 cups (340g) semi-sweet chocolate chips
- Flaky sea salt, for sprinkling on top (optional)
Instructions
- Brown the butter: Place butter in a large saucepan over medium heat. Stir constantly until it foams, then subsides, revealing brown specks and a nutty aroma (3-5 minutes). Remove from heat immediately and pour into a heat-proof bowl. Let cool for 10 minutes.
- Mix wet ingredients: To the cooled brown butter, add granulated sugar, brown sugar, eggs, and vanilla extract. Whisk vigorously for 1-2 minutes until glossy and slightly thickened.
- Combine dry ingredients: In a separate bowl, whisk together flour, baking soda, and salt to remove lumps.
- Combine wet and dry: Pour dry ingredients into the wet mixture. Fold with a spatula until no streaks of flour remain. Do not overmix.
- Add chocolate chips: Fold in chocolate chips evenly.
- Chill dough (Optional): Refrigerate dough for 30 minutes to an hour to help cookies hold their shape and deepen flavor.
- Preheat oven and prepare sheets: Preheat oven to 375°F (190°C). Line baking sheets with parchment paper.
- Scoop cookies: Portion dough onto baking sheets, leaving 2 inches between each cookie.
- Bake: Bake for 10-12 minutes until edges are golden brown and centers look soft.
- Cool and serve: Let cookies cool on the pan for 5 minutes, then transfer to a wire rack. Sprinkle with flaky sea salt if desired.
Notes
Browning butter is critical; watch closely as it can burn quickly. Ensure butter is cooled before adding eggs to prevent scrambling. For extra chewiness, chill the dough. For crispier edges, ensure granulated sugar is used. Store in an airtight container with a slice of bread to maintain softness.
Nutrition
- Serving Size: 1 cookie
- Calories: 220
- Sugar: 18
- Sodium: 150
- Fat: 12
- Saturated Fat: 7
- Carbohydrates: 28
- Fiber: 1
- Protein: 3
Keywords: brown butter cookies, chocolate chip cookies, crispy chewy cookies, easy baking, comfort food, nutty cookies


