I had been looking for a Halloween treat that actually felt like a party without the sticky, glue-like mess that ruins your shirt by dessert time. For a while, I just accepted that apple-based snacks were either too healthy to be exciting or too messy to be fun. You know how it goes, trying to find that sweet spot where kids go wild but parents don’t hate the cleanup.
The gap was real. Store-bought caramel apples are often too sweet, and making them from scratch usually results in a kitchen floor that needs scrubbing for days. I wanted something handheld, sturdy, and visually striking for the seasonal feed. The idea of biting into a crisp apple with a hard, candy-like shell had been on my mind for years.
Let’s face it, traditional caramel apples are a nightmare for anyone with a sensitive jaw or a toddler who just wants to eat without getting stuck. I needed a solution that looked festive but behaved like a proper snack. The answer wasn’t a whole apple, but a slice.
I started experimenting with different coating methods, trying to get that snap without the chew. It took a few failed batches of melted sugar that turned into rock-hard shards, but eventually, it clicked. The combination of a sturdy apple slice, a thin caramel layer, and a crunchy coating was the missing piece.
This isn’t about reinventing the wheel, just making it safer and more fun. The quiet realization came when I saw the first batch come out of the oven. They held their shape, they didn’t drip, and the colors popped. It was simply the right fix for a seasonal craving that had been ignored for too long.
Why You’ll Love This Recipe
I’ve spent years testing dessert coatings, from chocolate-dipped pretzels to candied nuts, and this method stands out for its reliability. As someone who has burned sugar more times than I can count, I appreciate recipes that forgive minor timing errors. This crispy caramel apple slice recipe is chef-tested for texture and family-approved for taste.
Here is why this treat beats the rest:
* **Quick & Easy**: These come together in under 30 minutes, perfect for busy weeknights or last-minute Halloween party prep. You won’t be stuck by the stove all afternoon.
* **Simple Ingredients**: No fancy grocery trips needed; you likely already have apples, caramel sauce, and sprinkles in your kitchen. It uses pantry staples you trust.
* **Perfect for Parties**: Great for school Halloween parties, trick-or-treat favors, or cozy autumn dinners. They are easy to stack and transport.
* **Crowd-Pleaser**: Always gets rave reviews from kids and adults alike. The crunch factor is universally loved.
* **Unbelievably Delicious**: The texture combo is next-level comfort food. The snap of the coating followed by the juicy apple is satisfying.
What makes this different is the oven-baking step. Most people think you need a candy thermometer and hours of stirring to get a hard shell. Not true. Baking the coated slices firms up the caramel and sets the sprinkles without the risk of burning your fingers on hot sugar.
This recipe isn’t just good—it is the kind that makes you close your eyes after the first bite. It’s comfort food reimagined—healthier because it’s fruit-forward, faster, but with the same soul-soothing satisfaction. Perfect for impressing guests without stress, or turning a simple meal into something memorable.
What Ingredients You Will Need
This recipe uses simple, wholesome ingredients to deliver bold flavor and satisfying texture without the fuss. The key is balancing the sweetness of the caramel with the tartness of the apple. You don’t need exotic items, just quality basics.
Here is what you will need to get started:
* **Apples**: 3 large, firm apples (Honeycrisp or Granny Smith work best). Firm apples hold up better and don’t turn mushy. Look for apples that feel heavy for their size.
* **Caramel Sauce**: 1 cup of good-quality caramel sauce. I recommend Smucker’s or a homemade version if you have time. Avoid the thin syrup; you want something thick.
* **White Chocolate Chips**: 1 cup of white chocolate chips. This helps create the hard shell. Look for brands with a higher cocoa butter content for better melting.
* **Halloween Sprinkles**: ½ cup of themed sprinkles. Nonpareils or jimmies work well. Make sure they are food-safe and colorful.
* **Food Coloring Gel**: A few drops of orange or purple gel food coloring. Gel coloring is better than liquid because it won’t seize the chocolate.
* **Toothpicks**: Wooden toothpicks for handling. These are essential for dipping and keeping your fingers clean.
* **Parchment Paper**: A large sheet to line your baking tray. This prevents sticking and makes cleanup a breeze.
I personally prefer Honeycrisp apples for their balance of sweet and tart. They have a dense flesh that stays crisp even after baking. If you can’t find them, Gala is a decent second choice, though slightly softer.
For the caramel, using a jarred sauce saves significant time. However, if you want a less processed option, you can melt down caramel candies with a splash of heavy cream. Just ensure the consistency is pourable but not runny.
Substitution guidance: You can use milk chocolate chips instead of white chocolate for a darker, richer flavor. For a dairy-free option, use dairy-free white chocolate chips, though they may not snap as hard. Almond flour can be added to the sprinkles for a nutty crunch, but skip this for nut-free environments.
Keep this section scannable. The ingredients are straightforward, so there is no need to overcomplicate the list. Just grab what you need and get prepping.
Equipment Needed
You don’t need a professional kitchen to make these treats. Most tools are standard items found in any home kitchen. Having the right equipment makes the process much smoother and reduces stress.
* **Large Baking Sheet**: A standard 13×18 inch sheet pan. This provides enough surface area to lay out the slices without them touching.
* **Parchment Paper**: Essential for lining the baking sheet. Silicone mats work too, but parchment is cheaper and easier to dispose of.
* **Microwave-Safe Bowl**: For melting the white chocolate. A glass bowl works best because it heats evenly. Avoid metal bowls in the microwave.
* **Small Saucepan**: If you choose to heat the caramel gently, a small saucepan helps control the temperature. This prevents scorching.
* **Pastry Brush**: Useful for brushing excess caramel off the apple slices. It ensures an even coating and prevents dripping.
* **Toothpicks**: As mentioned, these are your handling tool. Have a box ready so you don’t run out mid-process.
I once tried using a fork to dip the apples, and it was a disaster. The caramel stuck to the tines, and the slices fell apart. Toothpicks give you better control and less mess.
For budget-friendly options, you don’t need a stand mixer or specialized candy tools. A simple microwave and a baking sheet are all you need. If you don’t have a pastry brush, a small spoon works for scraping off excess caramel.
Maintenance tips: Clean your microwave bowl immediately after melting the chocolate. Residual chocolate hardens quickly and is hard to scrub off later. A quick wipe-down saves time and keeps your kitchen tidy.
Preparation Method
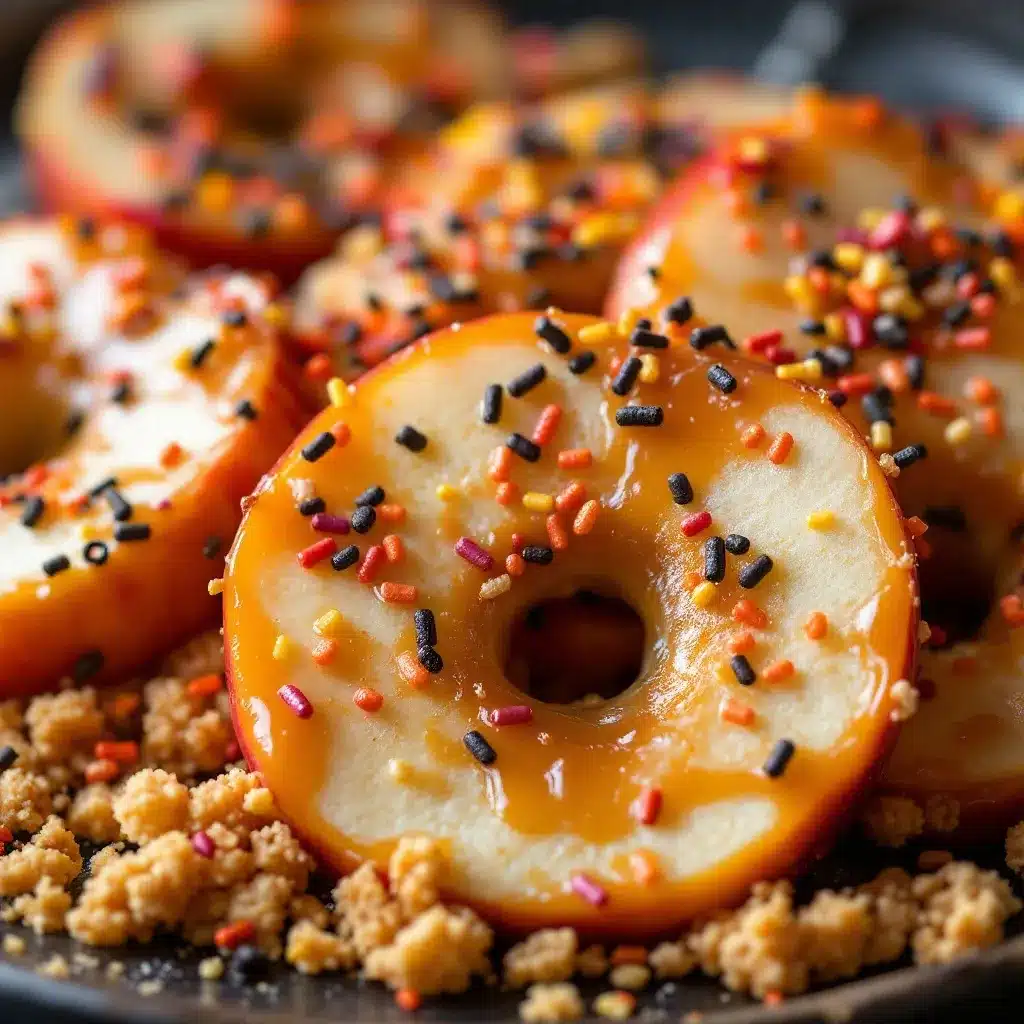
Follow these steps carefully to ensure your crispy caramel apple slices turn out perfectly. The process is straightforward but requires attention to detail.
1. **Prep the Apples**: Wash and dry the apples thoroughly. Remove the cores and slice them into ½-inch thick rounds. Place them on a plate lined with paper towels. Pat them dry again. Moisture is the enemy of a good coating. (5 minutes)
2. **Line the Pan**: Line your large baking sheet with parchment paper. Ensure the paper lies flat without wrinkles. This step is crucial for easy removal later. (2 minutes)
3. **Prepare Toothpicks**: Insert one toothpick into the stem end of each apple slice. Push it in about an inch. This gives you a handle for dipping. (5 minutes)
4. **Melt the Caramel**: Pour the caramel sauce into a microwave-safe bowl. Heat in 30-second intervals, stirring between each, until smooth and pourable. Do not overheat, or it will become too thin. (3 minutes)
5. **Dip the Apples**: Hold an apple slice by the toothpick. Dip it into the caramel, coating one side completely. Use a pastry brush to smooth out any bumps. Let the excess drip off for a few seconds. Place the slice, caramel-side up, on the prepared baking sheet. Repeat with all slices. (10 minutes)
6. **Melt the White Chocolate**: In a clean microwave-safe bowl, melt the white chocolate chips in 30-second intervals. Stir well after each interval until smooth. Add a few drops of orange food coloring gel and stir until evenly distributed. (3 minutes)
7. **Coat the Apples**: Hold each caramel-coated slice by the toothpick. Dip it into the melted white chocolate, covering the caramel and about half of the apple flesh. Shake off excess gently. Place it back on the baking sheet. (10 minutes)
8. **Add Sprinkles**: Immediately after dipping in chocolate, sprinkle Halloween sprinkles over the top. The chocolate is wet, so the sprinkles will stick. Be generous but avoid piling them too high. (2 minutes)
9. **Set in Oven**: Place the baking sheet in a preheated oven at 200°F (95°C) for 5 minutes. This helps the chocolate set and creates a slight snap. Do not bake longer, or the apples will soften. (5 minutes)
10. **Cool and Serve**: Remove from the oven and let cool completely at room temperature for 15 minutes. The chocolate will harden as it cools. Once set, remove toothpicks and enjoy. (15 minutes)
Total time is about 40 minutes. Troubleshooting: If the chocolate seizes, add a tiny drop of warm water and stir vigorously. If the caramel is too thick, add a teaspoon of milk to thin it out.
Cooking Tips & Techniques
Professional techniques can make a big difference in the final texture. I learned these through trial and error, including a few burnt batches and melted disasters.
* **Dry Apples Thoroughly**: Any moisture on the apple surface will prevent the caramel and chocolate from adhering properly. Use paper towels to pat them dry, even if you just washed them.
* **Control Chocolate Temperature**: White chocolate burns easily. Always melt it slowly and gently. If it gets too hot, it becomes grainy and won’t coat smoothly.
* **Work Quickly**: The chocolate sets fast. Have your sprinkles ready before you dip each slice. If you pause too long, the chocolate will harden on the bowl’s surface.
* **Avoid Overcrowding**: Leave space between slices on the baking sheet. If they touch, the chocolate will bridge them together, making them hard to separate later.
* **Use Gel Coloring**: Liquid food coloring contains water, which can cause white chocolate to seize. Gel coloring is concentrated and doesn’t add moisture, ensuring a smooth finish.
I once tried using liquid coloring, and the chocolate turned into a clumpy mess. It was frustrating, but it taught me the value of using gel. Now I always keep a small jar of orange gel on hand for fall recipes.
Timing is everything. If you bake the slices for too long in the oven, the apples will release juice and soften the coating. Five minutes is the sweet spot. It firms the chocolate without cooking the fruit.
Multitasking helps efficiency. While one batch is setting, you can prepare the next. But be careful not to rush and mix up your tools. Keep your caramel and chocolate bowls separate to avoid cross-contamination.
Variations & Adaptations
You can adapt this recipe to suit different tastes and dietary needs. The base method is flexible, allowing for creative twists.
* **Pumpkin Spice Twist**: Add a teaspoon of pumpkin pie spice to the white chocolate before melting. This adds a warm, autumnal flavor that pairs perfectly with apples.
* **Dark Chocolate Option**: Substitute white chocolate with dark chocolate chips. This creates a richer, less sweet treat. Add a pinch of sea salt on top for contrast.
* **Gluten-Free Version**: This recipe is naturally gluten-free if you use certified gluten-free sprinkles. Check labels carefully, as some sprinkles contain wheat starch.
* **Nut-Free Alternative**: Ensure your chocolate and sprinkles are made in a nut-free facility. This is important for school-friendly treats.
* **Candy Piece Variation**: Instead of sprinkles, press crushed Halloween candy pieces onto the chocolate. This adds a different texture and visual interest.
I tried a variation with crushed pretzels and caramel, which was salty and sweet. It was a hit with adults but maybe too salty for kids. Halloween sprinkles remain the crowd favorite for their festive look.
Seasonal variations are easy. In spring, use pastel sprinkles and white chocolate with mint extract. In summer, use bright colors and coconut flakes. The method stays the same, but the flavor profile changes.
For allergen substitutions, use dairy-free chocolate chips for a vegan option. Note that the caramel sauce must also be dairy-free. Some brands offer vegan caramel, so check the label.
Serving & Storage Suggestions
Serving these treats requires a bit of care to maintain their appearance. They look best when presented on a platter with space between each slice.
* **Serving Temperature**: Serve at room temperature. Chilled chocolate can become too hard and may crack. Room temperature ensures a pleasant snap.
* **Presentation**: Arrange them on a tiered stand or a dark-colored platter to make the colors pop. Add a few loose sprinkles around the edges for decoration.
* **Complementary Drinks**: Pair with hot apple cider or cold milk. The warmth of the cider enhances the apple flavor, while milk balances the sweetness.
* **Storage**: Store in an airtight container at room temperature for up to 3 days. Do not refrigerate, as condensation can make the chocolate sticky.
* **Reheating**: These are best eaten fresh. If you must reheat, leave them out for 15 minutes to warm slightly. Avoid using a microwave, as it will melt the chocolate.
Flavors develop over time, but the texture remains best within the first day. The caramel may soften slightly after a day, so eat them quickly for the best experience.
I usually make these the morning of the party. They hold up well throughout the day, as long as they are kept away from direct sunlight and heat. Humidity is the biggest enemy, so keep them in a dry area.
Nutritional Information & Benefits
While these are treats, they offer some nutritional benefits compared to candy bars. Apples provide fiber and vitamins, which is a plus.
* **Calories**: Approximately 150-200 calories per slice, depending on the size of the apple and amount of chocolate.
* **Fiber**: Apples are a good source of dietary fiber, aiding digestion. One slice provides about 1-2 grams of fiber.
* **Vitamins**: Apples contain vitamin C and potassium. These nutrients support immune health and heart function.
* **Dietary Considerations**: This recipe is gluten-free and dairy-free (if using appropriate chocolate). It is not low-sugar, so enjoy in moderation.
* **Allergens**: Contains dairy and tree nuts (if using chocolate with nut traces). Check labels for specific allergen information.
I view these as a guilt-free indulgence because of the fruit base. They satisfy a sweet tooth while providing some nutritional value. It’s a better option than pure candy for Halloween.
The key is portion control. One or two slices are enough to enjoy the flavor without overdoing it. Pairing them with a protein-rich snack can help balance blood sugar levels.
Conclusion
This crispy caramel apple slice recipe is a winner for any autumn celebration. It combines the classic flavors of apple and caramel with a fun, festive twist. The process is easy, and the results are impressive.
I love this recipe because it brings joy to both kids and adults. The crunch and the colors make it a standout treat. It’s also customizable, so you can make it your own.
Try this recipe and see how it turns out. Customize it with your favorite colors and toppings. Share your results in the comments below. I love seeing your creations and hearing about your experiences.
Enjoy the season and happy baking!
FAQs
Can I use any type of apple for this recipe?
Firm apples like Honeycrisp, Granny Smith, or Fuji work best. Soft apples like Red Delicious may become mushy and lose their shape during baking.
How do I prevent the chocolate from seizing?
Use gel food coloring instead of liquid. Ensure your bowl is completely dry before melting the chocolate. Heat the chocolate slowly and stir frequently.
Can I make these ahead of time?
Yes, you can make them up to 3 days in advance. Store them in an airtight container at room temperature. Avoid refrigeration to prevent condensation.
What if I don’t have an oven?
You can skip the oven step and let the chocolate set at room temperature or in the refrigerator for 30 minutes. However, the oven helps create a firmer snap.
Are these treats gluten-free?
Yes, this recipe is naturally gluten-free. Just ensure your sprinkles and chocolate chips are certified gluten-free to avoid cross-contamination.
Pin This Recipe!
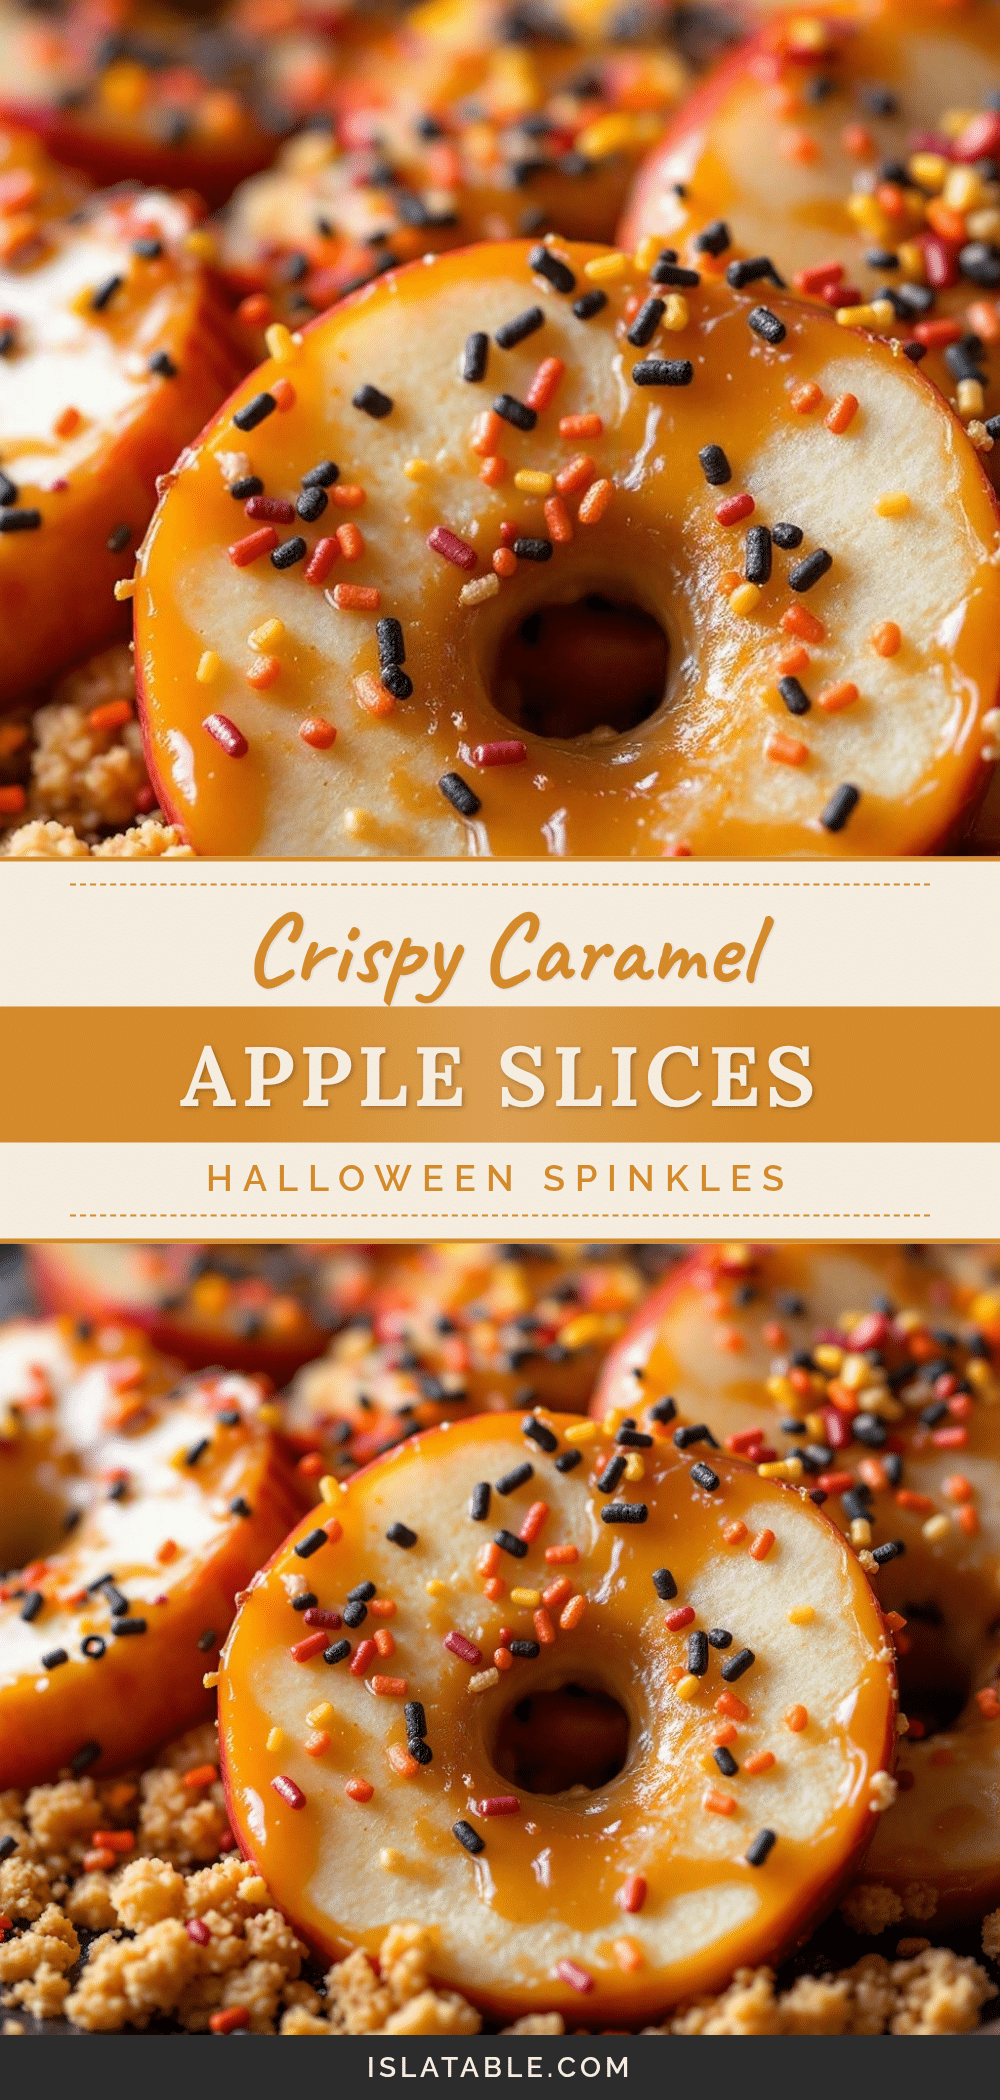
Crispy Caramel Apple Slices

A festive Halloween treat featuring firm apple slices dipped in caramel and white chocolate, topped with sprinkles, and baked for a crunchy shell.
- Prep Time: 25 minutes
- Cook Time: 5 minutes
- Total Time: 40 minutes
- Yield: Approximately 12-15 slices 1x
- Category: Dessert
- Cuisine: American
Ingredients
- 3 large firm apples (Honeycrisp or Granny Smith), cored and sliced into ½-inch rounds
- 1 cup good-quality caramel sauce
- 1 cup white chocolate chips
- ½ cup Halloween sprinkles
- Orange or purple gel food coloring
- Wooden toothpicks
- Parchment paper
Instructions
- Wash, dry, and core the apples. Slice into ½-inch thick rounds and pat dry thoroughly with paper towels.
- Line a large baking sheet with parchment paper.
- Insert one toothpick into the stem end of each apple slice.
- Microwave caramel sauce in 30-second intervals, stirring until smooth and pourable.
- Dip one side of each apple slice into the caramel, smooth with a pastry brush, and place caramel-side up on the baking sheet.
- Melt white chocolate chips in a microwave-safe bowl in 30-second intervals, stirring until smooth. Stir in gel food coloring.
- Dip the caramel-coated side of each apple slice into the melted white chocolate, covering the caramel and part of the apple.
- Immediately sprinkle Halloween sprinkles over the wet chocolate.
- Bake in a preheated oven at 200°F (95°C) for 5 minutes to set the chocolate.
- Remove from oven and let cool completely at room temperature for 15 minutes before removing toothpicks and serving.
Notes
Ensure apples are completely dry before dipping to prevent coating issues. Use gel food coloring to avoid seizing the chocolate. Do not refrigerate as condensation can make the chocolate sticky. Store in an airtight container at room temperature for up to 3 days.
Nutrition
- Serving Size: 1 slice
- Calories: 175
- Sugar: 20
- Sodium: 15
- Fat: 8
- Saturated Fat: 5
- Carbohydrates: 25
- Fiber: 2
- Protein: 2
Keywords: Halloween treats, caramel apples, apple slices, white chocolate, easy dessert, party snacks, gluten-free option


