The platter was empty before the kickoff return was over. My brother-in-law, who never compliments food, just pointed at the bare baking sheet and said, “You’re bringing these next week.” That was the moment I knew I had cracked the code on crispy baked chicken wings for football Sunday. No deep fryer, no mess, and somehow, the crispiest wings I’d ever made at home.
I wasn’t even trying to impress anyone that day. I was just tired of soggy wings, you know? The ones that look promising coming out of the oven but turn into sad, limp things by the time you carry them to the living room. I had tried every trick in the book—baking powder, high heat, flipping halfway—and still ended up with wings that were more steamed than crispy.
But that Sunday was different. I had a theory about moisture, a new rack in my kitchen, and honestly, nothing to lose. The result was so good that I actually texted my mom a photo mid-game. She called me back during a timeout just to ask what I did differently. That’s when I realized this wasn’t just another recipe. This was the one I’d be making for every game day from now on.
There’s something about getting it right that feels bigger than just the food. It’s the way people stop reaching for napkins because the wings aren’t greasy. It’s the way the crunch travels across the room. It’s the quiet satisfaction of watching someone take a bite and close their eyes for half a second. That’s the kind of recipe worth sharing.
Why You’ll Love These Crispy Baked Chicken Wings
I’ve tested this recipe more times than I care to admit. Some batches were disasters. One time I forgot the baking powder entirely and ended up with what I can only describe as sad, pale chicken. But I learned from every single mistake, and this version is the result of all that trial and error.
- Oven-Baked, Not Fried : You get all the crunch of deep-fried wings without the oil splatter, the smell that lingers for days, or the guilt. Your kitchen stays clean, and you can actually hang out with your guests instead of hovering over a pot of hot oil.
- Simple Pantry Ingredients : No weird specialty items here. You probably have everything in your kitchen right now. Baking powder, salt, pepper, and your favorite wing sauce. That’s it.
- Perfect for Game Day Gatherings : These wings hold up beautifully on a buffet table. They stay crispy even after sitting out for a while, which is rare for baked wings. Your guests can graze throughout the game without any drop in quality.
- Crowd-Pleaser Guaranteed : I’ve served these to picky eaters, health-conscious friends, and people who swear by fried wings only. Every single person has asked for the recipe. Even my dad, who owns a deep fryer, admitted these were just as good.
- Unbelievably Crispy Texture : The secret technique I use creates a crust that shatters when you bite into it. The meat stays juicy and tender underneath. It’s the kind of contrast that makes you wonder why you ever bothered with frying.
What makes this recipe different from the dozens of others out there? It’s the attention to moisture control. Most recipes skip the crucial step of drying the wings properly, or they use too much baking powder, leaving a metallic aftertaste. I figured out the exact balance between drying time, baking powder amount, and oven temperature that delivers consistently perfect results. This isn’t just another version of baked wings. It’s the best version I’ve ever made, and I’m pretty confident you’ll feel the same way.
These wings are the kind of food that makes football Sunday feel like an event. They’re the centerpiece that brings everyone to the table, the thing people remember long after the final score fades. And honestly? That’s exactly what game day food should be.
What Ingredients You Will Need
This recipe uses simple, straightforward ingredients to create something genuinely impressive. No fancy trips to specialty stores, no obscure spices you’ll use once and forget about. Just honest ingredients that work together to create magic.
For the Wings
- 3 pounds chicken wings , separated into drumettes and flats (about 24-30 pieces total)
- 2 tablespoons baking powder (aluminum-free, this is crucial for texture and taste)
- 1 teaspoon kosher salt (I prefer Diamond Crystal for its clean flavor)
- 1/2 teaspoon black pepper , freshly ground
- 1/2 teaspoon garlic powder (not garlic salt, we’re controlling the sodium ourselves)
- 1/4 teaspoon smoked paprika (adds a subtle smokiness that mimics grilled wings)
For the Sauce
- 1/2 cup buffalo wing sauce (I use Frank’s RedHot, it’s the gold standard for a reason)
- 3 tablespoons unsalted butter , melted (adds richness and helps the sauce cling to the wings)
- 1 tablespoon honey (balances the heat and helps the sauce caramelize slightly)
- 1 teaspoon Worcestershire sauce (adds depth and umami you can’t get from hot sauce alone)
For Serving
- Celery sticks , cut into 3-inch pieces
- Carrot sticks , optional but traditional
- Blue cheese dressing or ranch dressing for dipping
A few notes on ingredients: The baking powder is non-negotiable here. It’s what creates that shatteringly crisp skin by raising the pH of the chicken skin and helping it brown faster. Make sure yours is aluminum-free, or you’ll get a weird metallic taste. I learned this the hard way during my second test batch, and trust me, it’s worth checking the label.
For the chicken wings themselves, look for party wings that are already separated. Most grocery stores sell them this way, but if you can only find whole wings, just cut through the joints with a sharp knife. You’ll save a few dollars that way, too. I actually prefer buying whole wings and cutting them myself—it takes about five minutes and feels more satisfying.
If you’re watching your sodium, you can reduce the salt slightly, but don’t skip it entirely. The salt helps draw out moisture from the skin, which is essential for crispiness. It’s doing double duty here, both seasoning and texturizing.
Equipment Needed
You don’t need much to make these wings, which is part of their beauty. Here’s what you’ll want to have on hand:
- Baking sheet with a rim (18×13 inch half-sheet pan works perfectly)
- Wire rack that fits inside your baking sheet (this is the secret to even air circulation)
- Large bowl for tossing the wings with the dry rub
- Paper towels for drying the wings (lots of them)
- Small saucepan or microwave-safe bowl for the sauce
- Tongs for handling hot wings
- Pastry brush for applying sauce (optional, you can also toss them in a bowl)
The wire rack is the most important piece of equipment here. If you don’t have one, you can still make these wings, but they won’t be quite as crispy on the bottom. The rack lifts the wings off the baking sheet so air can circulate underneath, preventing the dreaded soggy bottom. I bought a cheap set of two at a restaurant supply store for under ten dollars, and they’ve paid for themselves a hundred times over.
If you don’t have a wire rack, try flipping the wings halfway through cooking and using a non-stick baking sheet. It’s not perfect, but it works in a pinch. Just know that the bottom won’t be as crispy as the top.
Preparation Method
This is where the magic happens. Follow these steps carefully, and you’ll have wings that rival anything from your favorite sports bar.
- Prep the wings : Pat the chicken wings completely dry with paper towels. I mean really dry. Change your paper towels at least twice. Any moisture on the skin will steam instead of crisp. This step is more important than you think. Take your time here.
- Season the wings : In a large bowl, whisk together the baking powder, salt, pepper, garlic powder, and smoked paprika. Add the dried wings and toss thoroughly until every piece is evenly coated. Use your hands for this—it’s the only way to make sure the seasoning gets into all the nooks and crannies.
- Rest the wings : Arrange the seasoned wings on the wire rack in a single layer, making sure they’re not touching. Place the baking sheet in the refrigerator, uncovered, for at least 1 hour. Overnight is even better. This drying time is what transforms good wings into great wings. The baking powder starts working immediately, drawing out more moisture from the skin.
- Preheat the oven : When you’re ready to cook, preheat your oven to 425°F (220°C). Position the rack in the upper third of the oven. This higher placement helps the wings brown more evenly.
- Bake the wings : Remove the wings from the refrigerator and let them sit at room temperature for about 15 minutes while the oven finishes preheating. Bake for 45-50 minutes, rotating the pan halfway through. The wings should be deep golden brown and the skin should look bubbly and crispy. Don’t open the oven too often during cooking—you’ll let out the heat and slow down the crisping process.
- Check for doneness : The internal temperature should reach 165°F (74°C) when measured at the thickest part of a drumette. But honestly, you can tell by looking. The skin will be tight, golden, and slightly blistered. The meat will pull away from the bone easily.
- Make the sauce : While the wings are baking, combine the buffalo wing sauce, melted butter, honey, and Worcestershire sauce in a small saucepan. Warm over low heat, stirring occasionally, until the butter is fully incorporated and the sauce is smooth. Keep it warm until the wings are ready.
- Sauce the wings : When the wings come out of the oven, let them rest on the rack for 2-3 minutes. Then transfer them to a large bowl, pour the warm sauce over them, and toss gently until every wing is coated. Don’t drown them—you want a coating, not a bath. If you prefer extra-crispy wings, serve the sauce on the side for dipping instead.
- Serve immediately : Arrange the sauced wings on a platter with celery and carrot sticks. Serve with blue cheese or ranch dressing on the side. Watch them disappear.
A quick note on timing: If you’re serving these during a game, plan the baking so the wings come out of the oven right at halftime or during a commercial break. They’re best within 15 minutes of coming out of the oven, though they hold up surprisingly well for about 30 minutes on a warm tray.
Cooking Tips & Techniques
I’ve made more batches of these wings than I can count, and I’ve learned a few things along the way. Here are the tips that make the biggest difference.
Don’t skip the drying step. I know it’s tempting to rush through this, especially when you’re hungry and the game is about to start. But the drying time in the refrigerator is what separates crispy wings from sad, soggy ones. The baking powder needs time to work its magic. One hour is the minimum, but four hours is better. Overnight is transformative. The skin literally shrinks and tightens around the meat, concentrating the flavor.
Use a thermometer. Oven temperatures vary wildly. I’ve cooked in apartments with ovens that ran 50 degrees hot. An oven thermometer is cheap and takes the guesswork out of baking. Place it near the front of the oven where you’ll actually see it. Trust me, your wings will thank you.
Don’t crowd the pan. Those wings need room to breathe. If they’re touching each other, they’ll steam instead of crisp. If you’re making a large batch, use two baking sheets and rotate them between the upper and lower racks halfway through cooking. It’s worth the extra dishes.
Flip with confidence. When you rotate the pan halfway through, use tongs to flip each wing over. This ensures even browning on all sides. The wings should release easily from the rack. If they stick, they’re not ready to flip yet. Give them another 5 minutes and try again.
My biggest failure came when I tried to rush the process. I skipped the drying step, used too much baking powder, and cranked the oven to 450°F thinking it would compensate. The result was wings that were burned on the outside, raw near the bone, and had a weird chemical aftertaste. I threw the whole batch in the trash and ordered pizza. Learn from my mistakes. Follow the method exactly, at least the first time.
Variations & Adaptations
Once you’ve mastered the basic recipe, feel free to experiment. Here are some of my favorite variations.
Spicy Honey Garlic : Replace the buffalo sauce with 1/4 cup honey, 2 tablespoons soy sauce, 4 minced garlic cloves, and 1 tablespoon sriracha. Simmer until thickened slightly. This version is sticky, sweet, and has a pleasant heat that builds slowly. It’s my wife’s favorite, and she usually hates spicy food.
Lemon Pepper : Skip the sauce entirely. After baking, toss the wings with melted butter, then sprinkle generously with lemon pepper seasoning and a pinch of extra salt. The brightness of the lemon cuts through the richness of the skin perfectly. This is what I make when I want wings but don’t feel like dealing with sticky sauce.
Dry Rub BBQ : Before baking, add 1 tablespoon brown sugar and 1 teaspoon chili powder to the dry rub mixture. The sugar will caramelize in the oven, creating a sweet, smoky crust. Serve with your favorite BBQ sauce on the side for dipping. This version is dangerously addictive.
Keto-Friendly : These wings are naturally low-carb, but if you’re strictly keto, skip the honey in the sauce. Use a sugar-free buffalo sauce and add a pinch of sweetener if you want that balance. The wings themselves have almost no carbs, making them perfect for game day without the guilt.
Smokeless BBQ Twist : If you’re craving that grilled flavor but don’t have access to a grill, try adding a teaspoon of liquid smoke to the sauce. It’s not quite the same as our flavorful indoor smokeless BBQ chicken recipe, but it comes surprisingly close for apartment dwellers.
Serving & Storage Suggestions
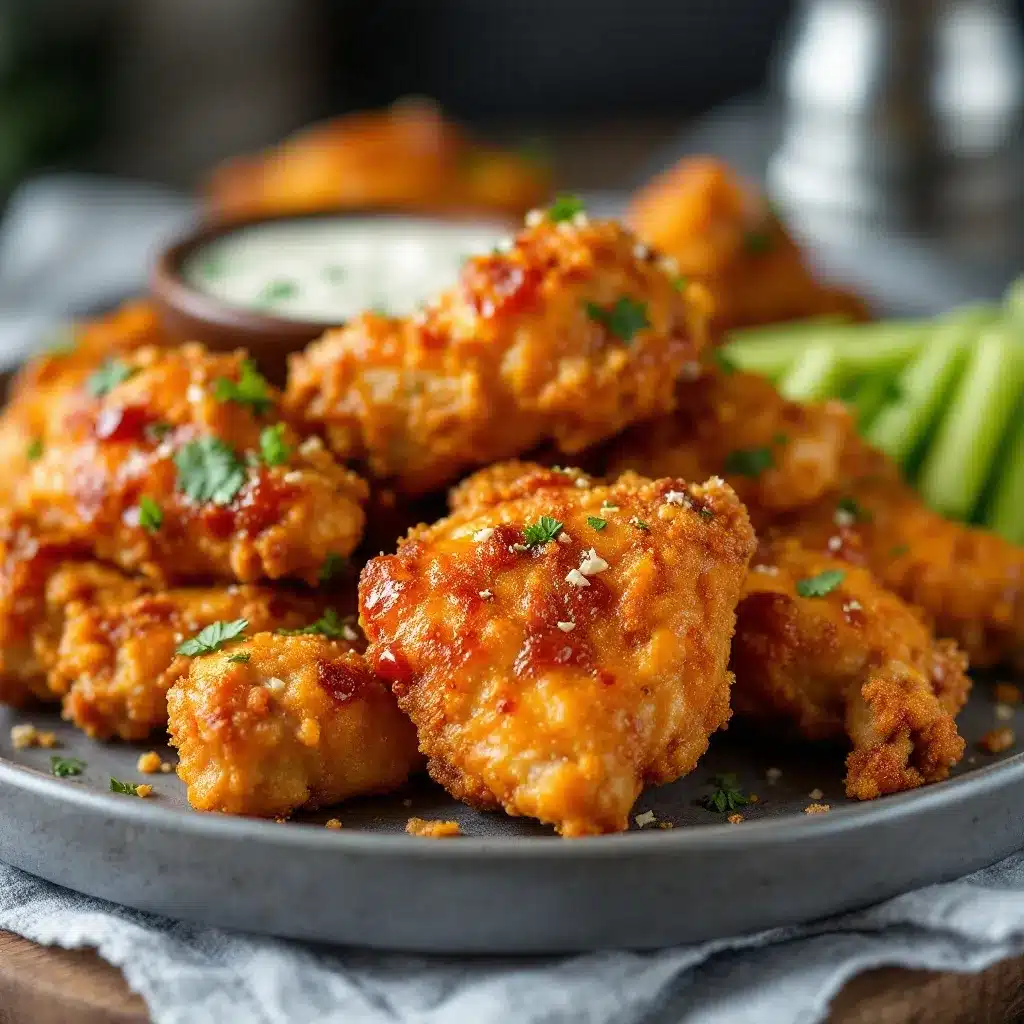
These wings are best served hot, right after saucing. The contrast between the crispy skin and the warm, flavorful sauce is what makes them special. Arrange them on a large platter with celery and carrot sticks tucked around the edges. The vegetables add color and provide a cool, crunchy contrast to the spicy wings.
For dipping, I’m a blue cheese dressing purist. There’s something about the tangy, creamy dressing that perfectly balances the heat of the buffalo sauce. But ranch works too, especially if you’re serving a crowd with mixed preferences. I always offer both, just to be safe.
If you’re serving these as part of a larger spread, they pair beautifully with other game day favorites. A creamy Mexican street corn pasta salad is a great side dish that complements the wings without competing with them. And if you want something lighter, a fresh keto-friendly cobb salad balances out the indulgence.
Storage : Leftover wings (if you have any) should be stored in an airtight container in the refrigerator. They’ll keep for up to 4 days. The sauce will soften the skin over time, so don’t expect them to be as crispy as when they were fresh.
Reheating : The best way to revive leftover wings is in the oven. Preheat to 375°F (190°C) and bake on a wire rack for 10-12 minutes. This re-crisps the skin without drying out the meat. Avoid the microwave at all costs—it turns crispy wings into rubbery, sad imitations of their former selves. If you have an air fryer, that works even better. 5 minutes at 375°F and they’ll taste almost fresh.
Freezing : You can freeze baked, unsauced wings for up to 3 months. Arrange them in a single layer on a baking sheet and freeze until solid, then transfer to a freezer bag. To serve, thaw in the refrigerator overnight, then reheat in a 400°F (200°C) oven for 15 minutes before saucing. This is a great make-ahead strategy for big game day parties.
Nutritional Information & Benefits
Per serving (about 6 wings, without sauce):
- Calories: 380
- Protein: 32g
- Fat: 26g
- Carbohydrates: 1g
- Fiber: 0g
- Sugar: 0g
- Sodium: 780mg
These numbers will vary depending on the sauce you use and how much butter you add, but the wings themselves are surprisingly nutrient-dense. Chicken wings are a good source of protein, selenium, and B vitamins. The skin contains collagen, which is great for joint health and skin elasticity.
If you’re watching your sodium, you can reduce the salt in the dry rub and use a low-sodium wing sauce. The wings will still be crispy, just less salty. And if you’re avoiding dairy, skip the butter in the sauce and use a dairy-free alternative. The texture won’t be quite as rich, but it still works.
These wings are naturally gluten-free, grain-free, and low-carb, making them suitable for a wide range of dietary preferences. Just double-check your wing sauce label, as some brands add flour or other thickeners. Frank’s RedHot is naturally gluten-free, which is one of the reasons I stick with it.
Conclusion
These crispy baked chicken wings have become my go-to for every football Sunday, and I honestly can’t imagine game day without them anymore. They’re the kind of recipe that makes you look like a hero without spending hours in the kitchen. The kind that people remember and request. The kind that turns a regular Sunday into something worth gathering around.
I want you to take this recipe and make it your own. Adjust the heat level. Try different sauces. Experiment with the dry rub. The method is solid, but the flavor combinations are endless. That’s the beauty of a good base recipe—it gives you a foundation to build on.
If you try these wings, I’d love to hear how they turn out. Drop a comment below and let me know your favorite sauce combination, or tag me in your photos if you share them online. Game day is better when we’re all eating well, and these wings are proof that you don’t need a deep fryer to get that perfect crunch.
Now go make some wings. The game’s about to start.
Frequently Asked Questions
Can I make these wings ahead of time?
Absolutely. You can prep the wings up to 24 hours in advance by seasoning them and letting them dry in the refrigerator on the wire rack. When you’re ready to serve, just pop them in the oven. You can also bake them completely, skip the sauce, and reheat them later. Just don’t sauce them until right before serving, or the skin will soften.
Why are my baked chicken wings not crispy?
This usually happens for one of three reasons: the wings weren’t dried thoroughly before seasoning, the baking powder was old or not aluminum-free, or the wings were crowded on the baking sheet. Make sure you’re patting the wings completely dry, using fresh baking powder, and giving each wing enough space to breathe. The refrigerator drying step is also crucial—don’t skip it.
Can I use frozen chicken wings?
Yes, but you need to thaw them completely first and dry them very well. Frozen wings release a lot of moisture as they thaw, so pat them dry with paper towels, then let them sit on a paper towel-lined baking sheet in the refrigerator for an hour before seasoning. The extra drying time is essential.
What’s the best way to reheat leftover wings?
The oven or air fryer is your best bet. Reheat at 375°F (190°C) for 10-12 minutes in the oven, or 5 minutes in an air fryer. This brings back the crispiness without drying out the meat. Avoid the microwave at all costs—it will make the skin rubbery and the meat tough.
Can I make these wings in an air fryer?
Yes, and they turn out amazing. Preheat your air fryer to 400°F (200°C). Arrange the seasoned wings in a single layer in the basket (you’ll need to work in batches). Cook for 20-25 minutes, shaking the basket halfway through. The cooking time is shorter than the oven method, and the results are just as crispy. This is my go-to method when I’m only making a small batch.
Pin This Recipe!
Crispy Baked Chicken Wings: The Best Game Day Recipe

These oven-baked chicken wings are incredibly crispy without deep frying, using a simple technique that creates a shatteringly crisp skin while keeping the meat juicy and tender. Perfect for game day gatherings, they stay crispy even after sitting out.
- Prep Time: 15 minutes
- Cook Time: 45 minutes
- Total Time: 1 hour 15 minutes (plus 1 hour refrigeration)
- Yield: 4 servings 1x
- Category: Appetizer
- Cuisine: American
Ingredients
- 3 pounds chicken wings, separated into drumettes and flats (about 24–30 pieces total)
- 2 tablespoons baking powder (aluminum-free)
- 1 teaspoon kosher salt
- 1/2 teaspoon black pepper, freshly ground
- 1/2 teaspoon garlic powder
- 1/4 teaspoon smoked paprika
- 1/2 cup buffalo wing sauce (such as Frank’s RedHot)
- 3 tablespoons unsalted butter, melted
- 1 tablespoon honey
- 1 teaspoon Worcestershire sauce
- Celery sticks, cut into 3-inch pieces
- Carrot sticks (optional)
- Blue cheese dressing or ranch dressing for dipping
Instructions
- Prep the wings: Pat the chicken wings completely dry with paper towels. Change paper towels at least twice to ensure they are very dry.
- Season the wings: In a large bowl, whisk together baking powder, salt, pepper, garlic powder, and smoked paprika. Add dried wings and toss thoroughly until every piece is evenly coated, using your hands.
- Rest the wings: Arrange seasoned wings on a wire rack set inside a baking sheet in a single layer, not touching. Refrigerate uncovered for at least 1 hour, or overnight for best results.
- Preheat the oven: Preheat oven to 425°F (220°C). Position rack in the upper third of the oven.
- Bake the wings: Remove wings from refrigerator and let sit at room temperature for 15 minutes. Bake for 45-50 minutes, rotating the pan halfway through, until deep golden brown and skin is bubbly and crispy.
- Check for doneness: Internal temperature should reach 165°F (74°C) at the thickest part of a drumette.
- Make the sauce: While wings bake, combine buffalo wing sauce, melted butter, honey, and Worcestershire sauce in a small saucepan. Warm over low heat, stirring occasionally, until smooth. Keep warm.
- Sauce the wings: Let baked wings rest on rack for 2-3 minutes. Transfer to a large bowl, pour warm sauce over them, and toss gently until coated. For extra-crispy wings, serve sauce on the side for dipping.
- Serve immediately: Arrange sauced wings on a platter with celery and carrot sticks. Serve with blue cheese or ranch dressing on the side.
Notes
Don’t skip the drying step in the refrigerator – it’s crucial for crispiness. Use aluminum-free baking powder to avoid metallic aftertaste. For best results, let wings dry overnight. If making a large batch, use two baking sheets and rotate between racks. Leftovers can be reheated in a 375°F oven for 10-12 minutes or in an air fryer for 5 minutes.
Nutrition
- Serving Size: 6 wings
- Calories: 380
- Sodium: 780
- Fat: 26
- Saturated Fat: 8
- Carbohydrates: 1
- Protein: 32
Keywords: crispy baked chicken wings, game day wings, buffalo wings, oven baked wings, football party food


