The first one disappeared before I could even grab a napkin. My son stood there with his hands full of golden flakes, looking at me with that wide-eyed expression that says he just discovered something magical. Then my wife asked, “Are those the ones from that bakery downtown?” I nodded, trying to hide my surprise that homemade could compete with the $8 pastry I usually buy. It’s now the third week in a row I’ve made these. Honestly, I’m not even mad about it.
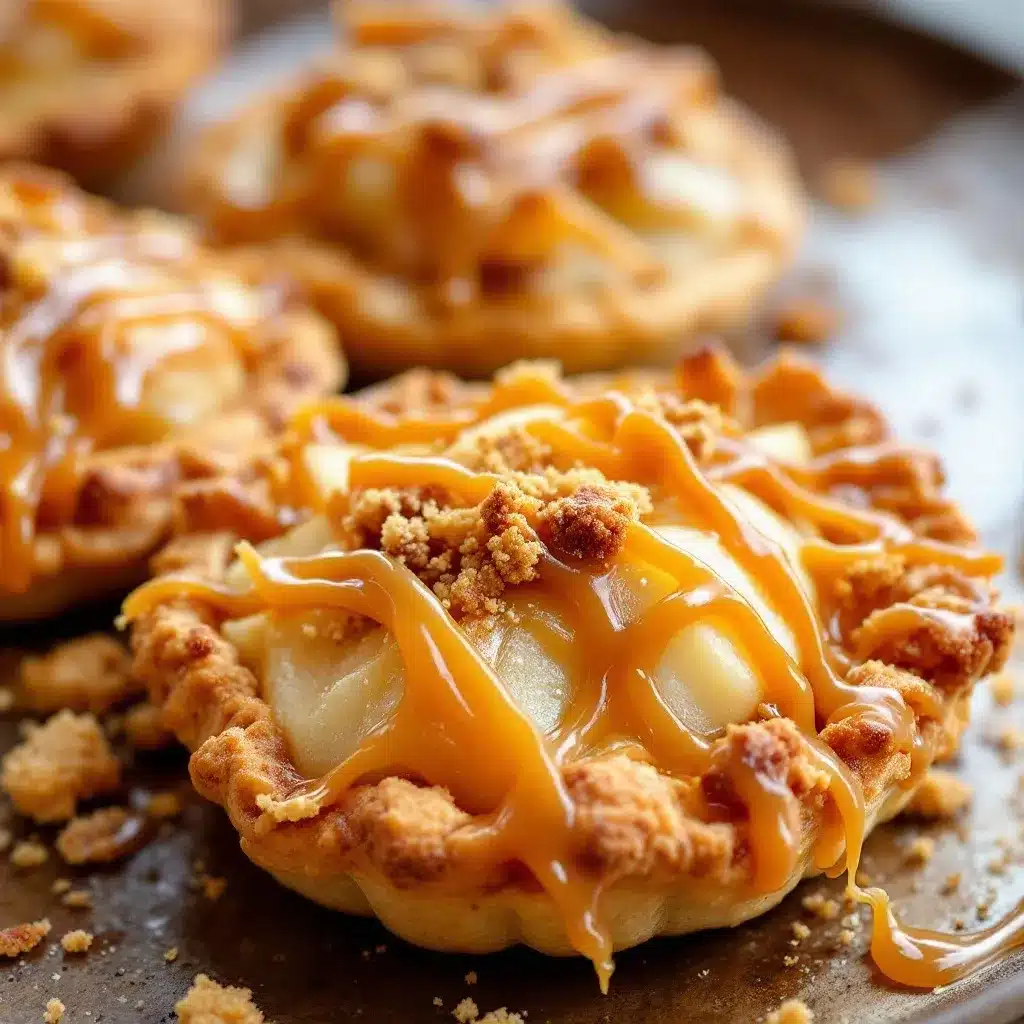
I usually stick to savory pies or maybe a classic crumble when the apples start turning. Hand pies felt like too much work for a Tuesday night. You know how it is—rolling dough, cutting shapes, sealing edges, frying or baking. It sounds like a project for a weekend with nothing else to do. But then I found this 4-ingredient version that changed the game entirely. The crust is flaky, the filling is warm and spiced, and that salted caramel drizzle is the kind of thing that makes people stop mid-bite.
There’s something about the smell of cinnamon and butter hitting the oven that just settles into your bones. It’s not complicated, but it feels special. Like you put in effort, even if you didn’t really have to. That’s the secret here. The simplicity is what makes it shine. If you can chop an apple and mix sugar, you can do this. The result is crispy on the outside, soft on the inside, and utterly addictive.
I used to think baking required a degree in chemistry. Now I know it just requires patience and the right ingredients. These hand pies have become our go-to for unexpected guests or just a quiet evening at home. They’re portable, messy in the best way, and always hit the spot. I’m sharing this because I know you’ll want to make them again and again. Just like we did.
Why You’ll Love This Recipe
Quick & Easy
You can have these from fridge to fork in under 45 minutes. That’s right, less time than it takes to order takeout and wait for the delivery driver. Perfect for busy weeknights or when you’re craving something sweet but don’t want to spend hours in the kitchen.
Simple Ingredients
No fancy grocery trips needed. You likely already have everything in your pantry. We’re talking refrigerated pie crusts, apples, sugar, cinnamon, and salted caramel. That’s it. No obscure flours or hard-to-find spices. This recipe uses simple, wholesome ingredients to deliver bold flavor and satisfying texture without the fuss.
Perfect for Any Occasion
Whether it’s a cozy dinner for two, a potluck dessert, or a weekend treat for the kids, these hand pies fit right in. They’re great for impressing guests without stress, or turning a simple meal into something memorable. They look professional but are surprisingly easy to pull off.
Crowd-Pleaser
Always gets rave reviews from kids and adults alike. Even my picky eater who usually turns his nose up at “fruit desserts” devoured two. The combination of tart apple and sweet caramel is a flavor profile that just works. It’s comfort food reimagined—healthier, faster, but with the same soul-soothing satisfaction.
Unbelievably Delicious
The texture and flavor combo is next-level comfort food. The crust shatters when you bite into it, revealing the warm, juicy apple filling inside. It’s the kind of treat that makes you close your eyes after the first bite. This recipe isn’t just good—it’s the kind that sticks with you.
What Makes It Different
Many hand pie recipes call for making dough from scratch, which can be intimidating. This version uses high-quality refrigerated pie crusts to save time without sacrificing flavor. I recommend using a brand like Pepperidge Farm for best texture, as they hold their shape well during baking. The addition of the salted caramel drizzle adds a gourmet touch that elevates the humble apple pie into something special. It’s not just another version—it’s your best version.
What Ingredients You Will Need
This recipe relies on the quality of a few key components to shine. Since there are only four main ingredients, each one plays a crucial role in the final taste and texture.
For the Crust
- Refrigerated Pie Crusts: Two packages of all-butter pie crusts. All-butter is non-negotiable for that flaky, tender bite. Butter-based crusts brown better and taste richer than shortening-based ones. Keep them cold until you’re ready to roll.
- Egg Wash: One large egg beaten with a tablespoon of water. This helps the crust turn golden brown and keeps the edges sealed.
For the Filling
- Apples: 3 medium-sized apples, peeled and diced. I prefer a mix of Granny Smith and Honeycrisp. Granny Smith adds tartness and holds its shape, while Honeycrisp adds sweetness and juiciness. Look for firm apples that won’t turn into mush.
- Sugar: 1/4 cup granulated sugar. Adjust based on how sweet your apples are. If you’re using very tart apples, you might need a bit more.
- Cinnamon: 1 teaspoon ground cinnamon. This is the star spice. Don’t skip it. It brings that classic apple pie aroma.
- Butter: 2 tablespoons unsalted butter, cut into small cubes. These get mixed into the apples to add richness.
For the Drizzle
- Salted Caramel Sauce: 1/2 cup store-bought or homemade. Store-bought is fine for speed, but homemade adds a personal touch. If you need a dairy-free option, look for vegan caramel sauces.
Substitution Tips
If you want to go gluten-free, you can use gluten-free pie crusts. They’ve improved a lot in recent years. For a lower-sugar option, you can use a sugar substitute, but note that it may affect the caramelization of the apples. In summer, you can swap in fresh berries instead of apples for a different twist.
Equipment Needed
You don’t need a fancy kitchen to make these. Here is what you’ll need:
- Baking Sheet: A standard 13×18 inch sheet pan. Line it with parchment paper for easy cleanup. Parchment paper is worth every penny—it prevents sticking and makes washing up a breeze.
- Rolling Pin: Any standard rolling pin will do. If you don’t have one, a clean wine bottle can work in a pinch, though it’s less efficient.
- Pastry Brush: For applying the egg wash. A silicone brush is easier to clean than a bristle one.
- Sharp Knife and Cutting Board: For dicing the apples. A paring knife is best for precision.
- Mixing Bowl: Medium-sized for tossing the apples with sugar and cinnamon.
- Fork: To crimp the edges of the pies. A fork gives a nice decorative touch and helps seal the crust.
Personal tip: I once tried using a glass jar to roll out the dough, and it worked, but it’s awkward. Just get a proper rolling pin. It makes the process so much smoother. Also, make sure your baking sheet is flat. Warped pans can lead to uneven baking.
Preparation Method
Step 1: Prep the Apples (10 minutes)
Peel, core, and dice the apples into small, uniform pieces. About 1/2 inch cubes work best. You want them small enough to cook through quickly but large enough to have some texture. Toss them in a bowl with the sugar, cinnamon, and butter cubes. Let them sit while you prep the dough. This allows the sugar to start drawing out some of the apple juices, creating a natural syrup.
Step 2: Prepare the Dough (5 minutes)
Preheat your oven to 400°F (200°C). Line your baking sheet with parchment paper. Take your refrigerated pie crusts out of the fridge. Let them sit for about 5-10 minutes to soften slightly so they are pliable but still cold. Unroll the dough and cut each circle into quarters. You should have 8 squares total.
Step 3: Assemble the Hand Pies (10 minutes)
Place a square of dough on a clean surface. Spoon about 2-3 tablespoons of the apple mixture into the center of the square, leaving a 1/2-inch border. Be careful not to overfill, or the pies might burst. Fold the opposite corners of the square toward the center to meet in the middle, creating a triangle shape. Press the edges firmly with your fingers to seal. Then, use a fork to crimp the edges for extra security and a pretty look. Repeat with the remaining squares.
Step 4: Egg Wash and Bake (20 minutes)
Whisk the egg with water and brush the tops of the pies lightly. This will give them a beautiful golden shine. Bake for 15-20 minutes, or until the crust is deep golden brown and the apples are tender. Keep an eye on them around the 15-minute mark, as oven temperatures can vary. The edges should look flaky and crisp.
Step 5: Cool and Drizzle (5 minutes)
Remove the pies from the oven and let them cool on the baking sheet for 5 minutes. This allows the filling to set slightly so it doesn’t spill out when you bite. Drizzle with salted caramel sauce while they are still warm. The warmth helps the caramel adhere better. Serve immediately for the best experience.
Troubleshooting Tips
If the crust tears, don’t panic. Just patch it with a small piece of leftover dough. If the apples are too juicy, you can add a teaspoon of cornstarch to the filling to thicken it. If the pies brown too quickly, cover them loosely with foil.
Cooking Tips & Techniques
Keep the Dough Cold
The secret to a flaky crust is keeping the butter cold. If the dough gets too warm and sticky, pop it back in the fridge for 10 minutes. Cold butter creates steam pockets in the oven, which lifts the layers of the crust. This is a technique I learned the hard way after a few soggy attempts.
Don’t Skip the Egg Wash
It’s tempting to skip this step, but it makes a huge difference. The egg wash not only adds color but also helps the crust bake evenly. It gives that professional bakery look. If you don’t have an egg, you can use a little milk, but the color won’t be as rich.
Uniform Sizing
Try to make all your hand pies the same size. This ensures they bake evenly. If some are bigger and some are smaller, the smaller ones might burn while the larger ones are still undercooked. Use a ruler or just eyeball it carefully.
Multitasking
While the pies are baking, you can start making the caramel sauce if you’re making it from scratch. This helps manage your time better. Also, clean your workspace while the pies cool. It’s easier to clean a dry surface than a sticky one.
Common Mistakes
One common mistake is overfilling the pies. If there’s too much filling, it will leak out during baking and burn on the pan. Another mistake is not sealing the edges well. This can cause the pies to open up. Take your time with the crimping step.
Variations & Adaptations
Flavor Variations
While apple and cinnamon is classic, you can experiment with other flavors. Try adding a pinch of nutmeg or allspice for a warmer spice profile. You can also use pear instead of apples for a milder flavor. For a chocolate twist, add a small square of dark chocolate to the center before folding.
Dietary Adjustments
For a gluten-free option, use gluten-free pie crusts. There are many good brands available now. For a dairy-free version, use a plant-based butter in the filling and a vegan caramel sauce. You can also use a flax egg for the wash if needed.
Seasonal Twists
In the fall, add chopped pecans or walnuts to the filling for extra crunch. In the spring, you can use strawberries or rhubarb instead of apples. The basic method remains the same. I once made these with blackberries and they were incredible. The tartness of the berries pairs well with the sweet crust.
Cooking Methods
You can also bake these in an air fryer. Cook at 350°F for 10-12 minutes. Check them frequently as air fryers can vary. The result is a slightly crispier crust. This is great for making small batches.
Serving & Storage Suggestions
Serving Suggestions
These hand pies are best served warm. They pair wonderfully with a cup of coffee or a glass of cold milk. For a fancy touch, serve them with a scoop of vanilla ice cream or a dollop of whipped cream. The contrast of hot pie and cold cream is heavenly. They also go well with a side of crispy kale salad for a balanced meal.
Storage Instructions
Store leftovers in an airtight container in the refrigerator for up to 3 days. The crust may soften slightly, but the flavor remains great. You can also freeze them for up to 2 months. Freeze them on a baking sheet first, then transfer to a freezer bag. This prevents them from sticking together.
Reheating Tips
To reheat, preheat your oven to 350°F and warm the pies for 10 minutes. This helps restore the crispiness of the crust. Avoid microwaving, as it will make the crust soggy. If you’re in a hurry, you can microwave them for 30 seconds, but the texture won’t be the same.
Flavor Development
The flavors actually improve after a day. The spices meld together, and the apples become even softer. If you make them ahead, they might taste even better the next day. Just reheat them properly.
Nutritional Information & Benefits
Each hand pie contains approximately 250-300 calories, depending on the size and amount of caramel used. The apples provide fiber and vitamin C, which are good for immune health. The cinnamon has anti-inflammatory properties and can help regulate blood sugar levels. However, keep in mind that the pie crust and caramel add significant sugar and saturated fat. Enjoy these as an occasional treat rather than a daily snack. If you’re watching your sugar intake, you can reduce the amount of caramel drizzle or use a sugar-free version. The apples themselves are a healthy choice, offering natural sweetness and crunch. Just be mindful of the portions. These are indulgent treats, so savor them slowly.
Conclusion
These Crispy Apple Hand Pies with Salted Caramel Drizzle are more than just a dessert; they’re a moment of joy in a package. The combination of flaky crust, spiced apples, and sweet caramel is unbeatable. I hope you try this recipe and enjoy it as much as we have. It’s simple, delicious, and perfect for sharing. Feel free to customize it with your favorite spices or fruits. Let me know how they turn out in the comments below! Share your photos and tag us. We love seeing your creations. Happy baking!
FAQs
Can I use frozen pie crusts?
Yes, but you’ll need to thaw them according to the package instructions. Make sure they are still cold when you start rolling them out. Frozen crusts can work well, but fresh refrigerated ones are easier to handle.
How do I prevent the filling from leaking?
Don’t overfill the pies. Use about 2-3 tablespoons of filling per pie. Also, make sure to seal the edges tightly by pressing with your fingers and crimping with a fork. If you see any leaks, patch them quickly with a bit of dough.
Can I make these ahead of time?
Yes, you can assemble the pies and refrigerate them for up to 24 hours before baking. You may need to add a couple of minutes to the baking time if they go into the oven cold. You can also freeze them unbaked for later.
What type of apples are best?
A mix of tart and sweet apples works best. Granny Smith and Honeycrisp are a great combination. You can also use Pink Lady or Braeburn apples. Avoid using apples that are too soft or mealy, as they will turn into mush.
Can I use a different sweetener?
Yes, you can use brown sugar, maple syrup, or a sugar substitute. Brown sugar will add a deeper flavor, while maple syrup will add a distinct taste. If using a substitute, check the package for conversion ratios.
Pin This Recipe!

Crispy Apple Hand Pies: 4-Ingredient Easy Recipe

These crispy apple hand pies feature a flaky refrigerated crust, warm spiced apple filling, and a salted caramel drizzle. They are quick to make, using simple ingredients for a delicious dessert ready in under 45 minutes.
- Prep Time: 25 minutes
- Cook Time: 20 minutes
- Total Time: 45 minutes
- Yield: 8 servings 1x
- Category: Dessert
- Cuisine: American
Ingredients
- 2 packages all-butter refrigerated pie crusts
- 1 large egg beaten with 1 tablespoon water (for egg wash)
- 3 medium apples (mix of Granny Smith and Honeycrisp), peeled and diced
- 1/4 cup granulated sugar
- 1 teaspoon ground cinnamon
- 2 tablespoons unsalted butter, cut into small cubes
- 1/2 cup salted caramel sauce
Instructions
- Preheat oven to 400°F (200°C) and line a baking sheet with parchment paper.
- Peel, core, and dice apples into 1/2-inch cubes. Toss with sugar, cinnamon, and butter cubes; let sit while prepping dough.
- Remove pie crusts from fridge and let sit for 5-10 minutes to soften slightly. Unroll and cut each circle into quarters to make 8 squares.
- Place an apple mixture spoonful (2-3 tablespoons) in the center of each dough square, leaving a 1/2-inch border.
- Fold opposite corners of the square toward the center to form a triangle. Press edges to seal and crimp with a fork.
- Brush tops with egg wash.
- Bake for 15-20 minutes until crust is deep golden brown and apples are tender.
- Cool on baking sheet for 5 minutes, then drizzle with salted caramel sauce while warm.
Notes
Keep dough cold for a flaky crust. Do not overfill to prevent leaking. If apples are too juicy, add a teaspoon of cornstarch. For gluten-free, use gluten-free pie crusts. For dairy-free, use plant-based butter and vegan caramel.
Nutrition
- Serving Size: 1 hand pie
- Calories: 275
- Sugar: 24
- Sodium: 180
- Fat: 14
- Saturated Fat: 6
- Carbohydrates: 38
- Fiber: 2
- Protein: 3
Keywords: apple hand pies, easy dessert, salted caramel, apple pie, quick baking, family friendly, fall recipes


