I was standing there in my pajamas, holding a whisk like it was a weapon, when I realized I had absolutely no idea what to serve for the trick-or-treaters. It was 4:55 PM. The sun was already dipping below the horizon, casting those long, spooky shadows that make every house look like a haunted mansion. My kids were vibrating with sugar energy, demanding to know if we had “the pumpkin thing” ready. You know the drill. They saw it on TikTok, they saw it on Instagram, and now they expect it to materialize out of thin air before the first knock.
I looked at the fridge. Empty. Except for two cartons of vanilla pudding, a tub of whipped cream, and a literal mountain of pumpkins we’d bought for a party that got cancelled. Panic set in. I didn’t have time to bake. I didn’t have time to simmer a sauce. I just had twenty minutes to make something that looked like magic but tasted like a hug. So, I grabbed the Oreos. I crushed them. I mixed the pudding with a little pumpkin spice and some cream cheese to give it that dense, creamy texture that isn’t just watery sugar water.
The house started smelling like autumn and chocolate chip cookies. The kids stopped screaming. Even the dog stopped barking at the wind. I layered the dirt, the pumpkin cream, and the mini candy pumpkins into little plastic cups. When I handed one to my oldest, he took one bite, closed his eyes, and said, “This is actually good.” That’s the moment you know you’ve won. It’s not about perfection. It’s about showing up with something sweet when the chaos hits. And honestly, these cups are so easy, you can make them while the doorbell keeps ringing.
Why You’ll Love This Recipe
Look, I’ve tried everything when it comes to Halloween desserts. Some are too sweet, some are too messy, and most require a degree in pastry arts that I definitely don’t have. These creamy pumpkin patch pudding cups with Oreo dirt hit that perfect sweet spot. They’re not just another box-mix disaster; they’re a texture dream. The contrast between the light, spiced pumpkin cream and the crunchy, chocolatey “dirt” is what makes this recipe special. It’s comfort food for grown-ups too, let’s be real.
- Quick & Easy: You don’t need an oven. You don’t need to wait for batter to bake. This comes together in under 15 minutes, which is perfect for those last-minute parties or when you’re hiding in the pantry for five minutes of peace.
- Simple Ingredients: No fancy grocery trips needed. If you have pudding mix, whipped topping, Oreos, and a can of pumpkin puree, you’re already halfway done. You likely already have everything in your kitchen right now.
- Perfect for Halloween: Great for trick-or-treaters, classroom parties, or just a cozy movie night snack. The visual of the “dirt” and the little pumpkin candies makes it instantly festive without any extra effort.
- Crowd-Pleaser: Always gets rave reviews from kids and adults alike. Kids love the dirt part, and adults love the pumpkin spice part. It’s a win-win that rarely fails.
- Unbelievably Delicious: The texture and flavor combo is next-level comfort food. The pumpkin isn’t just a flavor; it adds a richness that makes the pudding feel more substantial and less like dessert syrup.
What makes this different from the rest? It’s the balance. Most pumpkin desserts are too cloying or too dry. By using the cream cheese and folding in the whipped topping, we get a mousse-like consistency that feels fancy but is actually just lazy cooking at its finest. It’s the kind of treat that makes you close your eyes after the first bite. It’s nostalgic, it’s fun, and it’s easy enough to make with one hand while holding a toddler with the other.
What Ingredients You Will Need
This recipe uses simple, wholesome ingredients to deliver bold flavor and satisfying texture without the fuss. You don’t need to hunt down exotic spices or expensive gadgets. The magic here is in the combination of pantry staples that you probably already have. We are leaning on the classic flavors of fall—pumpkin and spice—but keeping it light and creamy. I like to keep the ingredient list short so I can focus on getting the layers right.
For the Pumpkin Pudding Layer
- Vanilla Instant Pudding Mix: Two boxes (3.4 oz each). I recommend Jell-O for the most consistent set. Look for the box that says “French Vanilla” if you want a richer taste.
- Heavy Cream: 1 cup, cold. Using heavy cream instead of milk makes the pudding incredibly rich and stable. It won’t get watery if you make these ahead of time.
- Canned Pumpkin Puree: 1 cup. Make sure it’s 100% pure pumpkin, not pumpkin pie filling. Pie filling has sugar and spices already, which would throw off the balance. We want the pure, earthy flavor.
- Cream Cheese: 4 oz, softened. This is the secret weapon. It adds tang and thickness, making the pudding feel more like a cheesecake filling. It helps it hold its shape in the cup.
- Pumpkin Pie Spice: 1 teaspoon. If you don’t have a blend, mix cinnamon, ginger, nutmeg, and cloves. But honestly, the blend is easier and tastes just as good.
- Confectioners’ Sugar: 2 tablespoons. Just a little bit to cut the slight bitterness of the pumpkin and enhance the vanilla.
For the “Dirt” and Garnish
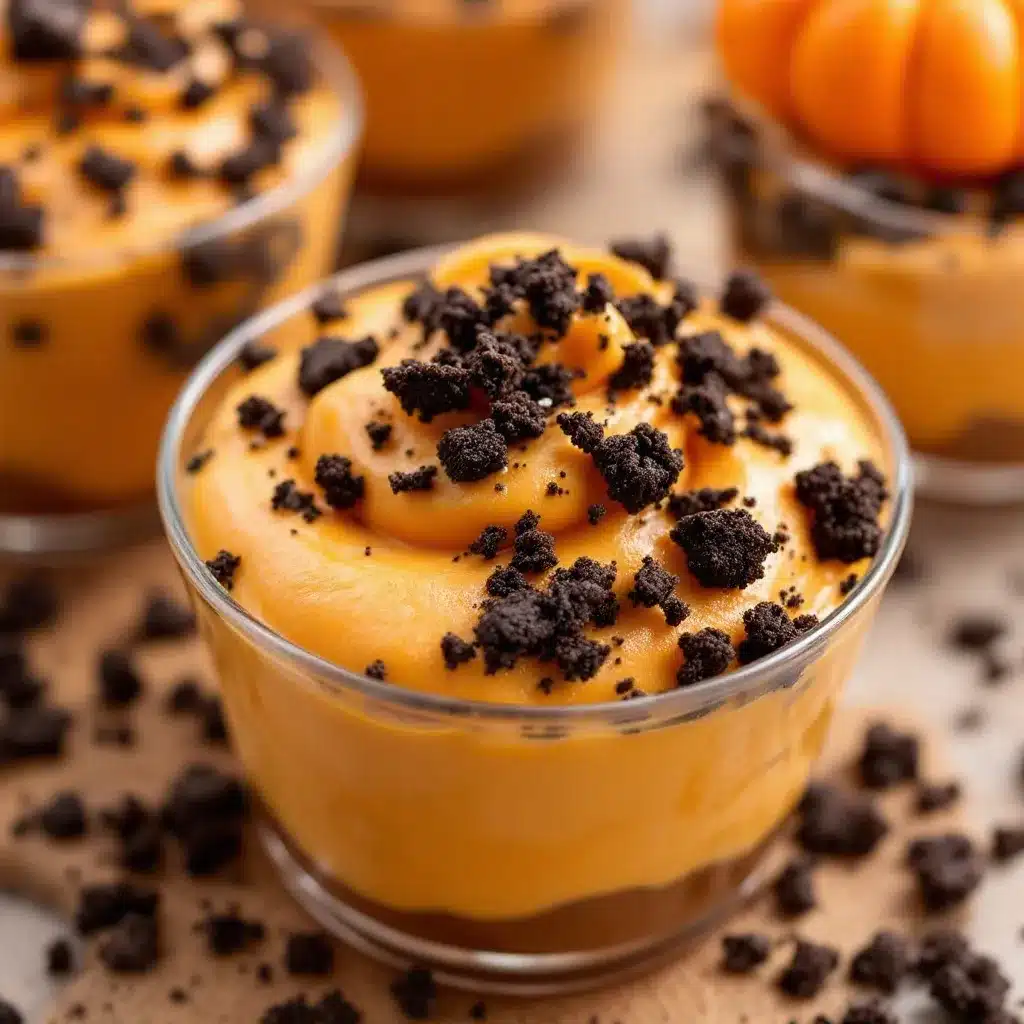
- Oreo Cookies: 1 package (14.3 oz). The classic black cookies are essential for the dirt look. You can use double-stuff for more chocolatey bits, but regular works fine too.
- Mini Candy Pumpkins: 1 small bag. These are the cute orange decorations you find in the Halloween aisle. They add that final pop of color.
- Gummy Worms: Optional, but highly recommended for the “dirt” effect. They look like they are crawling out of the ground.
For the best texture, I always let the cream cheese soften in the microwave for 15 seconds before mixing. It blends so much smoother. And if you’re worried about sugar, you can swap the pudding mix for a sugar-free version, though the texture might be slightly different. But for a Halloween treat? I say go for the full sugar experience.
Equipment Needed
You don’t need a lot of fancy gear for this, which is part of the appeal. Here is what you’ll need to get the job done efficiently.
- Food Processor or Ziploc Bag: A food processor is fastest for crushing the Oreos into fine “dirt.” If you don’t have one, put the cookies in a heavy-duty Ziploc bag and smash them with a rolling pin. It’s a great workout and very satisfying.
- Mixing Bowls: Two large bowls. One for the pudding mixture and one for the whipped topping if you’re folding it in separately (though we’ll be mixing it all together for simplicity).
- Electric Mixer or Whisk: An electric hand mixer makes blending the cream cheese and pumpkin puree much easier. You want it smooth, with no lumps. A whisk works, but it takes more arm strength.
- Pudding Cups or Jars: Small plastic cups (4-6 oz) are perfect for serving. Glass mason jars look cute for older kids or adults, but plastic is less likely to break if dropped.
- Spatula: A rubber spatula is essential for scraping down the sides of the bowl to ensure everything is evenly mixed.
If you’re on a budget, skip the fancy cups. You can use regular shot glasses or even hollowed-out mini pumpkins for a rustic look. But for a quick party, the clear plastic cups let you see the beautiful layers, which is half the fun.
Preparation Method
Let’s get this done before the doorbell rings again. This process is straightforward, but timing is key to getting those perfect layers.
- Crush the Oreos (2 minutes): Take your Oreo cookies out of the package. If using a food processor, pulse them until they are fine crumbs. If using a bag, smash them until they look like dark sand. Set aside. You want some tiny chunks for texture, but mostly fine dirt.
- Prepare the Cream Cheese Base (3 minutes): In a large mixing bowl, combine the softened cream cheese, canned pumpkin puree, pumpkin pie spice, and confectioners’ sugar. Use your electric mixer on medium speed. Beat this until it is completely smooth and pale orange. This step is crucial because if you have lumps of cream cheese, they will show up in the final cup. Scrape down the sides of the bowl.
- Make the Pudding (2 minutes): In a separate bowl, whisk the instant pudding mix with the cold heavy cream. Mix for about 2 minutes until it starts to thicken. It should be quite thick, almost like a stiff batter. Don’t overmix it, or it might get gluey.
- Combine the Mixtures (2 minutes): Gently fold the thickened pudding into the pumpkin cream cheese mixture. Use a spatula and fold carefully. You want to keep as much air in the mixture as possible so it stays light and fluffy. The color should be a uniform, creamy orange. Taste it now. If you want it sweeter, add a little more sugar. If you want more spice, add a pinch of cinnamon.
- Assemble the Cups (3 minutes): Take your plastic cups. First, add a layer of the Oreo dirt at the bottom—about a tablespoon. Then, spoon in the pumpkin pudding mixture, filling the cup about halfway. Add another layer of Oreo dirt on top. Finally, add a dollop of whipped cream if you have it, and garnish with a mini candy pumpkin and a gummy worm.
- Chill and Serve (10 minutes): Place the cups in the fridge for at least 10 minutes to let the pudding set slightly. This helps the layers hold their shape when you pick them up. Then, they are ready to go.
Pro tip: If you are making these ahead of time, do not add the gummy worms until you are ready to serve. They will get soggy and lose their “worm” shape if they sit in the moisture for too long. The dirt and pudding can be layered up to 24 hours in advance.
Cooking Tips & Techniques
I’ve made a few mistakes with this recipe over the years, so you don’t have to. The biggest issue people face is a runny pudding. This happens if the heavy cream isn’t cold enough. Make sure your cream is straight from the fridge, not sitting on the counter. If it’s warm, the pudding won’t set properly.
Another common mistake is not softening the cream cheese enough. Cold cream cheese creates lumps that are hard to fix. If you’re in a rush, microwave it for 10-second intervals until it’s soft to the touch. Don’t melt it, just soften it.
When crushing the Oreos, don’t turn them into dust. You want some texture. If the dirt is too fine, it mixes with the pudding and becomes a brown sludge. Keep some little cookie chunks in there for that “dirt” crunch.
Also, taste your pumpkin puree. Some brands are watery, and some are thicker. If your puree is very wet, you might need to add a little more cream cheese or pudding mix to compensate. It’s all about feel. The mixture should be thick enough to hold a spoon upright.
Multitasking is key here. While the pudding is mixing, start crushing the cookies. While the cookies are crushing, check your cream cheese. Get everything ready before you start assembling. It makes the process feel less chaotic and more like a fun craft project.
Variations & Adaptations
This recipe is very flexible. Here are a few ways to tweak it based on your needs or what you have on hand.
- Gluten-Free Option: Use gluten-free vanilla pudding mix and gluten-free Oreos (or just use gluten-free chocolate sandwich cookies). The texture will be very similar, and nobody will know the difference.
- Dairy-Free Version: Swap the heavy cream for full-fat coconut cream. Use dairy-free cream cheese and a dairy-free pudding mix. The flavor will be slightly more coconutty, which actually pairs well with pumpkin. Use dairy-free Oreos for the dirt.
- Low-Sugar/Keto: Use sugar-free instant pudding and sweeten the pumpkin mixture with erythritol or stevia. For the dirt, crush sugar-free cookies or use crushed pecans mixed with cocoa powder for a “dirt” that is low-carb. It’s not as sweet, but it’s still delicious.
- Flavor Twist: Add a layer of caramel sauce between the pudding and the dirt for a salted caramel pumpkin cup. Or, mix some white chocolate chips into the pudding mixture for extra richness.
I once made these with chocolate pudding and orange zest for the pumpkin layer. It was weird but surprisingly good. The orange cut through the chocolate nicely. But stick to the classic pumpkin spice for your first time. It’s a crowd favorite for a reason.
Serving & Storage Suggestions
These cups are best served cold. The cold temperature enhances the flavor of the pumpkin spice and makes the pudding feel more like a mousse. Present them on a tray with other Halloween treats. They look great next to dairy-free star-spangled fruit pizza or gluten-free red-white-blueberry parfaits for a festive spread.
Store leftovers in the refrigerator in an airtight container. They will keep for up to 3 days. However, the Oreo dirt will absorb moisture from the pudding over time, so they might get a bit softer. If you want to keep them crunchy, store the dirt and pudding in separate containers and assemble right before serving.
You can also freeze these! Place the assembled cups (without the gummy worms) in the freezer. They will last for up to a month. Thaw them in the fridge for a few hours before serving. The texture might be slightly different after freezing, but the flavor remains intact.
For serving, pair these with a hot cup of coffee or a glass of cold milk. The contrast between the warm drink and the cold dessert is satisfying. They are also great for potlucks because they are individual portions, so no cutting or serving plates are needed.
Nutritional Information & Benefits
While these are definitely a treat, they do offer some nutritional benefits. Pumpkin puree is high in Vitamin A and fiber, which is good for your immune system and digestion. One cup of pumpkin provides more than your daily recommended intake of Vitamin A.
Each serving (one cup) contains approximately 250-300 calories, depending on the size of the cup and the amount of cream used. The fat content comes from the cream cheese and heavy cream, which provides satiety. The sugar content is moderate, coming from the pudding mix and cookies.
If you are watching your sugar intake, opt for the low-sugar variations mentioned earlier. For those with gluten sensitivities, the gluten-free adaptation is a safe and delicious alternative. These cups are a fun way to incorporate vegetables into a dessert, which is always a win in my book.
Remember, moderation is key. These are perfect for occasional indulgence, especially during the Halloween season. Enjoy them as part of a balanced diet, and don’t feel guilty about having a second cup. You earned it.
Conclusion
These creamy pumpkin patch pudding cups with Oreo dirt are the ultimate Halloween hack. They are easy, delicious, and visually stunning. I love making them because they bring a smile to my kids’ faces and take very little effort on my part. It’s the kind of recipe that feels like a win every single time.
I encourage you to try this recipe and customize it to your liking. Add your favorite candies, change the cookie type, or experiment with different spices. Make it your own. I love this recipe because it turns a chaotic moment into a happy memory. It’s simple, but it’s special.
Please leave a comment below and let me know how your cups turned out. Did you add extra gummy worms? Did you use gluten-free cookies? I’d love to hear your adaptations. Share this recipe with your friends and family, and tag me on social media if you post a photo. Happy Halloween, and happy cooking!
FAQs
Can I make these pudding cups ahead of time?
Yes, you can assemble them up to 24 hours in advance. Store them in the refrigerator in an airtight container. Just wait to add the gummy worms until right before serving to prevent them from getting soggy.
What can I use instead of Oreos for the dirt?
You can use any dark chocolate sandwich cookies, such as chocolate wafers or gluten-free chocolate cookies. For a less sweet option, try crushed graham crackers mixed with a little cocoa powder.
Can I use fresh pumpkin instead of canned?
You can, but it requires more work. You’ll need to roast the pumpkin, puree it, and drain the excess water. Canned pumpkin puree is concentrated and has less water, which helps the pudding set better. If you use fresh, make sure to strain it well.
How do I keep the layers distinct?
The key is to make the pudding mixture thick. Using heavy cream instead of milk helps with this. Also, chill the cups for at least 10 minutes before serving to let the pudding firm up. This helps the layers hold their shape.
Are these cups safe for kids with allergies?
Standard Oreos contain gluten and dairy, and the pudding mix often contains milk derivatives. For allergies, use gluten-free and dairy-free alternatives as mentioned in the variations section. Always check the labels of specific brands to ensure they are safe for your child’s needs.
Pin This Recipe!

Creamy Pumpkin Patch Pudding Cups: 15-Min Halloween Treat

A quick, no-bake Halloween dessert featuring layers of spiced pumpkin pudding, Oreo ‘dirt’, and festive candy garnishes. Perfect for trick-or-treaters or last-minute parties.
- Prep Time: 15 minutes
- Cook Time: 0 minutes
- Total Time: 15 minutes
- Yield: 8 servings 1x
- Category: Dessert
- Cuisine: American
Ingredients
- 2 boxes (3.4 oz each) Vanilla Instant Pudding Mix
- 1 cup Heavy Cream, cold
- 1 cup Canned Pumpkin Puree
- 4 oz Cream Cheese, softened
- 1 teaspoon Pumpkin Pie Spice
- 2 tablespoons Confectioners’ Sugar
- 1 package (14.3 oz) Oreo Cookies
- 1 small bag Mini Candy Pumpkins
- Gummy Worms (optional)
Instructions
- Crush the Oreo cookies into fine crumbs using a food processor or by smashing them in a heavy-duty Ziploc bag with a rolling pin. Set aside.
- In a large mixing bowl, combine the softened cream cheese, canned pumpkin puree, pumpkin pie spice, and confectioners’ sugar. Beat with an electric mixer on medium speed until completely smooth and pale orange.
- In a separate bowl, whisk the instant pudding mix with the cold heavy cream for about 2 minutes until it thickens.
- Gently fold the thickened pudding into the pumpkin cream cheese mixture using a spatula until uniform and creamy.
- Assemble the cups by adding a layer of Oreo dirt at the bottom, followed by the pumpkin pudding mixture, another layer of Oreo dirt, and a dollop of whipped cream if desired.
- Garnish with mini candy pumpkins and gummy worms.
- Chill in the refrigerator for at least 10 minutes to set before serving.
Notes
Ensure heavy cream is very cold to help the pudding set. Soften cream cheese thoroughly to avoid lumps. Do not add gummy worms until serving time to prevent sogginess. Can be made up to 24 hours in advance.
Nutrition
- Serving Size: 1 cup
- Calories: 275
- Sugar: 22
- Sodium: 250
- Fat: 18
- Saturated Fat: 10
- Carbohydrates: 28
- Fiber: 2
- Protein: 4
Keywords: Halloween dessert, pumpkin pudding, no-bake treat, Oreo dirt, quick dessert, kid-friendly, fall recipes


