It is past ten on a Tuesday, and the house has finally settled into that heavy, quiet hum of late-night silence. The kitchen lights are dimmed to a low amber glow, reflecting off the stainless steel counters. You know the drill—dishes are washed, floors are swept, and the last of the day’s chaos has dissipated. Honestly, the only thing I want is a creamy mini pumpkin cheesecake with gingersnap crust. Not a giant slice from a bakery that costs more than my grocery bill, but something small, manageable, and entirely mine.
I remember the first time I made these. It was a rainy November evening, the kind where the wind rattles the windowpanes just enough to remind you to stay inside. I had leftover pumpkin puree and a package of gingersnaps that were starting to go soft. I wasn’t trying to impress anyone. There was no audience, no Instagram lighting setup, just me and a muffin tin. The smell of ginger and warm spices filled the small apartment, wrapping around me like a weighted blanket.
These mini cheesecakes have become my go-to ritual for those nights when I need a little comfort but don’t want to commit to a whole dessert that will last for days. They are portable, rich, and stop the sweet tooth without leaving you feeling sluggish. You can make them on Sunday for the week ahead, or whip them up on a whim when the craving hits at midnight. Either way, they feel like a hug in a cupcake liner.
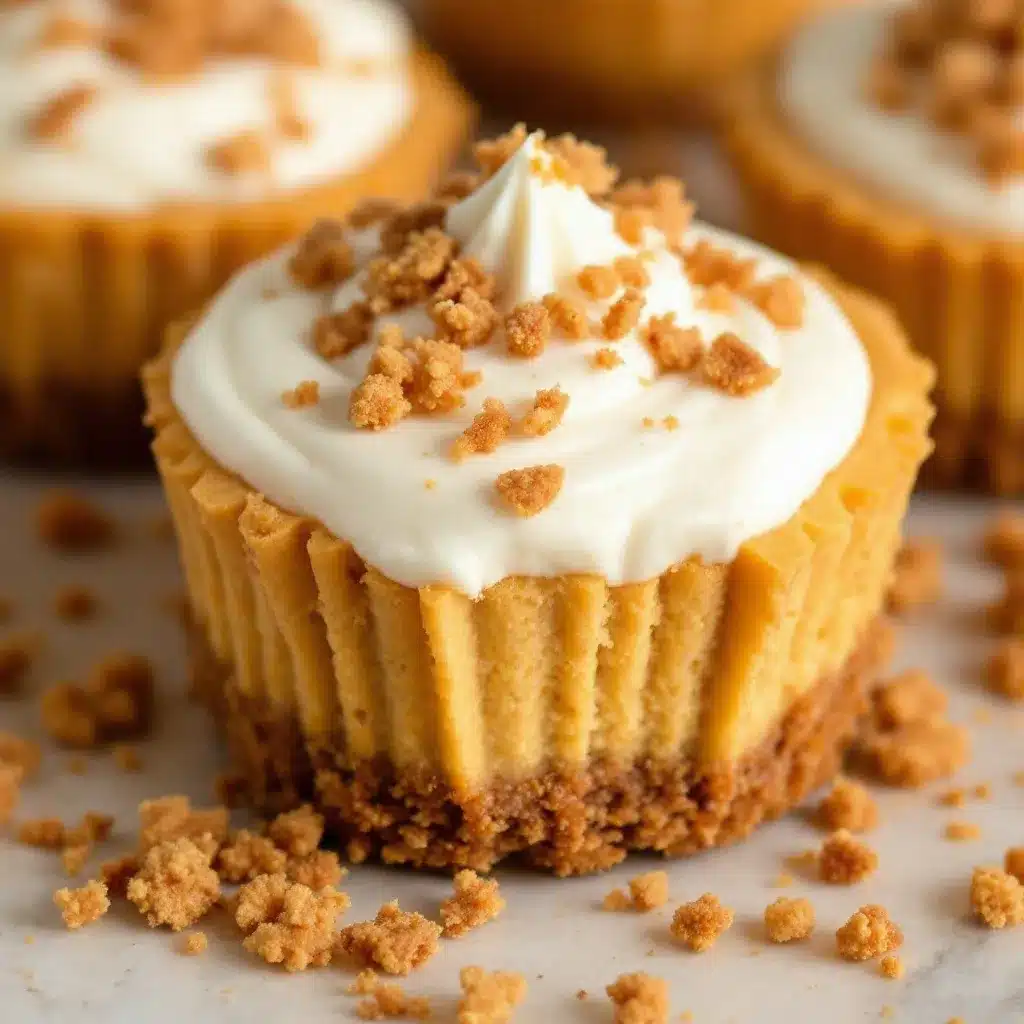
There is something deeply satisfying about peeling back the paper liner and seeing that distinct orange layer sitting atop the dark, crumbly base. It’s a texture contrast that feels intentional, not accidental. The creaminess of the cheese balances the snap of the cookie crust perfectly. I’ve tried making larger versions, but they always end up too dense or difficult to serve. These mini versions hit the sweet spot—literally and figuratively. They are the kind of treat that makes you close your eyes after the first bite and just breathe.
I keep a batch in the fridge year-round, honestly. Whether it’s pumpkin season or just a random Wednesday, they are there. They represent a small moment of peace in a busy life. And if you make them, you’ll understand why I keep coming back to this simple, quiet joy. It’s not about perfection; it’s about the feeling you get when you finally sit down and enjoy something you made yourself.
Why You’ll Love This Recipe
After testing this recipe dozens of times—some failures, some successes, and plenty of taste-testing in between—I’ve landed on a version that is foolproof. You don’t need to be a professional baker to get this right. In fact, the beauty of these mini cheesecakes lies in their simplicity. Here is why this specific recipe stands out from the crowd:
- Quick & Easy: You can have these from start to finish in under 45 minutes of active time, plus chilling. This is perfect for busy weeknights or when you need a last-minute dessert for unexpected guests. No long baking times required.
- Simple Ingredients: You likely already have most of these items in your pantry. Cream cheese, sugar, pumpkin puree, eggs, and gingersnaps. No fancy grocery trips needed. It’s wholesome, simple, and effective.
- Perfect for Meal Prep: These are incredibly stable in the fridge. Make them on Sunday, and you have a ready-to-eat treat for the entire week. They hold their shape beautifully, making them great for lunchboxes or office snacks.
- Crowd-Pleaser: Kids love the fun size, and adults appreciate the balanced flavor. They are never too sweet, which is a common issue with pumpkin desserts. They get rave reviews from everyone, even the skeptics.
- Unbelievably Delicious: The texture is next-level comfort food. The gingersnap crust provides a spicy crunch that contrasts with the silky, smooth filling. It is the kind of combo that feels indulgent but tastes light.
- Distinctive Technique: Many pumpkin cheesecake recipes rely on heavy spices that mask the pumpkin flavor. This recipe uses a precise balance of ginger, cinnamon, and nutmeg to let the pumpkin shine. It’s not just another pumpkin recipe; it’s a balanced, creamy masterpiece.
This recipe isn’t just good—it is the kind of dessert that feels like a secret you’ve discovered. It’s comfort food reimagined for the modern kitchen. Whether you are hosting a small dinner party or just treating yourself, these mini cheesecakes turn a simple moment into something memorable. They are easy to impress with, yet humble enough to feel like home.
What Ingredients You Will Need
This recipe relies on a few key components that work together to create that signature texture and flavor profile. The ingredients are simple, but the quality matters, especially with the cream cheese and pumpkin puree. Here is what you need to gather:
For the Gingersnap Crust
- Gingersnap Cookies: 1 ½ cups of finely crushed cookies. I prefer using standard brand gingersnaps for that classic spicy kick. Avoid the soft, cake-like gingerbread cookies as they won’t create a crunchy crust.
- Unsalted Butter: 5 tablespoons, melted. This binds the crumbs together. Using unsalted allows you to control the sodium level.
- Granulated Sugar: 1 tablespoon. Just a touch to help caramelize the crust slightly and balance the spice.
- Ground Ginger: ½ teaspoon. If your cookies are very mild, add a pinch more here for extra zing.
For the Pumpkin Cheesecake Filling
- Full-Fat Cream Cheese: 16 ounces (two 8-ounce blocks), softened to room temperature. Pro Tip: I recommend using Philadelphia or a high-quality store brand. Low-fat versions can result in a grainy texture.
- Sour Cream: ½ cup, room temperature. This adds tang and richness, preventing the cheesecake from being too dense. You can substitute with full-fat Greek yogurt if needed.
- Pumpkin Puree: ½ cup. Make sure this is 100% pure pumpkin, not pumpkin pie filling. Pie filling has added sugar and spices that will throw off the balance.
- Granulated Sugar: ¾ cup. Adjust to ½ cup if you prefer less sweetness.
- Large Eggs: 3 eggs, room temperature. Room temp eggs emulsify better, preventing curdling.
- Vanilla Extract: 1 teaspoon. Use pure vanilla, not imitation, for a cleaner flavor.
- Ground Cinnamon: 1 teaspoon. The classic autumn spice.
- Ground Nutmeg: ¼ teaspoon. Freshly grated is best, but pre-ground works fine.
- Cayenne Pepper: A tiny pinch (optional). This adds a subtle warmth that highlights the ginger without making it spicy.
For the Topping (Optional)
- Whipped Cream: Homemade or store-bought.
- Crushed Gingersnaps: For garnish.
- Pumpkin Seeds: Toasted pepitas for crunch.
Equipment Needed
You don’t need a fancy kitchen to make these, but having the right tools makes the process much smoother. Here is what you will need:
- 12-Cup Muffin Tin: Standard size is perfect for these mini cheesecakes. If you want smaller ones, you can use a mini muffin tin, but adjust baking time accordingly.
- Paper Liners: Cupcake liners. I recommend using foil liners if you have them, as they hold up better to moisture than paper ones, but paper works fine too.
- Food Processor or Blender: This is the easiest way to crush the gingersnap cookies into fine crumbs. Alternatively, you can use a rolling pin and a zip-top bag, but it takes more elbow grease.
- Mixing Bowls: One large bowl for the filling and one medium for the crust.
- Electric Mixer: A hand mixer or stand mixer is helpful for beating the cream cheese until smooth. You can do it by hand with a sturdy spoon, but it takes longer.
- Spatula: A silicone spatula is essential for scraping down the sides of the bowl and folding in ingredients gently.
- Measuring Cups and Spoons: Precision matters in baking, especially with cheese and puree.
If you don’t have a food processor, a heavy-duty blender works too. Just be careful not to over-process the cookies into a powder; you want some texture. For the muffin tin, if you find the liners sticking, lightly spray them with cooking spray before adding the crust.
Preparation Method
- Prepare the Crust (5 minutes): Preheat your oven to 350°F (175°C). Place the gingersnap cookies in a food processor and pulse until they resemble coarse sand. If you don’t have a processor, place them in a zip-top bag and crush them with a rolling pin. Transfer the crumbs to a medium bowl. Add the melted butter, sugar, and ground ginger. Stir until the mixture looks like wet sand. This is your base.
- Press into Liners (5 minutes): Place paper or foil liners into the muffin tin. Divide the crust mixture evenly among the 12 cups. Use the bottom of a measuring cup or a small glass to press the crumbs firmly into the bottom and slightly up the sides of each liner. You want a compact base so it doesn’t crumble when you eat it. Set the tin aside.
- Beat the Cream Cheese (2 minutes): In a large mixing bowl, add the softened cream cheese and sugar. Using an electric mixer on medium speed, beat until completely smooth and creamy. This is crucial. Any lumps will remain in the final product. Scrape down the sides of the bowl with a spatula to ensure everything is incorporated.
- Add Wet Ingredients (1 minute): Add the sour cream (or Greek yogurt) and vanilla extract to the cream cheese mixture. Beat on low speed just until combined. Do not overmix at this stage, as incorporating too much air can cause cracking later.
- Incorporate Pumpkin and Spices (1 minute): Add the pumpkin puree, cinnamon, nutmeg, and the pinch of cayenne. Mix on low speed until the batter is uniform in color. The mixture should be smooth and orange. If it looks too thick, you can add a teaspoon of milk, but it usually isn’t necessary.
- Add Eggs Carefully (2 minutes): This is the most important step. Add the eggs one at a time, mixing on low speed after each addition. Stop as soon as the yellow yolk disappears. Overmixing eggs adds air, which leads to puffy cheesecakes that then collapse and crack. Be gentle here.
- Fill the Liners (3 minutes): Divide the filling evenly among the crust-lined muffin cups. You should have enough for 12 mini cheesecakes. Use a spatula to smooth the tops. If you have any leftover crust crumbs, sprinkle them on top for extra texture.
- Bake (18-20 minutes): Place the muffin tin in the preheated oven. Bake for 18 to 20 minutes. The edges should be set, but the centers should still have a slight jiggle when you gently shake the pan. They will continue to set as they cool. Do not overbake, or they will become dry.
- Cool and Chill (4+ hours): Remove the tin from the oven and let it cool on a wire rack for 10 minutes. Then, transfer the entire tin to the refrigerator. Chill for at least 4 hours, preferably overnight. This chilling time is non-negotiable for the right texture. It allows the flavors to meld and the cheesecake to firm up.
- Serve: Once chilled, remove from the fridge. Top with a dollop of whipped cream and a sprinkle of crushed gingersnaps if desired. Peel off the liners and enjoy.
Cooking Tips & Techniques
Getting the texture right is the difference between a good cheesecake and a great one. Here are some professional tips to ensure success:
- Room Temperature Ingredients: This cannot be stressed enough. Cold cream cheese will result in a lumpy batter. Take your cream cheese, eggs, and sour cream out of the fridge at least an hour before you start. If you forget, you can soften the cream cheese by microwaving it in short bursts, but be careful not to melt it.
- Don’t Overmix: As mentioned, overmixing introduces air. Air expands in the oven and contracts when cooling, causing cracks. Mix on low speed and stop as soon as ingredients are combined. If you see bubbles, tap the muffin tin on the counter to pop them.
- The Water Bath Alternative: Traditional cheesecakes use a water bath to ensure even, gentle heat. For mini cheesecakes, this is usually unnecessary and can make the crust soggy. However, if you are worried about even baking, you can place a pan of hot water on the rack below the muffin tin.
- Testing for Doneness: The “jiggle test” is your best friend. The centers should look set but still move slightly like gelatin. If they look dry or firm, they are overbaked. They will firm up significantly in the fridge.
- Crust Integrity: Pressing the crust firmly is key. If it’s loose, it will fall apart. Using the bottom of a glass ensures even pressure. Some people like a little crust up the sides, which adds a nice crunch with every bite.
- Storage Matters: These cheesecakes are delicate. Keep them covered in the fridge to prevent them from absorbing odors from other foods. They last up to 5 days in the fridge or can be frozen for up to 2 months.
Variations & Adaptations
While the classic pumpkin and gingersnap combo is timeless, there are many ways to tweak this recipe to suit your taste or dietary needs:
- Gluten-Free Option: Simply use gluten-free gingersnap cookies for the crust. Most major brands offer GF versions that work perfectly. Ensure your pumpkin puree is certified gluten-free if you have celiac disease.
- Dairy-Free Version: Substitute the cream cheese with a high-quality vegan cream cheese block (like Kite Hill or Miyoko’s). Use coconut cream instead of sour cream and vegan butter for the crust. The texture will be slightly denser but still delicious.
- Spice It Up: Add a pinch of cardamom or allspice to the filling for a more complex flavor profile. If you like heat, increase the cayenne or add a dash of black pepper.
- Maple Glaze: Instead of whipped cream, drizzle a maple glaze over the top. Mix 2 tablespoons of maple syrup with 1 tablespoon of heavy cream and a drop of vanilla. Heat slightly to thin it out.
- Chocolate Twist: Add 2 tablespoons of cocoa powder to the filling for a pumpkin chocolate cheesecake. It sounds unusual, but the flavors pair beautifully. You can also add mini chocolate chips to the crust.
- Lower Sugar: Reduce the sugar in the filling to ½ cup and use a sugar-free sweetener like erythritol or monk fruit. Note that this may affect the texture slightly, so add a teaspoon of cornstarch to help bind it.
I once tried making these with a cookie butter swirl, and it was incredible. Just dollop a teaspoon of Biscoff spread on top of the filling before baking. It creates a marbled effect that is both pretty and tasty.
Serving & Storage Suggestions
These mini cheesecakes are versatile when it comes to serving. They are perfect for holiday parties, office potlucks, or quiet nights in. Here is how to keep them fresh and tasty:
- Serving Temperature: Serve them cold, straight from the fridge. The cold temperature enhances the creaminess and makes the gingersnap crust snapier. Let them sit out for 5 minutes if you prefer a slightly softer texture.
- Pairing Ideas: These pair wonderfully with a cup of hot tea or coffee. The bitterness of the coffee complements the sweetness of the cheesecake. You can also serve them with a side of fresh fruit, like apple slices or pears, for a lighter touch.
- Refrigerator Storage: Store the cheesecakes in an airtight container in the refrigerator for up to 5 days. If you don’t have an airtight container, cover the muffin tin tightly with plastic wrap.
- Freezing: You can freeze these for up to 2 months. Place them in a single layer on a baking sheet to freeze solid, then transfer to a freezer-safe bag. Thaw them in the fridge overnight before serving. Do not freeze with whipped cream on top.
- Reheating: These are best served cold. Reheating will melt the texture and make the crust soggy. If you must warm them, do so gently, but it is not recommended.
- Flavor Development: The flavors actually improve after 24 hours. The spices meld with the cream cheese, creating a deeper, more cohesive taste. If you can wait, let them chill for a full day.
Nutritional Information & Benefits
While these are a dessert, they can be enjoyed as part of a balanced diet. Here is a general overview of the nutritional profile per mini cheesecake (without topping):
- Calories: Approximately 180-200 calories per mini cheesecake.
- Fat: 12-14g, primarily from the cream cheese and butter.
- Carbohydrates: 15-18g, including sugars from the pumpkin and crust.
- Protein: 3-4g from the cream cheese and eggs.
Pumpkin is a nutritious ingredient, rich in vitamin A, potassium, and fiber. It adds moisture and flavor without excessive calories. The gingersnap crust provides some quick energy, but the fat content helps slow down sugar absorption. For those watching their carb intake, using a keto-friendly crust (almond flour and butter) can reduce the carb count significantly. Always consider portion size, as these are small but rich. Enjoy them as a special treat rather than an everyday snack.
Conclusion
These creamy mini pumpkin cheesecakes with gingersnap crust are more than just a dessert; they are a small moment of joy in a busy world. They are easy to make, delicious to eat, and perfect for sharing (or not). I hope you try this recipe and find your own quiet ritual around it. Whether you make them for a holiday gathering or a Tuesday night treat, they are sure to please.
I would love to hear how they turn out for you. Did you add any special twists? Did your family love them? Please leave a comment below and share your experience. If you enjoyed this recipe, you might also like my easy gluten-free cornbread muffins for a savory counterpart, or my dairy-free star-spangled fruit pizza for a summer twist. Happy baking!
FAQs
Can I use canned pumpkin pie filling instead of pure pumpkin puree?
No, it is important to use 100% pure pumpkin puree. Pumpkin pie filling contains added sugars, spices, and thickeners that will alter the flavor and texture of the cheesecake, making it too sweet and potentially gooey.
Why did my cheesecakes crack?
Cracking is usually caused by overmixing the batter (which incorporates too much air) or overbaking. Make sure to mix on low speed and remove the cheesecakes from the oven when the centers still have a slight jiggle. Cooling them gradually also helps prevent cracks.
Can I make these ahead of time?
Yes, these are actually better made a day in advance. They can be stored in the refrigerator for up to 5 days. In fact, the flavors meld and improve after 24 hours of chilling.
How do I store leftovers?
Store the cheesecakes in an airtight container in the refrigerator. If you don’t have an airtight container, cover the muffin tin tightly with plastic wrap. They will stay fresh for up to 5 days.
Can I freeze these mini cheesecakes?
Yes, you can freeze them for up to 2 months. Freeze them in the muffin tin until solid, then transfer to a freezer-safe bag. Thaw them in the fridge overnight before serving. Do not freeze with whipped cream on top.
Pin This Recipe!
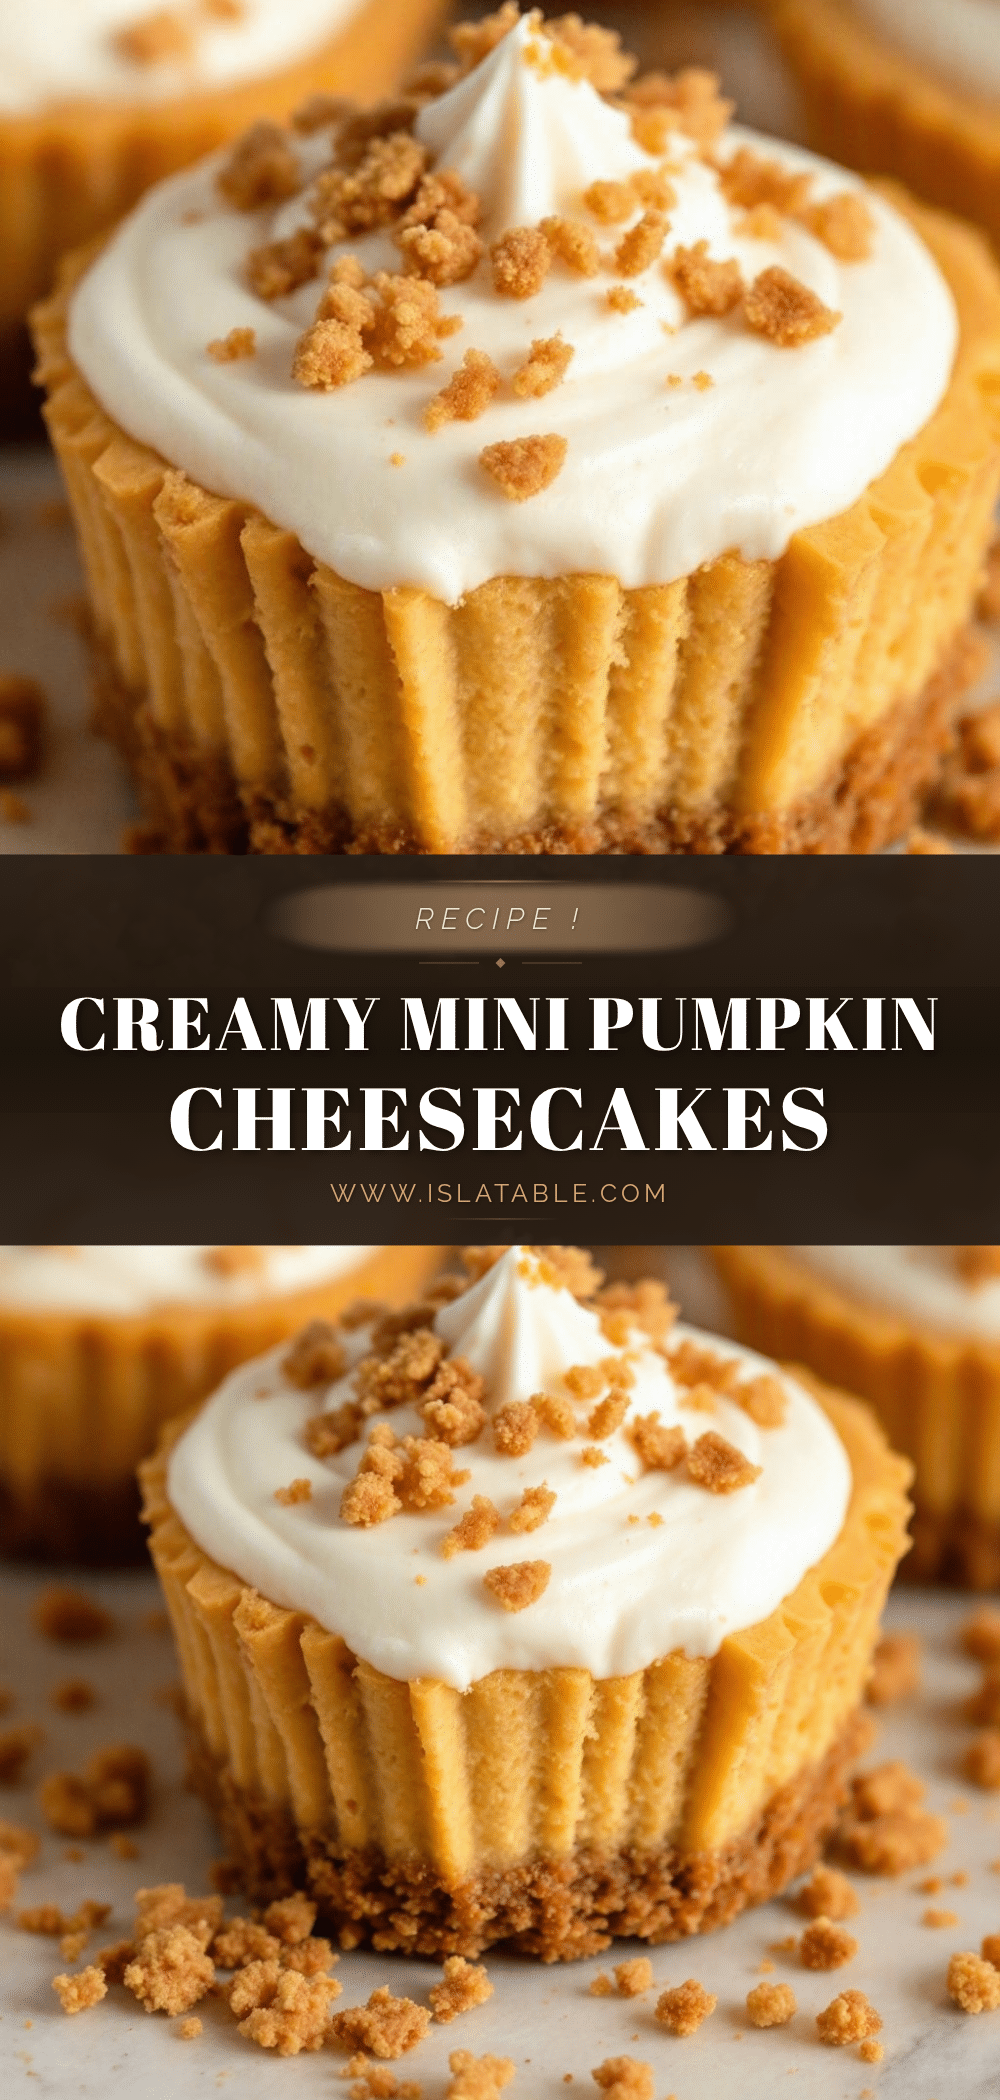
Creamy Mini Pumpkin Cheesecakes with Gingersnap Crust
These mini pumpkin cheesecakes feature a rich, creamy filling balanced by a spicy gingersnap crust. They are easy to make, perfect for meal prep, and offer a comforting dessert experience in every bite.
- Prep Time: 20 minutes
- Cook Time: 20 minutes
- Total Time: 4 hours 40 minutes
- Yield: 12 servings 1x
- Category: Dessert
- Cuisine: American
Ingredients
- 1 ½ cups finely crushed gingersnap cookies
- 5 tablespoons unsalted butter, melted
- 1 tablespoon granulated sugar
- ½ teaspoon ground ginger
- 16 ounces full-fat cream cheese, softened to room temperature
- ¾ cup granulated sugar
- ½ cup sour cream, room temperature
- ½ cup 100% pure pumpkin puree
- 3 large eggs, room temperature
- 1 teaspoon vanilla extract
- 1 teaspoon ground cinnamon
- ¼ teaspoon ground nutmeg
- A tiny pinch of cayenne pepper (optional)
Instructions
- Preheat oven to 350°F (175°C). Pulse gingersnap cookies in a food processor until they resemble coarse sand. Mix crumbs with melted butter, sugar, and ground ginger until it looks like wet sand.
- Place paper or foil liners in a 12-cup muffin tin. Divide crust mixture evenly among cups, pressing firmly into the bottom and slightly up the sides using the bottom of a measuring cup. Set aside.
- In a large bowl, beat softened cream cheese and sugar with an electric mixer on medium speed until completely smooth. Scrape down sides of the bowl.
- Add sour cream and vanilla extract to the cream cheese mixture. Beat on low speed just until combined.
- Add pumpkin puree, cinnamon, nutmeg, and cayenne pepper. Mix on low speed until the batter is uniform in color and smooth.
- Add eggs one at a time, mixing on low speed after each addition. Stop as soon as the yolk disappears to avoid overmixing.
- Divide filling evenly among the crust-lined muffin cups. Smooth tops with a spatula.
- Bake for 18-20 minutes. Edges should be set, but centers should still have a slight jiggle.
- Cool on a wire rack for 10 minutes, then transfer the entire tin to the refrigerator.
- Chill for at least 4 hours or preferably overnight to allow flavors to meld and texture to firm up.
- Serve chilled, optionally topped with whipped cream and crushed gingersnaps.
Notes
Ensure all dairy ingredients (cream cheese, eggs, sour cream) are at room temperature to prevent lumps and cracking. Do not overmix the batter, as incorporating too much air can cause the cheesecakes to puff up and then crack while cooling. The centers should have a slight jiggle when removed from the oven; they will firm up significantly during chilling. These can be stored in the fridge for up to 5 days or frozen for up to 2 months.
Nutrition
- Serving Size: 1 mini cheesecake
- Calories: 190
- Sugar: 12
- Sodium: 120
- Fat: 13
- Saturated Fat: 7
- Carbohydrates: 16
- Fiber: 0.5
- Protein: 3.5
Keywords: pumpkin cheesecake, mini cheesecake, gingersnap crust, fall dessert, easy dessert, meal prep dessert, pumpkin recipe, gingersnap cookies


