I didn’t actually intend to make chili that day. I had a half-can of pumpkin puree taking up space in my fridge, a couple of chicken breasts that needed cooking, and a serious craving for something warm that didn’t require a trip to the store. I threw everything into one pot, crossed my fingers, and honestly expected it to be weird. The pumpkin, the white beans, the chicken—it felt like a gamble. But that first spoonful stopped me mid-step. It was creamy, savory, slightly sweet, and had this cozy warmth that made the whole kitchen feel different. I stood there eating it straight from the ladle, which is not my proudest moment, but it was that good.
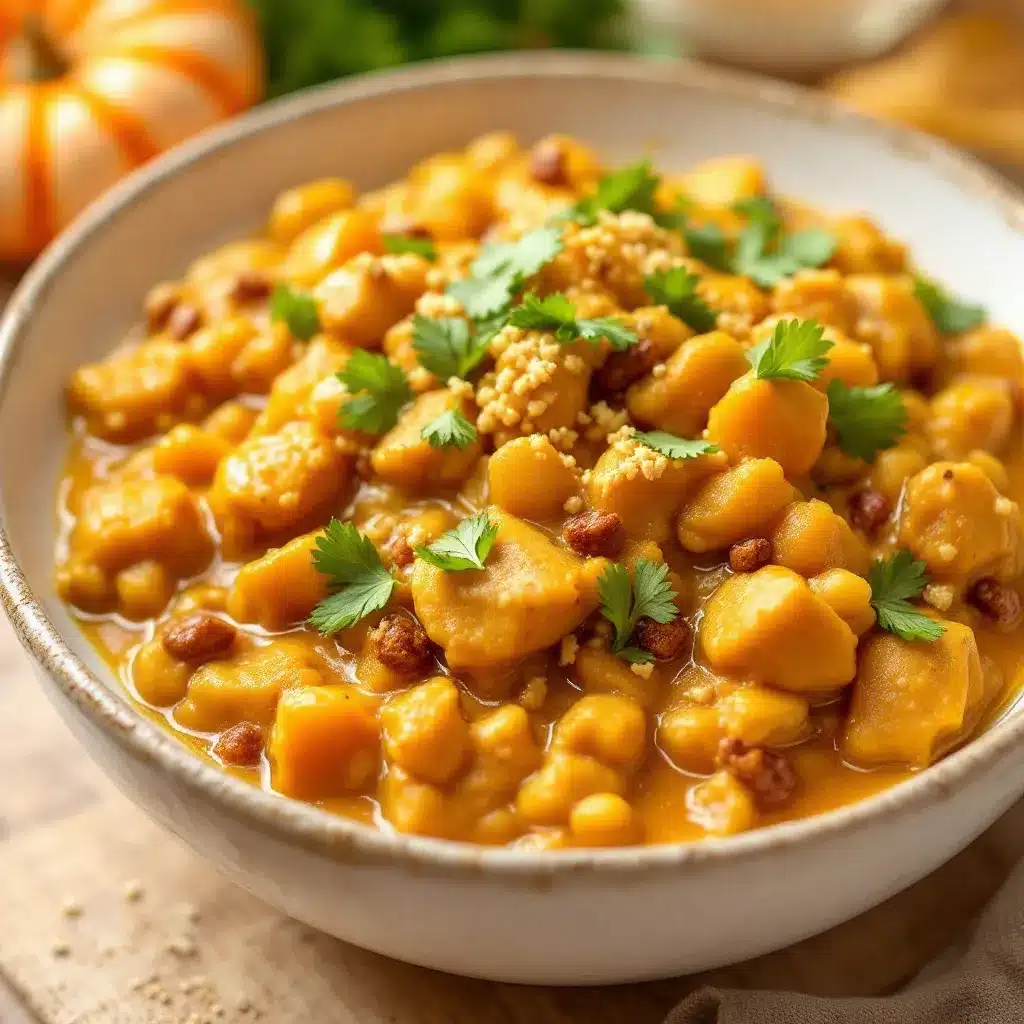
This pumpkin white chicken chili has become my cold-weather secret weapon. It tastes like you spent hours layering flavors, but it all comes together in about 40 minutes, start to finish. The pumpkin doesn’t make it taste like pumpkin pie—it adds a velvety richness and a subtle earthiness that plays perfectly with the smoky cumin and spicy green chiles. It’s the kind of meal that makes you want to curl up on the couch with a blanket and not talk to anyone for a while. In the best way possible.
If you’re looking for something that feels both familiar and surprising, this is it. It’s not your standard chicken chili, and that’s exactly why it works.
Why You’ll Love This Recipe
I’ve tested this chili more times than I care to admit, tweaking the spice levels, the creaminess, and the cooking method until it felt just right. Here’s what makes it stand out:
- One-Pot Wonder: Everything cooks in a single pot. Less cleanup, more time for that blanket-on-the-couch situation I mentioned.
- Quick & Easy: From fridge to table in about 40 minutes. No complicated techniques, no fancy equipment.
- Simple Ingredients: Most of these are pantry staples. The pumpkin might seem out of left field, but it’s becoming more common. You won’t need a specialty grocery run.
- Crowd-Pleaser: I’ve served this to picky eaters, spice-averse friends, and chili purists. Everyone goes back for seconds. It’s one of those rare recipes that pleases both kids and adults without compromise.
- Unbelievably Creamy Without Heavy Cream: The pumpkin puree does the heavy lifting here, creating a luscious texture without any dairy. It’s naturally creamy, not gloopy.
- Perfect for Meal Prep: This chili gets better the next day. The flavors meld together beautifully overnight, making it an ideal make-ahead lunch or dinner.
This isn’t just another chili recipe. It’s the one that makes you close your eyes after the first bite and forget about the stressful day you had. It’s comfort food that feels a little bit healthier, a little bit smarter, and a whole lot more interesting.
What Ingredients You Will Need
This recipe relies on simple, wholesome ingredients that come together to create something surprisingly complex. No weird additives, no hard-to-find spices—just real food that works.
- Chicken Breast: 1 pound, boneless and skinless. You can use chicken thighs if you prefer, but I find breast meat shreds more cleanly and keeps the chili lighter. (I usually buy organic, but conventional works fine.)
- Pumpkin Puree: 1 cup (not pumpkin pie filling—make sure it’s 100% pure pumpkin). This is the secret to the creamy texture without any dairy. Libby’s is my go-to brand because it’s consistently smooth and not watery.
- White Beans: 2 cans (15 oz each), drained and rinsed. Great Northern beans or cannellini beans both work. They add body and protein without making the chili heavy. (If you’re watching sodium, get the low-salt version.)
- Green Chiles: 1 can (4 oz) diced green chiles. These add a mild heat and tangy brightness that balances the richness of the pumpkin. (I use mild, but if you like more heat, go for the hot version.)
- Chicken Broth: 2 cups. Use low-sodium so you can control the salt level yourself. Homemade is lovely, but a good store-bought brand works perfectly.
- Yellow Onion: 1 medium, diced. The aromatic base that everything builds on.
- Garlic: 3 cloves, minced. Fresh garlic is non-negotiable here. The pre-minced stuff in a jar won’t give you the same punch.
- Cumin: 2 teaspoons, ground. This is the backbone spice. It gives the chili that warm, earthy, almost smoky depth.
- Chili Powder: 1 teaspoon. Not too much—you want a gentle warmth, not a spicy kick. (I use ancho chili powder for its mild, slightly sweet flavor.)
- Smoked Paprika: 1 teaspoon. This adds a subtle smokiness that makes the chili taste like it simmered for hours.
- Dried Oregano: 1 teaspoon. A little goes a long way. It adds an herbal note that lifts all the other flavors.
- Salt: 1 teaspoon, plus more to taste. Start with less and adjust at the end.
- Black Pepper: ½ teaspoon, freshly ground.
- Olive Oil: 2 tablespoons, for sautéing.
- Optional Toppings: Sour cream or Greek yogurt, shredded cheese (cheddar or Monterey Jack), fresh cilantro, sliced jalapeños, avocado, lime wedges, tortilla chips or strips.
Ingredient Selection Tip: When buying pumpkin puree, look for cans that are BPA-free if you can find them. And always shake the can before opening—if it sounds watery, it’s fine, but if it sounds solid, it might be too thick. You want a smooth, pourable consistency.
Substitution Guidance: If you’re dairy-free, skip the cheese and use a plant-based sour cream. For a gluten-free option, this recipe is naturally gluten-free as written—just double-check your broth label. If you want to make it vegetarian, swap the chicken for an extra can of white beans and use vegetable broth.
Equipment Needed
You don’t need a fancy kitchen to make this chili. Here’s what you’ll actually use:
- Large Dutch Oven or Heavy-Bottomed Pot: A 5- to 6-quart pot is ideal. I use my enameled cast iron Dutch oven, and it distributes heat evenly so nothing scorches. If you don’t have one, a stainless steel stockpot works fine—just keep an eye on the heat.
- Wooden Spoon or Silicone Spatula: For stirring and scraping up any browned bits from the bottom.
- Sharp Knife and Cutting Board: For dicing the onion and mincing the garlic. A good chef’s knife makes this step go quickly.
- Can Opener: Obvious, but worth mentioning. You’ll be opening several cans.
- Measuring Cups and Spoons: For the spices and liquids. I keep a separate set just for spices so they don’t get stained.
- Two Forks or a Hand Mixer: For shredding the chicken. Two forks work perfectly, but if you’re in a hurry, a hand mixer on low speed shreds chicken in about 30 seconds. (Just be careful not to overdo it.)
Budget-Friendly Tip: You don’t need a $300 Dutch oven. A heavy-bottomed pot from a thrift store or a basic stainless steel pot from a discount store will work just as well. The key is to avoid thin pots that create hot spots and burn the chili.
Preparation Method
Let’s get cooking. This comes together faster than you think, so have everything prepped and ready before you start.
- Prep the ingredients: Dice the onion, mince the garlic, drain and rinse the beans, and open the cans of pumpkin and green chiles. Measure out your spices into a small bowl so you can add them all at once. (This makes the process smoother and prevents you from accidentally adding chili powder twice.)
- Cook the chicken: Heat 1 tablespoon of olive oil in your pot over medium-high heat. Season the chicken breasts with a pinch of salt and pepper. Place them in the hot oil and cook for 5-6 minutes per side, until golden brown and cooked through (internal temperature should reach 165°F). Transfer the chicken to a plate and set aside. Don’t clean the pot—those browned bits are flavor.
- Sauté the aromatics: Reduce the heat to medium. Add the remaining 1 tablespoon of olive oil. Toss in the diced onion and cook for 4-5 minutes, stirring occasionally, until it’s soft and translucent. Add the minced garlic and cook for 30 seconds more—just until fragrant. (Don’t let the garlic brown, or it’ll turn bitter.)
- Bloom the spices: Add the cumin, chili powder, smoked paprika, dried oregano, salt, and pepper to the pot. Stir constantly for about 1 minute. This step wakes up the spices and makes them more aromatic. You’ll smell a warm, toasty fragrance when it’s ready.
- Add the liquids and beans: Pour in the chicken broth, scraping the bottom of the pot with your wooden spoon to lift up any browned bits (this is called deglazing, and it’s pure flavor). Add the pumpkin puree, diced green chiles, and drained white beans. Stir everything together until the pumpkin is fully incorporated and the broth turns a beautiful golden-orange color.
- Shred the chicken: While the chili comes to a simmer, shred the cooked chicken using two forks. You want bite-sized pieces, not tiny shreds. Add the shredded chicken back to the pot.
- Simmer: Bring the chili to a gentle boil, then reduce the heat to low. Let it simmer uncovered for 15-20 minutes, stirring occasionally. The chili will thicken slightly as it cooks. If it seems too thick, add a splash more broth or water. If it seems too thin, let it simmer a few minutes longer.
- Taste and adjust: This is the most important step. Taste the chili and adjust the seasoning. Does it need more salt? A squeeze of lime? A pinch more cumin? Trust your palate. I usually add another ½ teaspoon of cumin and a squeeze of fresh lime juice at this point.
- Serve: Ladle the chili into bowls and top with your favorite garnishes. I love a dollop of sour cream, a handful of shredded cheese, fresh cilantro, and a few crunchy tortilla chips on the side. The contrast of creamy chili and crunchy toppings is everything.
Sensory Cues: At step 4, the spices should smell warm and slightly smoky—not burnt. At step 6, the chili should look smooth and velvety, with no lumps of pumpkin. At step 7, it should be bubbling gently, not boiling aggressively. The final chili should coat the back of a spoon without being pasty.
Personal Tip: If you have time, let the chili sit for 10 minutes after cooking before serving. It allows the flavors to settle and meld together. I’ve rushed this step before, and the chili tasted good but not great. Patience pays off here.
Cooking Tips & Techniques
I’ve made this chili probably twenty times now, and I’ve learned a few things the hard way. Here’s what I wish someone had told me:
Don’t skip blooming the spices. This is a game-changer. If you add dry spices directly to the liquid, they taste raw and dusty. Blooming them in hot oil for a minute unlocks their essential oils and makes the whole dish taste more complex. I learned this after making a flat, boring chili that left me wondering why it didn’t taste like anything. Now I never skip this step.
Watch the heat. Pumpkin puree can scorch if the heat is too high. Keep the chili at a gentle simmer, not a rolling boil. If you see bubbles popping aggressively, turn the heat down. Burnt pumpkin tastes bitter and ruins the whole pot.
Shred the chicken while it’s still warm. Cold chicken shreds into uneven, clumpy pieces. Warm chicken shreds into tender, uniform strands that distribute evenly through the chili. If you let the chicken sit too long, pop it back in the microwave for 30 seconds to warm it up before shredding.
Taste twice, season once. I always season lightly at the beginning and then adjust at the end. Chili needs time to develop, so what tastes perfectly salted at the start might be too salty after simmering. Add salt gradually and taste as you go.
Multitasking strategy: While the chicken is cooking, dice the onion and mince the garlic. While the chili is simmering, prep your toppings. This way, everything is ready at the same time, and you’re not scrambling at the end.
Variations & Adaptations
This chili is endlessly adaptable. Here are a few ways I’ve tweaked it depending on my mood or what’s in the fridge:
Spicy Version: Add 1 diced jalapeño (seeds and membranes included for extra heat) along with the onion. Use hot green chiles instead of mild, and add a pinch of cayenne pepper or red pepper flakes with the other spices. Top with fresh sliced jalapeños for a double hit of heat.
Smoky Version: Swap the chicken breast for smoked chicken (if you have leftovers from a barbecue) or add ½ teaspoon of liquid smoke along with the broth. This gives the chili a deep, campfire-like smokiness that’s perfect for fall. If you’re a fan of grilled meats, you might also enjoy this flavorful indoor smokeless BBQ chicken for a similar vibe.
Vegetarian Version: Replace the chicken with 2 cans of white beans (or one can of white beans and one can of chickpeas). Use vegetable broth instead of chicken broth. The texture will be slightly different—bean-ier and less meaty—but still incredibly satisfying. For another hearty meatless option, check out these vegetarian street tacos with black beans.
Dairy-Free Version: This recipe is naturally dairy-free as written (the creaminess comes from the pumpkin, not cream). Just skip the cheese and sour cream toppings, or use dairy-free alternatives. A drizzle of coconut cream actually works surprisingly well as a topping.
Slow Cooker Adaptation: Sauté the onion and garlic in a skillet, then transfer everything except the chicken to a slow cooker. Add the raw chicken breasts, cover, and cook on low for 6 hours or high for 3 hours. Shred the chicken before serving. This version is perfect for busy days when you want dinner ready when you walk in the door.
Personal Variation: I once added a handful of chopped kale during the last 5 minutes of simmering, and it was fantastic. The kale softened just enough without getting mushy, and it added a pop of green that made the chili look even more appetizing. If you have a bag of kale that needs using, throw it in.
Serving & Storage Suggestions
Serving Temperature: Serve this chili piping hot, straight from the pot. It’s meant to warm you from the inside out. I like to let it cool for 2-3 minutes after ladling into bowls so the toppings don’t immediately melt or wilt.
Presentation: A dollop of sour cream or Greek yogurt in the center, a generous sprinkle of shredded cheese, a handful of fresh cilantro, and a few crunchy tortilla chips arranged on the side. A wedge of lime on the rim of the bowl adds a bright pop of color and a fresh squeeze of acidity.
Complementary Dishes: This chili pairs beautifully with gluten-free cornbread muffins for dipping and sopping up every last drop. A simple side salad with a citrus vinaigrette cuts through the richness. For a drink, a cold beer (a lager or pale ale) or a glass of crisp white wine works well.
Storage Instructions: Store leftovers in an airtight container in the refrigerator for up to 5 days. The chili thickens as it sits, so don’t be alarmed if it looks more like a stew the next day. Add a splash of broth or water when reheating to restore the desired consistency.
Freezer Instructions: This chili freezes beautifully. Let it cool completely, then transfer to freezer-safe containers or zip-top bags. Leave a little room for expansion. Freeze for up to 3 months. Thaw overnight in the refrigerator before reheating.
Reheating Methods: Reheat on the stovetop over medium-low heat, stirring occasionally, until warmed through (about 10 minutes). You can also microwave individual portions in 30-second intervals, stirring between each. Add a splash of broth if it’s too thick.
Flavor Development: Like most soups and stews, this chili tastes even better the next day. The flavors have time to meld and deepen overnight. If you can, make it a day ahead and reheat it for dinner. You won’t regret it.
Nutritional Information & Benefits
This chili is surprisingly well-balanced. Here’s the approximate nutritional breakdown per serving (based on 6 servings, without toppings):
| Nutrient | Amount per Serving |
|---|---|
| Calories | 320 |
| Protein | 30g |
| Carbohydrates | 28g |
| Fiber | 8g |
| Fat | 9g |
| Saturated Fat | 2g |
| Sodium | 680mg (varies with broth) |
Health Benefits: Pumpkin is packed with vitamin A (over 200% of your daily needs per cup), which supports eye health and immune function. White beans are an excellent source of fiber and plant-based protein, keeping you full and satisfied. Chicken provides lean protein for muscle repair and maintenance. The cumin and oregano add antioxidants and anti-inflammatory properties.
Dietary Considerations: This recipe is naturally gluten-free, dairy-free (if you skip the toppings), and nut-free. It’s also relatively low in saturated fat compared to traditional chili recipes that use heavy cream or lots of cheese. If you’re watching your sodium, use low-sodium broth and skip the added salt until the end.
Personal Wellness Perspective: I love that this chili feels indulgent without actually being heavy. It’s the kind of meal that satisfies a comfort food craving while still making you feel good afterward. No bloating, no guilt—just warmth and contentment.
Conclusion
This cozy creamy pumpkin white chicken chili has become a staple in my kitchen for a reason. It’s easy, it’s forgiving, and it delivers every single time. The pumpkin adds a richness that feels luxurious without any cream, the spices create a warmth that lingers, and the whole thing comes together in one pot with minimal fuss.
I hope you give it a try, and I hope it becomes a staple in your kitchen too. Don’t be afraid to make it your own—add more spice, swap in different beans, load it up with your favorite toppings. That’s the beauty of chili. It’s meant to be customized.
If you make this recipe, I’d love to hear about it. Drop a comment below and let me know how it turned out. Did you add something unexpected? Did your picky eater ask for seconds? Share your wins—I read every single comment. And if you loved it, share it with a friend who needs a little comfort right now. Happy cooking, friends.
Frequently Asked Questions
Can I use pumpkin pie filling instead of pumpkin puree?
No, please don’t. Pumpkin pie filling is pre-sweetened and spiced with cinnamon, nutmeg, and cloves. It will make your chili taste like dessert, and not in a good way. Stick with 100% pure pumpkin puree.
Can I make this in an Instant Pot or pressure cooker?
Absolutely. Use the sauté function to cook the onion and garlic, then add the remaining ingredients (including raw chicken). Pressure cook on high for 10 minutes, then do a natural release for 5 minutes before manually releasing the remaining pressure. Shred the chicken and stir before serving.
Does the chili freeze well?
Yes, it freezes beautifully. Let it cool completely, then transfer to freezer-safe containers. It will keep for up to 3 months. Thaw overnight in the fridge and reheat on the stovetop or in the microwave. Add a splash of broth if it’s too thick after thawing.
Can I use ground chicken instead of chicken breasts?
You can, but the texture will be different. Ground chicken will give you a more uniform, crumbly chili. Brown it with the onion and garlic, then proceed with the recipe. I personally prefer the shredded texture from whole chicken breasts, but ground chicken works in a pinch.
How can I thicken the chili if it’s too thin?
Let it simmer uncovered for an additional 10-15 minutes. The liquid will evaporate and the chili will naturally thicken. You can also mash some of the white beans against the side of the pot with a spoon to release their starches, which will help thicken the broth. Avoid adding cornstarch or flour—it’s not needed.
Pin This Recipe!

Cozy Creamy Pumpkin White Chicken Chili: Easy One-Pot Recipe

This creamy, savory, and slightly sweet pumpkin white chicken chili comes together in about 40 minutes with simple ingredients. It’s a one-pot wonder that’s perfect for cold-weather comfort, naturally creamy without heavy cream, and even better the next day.
- Prep Time: 10 minutes
- Cook Time: 30 minutes
- Total Time: 40 minutes
- Yield: 6 servings 1x
- Category: Main Course
- Cuisine: American
Ingredients
- 1 pound boneless, skinless chicken breast
- 1 cup pumpkin puree (not pumpkin pie filling)
- 2 cans (15 oz each) white beans (Great Northern or cannellini), drained and rinsed
- 1 can (4 oz) diced green chiles
- 2 cups low-sodium chicken broth
- 1 medium yellow onion, diced
- 3 cloves garlic, minced
- 2 teaspoons ground cumin
- 1 teaspoon chili powder (ancho preferred)
- 1 teaspoon smoked paprika
- 1 teaspoon dried oregano
- 1 teaspoon salt, plus more to taste
- ½ teaspoon freshly ground black pepper
- 2 tablespoons olive oil
- Optional toppings: sour cream or Greek yogurt, shredded cheese (cheddar or Monterey Jack), fresh cilantro, sliced jalapeños, avocado, lime wedges, tortilla chips or strips
Instructions
- Prep the ingredients: Dice the onion, mince the garlic, drain and rinse the beans, and open the cans of pumpkin and green chiles. Measure out spices into a small bowl.
- Cook the chicken: Heat 1 tablespoon olive oil in a large Dutch oven or heavy-bottomed pot over medium-high heat. Season chicken breasts with a pinch of salt and pepper. Cook for 5-6 minutes per side until golden brown and cooked through (internal temperature 165°F). Transfer chicken to a plate; do not clean the pot.
- Sauté the aromatics: Reduce heat to medium. Add remaining 1 tablespoon olive oil. Cook diced onion for 4-5 minutes until soft and translucent. Add minced garlic and cook for 30 seconds until fragrant.
- Bloom the spices: Add cumin, chili powder, smoked paprika, dried oregano, salt, and pepper. Stir constantly for about 1 minute until fragrant.
- Add liquids and beans: Pour in chicken broth, scraping up browned bits from the bottom of the pot. Add pumpkin puree, diced green chiles, and drained white beans. Stir until fully incorporated.
- Shred the chicken: While chili comes to a simmer, shred the cooked chicken using two forks into bite-sized pieces. Add shredded chicken back to the pot.
- Simmer: Bring chili to a gentle boil, then reduce heat to low. Simmer uncovered for 15-20 minutes, stirring occasionally, until thickened slightly. Add a splash of broth if too thick.
- Taste and adjust: Taste the chili and adjust seasoning as needed. Add more salt, cumin, or a squeeze of lime juice if desired.
- Serve: Ladle into bowls and top with desired garnishes. Let cool for 2-3 minutes before serving.
Notes
Don’t skip blooming the spices—it unlocks their essential oils. Keep the chili at a gentle simmer to avoid scorching the pumpkin. Shred chicken while still warm for best texture. Taste and adjust seasoning at the end. Chili thickens as it sits; add broth when reheating. For best flavor, make a day ahead.
Nutrition
- Serving Size: 1 bowl (about 1.5 cu
- Calories: 320
- Sugar: 6
- Sodium: 680
- Fat: 9
- Saturated Fat: 2
- Carbohydrates: 28
- Fiber: 8
- Protein: 30
Keywords: pumpkin white chicken chili, one-pot chili, creamy chicken chili, fall chili recipe, easy chili recipe, healthy chili, gluten-free chili, dairy-free chili


