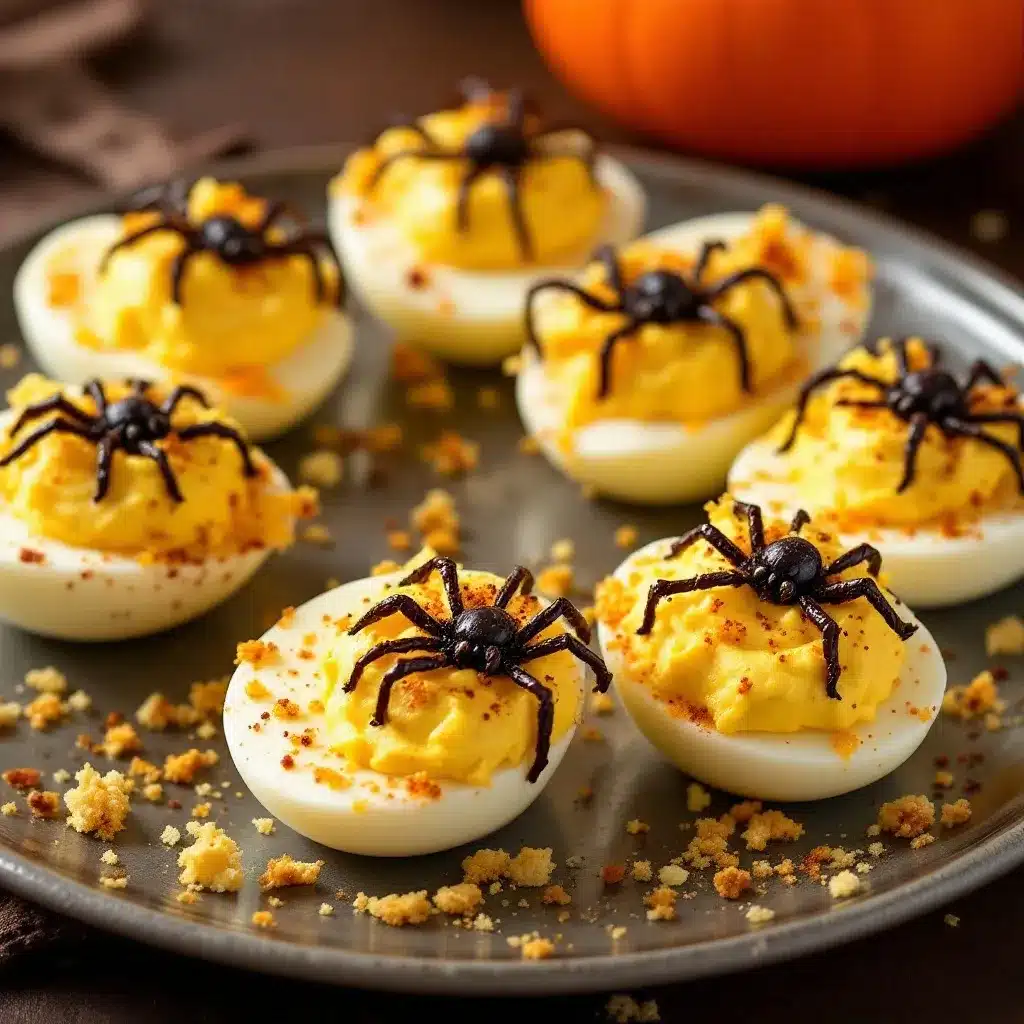
I figured black olives sliced into spider shapes would look cute and maybe a little creepy on deviled eggs. It took about ten minutes of trying to get the olive legs to stay put before I realized this was going to be more of a wrestling match than a cooking project. Honestly, the first batch looked less like spiders and more like sad, squished bugs that had seen better days. But somewhere between the third broken egg white and a muttered curse word, something clicked. The olive legs stayed, the paprika dusted just right, and suddenly I had a platter of little arachnids staring back at me like they owned the kitchen. That moment—when the silly idea actually works—is exactly why I keep making these.
These Best Spooky Spider Deviled Eggs for Halloween are the kind of appetizer that makes people stop mid-conversation and point. They are creepy in a fun way, not in a “what is that” way. The filling is creamy, tangy, and perfectly seasoned—exactly what a classic deviled egg should be. The black olive spiders perched on top do all the heavy lifting for the Halloween vibe. You do not need any special tools or artistic talent. If you can slice an olive and pipe filling into an egg white, you have got this handled.
I started making these for our annual Halloween potluck a few years ago, and they disappeared faster than the candy bowl. Now they are kind of my signature spooky dish. There is something deeply satisfying about watching grown adults hesitate before biting into a deviled egg that looks like it might crawl away. And then they take a bite and immediately reach for another. That contrast—the creepy look and the familiar, comforting taste—is what makes these so memorable. Trust me, once you bring these to one Halloween party, people will start asking if you are bringing “the spider eggs” again next year.
Why You Will Love This Recipe
- Quick & Easy: These come together in about 30 minutes, with most of that time being hands-off while the eggs boil. Perfect for last-minute Halloween party prep or a fun afternoon project with kids.
- Simple Ingredients: You only need eggs, mayonnaise, mustard, paprika, and black olives. No weird specialty items or trips to a fancy grocery store required.
- Perfect for Halloween Parties: These are the ultimate spooky appetizer. They fit right in at any Halloween gathering, from casual family get-togethers to full-on costume parties.
- Crowd-Pleaser: Even people who claim they do not like deviled eggs end up trying one because of the novelty factor. And then they go back for seconds.
- Unbelievably Delicious: The creamy, tangy filling paired with the briny olive spider is a flavor combination that just works. It is comfort food with a spooky twist.
What makes these different from other Halloween deviled eggs is the attention to detail. The olive spiders are positioned so they look like they are crawling right out of the filling. A tiny dab of paprika gives them little “eyes” that make them feel almost alive. I have tested this with different olive sizes and slicing techniques, and I can tell you exactly which method works best so you do not have to guess. This is not just another deviled egg recipe—it is the version that will have people asking for the recipe before the party is over.
These eggs hit that sweet spot between impressive and approachable. They look like you spent hours fussing over them, but the truth is they are surprisingly simple to put together. That is my favorite kind of recipe—the one that makes you look like a kitchen wizard without actually having to be one. And honestly, watching someone’s face light up when they see a spider crawling out of their deviled egg is pure gold.
What Ingredients You Will Need
This recipe uses simple, everyday ingredients to create something that looks far more complicated than it actually is. Everything listed here is easy to find at any grocery store, and you probably already have most of it in your kitchen.
- 6 large eggs – Use eggs that are at least a week old for easier peeling. Fresh eggs are harder to peel cleanly, so plan ahead if you can.
- 3 tablespoons mayonnaise – I prefer Duke’s or Hellmann’s for the creamiest texture. Do not use Miracle Whip here—the sweetness throws off the balance.
- 1 teaspoon yellow mustard – Adds that classic tangy kick. You can use Dijon if you want a slightly sharper flavor.
- 1/2 teaspoon white vinegar – Helps brighten the filling and cuts through the richness. Apple cider vinegar works too if that is what you have.
- 1/4 teaspoon salt – Fine sea salt dissolves best. Adjust to taste depending on how salty your olives are.
- 1/8 teaspoon black pepper – Freshly ground gives the best flavor, but pre-ground works fine.
- 1 can (6 ounces) large black olives – Look for the jumbo or colossal size. The bigger the olives, the easier they are to slice into spider shapes. I recommend Lindsay or Mario brand for consistent size and firmness.
- Paprika for dusting – Smoked paprika adds a deeper flavor, but regular sweet paprika gives that classic deviled egg look. Use a tiny pinch for the spider “eyes.”
- Fresh parsley or chives for garnish (optional) – Adds a pop of green that makes the presentation pop. Totally optional but worth it if you have them on hand.
For the olive spiders, you want olives that are firm and not too soft. Jumbo pitted black olives work best because they hold their shape when sliced. If you can only find medium olives, they will still work—you will just have smaller spiders. The taste is the same either way.
Equipment Needed
- Medium saucepan – For boiling the eggs. Make sure it is large enough to hold the eggs in a single layer.
- Mixing bowl – For mashing and mixing the filling.
- Fork or potato masher – For breaking down the egg yolks into a smooth paste.
- Piping bag or zip-top bag – For piping the filling into the egg whites. A zip-top bag with the corner snipped off works perfectly if you do not have a piping bag.
- Sharp paring knife – For slicing the olives into spider shapes. A dull knife will squish the olives.
- Cutting board – For olive prep. Use a separate board from raw meat prep to avoid cross-contamination.
- Small offset spatula or butter knife – For smoothing the filling if you prefer not to pipe it.
- Platter or serving dish – Something with a bit of space so the spiders do not touch each other.
If you do not have a piping bag, do not stress. A sturdy zip-top bag works just as well. Just fill it, seal it, and snip a small corner off. The smaller the hole, the more control you will have. I have also used a small cookie scoop to place the filling, then smoothed it with a knife. It is less fancy but still gets the job done.
Preparation Method
Step 1: Boil the eggs (10 minutes)
Place the eggs in a single layer in a medium saucepan. Cover them with cold water by about an inch. Bring the water to a rolling boil over high heat. Once boiling, cover the pot, remove it from the heat, and let it sit for exactly 10 minutes. This gives you hard-boiled eggs with firm whites and fully cooked yolks—no green ring around the yolk.
Step 2: Ice bath (5 minutes)
While the eggs are resting, fill a bowl with ice and cold water. When the 10 minutes are up, use a slotted spoon to transfer the eggs to the ice bath. Let them sit for at least 5 minutes. This stops the cooking process and makes the eggs much easier to peel. I have skipped this step before out of impatience, and I regretted it. The shells stick like glue when the eggs are still warm.
Step 3: Peel the eggs (3-4 minutes)
Gently tap each egg on the counter to crack the shell all over. Start peeling from the wider end where the air pocket is—that usually gives you an easier starting point. Rinse the peeled eggs under cold water to remove any tiny shell fragments. Pat them dry with a paper towel.
Step 4: Slice the eggs in half (2 minutes)
Using a sharp knife, slice each egg lengthwise. Wipe the knife clean between cuts for the neatest edges. Gently pop the yolks out into a mixing bowl. Arrange the egg white halves on a platter, cut side up.
Step 5: Make the filling (5 minutes)
Add the mayonnaise, yellow mustard, white vinegar, salt, and black pepper to the bowl with the egg yolks. Mash everything together with a fork until it is smooth and creamy. Taste it and adjust the seasoning if needed. I usually add a tiny pinch more salt and a dash more mustard because I like the tang.
Step 6: Pipe the filling (5 minutes)
Spoon the filling into a piping bag or a zip-top bag. Snip off a small corner. Pipe the filling into each egg white half, mounding it slightly. You want it to look generous and full, not flat. If you do not have a bag, just spoon the filling in and smooth the top with a knife.
Step 7: Make the olive spiders (10 minutes)
Drain the black olives and pat them dry with a paper towel. Slice each olive in half crosswise (not lengthwise). One half becomes the spider body. From the other half, slice thin strips lengthwise to make the legs—you want 8 legs per spider. This takes a steady hand, but it is not as hard as it sounds. If the legs break, just eat the evidence and try again with another olive.
Step 8: Assemble the spiders (5 minutes)
Place one olive half (the body) on top of each deviled egg, slightly off-center so it looks like the spider is crawling out of the filling. Arrange 4 olive leg strips on each side of the body, pressing them gently into the filling so they stay in place. Use a tiny pinch of paprika to make two little “eyes” on the front of the olive body.
Step 9: Garnish and serve (2 minutes)
Sprinkle a light dusting of paprika over the entire platter for color. If you are using fresh parsley or chives, scatter a few around the edges of the platter. Serve immediately or refrigerate until ready to serve.
Cooking Tips & Techniques
The biggest mistake I made the first time was using olives that were too small. Medium olives make tiny spiders that look more like specks than creepy crawlies. Jumbo olives are the way to go—they give you enough olive to work with and produce spiders that are actually visible from across the room.
For the cleanest olive slices, use the sharpest knife you own. A dull blade will crush the olive and make the legs look ragged. I learned this the hard way after squishing three olives in a row and getting increasingly frustrated. A quick pass on a sharpening steel made all the difference.
If the olive legs keep slipping off, try pressing them a little deeper into the filling. The mayonnaise acts like glue once it sets. You can also refrigerate the assembled eggs for 10 minutes before serving to help everything firm up. I do this whenever I am making them ahead of time.
For perfectly boiled eggs every time, do not skip the ice bath. I know it is tempting to just run them under cold water and call it done, but the ice bath makes peeling infinitely easier. Eggs that are shocked in ice water practically shed their shells. Eggs that are not? You will be picking off tiny shell fragments for way too long.
Timing tip: Boil the eggs and make the filling the day before. Store the whites and filling separately in the fridge. Assemble and add the olive spiders right before serving. This saves you a ton of stress on party day and the eggs taste just as fresh.
Variations & Adaptations
Spicy Spider Eggs: Add 1/4 teaspoon of cayenne pepper or a dash of hot sauce to the filling. The heat pairs surprisingly well with the briny olives and gives the eggs a little kick that adults love. I tried this for a friend who loves spicy food, and now she requests them every year.
Avocado Deviled Spiders: Replace half the mayonnaise with mashed avocado. The filling turns a lovely pale green, which makes the black olive spiders stand out even more. This version is a bit healthier and adds a creamy, earthy flavor. Just be aware that the filling will brown faster, so assemble these closer to serving time.
Bacon-Wrapped Spiders: Cook a few strips of bacon until crispy, then crumble it over the filling before adding the olive spiders. The salty, smoky crunch adds another layer of texture and flavor. This is the version I make for parties where I know people are going to be extra hungry.
Gluten-Free Note: This recipe is naturally gluten-free, so no substitutions needed. Just double-check your mustard and mayonnaise labels if you are serving someone with celiac disease—some brands add gluten-containing ingredients.
Dairy-Free Note: This recipe is also naturally dairy-free. The mayonnaise and mustard do not contain dairy, so you are good to go. If you want to try the avocado variation, that is dairy-free too.
For a different look, try using green olives stuffed with pimento instead of black olives. The green color is unexpected and the pimento adds a little pop of red. The spiders will look less traditional but still fun and festive. I tried this one year when I ran out of black olives, and people actually complimented the “alien spiders.”
Serving & Storage Suggestions
Serve these deviled eggs chilled or at room temperature. I prefer them cold because the filling holds its shape better and the olive spiders stay put. Arrange them on a dark platter if you have one—the contrast makes the spiders pop and looks especially spooky for Halloween.
These pair beautifully with other finger foods. If you are putting together a Halloween spread, consider adding some crispy keto bacon-wrapped jalapeño poppers for a savory, spicy counterpart. The creamy deviled eggs balance out the heat from the poppers perfectly. For something lighter, a fresh vegan watermelon flag salad adds a sweet, refreshing note that cuts through the richness. And if you want another crowd-pleasing appetizer, the creamy dairy-free queso dip with cashews is always a hit and keeps things plant-based for any guests with dietary restrictions.
For drinks, a crisp cider or a light lager works well. For a non-alcoholic option, try a sparkling apple cider or a magical kid-friendly color-changing galaxy lemonade—the color shift is a fun surprise that fits the Halloween theme.
Storage: Store leftover deviled eggs in an airtight container in the refrigerator for up to 2 days. The olive spiders may soften slightly over time, but they will still taste great. Do not freeze deviled eggs—the texture of the filling becomes watery and grainy when thawed.
Make-Ahead Tip: You can boil the eggs and prepare the filling up to 24 hours in advance. Store the egg whites and filling separately in the fridge. Assemble and add the olive spiders no more than 2 hours before serving for the best presentation.
The flavors actually meld together nicely after a few hours in the fridge. If you can, make these in the morning for an evening party. The filling gets a little creamier and the seasoning distributes more evenly. Just add the olive spiders right before serving so they stay firm and visually sharp.
Nutritional Information & Benefits
Each deviled egg half (filling included, without optional garnishes) contains approximately:
- Calories: 65
- Protein: 4g
- Fat: 5g
- Carbohydrates: 1g
- Fiber: 0g
- Sugar: 0g
- Sodium: 140mg
Eggs are an excellent source of high-quality protein and contain essential nutrients like vitamin B12, vitamin D, and choline, which supports brain health. The olive spiders add a small amount of healthy monounsaturated fats and iron. This recipe is naturally low-carb, gluten-free, and dairy-free, making it suitable for a wide range of dietary preferences.
If you are watching your sodium intake, you can use low-sodium olives or reduce the added salt in the filling. The olives are already quite salty, so you might not miss the extra salt anyway. I have made these with reduced-sodium olives and honestly could not tell the difference.
From a wellness perspective, these deviled eggs are a great option for Halloween parties because they are portion-controlled and satisfying without being overly indulgent. You get the creamy, rich flavor you crave without the sugar crash that comes with most holiday treats. That is a win in my book.
Conclusion
These Best Spooky Spider Deviled Eggs for Halloween are proof that a little creativity can turn a classic appetizer into something truly memorable. They are simple enough for a weeknight snack but impressive enough to steal the show at any Halloween gathering. The creamy, tangy filling is exactly what you want from a deviled egg, and the olive spiders add that perfect touch of spooky fun without requiring any artistic talent.
I love that this recipe lets me bring something homemade to parties without spending hours in the kitchen. It is the kind of dish that makes people smile, take pictures, and then actually eat every last bite. That is the sweet spot for me—food that looks fun and tastes even better.
Do not be afraid to experiment with the variations I mentioned. Make them spicy, add bacon, or try different olive colors. The base recipe is forgiving and adaptable, so you can make it your own. And honestly, half the fun is seeing how people react when they realize the spider is just an olive.
I would love to hear how these turn out for you. Drop a comment below and let me know if your guests were brave enough to try them. Share a photo of your spooky spread on social media and tag me—I love seeing these come to life in other kitchens. Until next time, happy Halloween and happy cooking!
Frequently Asked Questions
Can I make these deviled eggs a day ahead?
Yes, you can boil the eggs and prepare the filling up to 24 hours in advance. Store the egg whites and filling separately in the refrigerator. Assemble the eggs and add the olive spiders no more than 2 hours before serving for the best presentation.
How do I keep the olive legs from falling off?
Press the olive legs gently into the filling so the mayonnaise helps hold them in place. Refrigerating the assembled eggs for 10-15 minutes before serving also helps the filling firm up and grip the legs better.
Can I use a different type of olive?
Absolutely. Green olives stuffed with pimento work well and give a different color contrast. Just make sure they are large enough to slice easily. Kalamata olives are too soft and will fall apart, so stick with firm, pitted black or green olives.
How do I get perfectly peeled hard-boiled eggs?
Use eggs that are at least a week old—fresh eggs are harder to peel. After boiling, transfer them immediately to an ice bath and let them sit for at least 5 minutes. Start peeling from the wider end where the air pocket is located.
Are these deviled eggs safe to leave out at a party?
Deviled eggs should not sit at room temperature for more than 2 hours. If you are serving them at a party, keep the platter on ice or refrigerate them until just before serving. For outdoor parties in warm weather, reduce that time to 1 hour.
Pin This Recipe!
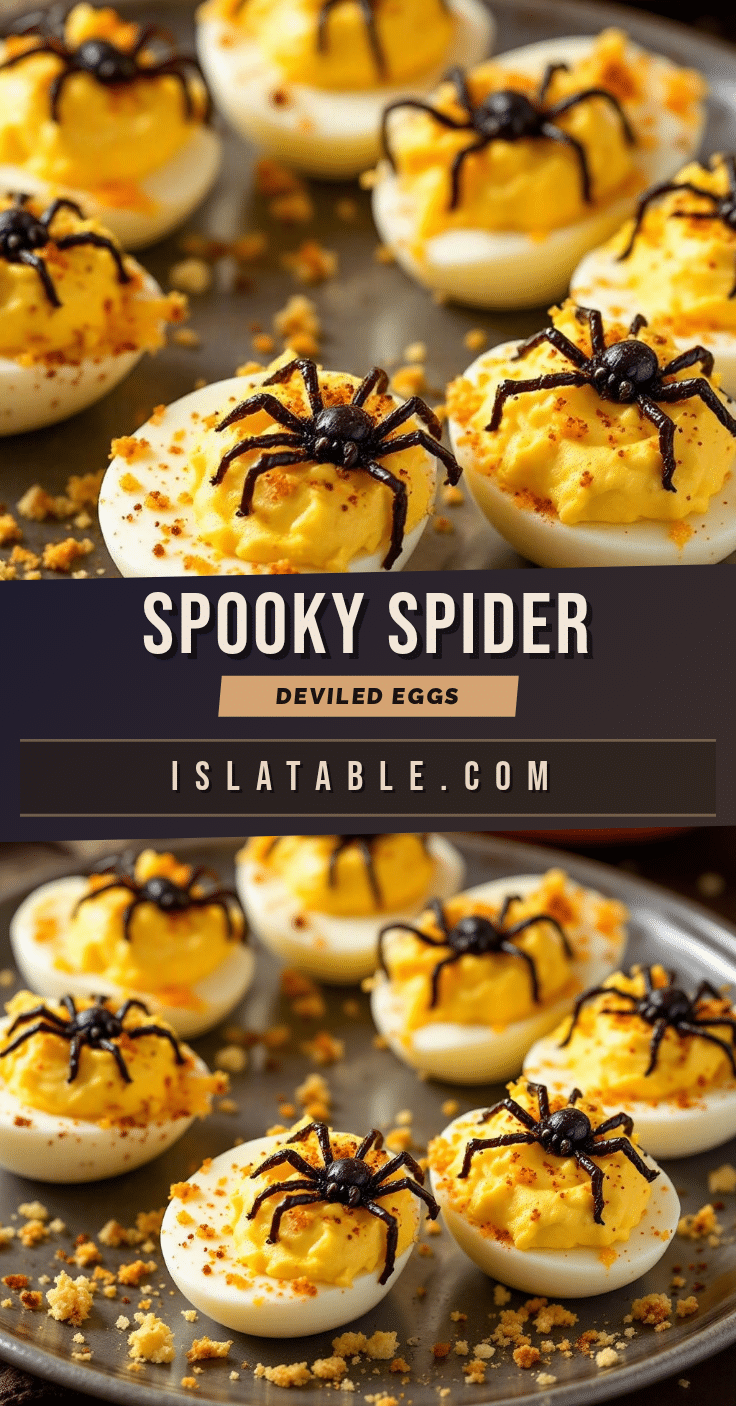
Best Spooky Spider Deviled Eggs for Halloween
These Best Spooky Spider Deviled Eggs for Halloween are the kind of appetizer that makes people stop mid-conversation and point. They are creepy in a fun way, not in a ‘what is that’ way.
- Prep Time: 15 minutes
- Cook Time: 10 minutes
- Total Time: 30 minutes
- Yield: 12 servings 1x
- Category: Appetizer
- Cuisine: American
Ingredients
- 6 large eggs
- 3 tablespoons mayonnaise
- 1 teaspoon yellow mustard
- 1/2 teaspoon white vinegar
- 1/4 teaspoon salt
- 1/8 teaspoon black pepper
- 1 can (6 ounces) large black olives
- Paprika for dusting
- Fresh parsley or chives for garnish (optional)
Instructions
- Boil the eggs: Place the eggs in a single layer in a medium saucepan. Cover them with cold water by about an inch. Bring the water to a rolling boil over high heat. Once boiling, cover the pot, remove it from the heat, and let it sit for exactly 10 minutes.
- Ice bath: While the eggs are resting, fill a bowl with ice and cold water. When the 10 minutes are up, use a slotted spoon to transfer the eggs to the ice bath. Let them sit for at least 5 minutes.
- Peel the eggs: Gently tap each egg on the counter to crack the shell all over. Start peeling from the wider end where the air pocket is. Rinse the peeled eggs under cold water to remove any tiny shell fragments. Pat them dry with a paper towel.
- Slice the eggs in half: Using a sharp knife, slice each egg lengthwise. Wipe the knife clean between cuts for the neatest edges. Gently pop the yolks out into a mixing bowl. Arrange the egg white halves on a platter, cut side up.
- Make the filling: Add the mayonnaise, yellow mustard, white vinegar, salt, and black pepper to the bowl with the egg yolks. Mash everything together with a fork until it is smooth and creamy. Taste it and adjust the seasoning if needed.
- Pipe the filling: Spoon the filling into a piping bag or a zip-top bag. Snip off a small corner. Pipe the filling into each egg white half, mounding it slightly.
- Make the olive spiders: Drain the black olives and pat them dry with a paper towel. Slice each olive in half crosswise (not lengthwise). One half becomes the spider body. From the other half, slice thin strips lengthwise to make the legs—you want 8 legs per spider.
- Assemble the spiders: Place one olive half (the body) on top of each deviled egg, slightly off-center so it looks like the spider is crawling out of the filling. Arrange 4 olive leg strips on each side of the body, pressing them gently into the filling so they stay in place. Use a tiny pinch of paprika to make two little ‘eyes’ on the front of the olive body.
- Garnish and serve: Sprinkle a light dusting of paprika over the entire platter for color. If you are using fresh parsley or chives, scatter a few around the edges of the platter. Serve immediately or refrigerate until ready to serve.
Notes
Use jumbo olives for best results. For perfectly boiled eggs, do not skip the ice bath. If the olive legs keep slipping off, press them deeper into the filling or refrigerate for 10 minutes before serving. Boil eggs and make filling a day ahead to save time.
Nutrition
- Serving Size: 1 deviled egg half
- Calories: 65
- Sodium: 140
- Fat: 5
- Saturated Fat: 1.5
- Carbohydrates: 1
- Protein: 4
Keywords: Halloween deviled eggs, spider deviled eggs, spooky appetizer, Halloween party food, deviled eggs with olives


