“These taste like the ones my grandma used to make for the church bake sale.” My neighbor said it while holding a red velvet crinkle cookie halfway to her mouth, and I swear she got a little misty-eyed. I hadn’t planned on sharing my batch that afternoon—I was just testing a new recipe tweak—but she caught the smell coming through my kitchen window and showed up at my door like a cookie detective.
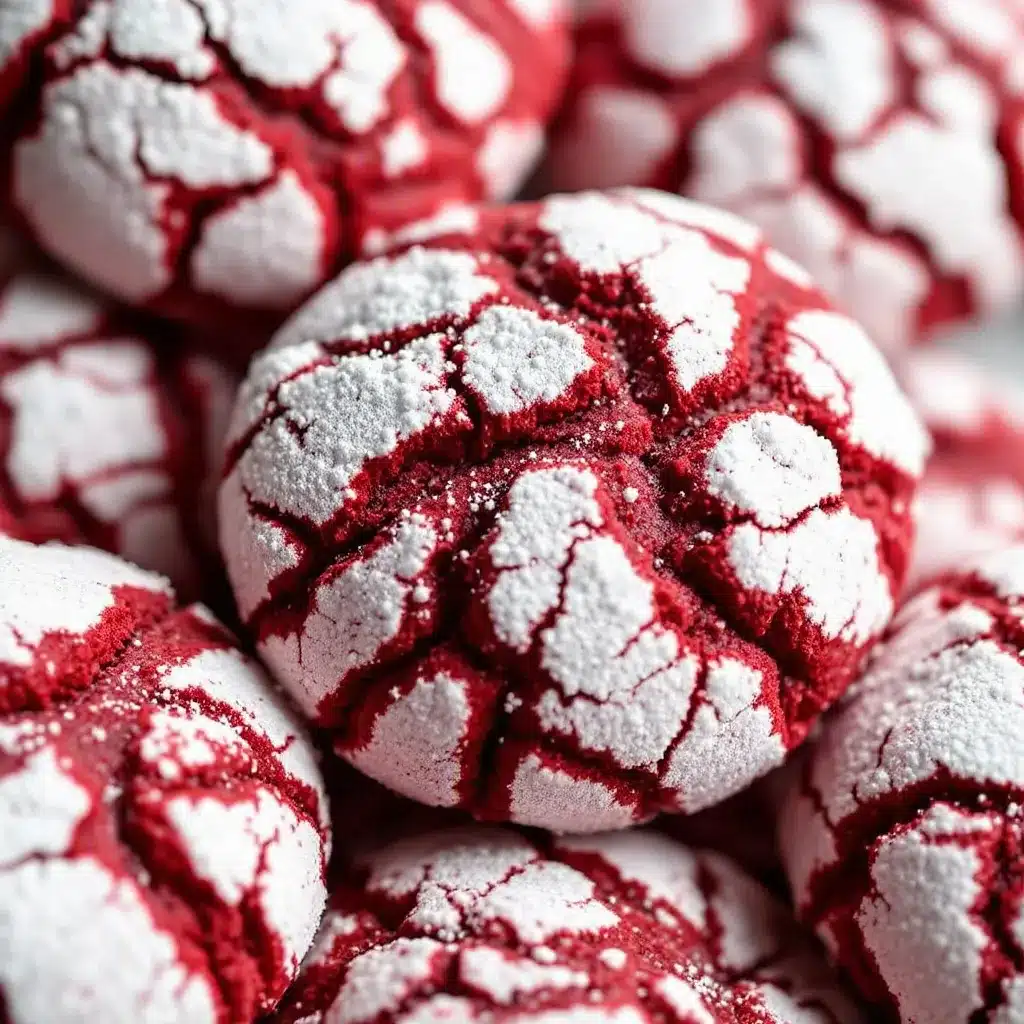
That moment stuck with me. Not because of the compliment (though I won’t pretend that didn’t feel good), but because of how a simple cookie could unlock a whole memory for someone. Red velvet crinkle cookies have that effect on people. They look fancy with their snowy powdered sugar coating and deep red cracks, but they’re genuinely one of the easiest cookies you’ll ever make. No chilling required, no complicated techniques, no fancy equipment. Just a bowl, a whisk, and about twenty minutes of your time.
I’ve been making these for years now, tweaking the texture until the edges are slightly crisp and the centers stay soft and fudgy. The secret is in how you handle the cocoa powder and the ratio of oil to eggs. Too much of either and you lose that signature crinkle. Too little and they come out flat. But I’ve done the trial-and-error part so you don’t have to. These best red velvet crinkle cookies with powdered sugar turn out perfect every single time.
Why You’ll Love This Recipe
Let me tell you why these cookies have become my most-requested dessert for holidays, potlucks, and random Tuesday cravings. I’ve tested this recipe at least a dozen times across different ovens and altitudes, and it holds up every single time.
- Quick & Easy: From mixing bowl to cooling rack in under 30 minutes. No stand mixer needed, no waiting for butter to soften, no chilling the dough. Just mix, roll, bake, and devour.
- Simple Ingredients: You probably have most of these in your pantry right now. Cocoa powder, flour, sugar, oil, eggs—nothing weird or hard to find. The red food coloring is the only specialty item, and you can grab it at any grocery store.
- Perfect for Holidays: These cookies scream Christmas, Valentine’s Day, and Fourth of July all at once. The red color pops against the white powdered sugar, making them look like little edible snowballs. They’re also fantastic for cookie exchanges and bake sales.
- Crowd-Pleaser: Kids love the bright color. Adults love the nostalgic flavor. Even people who claim they don’t like red velvet somehow end up reaching for a second one. I’ve watched it happen more times than I can count.
- Unbelievably Delicious: The edges have this delicate crispness that gives way to a soft, almost brownie-like center. The cocoa flavor is present but not overwhelming, and the powdered sugar adds just the right amount of sweetness on top. It’s the kind of cookie that makes you close your eyes after the first bite.
What makes these best red velvet crinkle cookies with powdered sugar different from other versions? It’s the texture. Most recipes produce cookies that are either too cakey or too flat. Mine hits that sweet spot where they’re dense and fudgy like a brownie but still light enough to eat three in a row without feeling guilty. The oil-based dough keeps them tender for days, and the vinegar reacts with the baking soda to create those beautiful cracks on top. It’s chemistry you can taste.
What Ingredients You Will Need
This recipe uses simple, everyday ingredients that come together to create something genuinely special. No obscure baking supplies or expensive imports here—just honest pantry staples that work hard for you.
- All-purpose flour (2 cups / 250g) – The backbone of the cookie. Spoon and level your flour for the most accurate measurement. Scooping directly from the bag packs in too much flour and makes the cookies dry.
- Unsweetened cocoa powder (1/3 cup / 30g) – I prefer Hershey’s Special Dark for a richer flavor, but any natural unsweetened cocoa works fine. Dutch-process cocoa will give a milder chocolate taste and darker color if that’s what you have.
- Granulated sugar (1 cup / 200g) – Regular white sugar. Don’t substitute brown sugar here because it changes the texture and the color of the dough.
- Vegetable oil (1/3 cup / 80ml) – This keeps the cookies tender and soft without needing butter. Canola oil, avocado oil, or any neutral-flavored oil works perfectly. Coconut oil (melted and cooled) is also fine but adds a slight coconut flavor.
- Large eggs (2, room temperature) – Bring them to room temperature by setting them on the counter for 30 minutes. Cold eggs seize up the oil and make the dough harder to mix evenly.
- White vinegar (1 tablespoon / 15ml) – This reacts with the baking soda to create the crinkly tops. Don’t skip it. You won’t taste it in the finished cookies, I promise.
- Vanilla extract (1 teaspoon / 5ml) – Pure vanilla extract gives the best flavor, but imitation vanilla works in a pinch.
- Red food coloring (1 tablespoon / 15ml, or more for deeper color) – Liquid food coloring is what I use most often. Gel food coloring gives a more intense red without thinning the dough. Start with 1 tablespoon and add more if you want a bolder color.
- Baking soda (1 teaspoon / 5g) – Make sure it’s fresh. Test it by dropping a little into vinegar—if it fizzes vigorously, it’s still active.
- Salt (1/2 teaspoon / 3g) – Just regular table salt. It balances the sweetness and enhances the chocolate flavor.
- Powdered sugar (1/2 cup / 60g, for rolling) – This is what gives the cookies their signature snowy look. Sift it first if it’s clumpy so it coats the dough balls evenly.
For the best red velvet crinkle cookies with powdered sugar, I recommend using a good-quality cocoa powder. I’m partial to Ghirardelli or Hershey’s Special Dark for their depth of flavor. And please don’t use the squeeze-tube red food coloring from the baking aisle if you can avoid it—the little bottles of liquid coloring give a much cleaner red without any weird aftertaste.
Equipment Needed
You don’t need a bakery-grade kitchen to pull these off. Here’s what you’ll actually use:
- Large mixing bowl – Any bowl big enough to fit all the ingredients without splashing. Glass or stainless steel works great.
- Whisk – For mixing the wet ingredients and combining the dry ingredients. A fork works in a pinch but a whisk is faster.
- Rubber spatula – For folding the dough together and scraping the bowl clean. I’ve broken too many wooden spoons on stiff cookie dough.
- Measuring cups and spoons – Accurate measurements matter here. Use dry measuring cups for flour and sugar, and liquid measuring cups for oil and food coloring.
- Baking sheets – Two standard half-sheet pans work perfectly. Line them with parchment paper or silicone baking mats for easy cleanup.
- Cooling rack – Lets air circulate around the cookies so they cool evenly without getting soggy bottoms.
- Small bowl – For the powdered sugar coating. A shallow bowl makes it easier to roll the dough balls.
- Cookie scoop (1.5 tablespoon size) – Not essential but makes portioning the dough so much faster and gives you evenly sized cookies. A regular spoon works too.
If you don’t have a cooling rack, just transfer the cookies to a clean plate or cutting board after they’ve set on the baking sheet for a few minutes. And if you’re using dark non-stick baking sheets, reduce your oven temperature by 25 degrees to prevent over-browning on the bottoms.
Preparation Method
Preheat your oven to 375°F (190°C). Line two baking sheets with parchment paper or silicone baking mats. This makes cleanup a breeze and prevents the cookies from sticking.
- Mix the dry ingredients. In a medium bowl, whisk together the flour, cocoa powder, baking soda, and salt. Make sure everything is evenly distributed. Set this aside while you work on the wet ingredients.
- Combine the wet ingredients. In a large mixing bowl, whisk together the granulated sugar and vegetable oil until smooth. It should look like wet sand. Add the eggs one at a time, whisking well after each addition. The mixture will thicken and become glossy. Stir in the vanilla extract, white vinegar, and red food coloring. The color should be a vibrant, deep red. If it looks more pink than red, add another teaspoon of coloring.
- Bring it all together. Pour the dry ingredients into the wet ingredients and fold together with a rubber spatula until just combined. Do not overmix. A few streaks of flour are okay. Overworking the dough develops gluten and makes the cookies tough instead of tender. The dough will be soft, slightly sticky, and a gorgeous shade of crimson.
- Portion the dough. Use a cookie scoop or a tablespoon to scoop out rounded balls of dough, about 1.5 tablespoons each. Roll each portion between your palms to form a smooth ball. The dough should hold together without cracking. If it feels too sticky to handle, refrigerate it for 10 minutes.
- Coat in powdered sugar. Place the powdered sugar in a small shallow bowl. Roll each dough ball in the sugar until completely coated. Be generous here—the sugar creates the crinkle effect as the cookies spread in the oven. Place the coated dough balls on the prepared baking sheets, spacing them about 2 inches apart. They spread a fair amount.
- Bake. Bake one sheet at a time in the center of the oven for 10 to 12 minutes. The cookies should look puffed, cracked, and slightly set around the edges but still soft in the center. The tops will look matte rather than glossy. Do not overbake. These cookies continue to set as they cool on the baking sheet.
- Cool completely. Let the cookies rest on the baking sheet for 5 minutes. They will be very soft and fragile right out of the oven. After 5 minutes, transfer them to a wire cooling rack to cool completely. The powdered sugar will settle into the cracks and create that beautiful crinkle pattern.
A few things I’ve learned the hard way: If your cookies come out flat, your baking soda is probably expired. If they come out too cakey, you might have overmixed the dough. And if the crinkle effect is barely visible, you didn’t roll them in enough powdered sugar. It should look excessive before they go into the oven.
Cooking Tips & Techniques
I’ve made these best red velvet crinkle cookies with powdered sugar more times than I care to admit, and I’ve definitely made my share of mistakes. Here’s what I wish someone had told me from the start.
The vinegar is non-negotiable. I know it sounds weird, but the vinegar reacts with the baking soda to create carbon dioxide bubbles that push the dough up and create those signature cracks. Without it, you get flat cookies with no crinkle. I once forgot to add it and ended up with sad, smooth-topped discs that looked more like hockey pucks than cookies.
Don’t skip the powdered sugar coating. Roll the dough balls generously and make sure every surface is covered. I like to double-coat them—roll once, let them sit for a minute, then roll again. This extra layer guarantees those beautiful white cracks against the red dough. If you skimp, the crinkle effect will be minimal.
Bake one sheet at a time. I know it’s tempting to save time by baking both sheets at once, but the uneven heat distribution leads to inconsistent results. The bottom sheet will brown too quickly while the top sheet stays pale. Rotating the pans halfway through helps but doesn’t solve the problem entirely. Just bake them one at a time and use the extra minute to roll more dough balls.
Watch the clock carefully. These cookies go from perfectly soft to overbaked in about 60 seconds. Start checking at the 9-minute mark if your oven runs hot. The cookies are done when the edges look set and the tops are covered in cracks. The centers should still look slightly underdone—they will continue baking from residual heat after you pull them out.
Use parchment paper. Silicone mats work fine, but parchment paper gives me more consistent results with these cookies. The cookies spread slightly more on silicone, which can make them thinner. Parchment paper gives them just enough grip to hold their shape while still spreading evenly.
Variations & Adaptations
One of the best things about this recipe is how adaptable it is. Here are some variations I’ve tried and loved.
Gluten-Free Version: Substitute the all-purpose flour with a 1:1 gluten-free baking flour blend that contains xanthan gum. I’ve used Bob’s Red Mill 1-to-1 Baking Flour with great results. The texture is slightly more tender than the original, but the crinkle effect works just as well. No other adjustments needed.
Dairy-Free Version: This recipe is already dairy-free since it uses oil instead of butter. Double-check your cocoa powder and food coloring to make sure they’re dairy-free, and you’re good to go. These are perfect for anyone avoiding dairy.
White Chocolate Chip Addition: Fold in 1/2 cup of white chocolate chips after mixing the dough. The creamy sweetness of white chocolate pairs beautifully with the mild cocoa flavor of the red velvet. I do this for Christmas cookie plates and they disappear first every time.
Peppermint Red Velvet: Add 1/2 teaspoon of peppermint extract along with the vanilla extract. Crush a few candy canes and sprinkle the pieces on top of the cookies right after baking. This is my go-to holiday variation and it always gets rave reviews.
Less Sugar Option: Reduce the granulated sugar to 3/4 cup. The cookies will be slightly less sweet but still delicious. You can also use a sugar substitute like Swerve for a lower-sugar version, though the texture will be slightly different and the crinkle effect may be less pronounced.
If you’re looking for something completely different but equally easy, try my gluten-free cornbread muffins for a savory-sweet treat that comes together just as quickly.
Serving & Storage Suggestions
These cookies are best served at room temperature, straight off the cooling rack. The edges should be slightly crisp while the centers stay soft and fudgy. I like to arrange them on a pretty plate with a dusting of extra powdered sugar on top for presentation.
For beverage pairings, a cold glass of milk is the classic choice and it never disappoints. But I also love these with a hot cup of coffee or a creamy latte. The slight bitterness of coffee balances the sweetness of the cookies perfectly. For a festive touch, serve them alongside a mug of hot chocolate with whipped cream.
These cookies also make fantastic ice cream sandwiches. Take two cookies, scoop a generous layer of vanilla or cream cheese ice cream between them, and freeze for at least an hour. The combination of soft cookies and cold, creamy ice cream is next-level delicious.
Storage: Store the cookies in an airtight container at room temperature for up to 5 days. Place a slice of bread in the container to keep them soft—the cookies will absorb moisture from the bread and stay tender. Change the bread slice every other day.
Freezing: You can freeze the baked cookies for up to 3 months. Layer them between sheets of parchment paper in a freezer-safe container. Thaw at room temperature for about 30 minutes before serving. For longer storage, freeze the unbaked dough balls. Roll them in powdered sugar, place them on a baking sheet lined with parchment, and freeze until solid. Transfer the frozen dough balls to a freezer bag. Bake directly from frozen, adding 2 to 3 minutes to the baking time.
Reheating: Pop a cookie in the microwave for 10 seconds to revive that just-baked softness. Or warm them in a 300°F oven for 5 minutes if you’re reheating a whole batch.
The flavors actually develop and deepen after a day or two in the container. The cocoa becomes more pronounced and the cookies soften beautifully. I honestly prefer them on day two.
Nutritional Information & Benefits
Here’s the estimated nutritional breakdown per cookie (based on 24 cookies):
- Calories: 135
- Total Fat: 6g
- Saturated Fat: 1g
- Cholesterol: 16mg
- Sodium: 95mg
- Total Carbohydrates: 20g
- Dietary Fiber: 1g
- Sugars: 13g
- Protein: 2g
These numbers are estimates and will vary based on your specific ingredients and portion sizes.
From a health perspective, cocoa powder is rich in antioxidants called flavonoids, which support heart health and reduce inflammation. The oil-based recipe keeps the saturated fat content lower than traditional butter-based cookies. And because these cookies are naturally dairy-free, they’re suitable for anyone with lactose intolerance.
That said, these are still cookies. They’re a treat, not a health food. But if you’re going to indulge, I’d rather you indulge in something made from scratch with real ingredients than something from a box with preservatives and artificial flavors you can’t pronounce.
If you’re watching your sugar intake, you might also enjoy my diabetic-friendly lemon cake for a lighter dessert option that doesn’t sacrifice flavor.
Conclusion
These best red velvet crinkle cookies with powdered sugar have become a staple in my kitchen for good reason. They’re quick enough for a last-minute dessert craving, fancy enough for holiday cookie plates, and simple enough that even beginner bakers can nail them on the first try. The combination of that deep red color, the snowy powdered sugar coating, and the soft fudgy center is honestly hard to beat.
I love that this recipe uses pantry staples and comes together in one bowl. No stand mixer to clean, no butter to soften, no complicated techniques to master. Just honest, delicious cookies that make people smile. That neighbor who showed up at my door? She now asks for the recipe every time I post a photo on social media. I think that says everything.
I’d love to hear how yours turn out. Did you add white chocolate chips? Try the peppermint version? Bake them for a holiday party? Drop a comment below and let me know. And if you share a photo on social media, tag me so I can see your beautiful crinkle cookies in all their glory. Happy baking, friends!
Frequently Asked Questions
Why didn’t my cookies crinkle?
The most common reason is not enough powdered sugar coating. Roll the dough balls generously and make sure every surface is covered. Another culprit is old baking soda—it loses its potency over time and won’t create enough bubbles to push the dough up and create cracks. Also, make sure you added the vinegar. It’s essential for the chemical reaction that creates the crinkle effect.
Can I use butter instead of oil?
You can, but the texture will be different. Butter contains water and milk solids, which changes the spread and texture of the cookies. Oil-based cookies stay softer and more tender for longer. If you swap in melted butter, expect cookies that are slightly flatter and less fudgy. I recommend sticking with oil for the best results.
How do I get a deeper red color?
Use gel food coloring instead of liquid. Gel coloring is more concentrated, so you need less of it to achieve a vibrant red. Start with 1 teaspoon of gel coloring and add more if needed. Another trick is to use a combination of red and a tiny drop of burgundy or violet coloring to deepen the shade. The cocoa powder naturally darkens the dough, so don’t panic if the raw dough looks darker than you expected—it will lighten slightly as it bakes.
Can I make the dough ahead of time?
Absolutely. You can prepare the dough, roll it into balls, and refrigerate them for up to 24 hours before baking. Roll them in powdered sugar just before baking, not before refrigerating, because the sugar will dissolve into the dough over time. You can also freeze the unbaked dough balls for up to 3 months as mentioned in the storage section.
Why are my cookies spreading too much?
If your cookies are spreading into flat discs, the dough might be too warm. Try refrigerating the scooped dough balls for 15 to 20 minutes before baking. Another cause is too much oil or too little flour. Make sure you’re measuring accurately—spoon and level your flour rather than scooping directly from the bag. And check that your baking soda is fresh, because without enough leavening, the cookies will spread instead of puffing up.
Pin This Recipe!
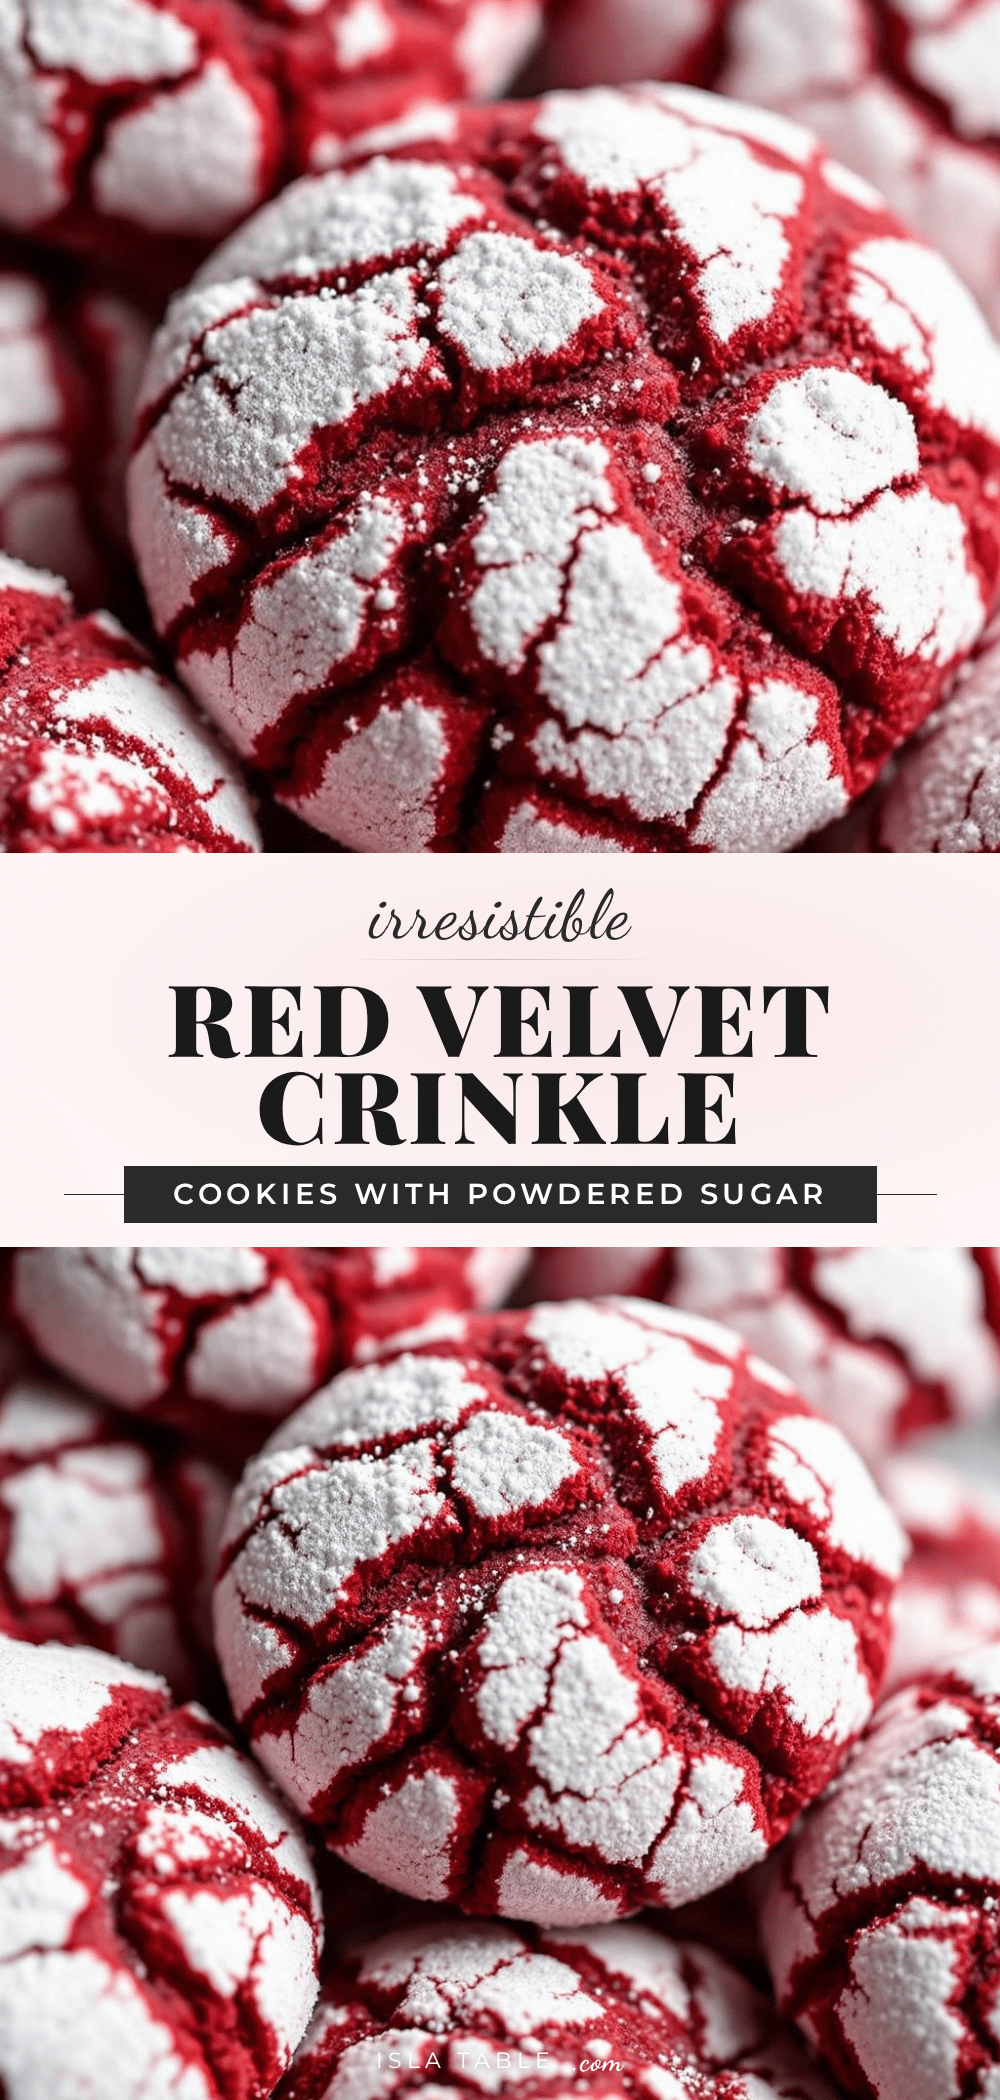
Best Red Velvet Crinkle Cookies Easy Homemade Recipe
These red velvet crinkle cookies are quick and easy to make, with a soft, fudgy center and a snowy powdered sugar coating. No chilling required, just mix, roll, bake, and enjoy a crowd-pleasing treat perfect for holidays or any occasion.
- Prep Time: 15 minutes
- Cook Time: 12 minutes
- Total Time: 27 minutes
- Yield: 24 servings 1x
- Category: Dessert
- Cuisine: American
Ingredients
- 2 cups (250g) all-purpose flour
- 1/3 cup (30g) unsweetened cocoa powder
- 1 cup (200g) granulated sugar
- 1/3 cup (80ml) vegetable oil
- 2 large eggs, room temperature
- 1 tablespoon (15ml) white vinegar
- 1 teaspoon (5ml) vanilla extract
- 1 tablespoon (15ml) red food coloring (or more for deeper color)
- 1 teaspoon (5g) baking soda
- 1/2 teaspoon (3g) salt
- 1/2 cup (60g) powdered sugar (for rolling)
Instructions
- Preheat oven to 375°F (190°C). Line two baking sheets with parchment paper or silicone baking mats.
- In a medium bowl, whisk together flour, cocoa powder, baking soda, and salt. Set aside.
- In a large mixing bowl, whisk together granulated sugar and vegetable oil until smooth. Add eggs one at a time, whisking well after each. Stir in vanilla extract, white vinegar, and red food coloring until the mixture is a vibrant deep red.
- Pour dry ingredients into wet ingredients and fold together with a rubber spatula until just combined. Do not overmix. The dough will be soft and slightly sticky.
- Using a cookie scoop or tablespoon, portion dough into rounded balls (about 1.5 tablespoons each). Roll each portion between your palms to form a smooth ball.
- Place powdered sugar in a small shallow bowl. Roll each dough ball in the sugar until completely coated. Place coated dough balls on prepared baking sheets, spacing them about 2 inches apart.
- Bake one sheet at a time in the center of the oven for 10 to 12 minutes. Cookies should look puffed, cracked, and slightly set around the edges but still soft in the center.
- Let cookies rest on the baking sheet for 5 minutes, then transfer to a wire cooling rack to cool completely.
Notes
The vinegar is essential for the crinkle effect—do not skip it. For best results, double-coat dough balls in powdered sugar. Bake one sheet at a time for even results. Start checking cookies at 9 minutes if your oven runs hot. Store in an airtight container at room temperature for up to 5 days; place a slice of bread in the container to keep them soft. Freeze baked cookies for up to 3 months or unbaked dough balls for up to 3 months.
Nutrition
- Serving Size: 1 cookie
- Calories: 135
- Sugar: 13
- Sodium: 95
- Fat: 6
- Saturated Fat: 1
- Carbohydrates: 20
- Fiber: 1
- Protein: 2
Keywords: red velvet crinkle cookies, easy red velvet cookies, crinkle cookies, homemade cookies, holiday cookies, red velvet dessert


