My husband stared at the black slate for a full ten seconds, then quietly picked up a pretzel bone, dipped it, and nodded once. That was it. No grand speech, no dramatic gasp, just a slow, satisfied chew that told me everything I needed to know. He’s not usually the type to get excited about snack plates, but seeing him ignore the expensive aged cheddar in favor of the salty, soft pretzel shapes was a win I didn’t expect.
It was supposed to be a quick snack while we watched the new horror movie, but this Best Halloween Charcuterie Board with Pretzel Bones turned into the main event. I watched him hunt for the next bone like a kid on Halloween morning, completely forgetting to press play on the TV. The look on his face wasn’t just about hunger; it was genuine delight at the novelty of eating something that looked like a spooky prop but tasted like comfort food.
Honestly, I’ve made charcuterie boards before. They’re usually just a sad assortment of crackers and cheese sticks that nobody touches until midnight. But this time, I wanted to add a homemade element that would actually compete with the fancy meats. The pretzel bones became the star of the show, drawing everyone into the kitchen long after the credits rolled.
The best part wasn’t the food itself, but the way it changed the mood of the evening. Instead of just sitting in silence, we were talking about how to make them look even spookier next year. It’s funny how a little dough and some baking soda can turn a regular Tuesday into a memorable night. Now, the recipe is stuck in my head, and I know I’ll be making it every October from now on.
Why You’ll Love This Halloween Charcuterie Board
It’s a Crowd-Pleaser That Actually Works
Let’s face it, most Halloween snacks are just candy in disguise. You want something that feels festive but isn’t just a sugar rush waiting to happen. This board hits that sweet spot perfectly. It’s salty, savory, and slightly sweet all at once. The pretzel bones are the real secret weapon here because they offer a texture that’s completely different from standard crackers or bread. They’re chewy on the inside and crisp on the outside, which makes them perfect for holding up to thick dips without getting soggy.
Quick & Easy Setup for Busy Nights
You don’t need to be a professional chef to pull this off. In fact, you don’t even need to be in the kitchen for long. The homemade pretzel bones take about twenty minutes to bake, and the rest is just assembly. It’s perfect for those last-minute parties or when you’re hosting friends who show up with zero notice. You can prep the dough earlier in the day and bake them right before guests arrive. It saves you time while still looking like you spent hours planning.
Simple Ingredients, Big Impact
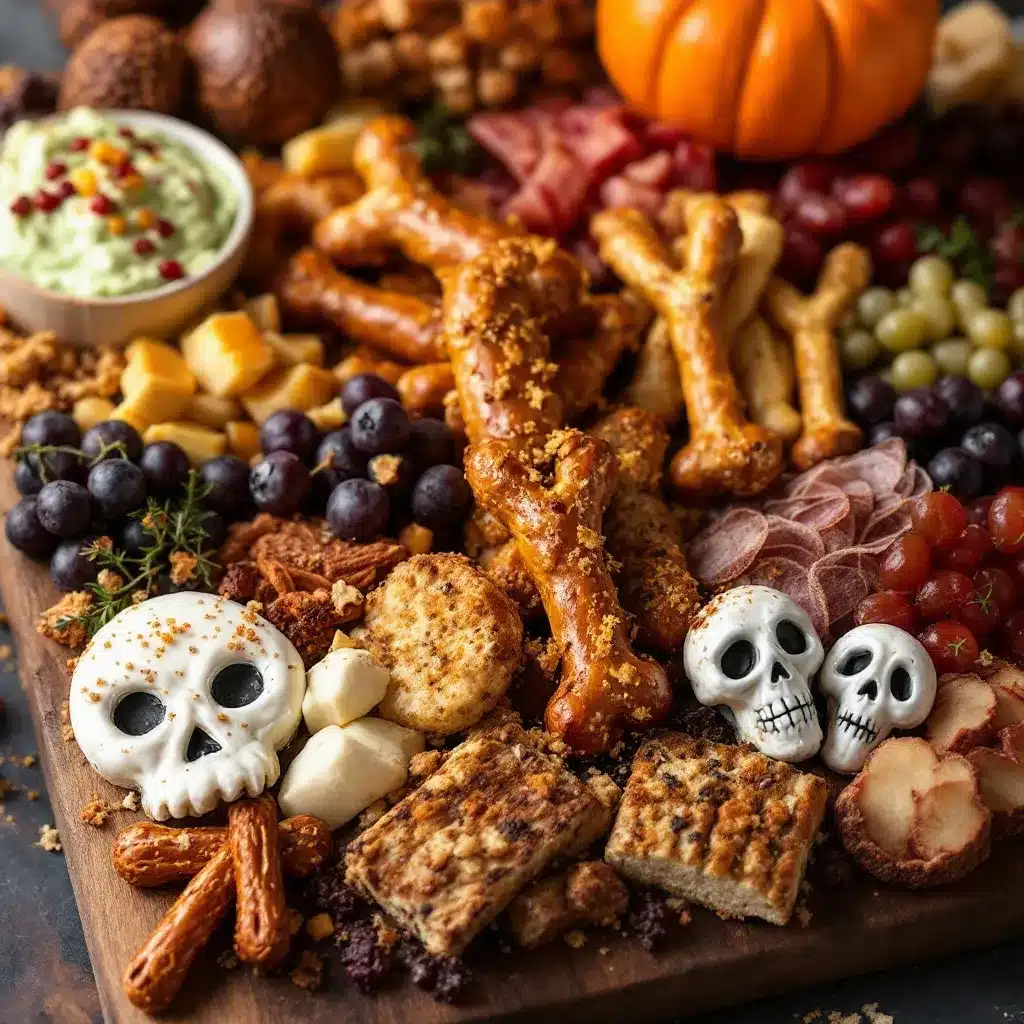
You likely have most of the ingredients for the pretzels already in your pantry. Flour, yeast, butter, sugar, and baking soda are staples in almost every home. For the board itself, you can use whatever cheeses and meats you have on hand. This isn’t about buying expensive imported items; it’s about arranging what you have in a way that looks intentional and fun. It’s a great way to use up leftovers from previous dinners while creating something new.
Unbelievably Delicious Comfort Food
There is something deeply satisfying about dipping a warm, salty pretzel into a creamy cheese sauce. It’s the kind of combination that makes you close your eyes after the first bite. The saltiness of the pretzel cuts through the richness of the cheese, creating a balance that is just next-level. It’s comfort food reimagined for a spooky theme, but with the same soul-soothing satisfaction you’d get from a bowl of chili on a cold night.
Perfect for Any Occasion
While this is obviously perfect for Halloween, it works for game day, sleepovers, or just a cozy night in. The visual appeal is high, which makes it great for photos, but the taste is what keeps people coming back. It’s versatile enough to be a snack or a light meal. I’ve served this at potlucks, and it’s always the first thing to disappear. It’s reliable, tasty, and always gets rave reviews from both kids and adults.
What Ingredients You Will Need for the Best Halloween Charcuterie Board with Pretzel Bones
Building the perfect spooky board starts with getting the details right. The pretzel bones are the foundation, so you want to use ingredients that give you that classic mall pretzel taste. For the dough, bread flour is your best friend. It has more protein than all-purpose flour, which gives those bones their signature chew. If you can’t find bread flour, all-purpose works, but the texture will be slightly softer. I always recommend using active dry yeast for this, as it gives a nice rise and flavor that instant yeast sometimes misses.
For the charcuterie side, variety is key. You want a mix of textures and flavors to keep things interesting. Hard cheeses like sharp cheddar or gouda hold their shape well, while soft cheeses like brie add a creamy contrast. For meats, salami and prosciutto are classic choices, but don’t forget about something crunchy like pork rinds or pretzel crisps. The color palette matters too. Black olives, dark grapes, and dark chocolate-covered pretzels add that spooky Halloween vibe without being too gimmicky.
Here is a breakdown of what you need to get started:
For the Pretzel Bones
- Bread Flour: 3 cups (420g). Provides the chewy structure.
- Warm Water: 1 cup (240ml). Make sure it’s not too hot, or it will kill the yeast.
- Active Dry Yeast: 2 teaspoons (7g). Standard packet size usually works.
- Sugar: 2 tablespoons. Helps the yeast activate and adds slight sweetness.
- Unsalted Butter: 2 tablespoons, melted. Adds richness to the dough.
- Salt: 1 teaspoon. Enhances the overall flavor.
- Large Egg: 1, beaten. Used for the egg wash to get that shiny, golden crust.
- Baking Soda: 1/3 cup. This is the secret ingredient for the authentic pretzel flavor and color.
- Coarse Sea Salt: For sprinkling on top. Essential for that salty crunch.
For the Charcuterie Board
- Sharp Cheddar Cheese: Cubed or sliced. A strong flavor that pairs well with sweet elements.
- Smoked Gouda: Sliced. Adds a smoky depth that fits the autumn theme.
- Salami or Pepperoni: Rolled or folded. Adds a savory, salty element.
- Black Olives: Whole or sliced. Their dark color adds to the spooky aesthetic.
- Dark Grapes: Left on the vine if possible. Adds a fresh, juicy contrast.
- Mustard or Whole Grain Honey: For dipping. Adds a tangy kick.
- Crackers: Plain or seeded. Provides a neutral base for the cheeses.
- Dark Chocolate Covered Pretzels: Optional. Adds a sweet treat option.
Substitutions and Tips
If you need a gluten-free option, you can swap the bread flour for a high-quality gluten-free blend, though the chew might be slightly different. For the cheese, try using almond flour crackers if you want to keep it low-carb. Look for firm, small-curd cottage cheese if you want to make a homemade dip, but store-bought soft cheeses work perfectly fine for ease. In summer, you might swap the heavy meats for lighter options like grilled chicken strips, but for Halloween, the classic cured meats are hard to beat.
Equipment Needed for Your Spooky Spread
You don’t need a fancy kitchen to make this, but having the right tools makes the process much smoother. First, you’ll need a large baking sheet lined with parchment paper. This is essential for shaping the pretzel bones and preventing them from sticking. A silicone baking mat is also a great alternative if you have one, as it makes cleanup a breeze.
For mixing the dough, a large mixing bowl is necessary. If you’re using a stand mixer, a dough hook attachment will save you a lot of time, but you can easily mix by hand. Just be prepared for a little bit of elbow grease. A rolling pin is helpful if you want uniform shapes, but honestly, shaping by hand feels more authentic and fun, especially with kids involved.
You’ll also need a small pot for boiling water and baking soda. This step is crucial for getting that authentic pretzel crust. A slotted spoon or spider strainer is very helpful for lifting the pretzels out of the boiling water quickly. For the egg wash, a small pastry brush works best, but a fork can do the job if you’re in a hurry. Finally, a large serving platter or a black slate board is needed for the final presentation. A slate board adds a nice contrast to the golden pretzels and colorful cheeses.
Preparation Method: Making Pretzel Bones
Step 1: Activate the Yeast (10 minutes)
Start by warming the water to about 110°F (43°C). It should feel warm to the touch, but not hot. Pour it into a large bowl and sprinkle the yeast and sugar over the top. Let it sit for about 5 to 10 minutes until it becomes foamy. This means the yeast is alive and ready to work. If it doesn’t foam, your yeast might be old, and you should start over.
Step 2: Mix the Dough (5 minutes)
Add the melted butter and salt to the yeast mixture. Gradually add the flour, one cup at a time, stirring with a wooden spoon or mixing paddle. Once the dough becomes too thick to stir, switch to using your hands. Knead the dough on a lightly floured surface for about 5 to 7 minutes. It should be smooth and slightly tacky, but not sticky. If it’s too sticky, add a little more flour. If it’s too dry, add a splash of water.
Step 3: First Rise (1 hour)
Place the dough in a lightly oiled bowl and cover it with a damp towel or plastic wrap. Let it rise in a warm spot for about 1 hour, or until it has doubled in size. This step is important for developing the flavor and texture. Don’t rush it. If your kitchen is cold, you can put it in a slightly warm oven with the light on.
Step 4: Shape the Bones (15 minutes)
Punch down the dough to release any air bubbles. Divide the dough into small portions, about the size of a tennis ball. Roll each portion into a long rope, about 12 inches long. Then, shape them into bones by pinching one end to make a bulbous shape and tapering the other end. Place them on the parchment-lined baking sheet. You can use a toothpick to make little holes for the “joints” if you want to get fancy.
Step 5: Second Rise (20 minutes)
Cover the shaped pretzels loosely with plastic wrap and let them rise again for about 20 minutes. They should look puffy and soft. This step ensures they are light and airy after baking.
Step 6: Boil the Pretzels (10 minutes)
Preheat your oven to 400°F (200°C). In a large pot, bring water and baking soda to a boil. Carefully drop the pretzels into the boiling water for about 30 seconds per side. This step gives them their signature dark, shiny crust and authentic pretzel flavor. Use a slotted spoon to remove them and place them back on the baking sheet.
Step 7: Bake (12-15 minutes)
Brush the boiled pretzels with the beaten egg wash and sprinkle generously with coarse sea salt. Bake for 12 to 15 minutes until they are deep golden brown. Remove from the oven and let them cool slightly before serving. They are best served warm.
Cooking Tips & Techniques for Perfect Pretzels
Getting the boil right is the most important part of this recipe. If you skip the baking soda bath, you’re just making sweet bread rolls. The alkaline environment created by the baking soda is what triggers the Maillard reaction, giving pretzels their distinct flavor and dark color. Be careful when dropping them into the boiling water, as they can bounce around. Use a slotted spoon to handle them gently.
Another common mistake is overworking the dough. You want it to be tender, not tough. If you knead it for too long, the gluten can become too strong, resulting in a chewy texture that’s more like bagel than pretzel. Stop kneading as soon as the dough is smooth. Also, make sure your water is at a rolling boil before adding the pretzels. If the water is too cool, they won’t cook properly.
If you’re making these ahead of time, you can freeze the shaped, raw pretzels on a baking sheet. Once they are frozen solid, transfer them to a bag. When you’re ready to bake, you can boil and bake them straight from the freezer, just adding a couple of extra minutes to the bake time. This is a huge time-saver for party planning.
Variations & Adaptations for Your Board
While the classic pretzel bone is a hit, you can easily adapt this recipe to fit different dietary needs or flavor preferences. For a spicy twist, add a pinch of cayenne pepper to the dough or serve the pretzels with a spicy mustard dip. If you want a sweeter option, brush the baked pretzels with honey and sprinkle with cinnamon sugar.
For a gluten-free version, use a gluten-free flour blend that includes xanthan gum. You may need to adjust the water content slightly, as gluten-free flours absorb water differently. The boiling step still works, but the texture might be slightly denser. For a dairy-free option, use olive oil instead of butter in the dough and serve with dairy-free cheese alternatives.
You can also change the shape entirely. Instead of bones, make traditional pretzel twists or knots. Or, for a more seasonal look, shape them into ghosts or pumpkins. The possibilities are endless. I once made mini pretzel bites for a party, and they were a huge hit because they were easy to eat while standing around.
Serving & Storage Suggestions
Serve the pretzel bones warm for the best texture. They are best enjoyed fresh, but they can be stored in an airtight container at room temperature for up to two days. To refresh them, pop them in the oven at 350°F (175°C) for 5 minutes. This will bring back some of the crispness.
For the charcuterie board, arrange the cheeses and meats on the board just before serving to prevent them from drying out. Keep the dips in small bowls to avoid cross-contamination. You can store leftover pretzels in the freezer for up to three months. Reheat them in the oven or air fryer to restore their texture.
Pair this board with a crisp apple cider or a bold red wine. The tannins in the wine cut through the richness of the cheese, while the cider complements the sweetness of the pretzels. It’s a perfect combination for a cozy fall night.
Nutritional Information & Benefits
This recipe is a mix of indulgence and balance. The pretzel bones provide carbohydrates for energy, while the charcuterie offers protein and healthy fats. The cheese is a good source of calcium, and the meats provide iron. However, it is important to note that this board can be high in sodium due to the pretzels and cured meats. Enjoy it in moderation as part of a balanced diet.
For those watching their calorie intake, you can reduce the portion size of the meats and cheeses and add more fresh vegetables like cucumber slices or bell pepper strips. This adds volume and nutrients without adding many calories. It’s a great way to make the board feel lighter while still being satisfying.
Conclusion
This Best Halloween Charcuterie Board with Pretzel Bones is more than just a snack; it’s an experience. It brings people together, sparks conversation, and delivers on flavor. I love this recipe because it’s versatile, fun to make, and always a crowd-pleaser. Whether you’re hosting a party or just having a quiet night in, it’s a great way to add some spooky charm to your table.
I encourage you to try this recipe and make it your own. Experiment with different cheeses, meats, and dips to find your perfect combination. Share your creations on social media and tag me. I’d love to see how you style your spooky boards. Let’s make this Halloween unforgettable with a board that tastes as good as it looks.
Frequently Asked Questions
Can I make the pretzel dough ahead of time?
Yes, you can make the dough and let it rise in the refrigerator overnight. This actually develops a deeper flavor. Just remember to let it come to room temperature before shaping and baking.
What can I use instead of baking soda for the boil?
You can use lye, which is traditional for pretzels, but it requires careful handling. Baking soda is a safer and easier alternative that still gives great results.
How do I store leftover charcuterie board items?
Store cheeses and meats in airtight containers in the refrigerator. Consume within 3-4 days. The pretzels can be stored at room temperature for up to two days.
Can I freeze the pretzel bones?
Yes, you can freeze the raw, shaped pretzels on a baking sheet, then transfer them to a bag. Bake them straight from the freezer, adding a few extra minutes to the bake time.
What dips go well with pretzel bones?
Classic mustard, cheese dip, honey mustard, and spicy brown mustard are all great options. You can also try a creamy beer cheese dip for a richer flavor.
Pin This Recipe!
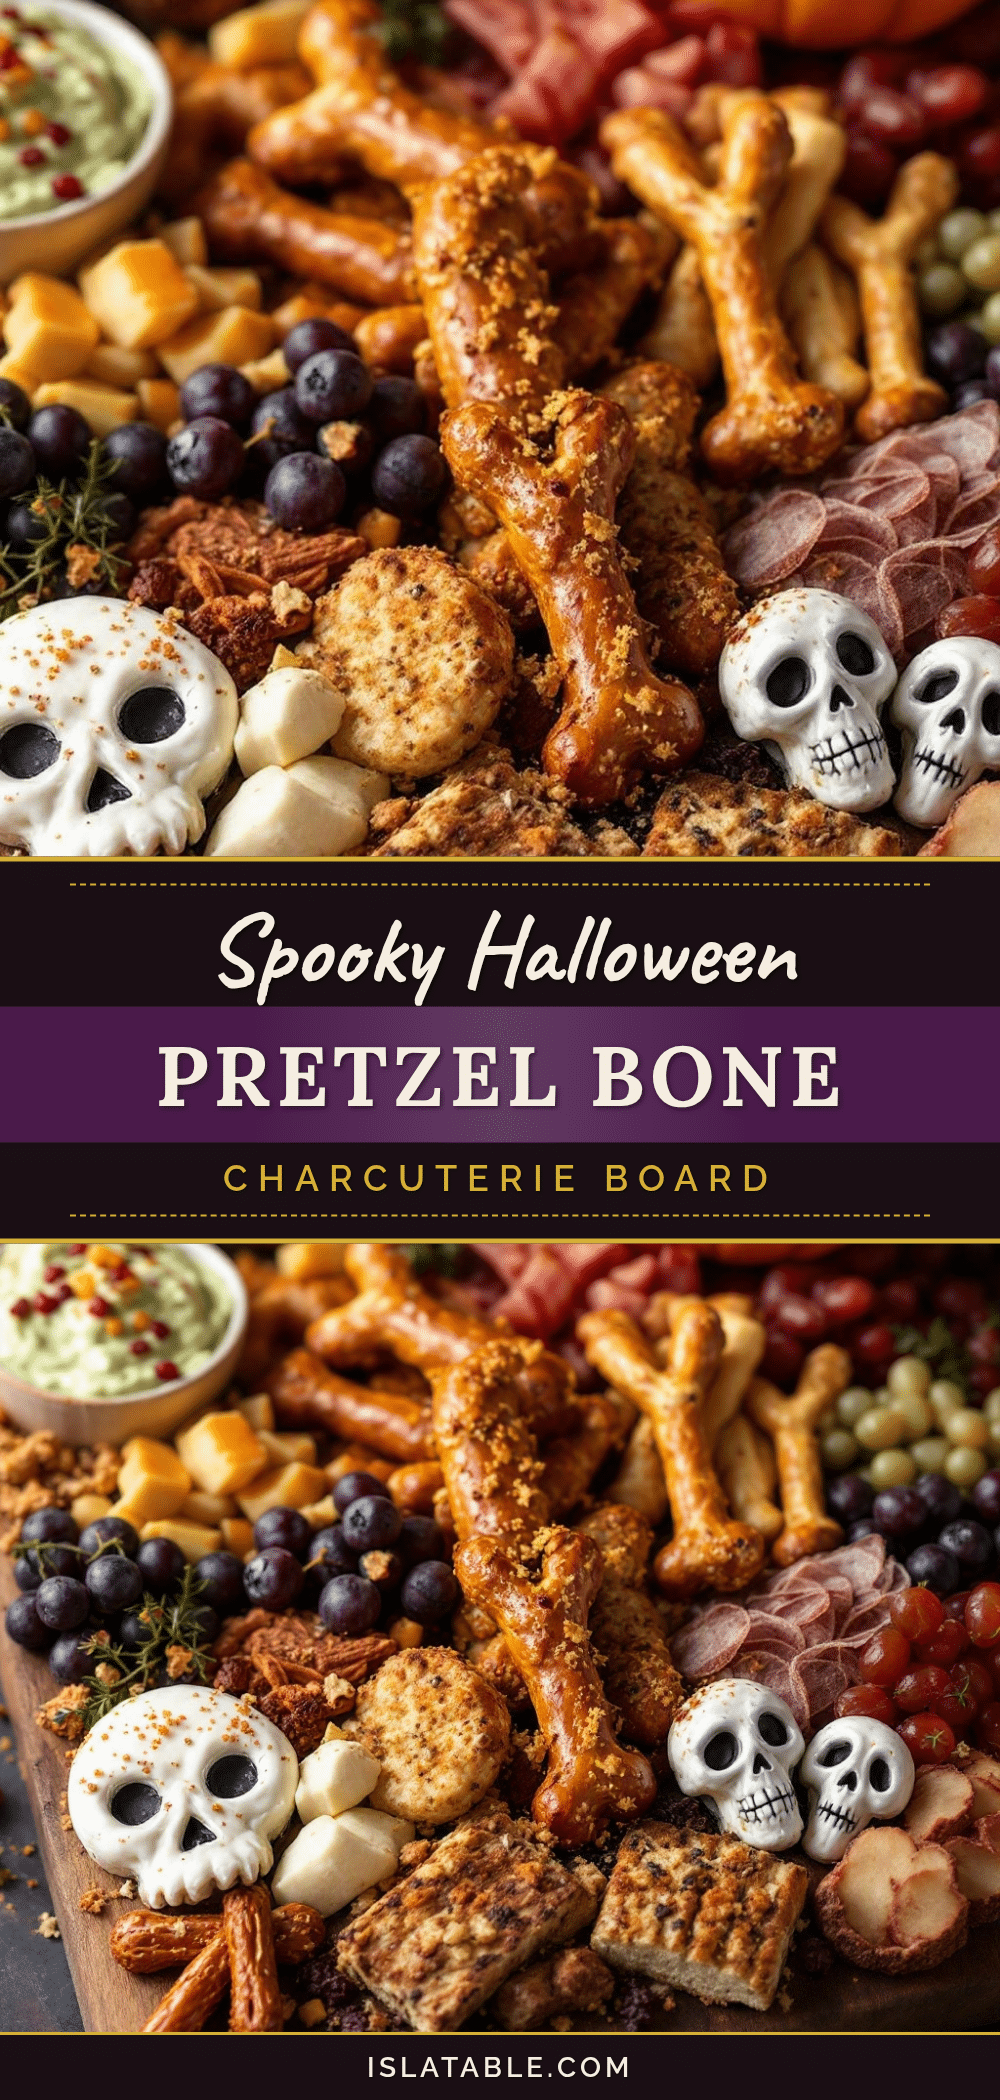
Best Halloween Charcuterie Board: Easy Pretzel Bones Recipe
A festive Halloween snack board featuring homemade pretzel bones with a chewy, salty crust, paired with a variety of cheeses, meats, and dips for a spooky yet comforting treat.
- Prep Time: 45 minutes
- Cook Time: 25 minutes
- Total Time: 1 hour 10 minutes
- Yield: Makes approximately 12-15 pretzel bones 1x
- Category: Appetizer
- Cuisine: American
Ingredients
- 3 cups (420g) Bread Flour
- 1 cup (240ml) Warm Water (110°F/43°C)
- 2 teaspoons (7g) Active Dry Yeast
- 2 tablespoons Sugar
- 2 tablespoons Unsalted Butter, melted
- 1 teaspoon Salt
- 1 Large Egg, beaten (for egg wash)
- 1/3 cup Baking Soda (for boiling water)
- Coarse Sea Salt (for sprinkling)
- Sharp Cheddar Cheese, cubed or sliced
- Smoked Gouda, sliced
- Salami or Pepperoni, rolled or folded
- Black Olives, whole or sliced
- Dark Grapes
- Mustard or Whole Grain Honey
- Crackers, plain or seeded
- Dark Chocolate Covered Pretzels (optional)
Instructions
- Activate the yeast: Warm water to 110°F. Pour into a large bowl, sprinkle with yeast and sugar, and let sit for 5-10 minutes until foamy.
- Mix the dough: Add melted butter and salt to the yeast mixture. Gradually add flour, stirring until thick. Knead on a floured surface for 5-7 minutes until smooth and slightly tacky.
- First rise: Place dough in an oiled bowl, cover, and let rise in a warm spot for 1 hour or until doubled in size.
- Shape the bones: Punch down dough. Divide into tennis ball-sized portions. Roll into 12-inch ropes and shape into bones by pinching one end to create a bulbous shape. Place on a parchment-lined baking sheet.
- Second rise: Cover shaped pretzels loosely with plastic wrap and let rise for 20 minutes until puffy.
- Boil the pretzels: Preheat oven to 400°F (200°C). Bring a large pot of water and baking soda to a boil. Drop pretzels in for 30 seconds per side. Remove with a slotted spoon and return to the baking sheet.
- Bake: Brush pretzels with beaten egg wash and sprinkle with coarse sea salt. Bake for 12-15 minutes until deep golden brown. Cool slightly before serving.
Notes
The baking soda bath is crucial for the authentic pretzel flavor and dark color. Do not skip this step. For make-ahead prep, you can freeze the shaped raw pretzels on a baking sheet, then transfer to a bag. Bake straight from frozen, adding a few extra minutes to the bake time. Serve warm for best texture.
Nutrition
- Serving Size: Varies based on boar
- Calories: 350
- Sugar: 6
- Sodium: 600
- Fat: 12
- Saturated Fat: 4
- Carbohydrates: 45
- Fiber: 2
- Protein: 10
Keywords: Halloween, charcuterie board, pretzel bones, easy snacks, party food, fall recipes, homemade pretzels, spooky snacks


