The first time I attempted a whole roasted turkey, I was twenty-three and convinced I had it figured out. I’d watched the holiday specials, read the glossy magazine spreads, and bought a bird that seemed reasonable enough. What I ended up with was something dry, pale, and strangely flavorless—a bird that looked more like a science experiment than a centerpiece. For years after that, I just accepted that turkey was going to be a little boring. You know, the kind of meat you drown in gravy because it needs the help. It wasn’t that people didn’t try—everyone had their method, their brine, their secret rub. But nothing ever delivered that combination of crispy, seasoned skin and meat so moist it barely needed a knife. I kept thinking there had to be a way to get that garlic herb butter flavor all the way through, not just on the surface. Honestly, I stopped believing it was possible for a while. Then I started paying attention to how butter actually works with heat, and how herbs release their oils at different stages, and suddenly the whole thing clicked. This Best Garlic Herb Butter Roasted Turkey (Whole Bird) recipe is the result of those quiet realizations—not a flashy trick, just a better way to do things. It’s the bird I wish I’d made that first time.
Why You’ll Love This Recipe
This isn’t another roasted turkey recipe that promises the world and delivers a dry breast. After years of testing, I can tell you exactly why this one works differently.
- Incredibly Juicy Meat: The garlic herb butter gets worked under the skin, directly onto the breast and thighs. This means the fat bastes the meat from the inside out as it roasts, keeping every bite tender and moist.
- Perfectly Crispy Skin: By separating the skin from the meat and applying the butter directly, the skin roasts dry and crisp. No soggy patches, just golden-brown crackling.
- Simple, Pantry-Friendly Ingredients: You don’t need a specialty grocery run. Butter, fresh garlic, a handful of herbs, salt, and pepper—that’s the backbone of this whole bird.
- Foolproof for Beginners and Pros Alike: The method is straightforward. No complicated brining, no basting every fifteen minutes. The oven does most of the heavy lifting.
- The Ultimate Crowd-Pleaser: Whether it’s Thanksgiving, Christmas, or a Sunday dinner that needs to feel special, this turkey gets genuine compliments. Even the people who claim they don’t like dark meat change their minds.
What makes this recipe different from the rest is the technique. It’s not about loading up on spices or using a fancy rub. It’s about understanding that butter carries flavor in a way oil never can, and that getting that flavor under the skin is the secret to a truly memorable bird. This is comfort food at its finest—simple, honest, and deeply satisfying.
What Ingredients You Will Need
This recipe relies on a short list of high-quality ingredients. Each one plays a specific role in creating that deep, aromatic flavor and perfect texture. Here is what you will need and why each ingredient matters.
- 1 whole turkey (12-14 pounds), thawed if frozen: Look for a bird that is fresh if possible, or plan ahead for thawing. A 12-14 pound turkey is the sweet spot for even cooking. I personally prefer a free-range bird for better flavor, but any good-quality turkey works beautifully.
- 1 cup (2 sticks) unsalted butter, softened to room temperature: Unsalted butter is crucial because it lets you control the salt level. Softened butter blends easily with the herbs and spreads smoothly under the skin. I recommend using a good European-style butter like Kerrygold for its higher fat content, which yields even crispier skin.
- 8-10 cloves fresh garlic, minced: Fresh garlic is non-negotiable here. The pre-minced stuff in a jar has a different, sharper flavor that doesn’t mellow as nicely. Mince it finely so it distributes evenly through the butter.
- 3 tablespoons fresh rosemary, finely chopped: Rosemary adds that classic, piney aroma that pairs so well with poultry. Strip the leaves from the woody stems before chopping. If you only have dried, use 1 tablespoon, but fresh really does make a difference.
- 3 tablespoons fresh thyme leaves: Thyme is more subtle than rosemary, with a slightly earthy, lemony note. Run your fingers down the stems to strip the leaves off easily.
- 2 tablespoons fresh sage, chopped: Sage brings a warm, slightly peppery flavor that is unmistakably autumnal. A little goes a long way, so don’t overdo it.
- 2 teaspoons salt: Use kosher salt if possible. Diamond Crystal is my go-to because it’s less dense and easier to control. If using table salt, reduce the amount slightly.
- 1 teaspoon black pepper, freshly ground: Freshly ground pepper has a floral heat that pre-ground pepper lacks. Grind it just before using.
- 1 lemon, halved: The lemon goes inside the cavity to add a subtle brightness and help keep the inside moist as it steams.
- 1 onion, quartered: Onion in the cavity adds savory depth and a touch of sweetness to the juices.
- 4-6 sprigs fresh herbs (rosemary, thyme, sage) for the cavity: These are extra aromatics that perfume the bird from the inside out as it roasts.
- 2 cups low-sodium chicken or turkey broth: This goes in the bottom of the roasting pan. It creates steam, keeps the drippings from burning, and forms the base for a killer gravy later.
Equipment Needed
You don’t need a professional kitchen to pull this off, but having the right tools makes the process smoother and safer. Here is what you will need.
- Roasting pan with a rack: A sturdy pan is essential. The rack lifts the turkey off the bottom, allowing hot air to circulate evenly and preventing the bottom from steaming. If you don’t have a rack, you can use thick-cut carrot and celery pieces as a makeshift one.
- Instant-read meat thermometer: This is the single most important tool for a perfect turkey. Guessing doneness by color or time is how dry turkey happens. A digital thermometer gives you an accurate reading instantly. I use a ThermoPro, and it has never let me down.
- Kitchen twine: Tying the legs together and tucking the wings helps the turkey cook evenly and keeps a nice, compact shape. You can find kitchen twine at any grocery store.
- Chef’s knife and cutting board: For mincing garlic and chopping herbs. A sharp knife makes the prep work feel effortless.
- Small mixing bowl: To combine the butter, garlic, and herbs into a cohesive paste.
- Paper towels: Absolutely critical for drying the turkey skin. Moisture is the enemy of crispy skin, so pat it dry thoroughly.
- Aluminum foil: You will need this to tent the turkey if the skin browns too quickly, and to rest the bird after it comes out of the oven.
Preparation Method
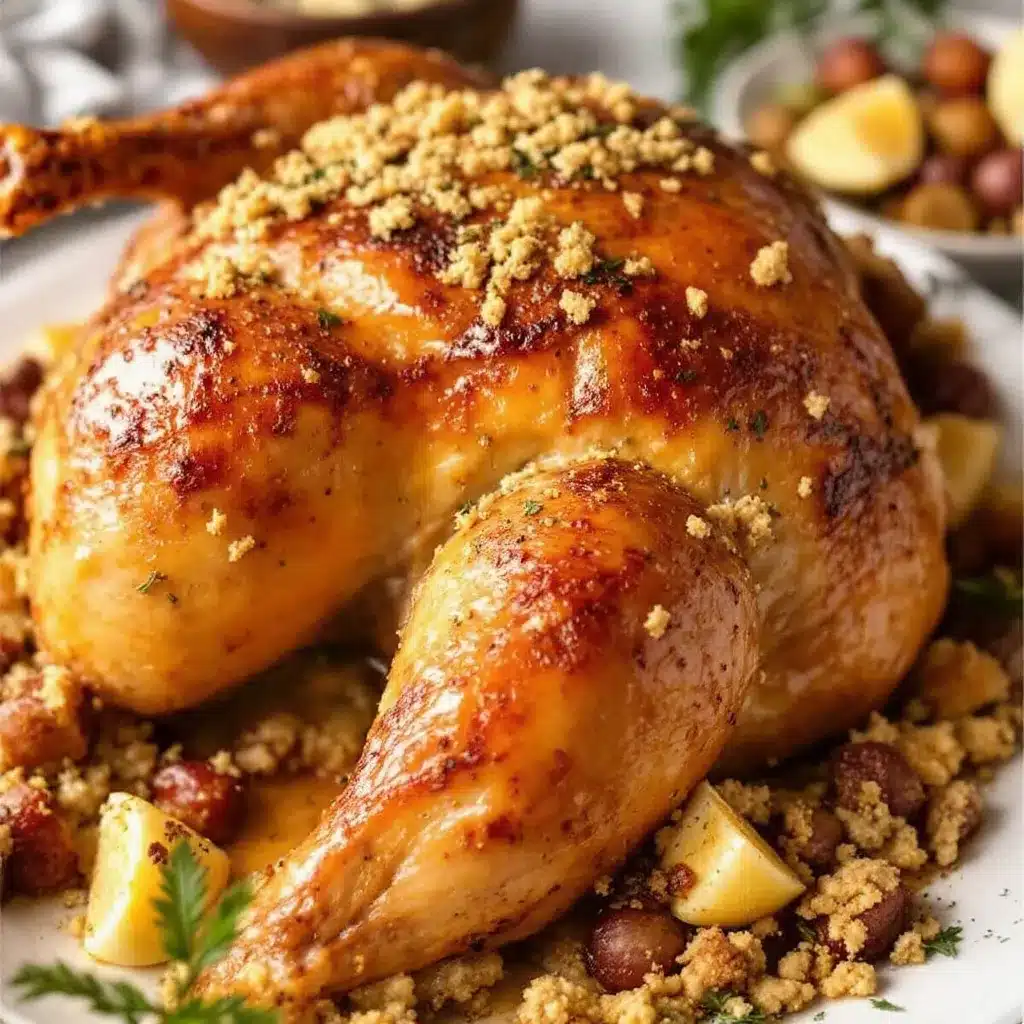
Take your time with the prep. A little patience here pays off in a big way. This method is designed to be clear and forgiving, even if it is your first time roasting a whole bird.
- Prep the turkey (15 minutes before you start): Remove the turkey from its packaging. Take out the giblets and neck from the cavity—these are often in a bag, so check both ends. Rinse the turkey inside and out with cold water, then pat it completely dry with paper towels. Get every nook and cranny. Set the turkey on a clean cutting board or baking sheet.
- Make the garlic herb butter (5 minutes): In your small mixing bowl, combine the softened butter, minced garlic, chopped rosemary, thyme, and sage. Add the salt and pepper. Mix everything together with a fork or spatula until it is evenly combined. Taste a tiny bit—it should be savory and aromatic, not overwhelmingly garlicky. Set it aside at room temperature.
- Loosen the skin (10 minutes, be gentle): This is the most important step. Using your fingers, gently work your way under the skin of the turkey breast. Start at the neck cavity and slide your hand between the skin and the meat, moving down toward the breast. Do the same on the thighs. Take your time—if the skin tears, it’s not the end of the world, but try to keep it intact. You want to create pockets for the butter.
- Apply the butter (10 minutes): Take about two-thirds of the garlic herb butter and push it under the loosened skin, spreading it evenly over the breast meat and the thighs. Massage it from the outside to distribute it. Use the remaining butter to coat the outside of the turkey, covering every inch of skin. Don’t forget the legs and wings. This is where the flavor lives.
- Stuff the cavity and truss (5 minutes): Place the halved lemon, quartered onion, and the extra herb sprigs inside the turkey cavity. They are not for eating—they are for flavor and moisture. Tie the legs together with kitchen twine. Tuck the wing tips under the body of the turkey so they don’t burn.
- Preheat and prepare the pan (5 minutes): Preheat your oven to 425°F (220°C). Place your roasting rack in the pan. Pour the 2 cups of broth into the bottom of the pan. Place the turkey on the rack, breast side up.
- Roast the turkey (2 to 2.5 hours for a 12-14 pound bird): Put the turkey in the oven. Roast at 425°F (220°C) for 30 minutes. This high heat jump-starts the browning. Then, without opening the oven, reduce the temperature to 350°F (175°C). Continue roasting for about 1.5 to 2 hours more. The total time will be roughly 13 minutes per pound, but the thermometer is your true guide.
- Check for doneness (30 seconds): Start checking the internal temperature about 30 minutes before you think it might be done. Insert your instant-read thermometer into the thickest part of the thigh, avoiding the bone. You are looking for 165°F (74°C). Also check the breast—it should be around 160°F (71°C), as it will carry over to 165°F while resting. If the skin is getting too dark before the meat is done, tent the turkey loosely with foil.
- Rest the turkey (20-30 minutes, crucial): Once the turkey hits the right temperature, remove it from the oven. Transfer it to a cutting board and tent it loosely with foil. Let it rest for at least 20 minutes, preferably 30. This allows the juices to redistribute back into the meat. If you cut into it too soon, all that moisture will run out onto the board.
- Carve and serve (5 minutes): After resting, remove the twine and discard the cavity aromatics. Carve the turkey as desired. The meat should be juicy, the skin crispy, and the aroma of garlic and herbs should fill the room.
Cooking Tips & Techniques
I have made every mistake in the book with roasted turkey, and I am sharing those lessons so you don’t have to repeat them. Here are the things I wish someone had told me.
Don’t skip the drying step. The number one reason for soggy skin is moisture. Pat that bird dry with paper towels, and then pat it again. If you have time, let it sit uncovered in the fridge for a few hours or even overnight. This dries out the skin even more and guarantees a crispier result. I learned this after years of wondering why my skin was always tough and rubbery.
Use a thermometer, not a timer. Ovens vary wildly. A 14-pound turkey might be done in 2 hours in one oven and take 3 in another. The only reliable way to know is with a thermometer. I once served an undercooked turkey to ten guests because I trusted the “time per pound” rule. Never again. Insert the thermometer into the thigh, away from the bone, and wait for 165°F (74°C).
Let the butter come to room temperature. Cold butter is difficult to spread and won’t mix evenly with the herbs. Leave it out on the counter for an hour before you start. If you forget, you can microwave it in 5-second bursts, but be careful not to melt it. You want it soft, not liquid.
Basting is optional. Contrary to popular belief, opening the oven to baste every 30 minutes actually makes the skin less crispy because it releases heat and moisture. The butter under the skin does the basting work for you. If you want to baste, do it once or twice at most, and work quickly.
Resting is not a suggestion. I know it’s tempting to carve right away, especially when everyone is hungry and the kitchen smells amazing. But carving immediately is the fastest way to dry out your turkey. The carryover cooking during the rest will bring the breast to the perfect temperature, and the juices will settle. Trust the rest.
Variations & Adaptations
This recipe is a fantastic base, and it welcomes modifications. Here are some ways to make it your own, depending on your needs or mood.
- Herb Swap: Not a fan of sage? Replace it with equal parts fresh parsley or tarragon. Tarragon has a slight anise flavor that works beautifully with garlic butter. I tried this once when I ran out of sage, and it was a happy accident.
- Citrus Twist: Instead of just lemon in the cavity, add a halved orange or a few slices of grapefruit. The citrus adds a different bright note. For a more complex flavor, stuff the cavity with lemon, orange, and a few sprigs of fresh dill.
- Spicy Version: Add 1-2 teaspoons of red pepper flakes or a minced chipotle pepper in adobo sauce to the garlic herb butter. The heat cuts through the richness of the butter and pairs surprisingly well with the herbs. This is my go-to when I want a little kick.
- Dairy-Free Adaptation: Substitute the butter with a high-quality vegan butter or a generous amount of olive oil. If using olive oil, add an extra tablespoon of herbs to compensate for the milder flavor. The skin won’t be quite as crispy, but it will still be delicious and moist.
- Gluten-Free: This recipe is naturally gluten-free as written. Just double-check your broth to ensure it is labeled gluten-free, as some store-bought broths contain wheat-based additives.
Serving & Storage Suggestions
This turkey is a star on its own, but the way you serve and store it can make a big difference in the overall experience.
Serving: Serve the turkey hot, ideally within 30 minutes of carving. Arrange the slices on a warm platter, garnished with a few fresh herb sprigs and maybe some lemon wedges for color. It pairs beautifully with classic sides like mashed potatoes, roasted vegetables, and a simple green salad. For a different take, try it alongside a fresh keto-friendly cobb salad for a lighter, yet still satisfying, meal. The rich, herby turkey complements the crisp bacon and creamy avocado perfectly.
Storage: Leftover turkey should be removed from the bones and stored in an airtight container in the refrigerator. It will keep well for 3-4 days. The bones and any leftover carcass are gold for making stock—just cover them with water, add a few aromatics, and simmer for a few hours.
Reheating: The best way to reheat turkey is gently. Place slices in a baking dish, add a splash of broth or water, cover with foil, and warm in a 300°F (150°C) oven for about 15-20 minutes. This prevents the meat from drying out. Avoid the microwave if you can—it tends to make the meat tough. The flavors of the garlic and herbs actually meld and deepen overnight, so leftovers often taste even better the next day.
Nutritional Information & Benefits
Turkey is a fantastic source of lean protein, and this recipe keeps it relatively healthy despite the butter. Here is a general estimate for a serving of roasted turkey (about 4 ounces, or 113 grams, of meat without skin).
- Calories: Approximately 250-300
- Protein: 30-35 grams
- Fat: 12-15 grams (mostly from butter, which is rich in healthy saturated fats and fat-soluble vitamins)
- Carbohydrates: Less than 1 gram
Health Benefits: Turkey is packed with B vitamins (especially B6 and B12), which support energy metabolism and brain function. It is also a good source of selenium, an antioxidant that helps protect your cells. The garlic in this recipe is known for its immune-boosting properties, and fresh herbs like rosemary and thyme are rich in anti-inflammatory compounds. If you are watching your fat intake, you can remove the skin before eating, though you will lose some of the crispy texture. This recipe is naturally low-carb, gluten-free, and fits well into a balanced diet. For another healthy, protein-rich option, consider pairing it with healthy high-protein low-carb chicken zucchini boats for a meal prep inspiration that uses similar flavors.
Conclusion
This Best Garlic Herb Butter Roasted Turkey (Whole Bird) is more than just a recipe—it is a method you can trust. It turns a potentially intimidating dish into something straightforward and rewarding. The combination of crispy, golden skin and tender, flavorful meat is exactly what a roasted turkey should be. I love this recipe because it proves that you don’t need complicated techniques or a long list of ingredients to create something truly special. It is honest cooking that delivers every single time. I encourage you to make it your own—swap the herbs, adjust the garlic, or experiment with the citrus. And when you do, I would love to hear about it. Leave a comment below and let me know how it turned out, or share your own twist. This is the kind of recipe that brings people together, and I hope it becomes a favorite in your home, just as it has in mine.
Frequently Asked Questions
Can I use dried herbs instead of fresh?
Yes, you can, but the flavor will be less vibrant. If using dried herbs, use about one-third of the amount called for fresh. For example, use 1 tablespoon of dried rosemary instead of 3 tablespoons fresh. The texture of the butter will also be slightly different, but it will still work.
Do I need to brine the turkey first?
No, you do not need to brine this turkey. The garlic herb butter does an excellent job of keeping the meat moist and flavorful. If you prefer a brined texture, you can certainly do so, but it is not required for success with this recipe.
My turkey skin is browning too fast. What should I do?
If the skin is getting dark before the internal temperature is close to done, tent the turkey loosely with a piece of aluminum foil. This will slow down the browning while the meat continues to cook. Check the temperature after 20 minutes.
How do I make gravy from the pan drippings?
After removing the turkey, pour the pan drippings into a fat separator or a glass measuring cup. Let the fat rise to the top. Skim off most of the fat, leaving about 2-3 tablespoons in the pan. Place the pan on the stovetop over medium heat. Whisk in 2-3 tablespoons of flour and cook for 1 minute. Slowly whisk in the remaining drippings plus enough broth to reach your desired consistency. Simmer until thickened.
Can I roast vegetables in the same pan as the turkey?
Yes, you can. Add chopped root vegetables like carrots, potatoes, and onions to the pan around the turkey during the last hour of roasting. They will cook in the drippings and become wonderfully flavorful. Just make sure they are cut into even pieces so they cook at the same rate.
Pin This Recipe!
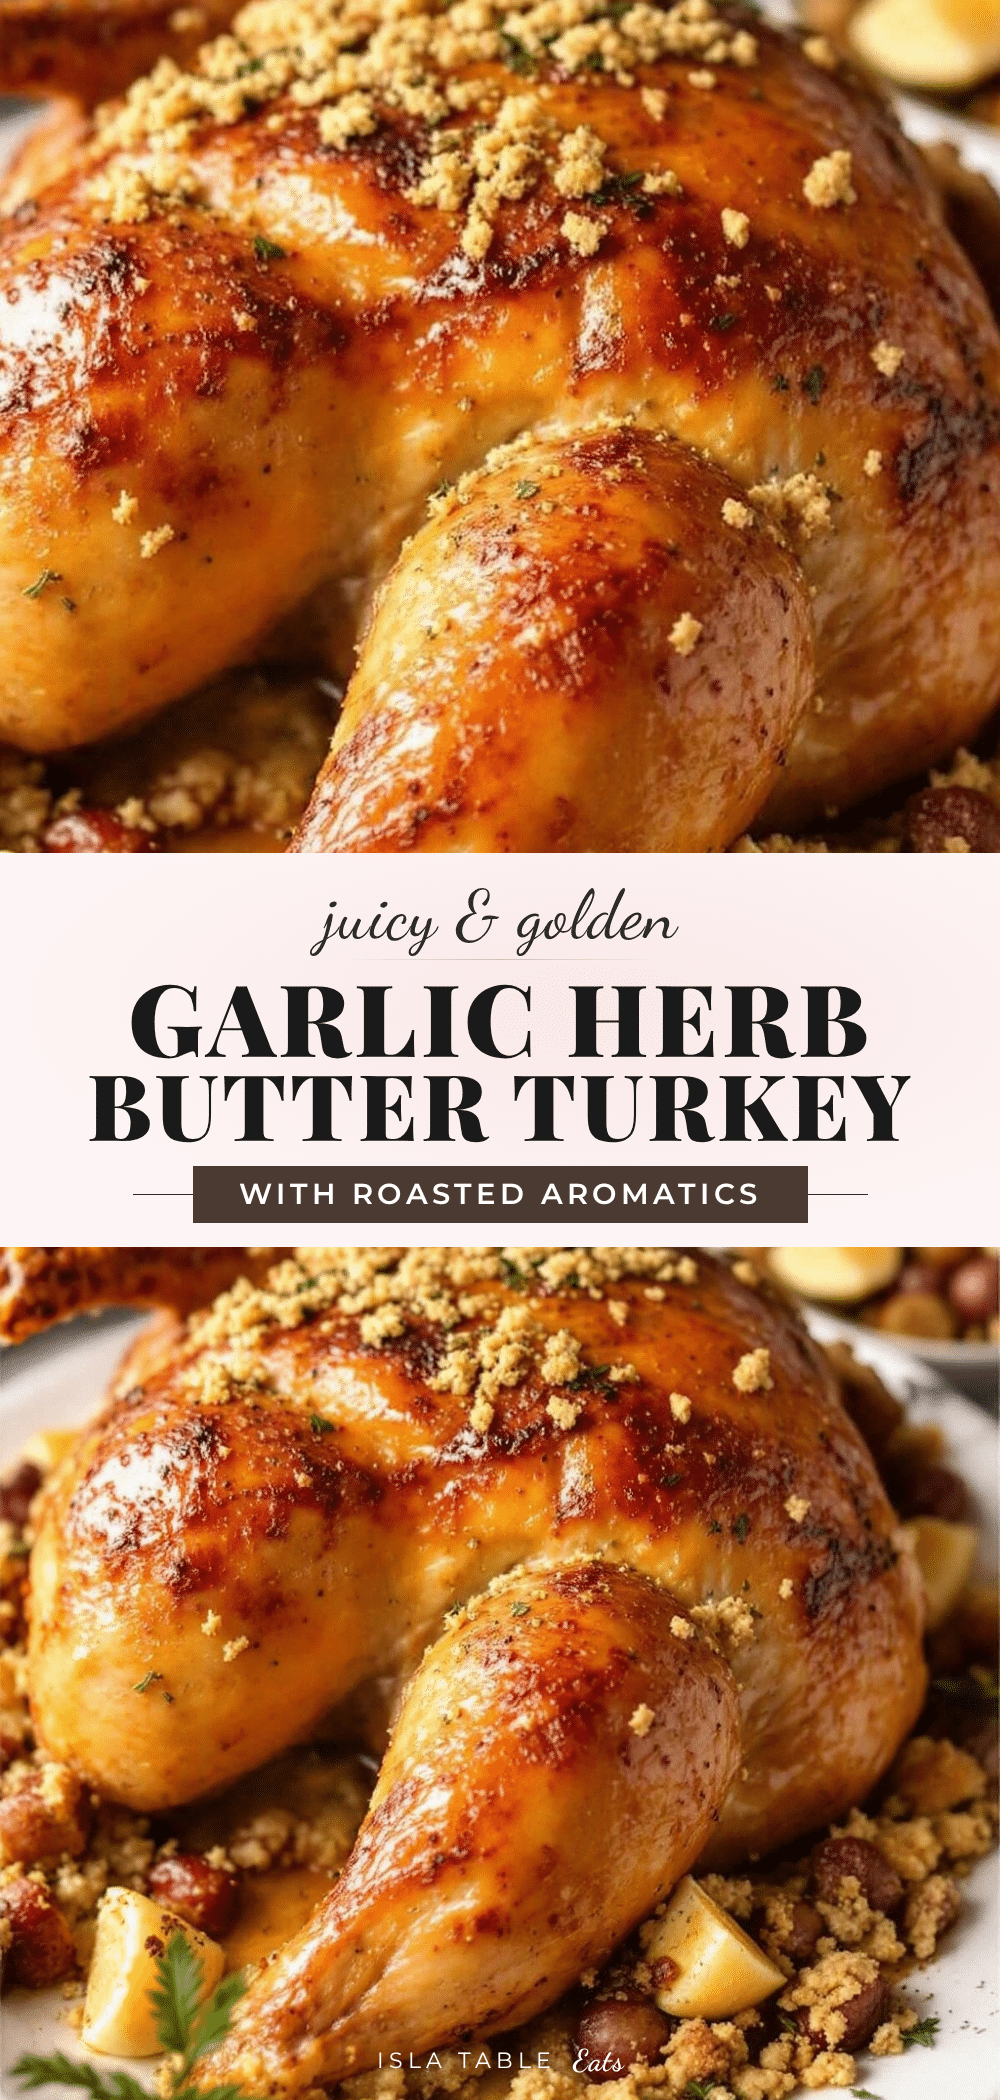
Best Garlic Herb Butter Roasted Turkey Recipe
This foolproof roasted turkey recipe delivers incredibly juicy meat and perfectly crispy skin, thanks to a garlic herb butter that gets worked under the skin. Simple, pantry-friendly ingredients and a straightforward method make it ideal for beginners and pros alike.
- Prep Time: 30 minutes
- Cook Time: 2 hours 30 minutes
- Total Time: 3 hours
- Yield: 8-10 servings 1x
- Category: Main Course
- Cuisine: American
Ingredients
- 1 whole turkey (12–14 pounds), thawed if frozen
- 1 cup (2 sticks) unsalted butter, softened to room temperature
- 8–10 cloves fresh garlic, minced
- 3 tablespoons fresh rosemary, finely chopped
- 3 tablespoons fresh thyme leaves
- 2 tablespoons fresh sage, chopped
- 2 teaspoons salt
- 1 teaspoon black pepper, freshly ground
- 1 lemon, halved
- 1 onion, quartered
- 4–6 sprigs fresh herbs (rosemary, thyme, sage) for the cavity
- 2 cups low-sodium chicken or turkey broth
Instructions
- Prep the turkey (15 minutes before you start): Remove the turkey from its packaging. Take out the giblets and neck from the cavity. Rinse the turkey inside and out with cold water, then pat it completely dry with paper towels.
- Make the garlic herb butter (5 minutes): In a small mixing bowl, combine the softened butter, minced garlic, chopped rosemary, thyme, and sage. Add the salt and pepper. Mix until evenly combined.
- Loosen the skin (10 minutes, be gentle): Using your fingers, gently work your way under the skin of the turkey breast. Start at the neck cavity and slide your hand between the skin and the meat, moving down toward the breast. Do the same on the thighs.
- Apply the butter (10 minutes): Take about two-thirds of the garlic herb butter and push it under the loosened skin, spreading it evenly over the breast meat and the thighs. Use the remaining butter to coat the outside of the turkey.
- Stuff the cavity and truss (5 minutes): Place the halved lemon, quartered onion, and extra herb sprigs inside the turkey cavity. Tie the legs together with kitchen twine. Tuck the wing tips under the body.
- Preheat and prepare the pan (5 minutes): Preheat your oven to 425°F (220°C). Place the roasting rack in the pan. Pour the 2 cups of broth into the bottom of the pan. Place the turkey on the rack, breast side up.
- Roast the turkey (2 to 2.5 hours for a 12-14 pound bird): Roast at 425°F (220°C) for 30 minutes. Then reduce the temperature to 350°F (175°C) and continue roasting for about 1.5 to 2 hours more.
- Check for doneness (30 seconds): Insert an instant-read thermometer into the thickest part of the thigh, avoiding the bone. Look for 165°F (74°C). The breast should be around 160°F (71°C). Tent with foil if browning too quickly.
- Rest the turkey (20-30 minutes, crucial): Transfer the turkey to a cutting board and tent it loosely with foil. Let it rest for at least 20 minutes, preferably 30.
- Carve and serve (5 minutes): Remove the twine and discard the cavity aromatics. Carve the turkey as desired.
Notes
Don’t skip drying the turkey skin thoroughly for crispy skin. Use a thermometer, not a timer, for doneness. Let the butter come to room temperature for easy spreading. Basting is optional; the butter under the skin does the work. Resting is crucial for juicy meat.
Nutrition
- Serving Size: 4 ounces (113 grams)
- Calories: 250300
- Sodium: 400500
- Fat: 1215
- Saturated Fat: 79
- Carbohydrates: 1
- Protein: 3035
Keywords: roasted turkey, garlic herb butter, Thanksgiving turkey, whole turkey, crispy skin turkey, juicy turkey, holiday turkey


