Box of yellow cake mix in one hand, can of pumpkin in the other, and the oven preheating before I’d even fully decided what I was making. That’s how this happened. Not from a family recipe passed down through generations, not from a fancy cooking class — just a Tuesday afternoon in October when the craving for something warm and spiced hit hard, but my energy levels were already running on empty.
Honestly, I’d been scrolling through dessert recipes for twenty minutes and everything looked exhausting. Layer this, chill that, cream together something else. I didn’t have it in me. But I had a can of pumpkin puree sitting in the pantry (leftover from a lemon cake attempt that went sideways) and a box of yellow cake mix I’d grabbed on sale. So I thought — what if I just… dumped everything together and hoped for the best?
And that’s exactly what I did. No mixer. No complicated steps. Just poured, sprinkled, baked, and waited. The smell that filled my kitchen was ridiculous — butter, cinnamon, pumpkin, all mingling together like they’d been planning this reunion for years.
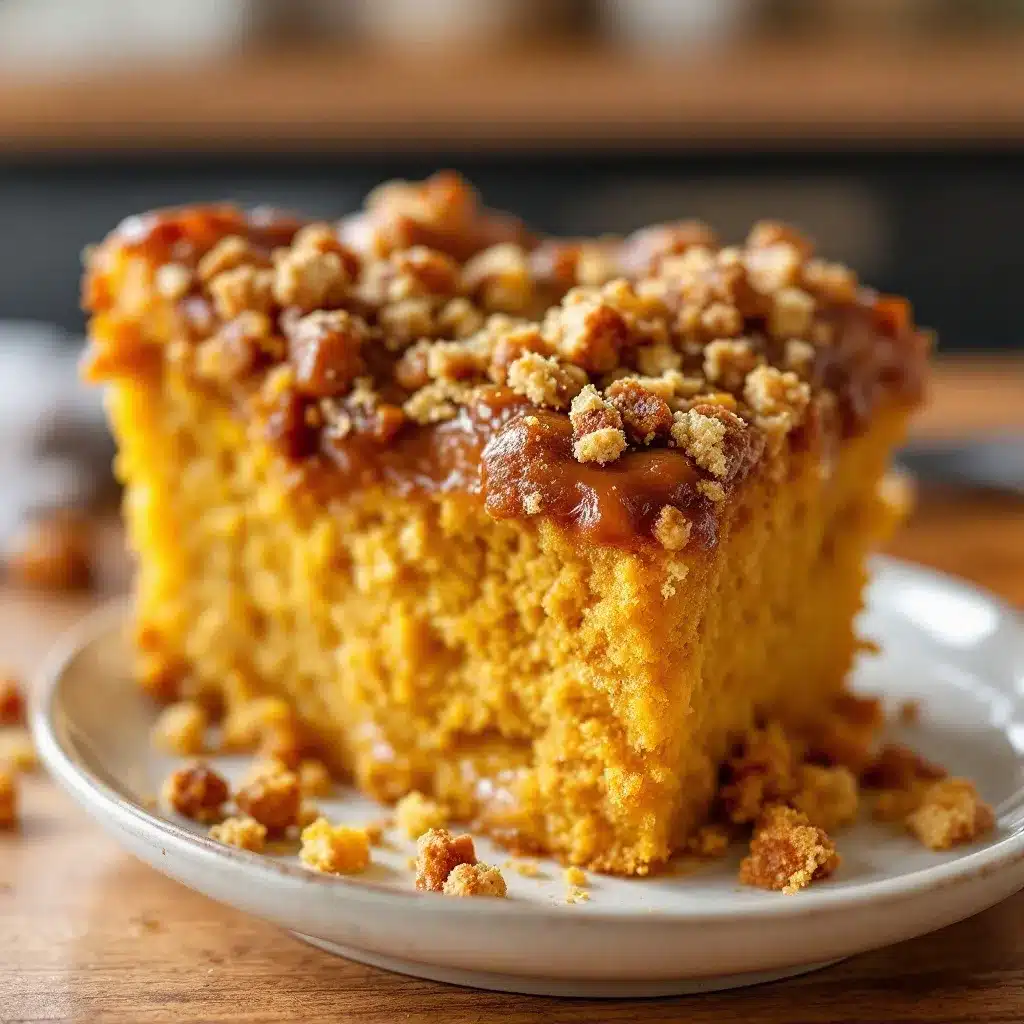
The first bite stopped me mid-chew. It was everything I wanted fall dessert to be — soft, almost pudding-like underneath, with this craggy, buttery, slightly crunchy top that shattered when you broke through it with a spoon. No fuss, no fancy presentation, just pure comfort in a dish. And that’s when I knew this easy pumpkin dump cake with yellow cake mix wasn’t just a happy accident. It was the recipe I’d keep coming back to, year after year.
Why You’ll Love This Recipe
I’ve tested this recipe at least six times now — tweaking the butter amount, trying different spice blends, even attempting it with a gluten-free cake mix (more on that later). So trust me when I say this version is the one. Here’s why it works:
- Ridiculously Easy: We’re talking five minutes of hands-on time. Stir, dump, bake. That’s it. No electric mixer required, no rolling pin, no chilling dough.
- Pantry-Friendly Ingredients: Canned pumpkin, boxed cake mix, butter, eggs, and a few spices. You probably have most of this already, which makes it perfect for those “I need dessert right now” moments.
- Perfect for Fall Gatherings: Thanksgiving, Friendsgiving, potlucks, or just a cozy Sunday — this dessert feeds a crowd without breaking a sweat.
- Everyone Loves It: Kids devour it. Adults go back for seconds. Even people who swear they don’t like pumpkin desserts end up asking for the recipe.
- That Texture Though: The bottom layer stays soft and almost custard-like, while the top bakes into this golden, buttery, slightly crisp crust. It’s like a cake and a crumble had a baby.
What makes this version different from the dozens of pumpkin dump cake recipes out there? It’s the balance. I played with the spice ratio until the pumpkin flavor shone through without being overpowered, and I found the sweet spot for butter distribution so every bite gets that crispy top. No dry patches, no soggy middle — just perfect, every time.
This isn’t just another dump cake. It’s the kind of dessert that makes you close your eyes after the first forkful. It’s comfort food, simplified — warm, spiced, buttery, and deeply satisfying without any of the stress.
What Ingredients You Will Need
This recipe keeps things simple. You don’t need anything fancy, and that’s the beauty of it. Here’s what you’ll need and why each ingredient matters:
For the Pumpkin Layer:
- 1 can (15 oz) pumpkin puree — Not pumpkin pie filling. Make sure you grab plain pumpkin puree. Libby’s is my go-to brand because it’s consistently thick and not watery. If you use a different brand, just check the consistency — it should be dense, not runny.
- 1 can (12 oz) evaporated milk — This adds richness without making the filling too heavy. You can use full-fat or low-fat, both work fine. I’ve used both and honestly couldn’t tell the difference.
- 3 large eggs — Room temperature if you remember, straight from the fridge if you don’t. I’ve done both and it still turns out great.
- 1 cup granulated sugar — Just regular white sugar. It dissolves easily and balances the earthy pumpkin flavor beautifully.
- 2 teaspoons pumpkin pie spice — If you don’t have this, mix 1 teaspoon cinnamon, ½ teaspoon ginger, ¼ teaspoon nutmeg, and ¼ teaspoon cloves. I actually prefer making my own blend because I like extra cinnamon.
- ½ teaspoon salt — Don’t skip this. Salt makes all the warm spices pop and prevents the dessert from tasting flat.
For the Cake Topping:
- 1 box (15.25 oz) yellow cake mix — Duncan Hines or Betty Crocker both work perfectly. Don’t use the kind with pudding in the mix — it changes the texture. Just plain yellow cake mix.
- 1 cup chopped pecans or walnuts — Totally optional, but I love the crunch they add. Toast them lightly in a dry pan first for extra flavor. I’ve made it without nuts too, and it’s still fantastic.
- ¾ cup unsalted butter, melted — This is key. The butter gets drizzled over the dry cake mix and creates that signature crispy, golden top. Use real butter, not margarine. Trust me on this one.
For Serving (Optional but Recommended):
- Whipped cream or vanilla ice cream — A scoop of vanilla ice cream melting over warm pumpkin dump cake is basically a religious experience. Just saying.
- Caramel sauce — A drizzle takes it over the top, especially if you’re serving this for a holiday dinner.
Equipment Needed
- 9×13-inch baking dish — Glass or metal both work. I prefer glass because I can see how the bottom layer is setting up, but metal conducts heat a bit faster. Either way, you’re fine.
- Large mixing bowl — For whisking together the pumpkin filling.
- Whisk — A fork works in a pinch, but a whisk makes the filling smooth in seconds.
- Measuring cups and spoons — For the sugar, spices, and butter.
- Small saucepan or microwave-safe bowl — For melting the butter.
- Rubber spatula — For scraping every last bit of pumpkin goodness into the dish.
That’s it. No stand mixer, no hand mixer, no special pans. If you’ve got these basics, you’re ready to go. I’ve made this in a disposable aluminum pan for potlucks too, and it works perfectly — just keep an eye on the baking time since metal pans can cook a little faster.
Preparation Method
Preheat your oven to 350°F (175°C). Lightly grease your 9×13-inch baking dish with butter or nonstick spray. Don’t skip this step — even with all that butter on top, the pumpkin layer can stick if the dish isn’t greased.
- Make the pumpkin filling: In a large bowl, whisk together the pumpkin puree, evaporated milk, eggs, sugar, pumpkin pie spice, and salt. Whisk until everything is completely smooth and well combined. You shouldn’t see any streaks of egg or pockets of spice. This takes about a minute of steady whisking.
- Pour into the dish: Scrape the pumpkin mixture into your prepared baking dish and spread it evenly with a spatula. The layer should be uniform — about ½ inch thick across the whole dish.
- Sprinkle the cake mix: Here’s the part that feels weird but trust the process. Sprinkle the entire box of dry yellow cake mix evenly over the pumpkin layer. Don’t stir it in. Don’t mix it. Just pour it out and spread it with your fingers or a fork so it covers the surface completely. Every bit of pumpkin should be covered with a thin layer of cake mix.
- Add the nuts: If you’re using pecans or walnuts, sprinkle them evenly over the dry cake mix now. They’ll toast up during baking and add wonderful crunch.
- Drizzle the butter: Melt your butter and drizzle it as evenly as possible over the entire surface. Try to cover as much of the cake mix as you can. Some spots will get more butter, some less — that’s totally fine. The butter will soak through the dry mix as it bakes and create that signature crispy top.
- Bake: Place the dish in the preheated oven and bake for 45-50 minutes. The top should be golden brown and the edges should be bubbly. You’ll know it’s done when the center is set — it shouldn’t jiggle when you gently shake the pan. If the top is browning too quickly but the center still looks loose, tent loosely with foil and continue baking.
- Cool slightly: Let the dump cake cool on a wire rack for at least 15-20 minutes before serving. This allows the pumpkin layer to set up a bit. It’s still warm and scoopable, but not so hot that it runs all over the plate.
A note on timing: This is not a precise science. Ovens vary, and so do baking dishes. Start checking at 40 minutes, but don’t be surprised if yours needs the full 50. The top should be deeply golden and the edges should look caramelized.
Cooking Tips & Techniques
I’ve made this easy pumpkin dump cake with yellow cake mix more times than I can count, and I’ve learned a few things along the way. Here’s what I wish someone had told me the first time:
Don’t overmix the pumpkin layer. I know it sounds counterintuitive, but over-whisking can incorporate too much air, which makes the filling puff up and then collapse. Just whisk until smooth and stop.
Spread the cake mix evenly. This is the most common mistake I see. If you dump the cake mix in one spot and don’t spread it, you’ll end up with dry pockets of raw mix after baking. Take the extra 30 seconds to distribute it evenly with your fingers.
The butter matters. I tried this once with margarine because I was out of butter. Big mistake. The top didn’t crisp up the same way, and the flavor was flat. Real butter gives you that golden, buttery crust that makes this dessert unforgettable.
Let it rest. I know it’s tempting to dig in right away, but letting it sit for 15-20 minutes makes a huge difference. The pumpkin layer firms up, the flavors meld together, and you get cleaner servings. If you serve it too hot, it’s more like pumpkin soup with a crunchy top — still delicious, but messy.
Use a metal spatula for serving. A thin metal spatula slides under the cake layer much better than a plastic one. Scoop from the bottom to get both the pumpkin layer and the crispy top in every serving.
I once forgot to add the sugar to the pumpkin mixture. Caught it right before pouring it into the dish, thank goodness. But that near-disaster taught me to always double-check my ingredients before I start combining things.
Variations & Adaptations
This recipe is incredibly forgiving, which makes it perfect for experimenting. Here are some variations I’ve tried and loved:
Gluten-Free Version: Use a gluten-free yellow cake mix. I’ve tried this with King Arthur’s gluten-free yellow cake mix and it worked beautifully. The texture is slightly different — a little more crumbly on top — but the flavor is spot on. Just make sure your pumpkin puree and spices are certified gluten-free if that’s a concern.
Dairy-Free Adaptation: Substitute the butter with a good quality dairy-free butter (I like Miyoko’s or Country Crock plant butter) and use canned coconut milk instead of evaporated milk. The coconut flavor is subtle and actually pairs nicely with the pumpkin and spices.
Spice It Up: Add ¼ teaspoon of cardamom or allspice to the pumpkin mixture for a more complex flavor profile. I did this for a Friendsgiving once and got so many compliments. You can also add a pinch of black pepper — it sounds weird, but it really brings out the warmth of the other spices.
Chocolate Twist: Sprinkle ½ cup of chocolate chips over the cake mix before adding the butter. The chocolate melts into the top layer and creates these little pockets of gooey goodness. I’ve also used white chocolate chips, which are amazing with pumpkin.
Pumpkin-Apple Combo: Layer 1 cup of diced apples (peeled and tossed with a tablespoon of sugar and cinnamon) over the pumpkin mixture before adding the cake mix. The apples soften during baking and add little bursts of sweet-tart flavor.
Low-Sugar Option: Use a sugar substitute like Swerve or monk fruit sweetener in place of the granulated sugar. The texture will be slightly different, but it still works. I’ve also used a sugar-free yellow cake mix with good results.
My personal favorite variation? The one with toasted pecans and a drizzle of caramel sauce over a scoop of vanilla ice cream. It’s over-the-top in the best way, and it’s what I make every year for Thanksgiving dessert.
Serving & Storage Suggestions
This dump cake is best served warm, straight from the oven. The contrast between the warm, soft pumpkin layer and the crispy, buttery top is at its peak within the first hour. But that doesn’t mean leftovers aren’t worth having — they absolutely are.
Serving: Scoop into bowls or onto plates using a metal spatula. Top with a generous dollop of whipped cream or a scoop of vanilla ice cream. A drizzle of caramel sauce or a dusting of cinnamon makes it look fancy with zero extra effort. For holiday gatherings, I like to serve it in the baking dish with a serving spoon — it keeps things casual and inviting.
Storage: Cover the baking dish tightly with foil or plastic wrap and store in the refrigerator for up to 5 days. The top will soften slightly as it sits, but the flavor actually gets better. I’ve eaten this cold straight from the fridge and it’s surprisingly good — almost like pumpkin pie filling with a soft crumble topping.
Reheating: The best way to reheat is in the oven at 300°F for about 10-15 minutes, which helps revive some of that crispy top. The microwave works in a pinch (30-second bursts), but the top will be soft. If you’re okay with that, go for it.
Freezing: This freezes beautifully. Let the dump cake cool completely, then wrap the entire dish tightly in plastic wrap, then foil. Freeze for up to 3 months. To serve, thaw overnight in the refrigerator and reheat in the oven. I’ve also frozen individual portions in airtight containers for quick desserts — just grab one, microwave for 45 seconds, and you’re set.
One thing I love about this recipe is how the flavors deepen overnight. If you make it a day ahead, the spices meld together even more, and the texture becomes almost fudge-like in places. It’s different from fresh-baked, but equally delicious.
Nutritional Information & Benefits
Let’s be real — this is a dessert, not a health food. But it does have some redeeming qualities worth mentioning.
Per serving (based on 12 servings):
- Calories: Approximately 380-420
- Fat: 18-22g
- Carbohydrates: 50-55g
- Protein: 5-7g
- Fiber: 2-3g
- Sugar: 32-36g
Health Highlights:
- Pumpkin is packed with vitamin A — one serving provides over 100% of your daily vitamin A needs, which supports eye health and immune function.
- Good source of fiber — pumpkin puree adds a modest amount of fiber, especially compared to most other desserts.
- Lower in fat than traditional pumpkin pie — this recipe uses less butter overall than a typical pie crust + filling combo.
Dietary Considerations:
- Contains gluten, dairy, eggs, and nuts (if using pecans/walnuts)
- Can be made gluten-free with a GF cake mix
- Can be made dairy-free with substitutions noted above
- Not suitable for low-carb or keto diets due to the sugar and cake mix
I’m not here to pretend this is a health food. It’s a treat, and treats are meant to be enjoyed. But it’s nice to know that behind all that buttery, sugary goodness, there’s a vegetable hiding in there somewhere.
Conclusion
This easy pumpkin dump cake with yellow cake mix has become my go-to fall dessert for a reason. It’s forgiving enough for beginner bakers, impressive enough for holiday tables, and simple enough for random Tuesday cravings. It delivers all the cozy, spiced, buttery comfort of traditional pumpkin desserts without the stress of rolling dough or making complicated fillings.
What I love most about this recipe is how it brings people together. I’ve made it for Thanksgiving dinners, potluck gatherings, and quiet nights at home. Every single time, someone asks for the recipe. And every single time, I get to say, “It’s the easiest thing you’ll ever make.”
So go ahead — grab that can of pumpkin and that box of cake mix sitting in your pantry. Give this a try, and don’t be afraid to make it your own. Add extra cinnamon. Throw in some chocolate chips. Top it with a mountain of whipped cream. This recipe is meant to be played with.
I’d love to hear how yours turns out! Drop a comment below and let me know what variations you tried, or tag me in your photos. Happy baking, friends.
Frequently Asked Questions
Can I use pumpkin pie filling instead of pumpkin puree?
I wouldn’t recommend it. Pumpkin pie filling already has sugar and spices added, so using it would throw off the sweetness and spice balance of this recipe. Stick with plain pumpkin puree for the best results.
Do I need to refrigerate pumpkin dump cake?
Yes, because of the eggs and evaporated milk in the pumpkin layer, this dessert should be refrigerated within two hours of baking. Cover it tightly and store it in the fridge for up to 5 days.
Can I make this in a different size pan?
You can, but you’ll need to adjust the baking time. A 9×13-inch dish is ideal because it gives the right thickness for both layers. If you use a smaller dish, the layers will be thicker and you’ll need to bake longer. If you use a larger dish, it will be thinner and bake faster.
Why is my dump cake runny in the middle?
This usually means it needs more time in the oven. Every oven runs differently, so don’t rely solely on the timer. The center should be set and not jiggle when you shake the pan. If the top is browning too fast, tent it with foil and keep baking.
Can I use a different cake mix flavor?
Absolutely! Spice cake mix is the most popular alternative and it’s amazing with pumpkin. Butter pecan, caramel, or even white cake mix all work well. Just avoid chocolate cake mix — the flavors don’t play nicely with pumpkin in my experience.
Pin This Recipe!
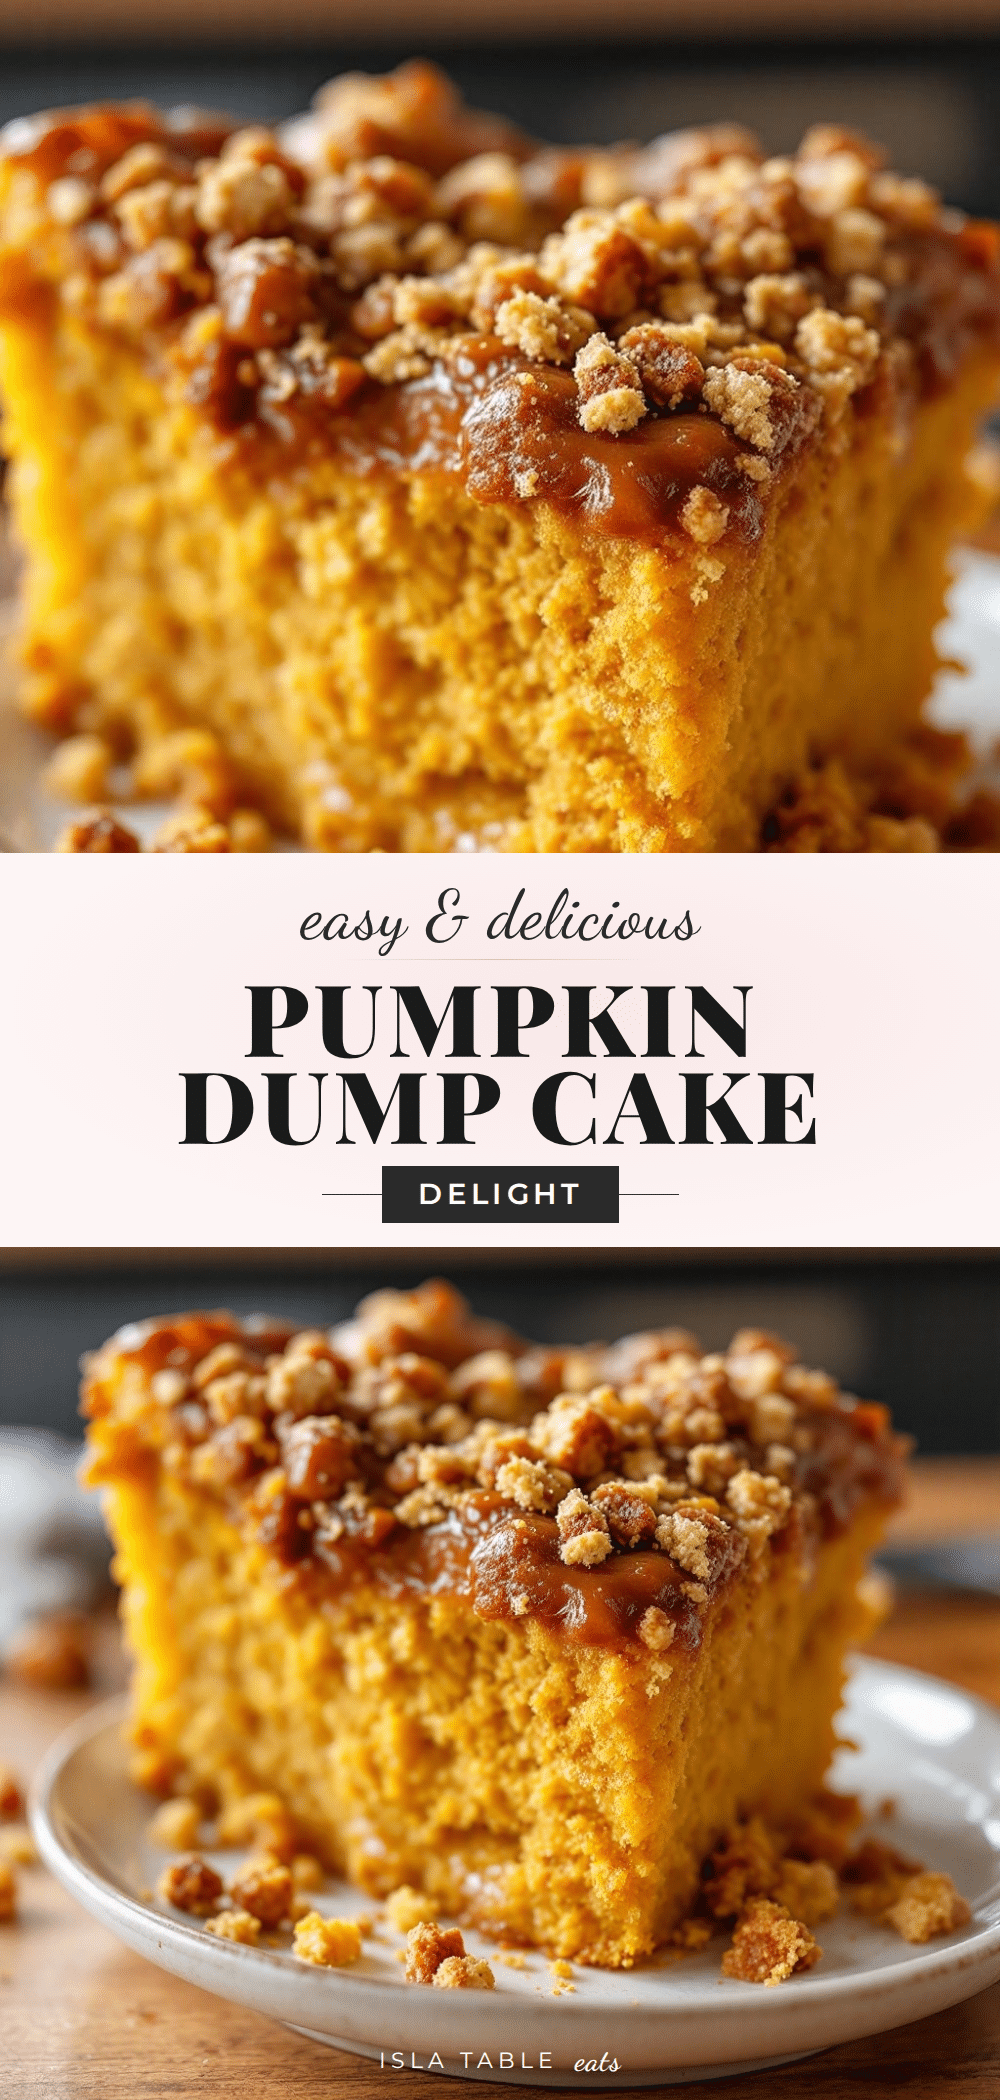
Best Easy Pumpkin Dump Cake with Yellow Cake Mix
An incredibly easy pumpkin dump cake made with yellow cake mix, canned pumpkin, and warm spices. This no-fuss dessert features a soft, custard-like pumpkin layer topped with a buttery, crispy crust—perfect for fall gatherings or cozy nights in.
- Prep Time: 10 minutes
- Cook Time: 45-50 minutes
- Total Time: 55-60 minutes
- Yield: 12 servings 1x
- Category: Dessert
- Cuisine: American
Ingredients
- 1 can (15 oz) pumpkin puree
- 1 can (12 oz) evaporated milk
- 3 large eggs
- 1 cup granulated sugar
- 2 teaspoons pumpkin pie spice
- ½ teaspoon salt
- 1 box (15.25 oz) yellow cake mix
- 1 cup chopped pecans or walnuts (optional)
- ¾ cup unsalted butter, melted
- Whipped cream or vanilla ice cream (for serving, optional)
- Caramel sauce (for serving, optional)
Instructions
- Preheat your oven to 350°F (175°C). Lightly grease a 9×13-inch baking dish with butter or nonstick spray.
- In a large bowl, whisk together the pumpkin puree, evaporated milk, eggs, sugar, pumpkin pie spice, and salt until completely smooth and well combined.
- Pour the pumpkin mixture into the prepared baking dish and spread it evenly with a spatula.
- Sprinkle the entire box of dry yellow cake mix evenly over the pumpkin layer. Do not stir or mix.
- If using nuts, sprinkle them evenly over the dry cake mix.
- Drizzle the melted butter as evenly as possible over the entire surface.
- Bake for 45-50 minutes, until the top is golden brown and the edges are bubbly. The center should be set and not jiggle when shaken.
- Let the dump cake cool on a wire rack for at least 15-20 minutes before serving.
- Serve warm, topped with whipped cream or vanilla ice cream and a drizzle of caramel sauce if desired.
Notes
Don’t overmix the pumpkin layer. Spread the cake mix evenly to avoid dry pockets. Use real butter for the best crispy top. Let the cake rest for 15-20 minutes before serving for cleaner slices. For gluten-free, use a gluten-free yellow cake mix. For dairy-free, substitute butter with dairy-free butter and use canned coconut milk instead of evaporated milk.
Nutrition
- Serving Size: 1 serving
- Calories: 400
- Sugar: 34
- Sodium: 380
- Fat: 20
- Saturated Fat: 10
- Carbohydrates: 52
- Fiber: 2.5
- Protein: 6
Keywords: pumpkin dump cake, easy pumpkin dessert, yellow cake mix pumpkin, fall dessert, dump cake recipe


