I was about seven years old, standing on a step stool that wobbled just enough to keep me alert. The house smelled like roasted turkey and pine needles, but the real magic was happening in the bowl. She was making these little cake pops, rolling them into perfect spheres while I tried to mimic her movements with clumsy, flour-dusted hands. We didn’t have fancy decorations then. We used melted chocolate and sprinkles, and sometimes, if we were feeling fancy, we’d pipe on little faces.
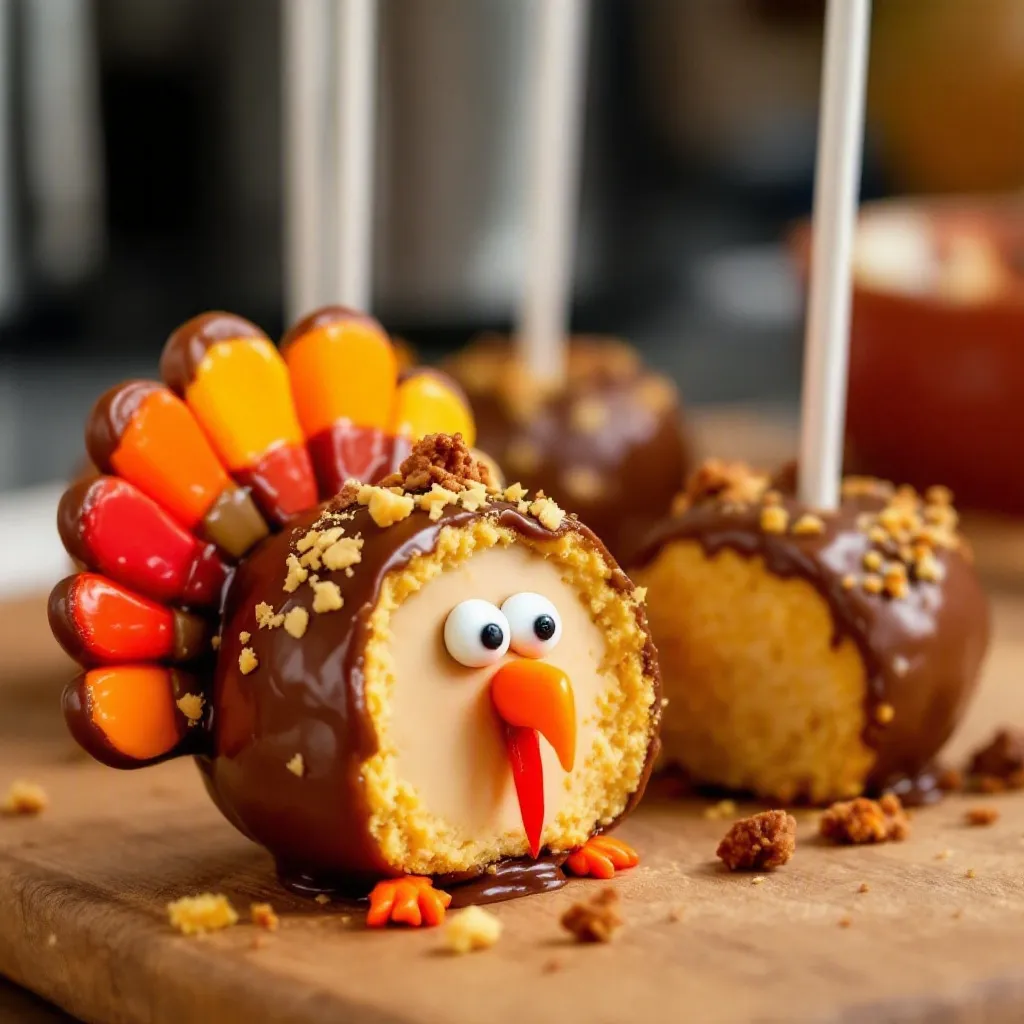
Fast forward to last week, and I found myself standing in my own kitchen, the autumn light filtering through the blinds in that same golden, dusty way. I wanted to recreate that feeling for my kids, but I didn’t want to spend hours fussing over a giant cake. I needed something small, manageable, and undeniably cute. That’s when the idea for Adorable Mini Thanksgiving Turkey Cake Pops struck me. It wasn’t just about dessert; it was about capturing that cozy, chaotic holiday energy in a bite-sized treat.
Let’s face it, holiday baking can get stressful. You’re trying to balance the main course, the sides, and the drinks. Having a dessert that is essentially “set it and forget it” until the last minute is a lifesaver. These little turkeys are forgiving. If one looks a bit lopsided, who cares? It just makes it more rustic. Honestly, the best part is watching the kids’ faces light up when they realize they’re eating a bird that looks like it’s about to say hello.
I’ve made dozens of batches over the years, tweaking the recipe to ensure they stay moist and the decorations hold up in the chilly air. There’s a quiet satisfaction in holding one of these little treats. It’s not just sugar and flour; it’s a piece of the season, wrapped in chocolate. And if you’re looking for other festive treats, you might also enjoy checking out these easy gluten-free red, white, and blueberry parfaits for a different kind of holiday flair.
Why You’ll Love This Recipe
There is a special kind of joy in baking that doesn’t require a degree in culinary arts or a pantry full of expensive ingredients. This recipe is built on the foundation of simple, accessible components that deliver maximum impact. I’ve tested this method countless times, from hurried weeknights before guests arrive to slow Sunday mornings. The consistency is reliable, which means you can focus on the fun part: the decorating.
- Quick & Easy: The entire process, from baking the cake to rolling the pops, takes less than two hours if you’re efficient. This is perfect for busy weeknights or last-minute cravings when you need a sweet fix without the stress.
- Simple Ingredients: You likely already have everything you need in your kitchen. Cake mix, frosting, chocolate, and sprinkles are pantry staples. No fancy grocery trips needed for obscure items.
- Perfect for Holiday Gatherings: Whether it’s Thanksgiving, a Christmas party, or a winter birthday, these turkeys fit right in. They are small enough to not fill people up before the main meal but festive enough to look great on a dessert table.
- Crowd-Pleaser: Kids love them because they are cute. Adults love them because they are nostalgic. It’s a rare treat that gets rave reviews from all ages.
- Unbelievably Delicious: The texture is moist and rich, balanced by the slight crunch of the chocolate coating. It’s comfort food reimagined—sweet, festive, and soul-soothing.
What makes this recipe different from the rest is the attention to detail in the decoration. Many cake pop recipes skip the character work, leaving you with plain balls. By shaping the turkey body and adding those little feather details, you turn a simple snack into a conversation starter. It’s the kind of recipe that makes you close your eyes after the first bite and smile. It’s not just good; it’s memorable.
What Ingredients You Will Need
This recipe uses simple, wholesome ingredients to deliver bold flavor and satisfying texture without the fuss. You don’t need artisanal flours or exotic spices here. The beauty of cake pops lies in their adaptability. You can use a box mix for speed or bake from scratch for depth. For this guide, I’ll stick to the accessible route, but I’ll note where you can upgrade if you’re feeling ambitious.
For the Cake Base
- Yellow or Vanilla Cake Mix: 1 box (15.25 oz / 432g). I recommend Duncan Hines or Wilton for their consistent texture, but any brand works.
- Vegetable Oil: 1/3 cup (80ml). Adds moisture without making the cake dense.
- Water: 1/3 cup (80ml). Some recipes use milk for richness, but water keeps the flavor neutral so the frosting shines.
- Eggs: 2 large eggs, room temperature. Essential for binding the cake crumbs.
For the Binding & Coating
- Vanilla Frosting: 1 cup (240g). You can use canned frosting or homemade buttercream. Wilton Buttercream Icing is great because it’s stiff and holds shape well.
- White Chocolate Chips: 2 cups (340g). The base for the turkey’s body. Use high-quality chips like Ghirardelli for better melting.
- Chocolate Chips (Semi-Sweet or Milk): 1/2 cup (85g). For the tail feathers and wattle.
- Shortening or Coconut Oil: 1 teaspoon per cup of chocolate. This thins the chocolate slightly for easier dipping and helps it set with a nice snap.
For the Decorations
- Orange Candy Melts or Orange Frosting: For the beak and wattle.
- Black Food Coloring Gel: A tiny amount to make the eyes. Gel is better than liquid because it won’t thin the frosting.
- Orange Sprinkles or Jimmies: For the tail feathers. Alternatively, you can pipe feather shapes.
- Lollipop Sticks:
If you want to make this gluten-free, you can easily swap the cake mix for a gluten-free cornbread muffin mix base, though the flavor profile will shift slightly. For a dairy-free option, use coconut milk-based frosting and dairy-free chocolate chips. The key is to keep the ratios similar so the texture remains right.
Equipment Needed
You don’t need a professional kitchen to pull this off. Here is what you’ll actually use.
- Bundt Pan or Round Cake Pan: A Bundt pan is ideal because it has a hole in the middle, which creates more surface area for even baking and easier crumbling. If you use a round pan, just make sure it’s not too deep.
- Food Processor or Stand Mixer: To crumble the cake. A food processor makes quick work of this, but you can also use your hands or a fork if you’re old-school.
- Microwave-Safe Bowls: For melting the chocolate. Glass or ceramic works best to avoid hot spots.
- Thermometer (Optional but Helpful): If you want perfect chocolate, keep it between 88-90°F. But honestly, if you just melt it gently in 30-second intervals, you’ll be fine.
- Piping Bags or Ziploc Bags: For detailing the eyes and beak. Snipping a tiny corner of a Ziploc bag works just as well as a professional piping tip.
- Cupcake Stand or Styrofoam Block: To hold the pops while the chocolate sets. A block of floral foam or even a thick stack of cardboard boxes covered in foil works great.
I’ve tried using silicone molds, but they can be tricky with irregular shapes like turkeys. The free-form dipping method gives you more character. Just make sure your equipment is clean and dry; even a drop of water can ruin your chocolate.
Preparation Method
- Bake the Cake: Preheat your oven to 350°F (175°C). Prepare your Bundt pan with non-stick spray. Mix the cake ingredients according to the box instructions. Bake for the time listed, usually 30-40 minutes. Let it cool completely in the pan for 10 minutes, then invert onto a wire rack. Crucial Step: The cake must be 100% cool. If it’s warm, it will turn your frosting into soup.
- Crumble the Cake: Once cool, break the cake into large chunks. Place them in a food processor and pulse until you have fine, sand-like crumbs. If you don’t have a processor, put the cake in a large ziplock bag and crush it with a rolling pin. You want about 2 cups of crumbs.
- Make the Dough: In a large bowl, combine the cake crumbs and the frosting. Start with 1 cup of frosting and mix. Add more frosting a tablespoon at a time until the mixture holds together when squeezed. It should feel like playdough. Don’t over-mix, or it will become greasy.
- Chill the Mixture: Cover the bowl with plastic wrap and refrigerate for at least 1 hour. This firms up the fat, making it much easier to roll. If you skip this, you’ll be fighting sticky dough the whole time.
- Roll the Balls: Take small portions of the cake mixture (about 1 tablespoon each) and roll them between your palms. Aim for smooth, tight spheres. Place them on a parchment-lined baking sheet. You should get about 24-30 pops.
- Insert Sticks: Melt a tiny amount of your dipping chocolate in the microwave. Dip the tip of a lollipop stick into the chocolate, then insert it about halfway into the cake ball. This acts as glue. Refrigerate again for 15 minutes to set the stick.
- Melt the Chocolate: In a microwave-safe bowl, combine the white chocolate chips and shortening. Microwave in 30-second intervals, stirring in between, until smooth. Do not overheat, or it will seize. Repeat with the colored chocolates for the feathers.
- Dip the Turkeys: Hold a cake pop by the stick and dip it into the white chocolate, swirling to coat. Tap the stick gently against the side of the bowl to remove excess. Place immediately on your setting stand. Tip: Work quickly so the chocolate doesn’t harden before you can decorate.
- Decorate: While the white coating is still wet, pipe on the eyes and beak using the colored chocolates or candy melts. Add the orange feathers at the back. If the chocolate sets before you can decorate, you can pipe on top after it hardens, but it won’t stick as well.
- Set: Let the pops sit at room temperature for 20 minutes or in the fridge for 10 minutes until the chocolate is fully set. Handle them by the base of the stick only.
Cooking Tips & Techniques
Let’s talk about the #1 enemy of cake pops: cracking. If your cake balls crack when you dip them, it’s usually because they are too cold. Take them out of the fridge 10-15 minutes before dipping to let them come closer to room temperature. The temperature difference between the cold cake and the warm chocolate causes the cake to contract, leading to cracks.
Another common mistake is using too much frosting. If the mixture is too wet, the pops will fall off the sticks. Always add frosting gradually. I’ve learned this the hard way after wasting a batch of cake mix on a sticky mess. If your mixture feels sticky, add a few more crumbs. If it’s dry and crumbly, add a teaspoon of milk or more frosting.
When melting chocolate, low and slow is the rule. High heat burns chocolate and makes it grainy. If your chocolate looks lumpy, keep stirring. Sometimes it just needs a bit more agitation to come together. If it seizes (turns into a solid clump), add a tiny bit of vegetable oil and stir vigorously to salvage it, though it’s best to start fresh.
For the turkey shape, you don’t need to make the balls perfectly round. A slightly oval shape works better for a turkey body. Think of it as an egg shape, wider at the bottom. This makes the tail feathers look more natural. Also, don’t be afraid to use your hands to shape the feathers if you’re using frosting for them. It’s tactile and fun.
Variations & Adaptations
While the classic turkey is the star, there are plenty of ways to twist this recipe. Here are a few ideas I’ve tried.
- Gluten-Free Option: Use a gluten-free yellow cake mix. Ensure your frosting and chocolate chips are also certified gluten-free. The texture might be slightly denser, but the flavor is just as good.
- Dairy-Free Version: Swap the buttercream for a coconut oil-based frosting or vegan buttercream. Use dairy-free white chocolate chips (like Enjoy Life or Pascha). The coating might take slightly longer to set, but it works beautifully.
- Flavor Variations: Instead of yellow cake, try chocolate cake for a “chocolate turkey” or pumpkin spice cake for an extra autumn kick. If using pumpkin spice, reduce the liquid in the cake mix slightly to compensate for the moisture in the pumpkin puree if you’re adding it.
- Nut-Free: This recipe is naturally nut-free if you avoid cross-contamination in your chocolate chips. Just check the labels. This makes them safe for school parties or nut-allergy households.
I once made these with red velvet cake and white chocolate, which looked like a winter wonderland turkey. It was a hit at a December party. The possibilities are really limited only by your imagination and your sprinkles collection.
Serving & Storage Suggestions
These cake pops are best served at room temperature. If they are too cold, the chocolate can be hard and the cake dense. Take them out of the fridge 30 minutes before serving for the best texture.
For presentation, arrange them on a tiered stand or in a basket lined with parchment paper. They look adorable paired with a glass of warm milk or a cup of hot cocoa. If you’re serving them alongside a main meal, consider pairing them with something savory to balance the sweetness. I often serve these with a side of healthy keto coleslaw or a crisp apple salad to cut through the richness.
Storage: Store the cake pops in an airtight container at room temperature for up to 5 days. Do not refrigerate them unless you live in a very hot and humid climate, as condensation can ruin the chocolate coating. If you must refrigerate, let them come to room temperature in the container before opening to prevent sweating.
Freezing: You can freeze cake pops for up to 3 months. Wrap them individually in plastic wrap, then place them in a freezer-safe bag. Thaw them in the refrigerator overnight before serving. This is great for meal prepping ahead of holiday parties.
Nutritional Information & Benefits
While these are definitely a treat, they are made with simple ingredients. Each cake pop is approximately 150-200 calories, depending on the size and coating thickness. They contain carbohydrates from the cake and sugar, and fats from the chocolate and frosting.
For those watching their sugar intake, you can use sugar-free cake mix and sugar-free frosting, though the texture may vary. The recipe is naturally nut-free, which is a benefit for many families. However, it does contain gluten, dairy, and eggs, so it is not suitable for those with celiac disease or dairy allergies without substitutions.
From a wellness perspective, these are best enjoyed in moderation as a special occasion treat. They bring joy and comfort, which is a vital part of mental well-being during the busy holiday season. Balance is key, and a small, delicious treat can be a wonderful way to celebrate.
Conclusion
Making Adorable Mini Thanksgiving Turkey Cake Pops is more than just baking; it’s about creating a memory. Whether you’re making them for your kids, your neighbors, or just for yourself, the process is rewarding. The end result is a cute, tasty treat that brings a smile to everyone’s face.
I encourage you to try this recipe and make it your own. Experiment with different sprinkles, colors, and cake flavors. Don’t worry if they aren’t perfect; the charm is in their handmade look. I love this recipe because it’s simple yet festive, allowing me to enjoy the holidays without spending hours in the kitchen.
Please try this out and let me know how it goes! I’d love to see your creations, so feel free to share photos or leave a comment below with your tips or variations. Happy baking, and happy Thanksgiving!
FAQs
Can I make these ahead of time?
Yes! You can make the cake balls and dip them up to 3 days in advance. Store them in an airtight container at room temperature. If you need to freeze them, wrap them tightly and freeze for up to 3 months.
Why did my chocolate crack?
Cracking usually happens if the cake balls are too cold. Let them sit out for 15 minutes before dipping. Also, ensure your chocolate isn’t too hot when you dip the cold cake.
Can I use homemade cake instead of a mix?
Absolutely. Any cake recipe that crumbles well will work. Just make sure it’s completely cool before crumbling. Homemade cake might be denser, so you may need slightly less frosting.
How do I keep the feathers from falling off?
If using frosting for feathers, pipe them on while the white chocolate coating is still wet. If using chocolate chips, melt them slightly and attach them quickly before the base hardens.
What if I don’t have a Bundt pan?
Use a round cake pan or even muffin tins. Just ensure the cake is baked through and cooled completely. The shape of the pan doesn’t matter as much as the texture of the crumbs.
Pin This Recipe!
Adorable Mini Thanksgiving Turkey Cake Pops

These adorable mini Thanksgiving turkey cake pops are a festive, bite-sized holiday treat that combines moist cake with a chocolate coating and cute turkey decorations. They are quick to make, perfect for busy weeknights, and loved by both kids and adults.
- Prep Time: 30 minutes
- Cook Time: 40 minutes
- Total Time: 2 hours
- Yield: 24-30 servings 1x
- Category: Dessert
- Cuisine: American
Ingredients
- 1 box (15.25 oz / 432g) Yellow or Vanilla Cake Mix
- 1/3 cup (80ml) Vegetable Oil
- 1/3 cup (80ml) Water
- 2 large eggs, room temperature
- 1 cup (240g) Vanilla Frosting
- 2 cups (340g) White Chocolate Chips
- 1/2 cup (85g) Semi-Sweet or Milk Chocolate Chips
- 1 teaspoon Shortening or Coconut Oil per cup of chocolate
- Orange Candy Melts or Orange Frosting (for beak and wattle)
- Black Food Coloring Gel (for eyes)
- Orange Sprinkles or Jimmies (for tail feathers)
- 24–30 Lollipop Sticks
Instructions
- Preheat oven to 350°F (175°C). Prepare a Bundt or round cake pan with non-stick spray. Mix cake ingredients according to box instructions and bake for 30-40 minutes. Cool completely in the pan for 10 minutes, then invert onto a wire rack to cool 100%.
- Crumble the cooled cake into fine crumbs using a food processor or by crushing in a bag with a rolling pin. You should have about 2 cups of crumbs.
- In a large bowl, combine cake crumbs and 1 cup of vanilla frosting. Mix until it resembles playdough. Add more frosting a tablespoon at a time if needed, but avoid over-mixing.
- Cover the mixture and refrigerate for at least 1 hour to firm up the fat.
- Roll the mixture into small, tight spheres (about 1 tablespoon each). Place on a parchment-lined baking sheet. You should get 24-30 pops.
- Melt a tiny amount of dipping chocolate. Dip the tip of a lollipop stick into the chocolate and insert it halfway into a cake ball. Refrigerate for 15 minutes to set.
- Melt white chocolate chips with shortening in 30-second intervals, stirring until smooth. Repeat with colored chocolates for decorations.
- Dip each cake pop into the white chocolate, swirling to coat. Tap off excess and place on a setting stand.
- While the white coating is wet, pipe on eyes and beak using colored chocolates or candy melts. Add orange feathers at the back.
- Let the pops sit at room temperature for 20 minutes or in the fridge for 10 minutes until the chocolate is fully set.
Notes
Ensure the cake is 100% cool before crumbling to prevent the frosting from becoming soupy. If cake balls crack during dipping, they may be too cold; let them sit at room temperature for 10-15 minutes before dipping. Do not refrigerate cake pops unless in a hot/humid climate to avoid condensation ruining the chocolate.
Nutrition
- Serving Size: 1 cake pop
- Calories: 175
- Sugar: 18
- Sodium: 150
- Fat: 10
- Saturated Fat: 6
- Carbohydrates: 22
- Fiber: 1
- Protein: 2
Keywords: Thanksgiving, cake pops, turkey cake pops, holiday treats, easy dessert, kids baking, chocolate cake pops, festive recipes


