By the third batch of these little guys in as many days, I was elbow-deep in powdered sugar and starting to see faces in the flour clouds on my counter. It was a Thursday night, and my kitchen looked like a frosting bomb had gone off — which, honestly, it had. The first batch had eyes that were too big, the second batch had bandages that looked more like angry scars than gauze, and somewhere around midnight, I finally got it. One cookie. Then another. And then I couldn’t stop.
There’s something about the simplicity of a mummy cookie that hooks you. It’s not about perfection — it’s about the character you can give each one. Some of mine have one wonky eye. Some have three. One looks like it just woke up from a hundred-year nap and is not thrilled about it. The royal icing dries to a perfect matte finish, and the way the white stripes overlap on the dark chocolate base? Honestly, it’s the most satisfying thing I’ve piped all year.
These Halloween Mummy Sugar Cookies aren’t just cute — they’re the kind of project that makes you feel like a cookie artist, even if your piping skills are still a work in progress. I kept coming back to the kitchen because each batch taught me something new about the icing consistency, the timing, and the weird little personality that comes out when you’re not trying so hard. By the time I packed them up for the neighbor kids, I already knew I’d be making them again next week.
Why You’ll Love This Recipe
I’ve tested royal icing recipes for years, and this one finally hits the sweet spot between structure and spread. It holds its shape for the bandages but still settles enough to look smooth. These cookies are the real deal — no special cutters required, no complicated techniques, and they look way harder than they actually are.
- Super Easy Royal Icing : This recipe uses a simple meringue powder base that dries hard and shiny without any raw egg concerns. It’s stable, forgiving, and perfect for beginners.
- No Special Cutters Needed : You just need a round cookie cutter (or a glass) and a piping bag. The mummy look comes from the icing, not the shape.
- Perfect for Halloween Parties : These little guys are the star of every Halloween spread. Kids go wild for them, and adults can’t resist snapping a photo first.
- Endlessly Customizable : Make them spooky, silly, or somewhere in between. Each cookie gets its own personality, which makes decorating them genuinely fun.
- Make-Ahead Friendly : The cookies stay fresh for days, and the royal icing hardens beautifully for stacking and gifting.
What makes these different from every other decorated sugar cookie out there is the texture — the cookie itself is soft with a slight edge of crunch, and the royal icing adds that signature crack when you bite into it. It’s the kind of cookie that makes you close your eyes after the first bite, even if you’re surrounded by Halloween chaos.
What Ingredients You Will Need
This recipe uses simple, everyday ingredients to create cookies that look like they came from a bakery. Most of these are probably already in your pantry, which is exactly how I like to roll.
For the Sugar Cookies
- 2 ¾ cups all-purpose flour (spooned and leveled — don’t scoop directly from the bag or you’ll end up with dense cookies)
- 1 cup unsalted butter, softened to room temperature (I use Challenge or Kerrygold for the best flavor)
- 1 cup granulated sugar
- 1 large egg, room temperature
- 1 teaspoon vanilla extract (pure, not imitation, if you can swing it)
- ½ teaspoon almond extract (this is my secret weapon — it adds a subtle nutty warmth that makes these cookies unforgettable)
- ½ teaspoon baking powder
- ¼ teaspoon salt
For the Royal Icing

- 4 cups powdered sugar, sifted (don’t skip sifting unless you want lumpy icing)
- 3 tablespoons meringue powder (I like Wilton brand — it’s reliable and easy to find)
- 5-6 tablespoons warm water (add one tablespoon at a time — you want a smooth, ribbon-like consistency)
- ½ teaspoon vanilla extract
- Black food gel (for the eyes — Americolor Super Black is my go-to)
- White food gel (optional, for brightening the white icing — I use it for that crisp mummy look)
For Decorating
- Piping bags (disposable or reusable — I’ve used both and prefer disposable for easy cleanup)
- Small round piping tips (size 2 or 3 for the bandages, size 1 or 2 for the eyes)
- Candy eyes (optional, but super fun — I use Wilton candy eyes for a quicker decorating option)
If you’re looking for a dairy-free option, you can swap the butter with a high-quality vegan butter stick (I’ve had good luck with Earth Balance). Just make sure it’s cold when you cream it, or the cookies will spread too much. For a gluten-free version, use a 1:1 gluten-free flour blend with xanthan gum already added — I’ve tested this with King Arthur Measure for Measure and it works beautifully.
Equipment Needed
You don’t need a fancy bakery setup for these cookies. Here’s what you’ll actually use:
- Stand mixer or hand mixer — I’ve made these with both. The stand mixer is easier for the royal icing, but a hand mixer works just fine for the dough.
- 2 ½-inch round cookie cutter — If you don’t have one, a drinking glass with a thin rim works perfectly. I’ve done it.
- Baking sheets — Two standard half-sheet pans work well. Line them with parchment paper or a silicone baking mat.
- Piping bags and tips — I recommend getting a few disposable bags and a set of small round tips. They’re cheap and make a huge difference.
- Cooling rack — Essential for letting the cookies cool completely before icing. I use a simple wire rack from the grocery store.
- Small bowls — For separating the icing into different colors. I use ramekins for the black icing.
- Toothpicks — For popping air bubbles in the icing and for adjusting the eyes.
If you’re new to piping, don’t stress. I started with a ziplock bag with the corner snipped off, and honestly, it worked fine. The mummy look is forgiving — messy bandages are part of the charm.
Preparation Method
This process has a few steps, but I’ve broken it down so you can follow along without feeling rushed. Take your time — the cookies will thank you.
Step 1: Make the Sugar Cookie Dough
In a medium bowl, whisk together the flour, baking powder, and salt. Set aside. In a large bowl (or the bowl of your stand mixer), beat the softened butter and granulated sugar together on medium speed until light and fluffy — about 2 to 3 minutes. Scrape down the sides of the bowl, then add the egg, vanilla extract, and almond extract. Beat until combined, about 30 seconds.
Gradually add the dry ingredients to the wet ingredients, mixing on low speed until a soft dough forms. Don’t overmix — stop as soon as you don’t see any more flour streaks. The dough will be slightly sticky but should hold together when pressed.
Step 2: Chill the Dough
Divide the dough in half, shape each half into a flat disc (about 1 inch thick), wrap tightly in plastic wrap, and refrigerate for at least 1 hour. This step is non-negotiable — chilled dough spreads less and holds its shape better. I’ve skipped this before and ended up with cookies that looked more like blobs than mummies. Learn from my mistake.
Step 3: Roll and Cut the Cookies
Preheat your oven to 350°F (175°C). Line two baking sheets with parchment paper. Lightly flour your work surface and rolling pin. Roll out one disc of dough to about ¼-inch thickness. Cut out circles using your 2 ½-inch round cutter and place them 2 inches apart on the prepared baking sheets. Gather the scraps, re-roll, and cut again until all the dough is used.
Bake for 8 to 10 minutes, or until the edges are just barely golden. The centers should look set but not brown. Let the cookies cool on the baking sheet for 5 minutes, then transfer to a wire rack to cool completely. Do not ice warm cookies — the royal icing will melt and slide right off.
Step 4: Prepare the Royal Icing
In a large bowl, combine the sifted powdered sugar and meringue powder. Add 5 tablespoons of warm water and the vanilla extract. Beat on low speed until combined, then increase to medium-high speed and beat for 4 to 5 minutes. The icing should be thick, glossy, and hold a stiff peak when you lift the beater.
For the mummy bandages, you want a slightly thinner consistency — add water one teaspoon at a time until the icing flows like thick honey and settles smooth within 10 seconds. This is called “flood consistency.” For the eyes, keep about ¼ cup of the stiff icing aside and tint it black with black food gel.
Step 5: Decorate the Mummies
Transfer the white flood icing to a piping bag fitted with a size 2 or 3 round tip. Pipe thin, uneven lines across each cookie, leaving gaps for the eyes. Don’t worry about making them perfect — mummy bandages are supposed to look a little chaotic. I like to pipe horizontal lines on some and diagonal on others for variety.
While the white icing is still wet, pipe two small dots of black icing (or place candy eyes) in the gaps. Use a toothpick to adjust the eyes if needed. Let the cookies dry at room temperature for at least 4 hours, or overnight for best results. The royal icing will harden to a smooth, matte finish.
Cooking Tips & Techniques
I learned most of these the hard way — through batches that didn’t turn out quite right. Here’s what I wish someone had told me before I started:
- Chill your dough thoroughly. I cannot stress this enough. Warm dough spreads into weird shapes and loses that clean edge. If your kitchen is warm, pop the cut cookies back in the fridge for 10 minutes before baking.
- Don’t overbake. Sugar cookies continue to cook on the hot baking sheet after you pull them out. The second they look set, they’re done. Overbaked cookies are dry and crumbly — not ideal for icing.
- Test your icing consistency. Before you start piping, drag a spoon through the icing. The line should disappear within 10 seconds. If it’s too thick, add water drop by drop. If it’s too thin, add more sifted powdered sugar.
- Work in small batches. Royal icing dries fast, so keep the bowl covered with a damp paper towel while you’re piping. This prevents a crust from forming on top.
- Use a scribe tool or toothpick. For those tiny air bubbles that show up in the icing, a quick poke with a toothpick pops them right out. It makes the finished cookies look much more professional.
One time I forgot to sift the powdered sugar and ended up with lumpy icing that clogged my piping tip. I spent 20 minutes picking lumps out of the bag. Sift your sugar — it takes two minutes and saves you a headache.
Variations & Adaptations
These cookies are incredibly versatile. Here are a few ways I’ve changed them up depending on the occasion:
- Gluten-Free Version : Swap the all-purpose flour with a 1:1 gluten-free flour blend. I’ve tested this with King Arthur Measure for Measure and the texture is spot-on — slightly tender, not at all grainy.
- Dairy-Free Version : Use a high-quality vegan butter stick. Make sure it’s cold before creaming, and add an extra tablespoon of flour if the dough feels too soft.
- Fun Flavor Twists : Add ½ teaspoon of peppermint extract instead of almond for a holiday version. Or swap in lemon extract and add a pinch of lemon zest for a bright, springtime mummy.
- Quick Version with Candy Eyes : If you don’t want to pipe black eyes, use Wilton candy eyes. They stick right onto the wet icing and give the mummies a cute, cartoonish look.
- Spooky Spider Variation : Instead of mummy bandages, pipe a spiderweb pattern on top and add a small candy spider. Perfect for a Halloween party platter.
I once made a batch with orange extract and added a drop of orange food coloring to the dough — they tasted like creamsicles wrapped in a cookie. Not exactly spooky, but definitely delicious.
Serving & Storage Suggestions
These cookies are best served at room temperature, after the royal icing has fully hardened. I like to arrange them on a platter with some creamy dairy-free queso dip for a sweet-and-savory Halloween snack board. They also pair beautifully with a cold glass of milk or a warm cup of apple cider.
For storage, place the decorated cookies in a single layer in an airtight container. Separate layers with parchment paper to prevent the icing from sticking. They’ll stay fresh at room temperature for up to 5 days. Do not refrigerate — the humidity in the fridge can make the royal icing tacky.
You can also freeze the undecorated cookies for up to 3 months. Just wrap them tightly in plastic wrap and place them in a freezer-safe bag. When you’re ready to decorate, thaw them at room temperature for about an hour, then ice as usual. The flavor actually improves after freezing — the almond extract mellows out beautifully.
If you’re making these for a party, I recommend decorating them the day before. The royal icing needs a solid 4 to 6 hours to dry completely, and overnight drying gives you the best results. Plus, it’s one less thing to worry about on party day.
Nutritional Information & Benefits
Let’s be real — these are a treat, not a health food. But here’s what you’re working with per cookie (based on 24 cookies):
- Calories : 185
- Total Fat : 8g
- Saturated Fat : 5g
- Carbohydrates : 28g
- Sugar : 18g
- Protein : 2g
The almond extract adds a touch of vitamin E, and the butter provides a small amount of vitamin A. If you’re looking for a lower-sugar option, you can reduce the sugar in the cookie dough to ¾ cup — the cookies will be slightly less tender but still delicious. For a healthier twist, try swapping half the all-purpose flour with whole wheat pastry flour. It adds fiber without making the cookies taste like cardboard.
These cookies are not gluten-free or dairy-free as written, but the substitutions I mentioned above work beautifully. They are nut-free if you use vanilla extract instead of almond extract — perfect for school parties.
Conclusion
These Halloween Mummy Sugar Cookies are the kind of recipe that makes you feel like a holiday hero. They’re fun to make, even more fun to decorate, and they disappear faster than you’d think possible. Whether you’re hosting a Halloween party, sending treats to school, or just want a cozy afternoon project, these cookies deliver.
I love how each mummy ends up with its own personality — some look grumpy, some look confused, and some look like they’re plotting something. That’s the magic of this recipe. It’s not about perfection. It’s about the joy of creating something with your hands and watching people smile when they see it.
If you make these, I’d love to hear how they turn out. Drop a comment below with your mummy’s personality, or tag me in your photos. Happy Halloween, and happy baking!
Frequently Asked Questions
Can I use store-bought sugar cookie dough?
You absolutely can, but the texture won’t be as tender as homemade. If you’re short on time, refrigerated sugar cookie dough works in a pinch. Just roll it out a little thinner than the package suggests and bake according to the package directions. The royal icing recipe stays the same.
How long does royal icing take to dry?
Royal icing dries to the touch in about 1 to 2 hours, but it needs at least 4 hours to fully harden. For best results, let the cookies dry overnight. Humidity affects drying time — on a rainy day, it can take up to 12 hours. Be patient, or use a fan to speed things up.
Can I freeze decorated mummy cookies?
I don’t recommend freezing decorated cookies because the royal icing can crack or become tacky when thawed. However, you can freeze the undecorated cookies for up to 3 months. Just thaw them at room temperature and decorate fresh.
Why did my royal icing turn out runny?
You probably added too much water. Royal icing is finicky — add water one teaspoon at a time. If it’s already too thin, whisk in more sifted powdered sugar until it reaches the right consistency. Also, make sure you’re using meringue powder, not egg whites, for the most stable results.
How do I get clean, sharp edges on my mummy bandages?
Use a small round piping tip (size 2 or 3) and hold the bag at a 45-degree angle. Pipe with steady, even pressure and lift the tip slightly as you finish each line. If the icing spreads too much, it’s too thin — add a little more powdered sugar. Practice on parchment paper before you start on the cookies.
If you’re looking for more sweet treats to round out your Halloween spread, try my magical color-changing galaxy lemonade — it’s a hit with kids and adults alike. And for a savory option that balances all that sugar, these crispy bacon-wrapped jalapeño poppers are always a crowd-pleaser.
Pin This Recipe!
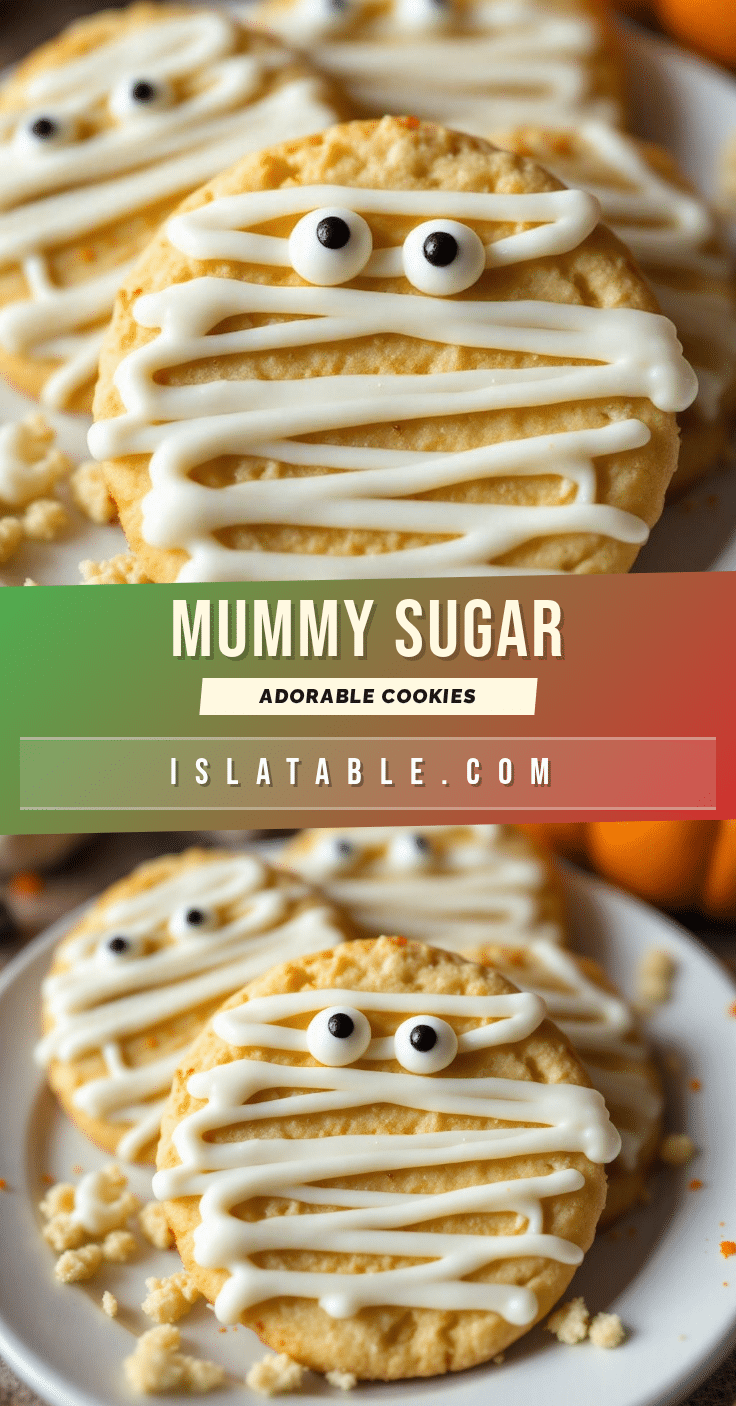
Adorable Halloween Mummy Sugar Cookies: Easy Royal Icing Recipe

These Halloween Mummy Sugar Cookies are soft, buttery sugar cookies decorated with a simple royal icing that dries to a perfect matte finish. Each cookie gets its own personality, making them fun to make and even more fun to eat.
- Prep Time: 1 hour 30 minutes
- Cook Time: 10 minutes
- Total Time: 5 hours 40 minutes (includes chilling and drying time)
- Yield: 24 cookies 1x
- Category: Dessert
- Cuisine: American
Ingredients
- 2 ¾ cups all-purpose flour (spooned and leveled)
- 1 cup unsalted butter, softened to room temperature
- 1 cup granulated sugar
- 1 large egg, room temperature
- 1 teaspoon vanilla extract (pure)
- ½ teaspoon almond extract
- ½ teaspoon baking powder
- ¼ teaspoon salt
- 4 cups powdered sugar, sifted
- 3 tablespoons meringue powder
- 5–6 tablespoons warm water
- ½ teaspoon vanilla extract
- Black food gel
- White food gel (optional)
- Piping bags
- Small round piping tips (size 2 or 3 for bandages, size 1 or 2 for eyes)
- Candy eyes (optional)
Instructions
- Make the sugar cookie dough: In a medium bowl, whisk together flour, baking powder, and salt. Set aside. In a large bowl, beat softened butter and granulated sugar on medium speed until light and fluffy (2-3 minutes). Scrape down sides, then add egg, vanilla extract, and almond extract. Beat until combined (about 30 seconds). Gradually add dry ingredients to wet ingredients, mixing on low speed until a soft dough forms. Do not overmix.
- Chill the dough: Divide dough in half, shape each half into a flat disc (about 1 inch thick), wrap tightly in plastic wrap, and refrigerate for at least 1 hour.
- Roll and cut the cookies: Preheat oven to 350°F (175°C). Line two baking sheets with parchment paper. Lightly flour work surface and rolling pin. Roll out one disc of dough to about ¼-inch thickness. Cut out circles using a 2 ½-inch round cutter and place 2 inches apart on prepared baking sheets. Gather scraps, re-roll, and cut again until all dough is used. Bake for 8-10 minutes, until edges are just barely golden. Let cool on baking sheet for 5 minutes, then transfer to a wire rack to cool com…
- Prepare the royal icing: In a large bowl, combine sifted powdered sugar and meringue powder. Add 5 tablespoons warm water and ½ teaspoon vanilla extract. Beat on low speed until combined, then increase to medium-high speed and beat for 4-5 minutes until thick, glossy, and holds a stiff peak. For mummy bandages, thin icing to flood consistency by adding water one teaspoon at a time until it flows like thick honey and settles smooth within 10 seconds. Keep about ¼ cup of stiff icing aside and tint…
- Decorate the mummies: Transfer white flood icing to a piping bag fitted with a size 2 or 3 round tip. Pipe thin, uneven lines across each cookie, leaving gaps for the eyes. While white icing is still wet, pipe two small dots of black icing (or place candy eyes) in the gaps. Use a toothpick to adjust eyes if needed. Let cookies dry at room temperature for at least 4 hours, or overnight for best results.
Notes
Chill dough thoroughly to prevent spreading. Do not overbake; cookies continue to cook on hot sheet. Test icing consistency before piping. Keep royal icing covered with a damp paper towel while piping to prevent crusting. Use a toothpick to pop air bubbles. For best results, let decorated cookies dry overnight. Do not refrigerate decorated cookies as humidity can make icing tacky. Undecorated cookies can be frozen for up to 3 months.
Nutrition
- Serving Size: 1 cookie
- Calories: 185
- Sugar: 18
- Sodium: 50
- Fat: 8
- Saturated Fat: 5
- Carbohydrates: 28
- Protein: 2
Keywords: Halloween cookies, mummy cookies, sugar cookies, royal icing, easy Halloween recipe, decorated cookies


