I figured layered Jello was one of those things that looked way too fussy for a regular Tuesday. It took about ten minutes of staring at a box of orange Jello in my pantry for that assumption to fall apart completely. Honestly, I was just trying to use up a few boxes of gelatin before they expired, and the kids were bouncing off the walls asking for a snack. I needed something that felt like a treat but didn’t require me to preheat an oven or wash a mixer. That’s when the idea hit me—why not make something that looks like candy corn? It’s a classic Halloween look, but this dessert has zero actual candy corn in it, which is a win in my book. (I’m one of those people who either loves candy corn or hides it at the back of the cabinet. No judgment either way.)
The first time I made these, I was convinced the layers would bleed into each other and I’d end up with a sad, muddy-looking cup of Jello. But you know what? They didn’t. The trick is just a little patience and a fridge that works hard. By the time I was spooning that first creamy, jiggly bite into my mouth, I knew I had stumbled onto something good. These Easy Candy Corn Layered Jello Cups are exactly that—a happy accident that turned into a family favorite. They’re the kind of dessert that makes you look like a kitchen wizard even when you barely tried. And really, isn’t that the best kind of recipe to have in your back pocket?
Why You’ll Love This Recipe
These aren’t your average Jello cups. They’re a full-on sensory experience that starts with the look and ends with that satisfying, wiggly bite. I’ve tested this method more times than I care to admit, and I can tell you exactly what makes these cups so special.
- Quick & Easy: The active prep time is maybe 15 minutes. The rest is just waiting for the Jello to set, which is the perfect excuse to binge a show or tackle that laundry pile.
- Simple Ingredients: You need exactly three boxes of Jello and some milk. That’s it. No weird extracts, no specialty items, no trip to a fancy grocery store.
- Perfect for Halloween: These are a total crowd-pleaser at any fall gathering, school party, or just a fun after-school snack that feels special.
- Crowd-Pleaser: I’ve served these to kids, adults, and even my picky sister-in-law. Every single person went back for seconds. They’re just fun to eat.
- Unbelievably Delicious: The combination of the sweet, fruity Jello with the creamy, smooth topping is next-level comfort food. It’s like a parfait, but wiggly.
What makes this recipe different from the hundreds of other Jello cup recipes out there is the specific technique for getting those crisp, clean layers. I learned the hard way that rushing the process is a recipe for disaster. The secret is letting each layer set completely before adding the next, and using a very specific ratio of water to gelatin for the creamy top layer. It’s not just another version of a layered dessert—it’s the best version, perfected through trial and error so you don’t have to make the same mistakes I did.
This is the kind of dessert that makes you close your eyes after the first bite. It’s comfort food reimagined—bright, colorful, and fun, but with the same soul-soothing satisfaction of a classic pudding cup. Perfect for impressing guests without stress, or turning a simple weeknight into something memorable.
What Ingredients You Will Need
This recipe uses simple, pantry-friendly ingredients to deliver a dessert that looks far more complicated than it actually is. Each component plays a specific role in creating that perfect candy corn color gradient and texture.
- 1 box (3 oz) Lemon Jello: This is your bottom layer, giving you that bright yellow base. I prefer the store brand just fine, but if you want the most consistent set, go with the name brand. (Pro tip: make sure it’s the regular kind, not the sugar-free, for the best texture.)
- 1 box (3 oz) Orange Jello: This is the middle layer, the classic orange that makes these look like the real deal. Any brand works, but I’ve found the orange flavor is always reliably strong.
- 1 box (3 oz) Lime Jello: Wait, lime? Yes! This is my secret. The lime Jello, when mixed with the creamy topping, turns a perfect, soft pastel yellow. It’s the top layer that mimics the white tip of a candy corn. Plus, the lime flavor is so subtle once it’s mixed with the cream that it just tastes like a sweet, creamy vanilla. Don’t skip it.
- 3 cups Boiling Water: Divided into 1-cup portions for each box of Jello. You need it hot enough to fully dissolve the gelatin crystals.
- 1 cup Cold Water: You’ll use this to mix the creamy top layer. It helps cool the gelatin down so it doesn’t curdle the milk.
- 1 can (12 oz) Evaporated Milk: This is the magic ingredient for the creamy top layer. It’s richer than regular milk but won’t separate like heavy cream can. I’ve tried using whole milk, and the layer just isn’t as stable. Evaporated milk is the way to go for that perfect, smooth, sliceable top.
Equipment Needed
You don’t need anything fancy for this recipe, which is part of the appeal. Here’s what you’ll need to grab:
- 9×13-inch Baking Dish: This is the perfect size for getting nice, thick layers. A glass dish works best because you can see the layers setting up.
- Small Mixing Bowls: You’ll need one for each flavor of Jello. I use three separate bowls so I can prep them all at once.
- Whisk: For dissolving the Jello and mixing the creamy layer. A fork works in a pinch, but a whisk is faster.
- Measuring Cups: For the boiling water and cold water. A liquid measuring cup is best for accuracy.
- Refrigerator: The most important tool! You need a reliable fridge that can stay cold and consistent. Don’t try to rush this by sticking the dish in the freezer—it’ll mess up the layers.
If you don’t have a 9×13 dish, you can use two smaller 8×8 dishes, but the layers will be thinner and set faster. Keep an eye on them.
Preparation Method
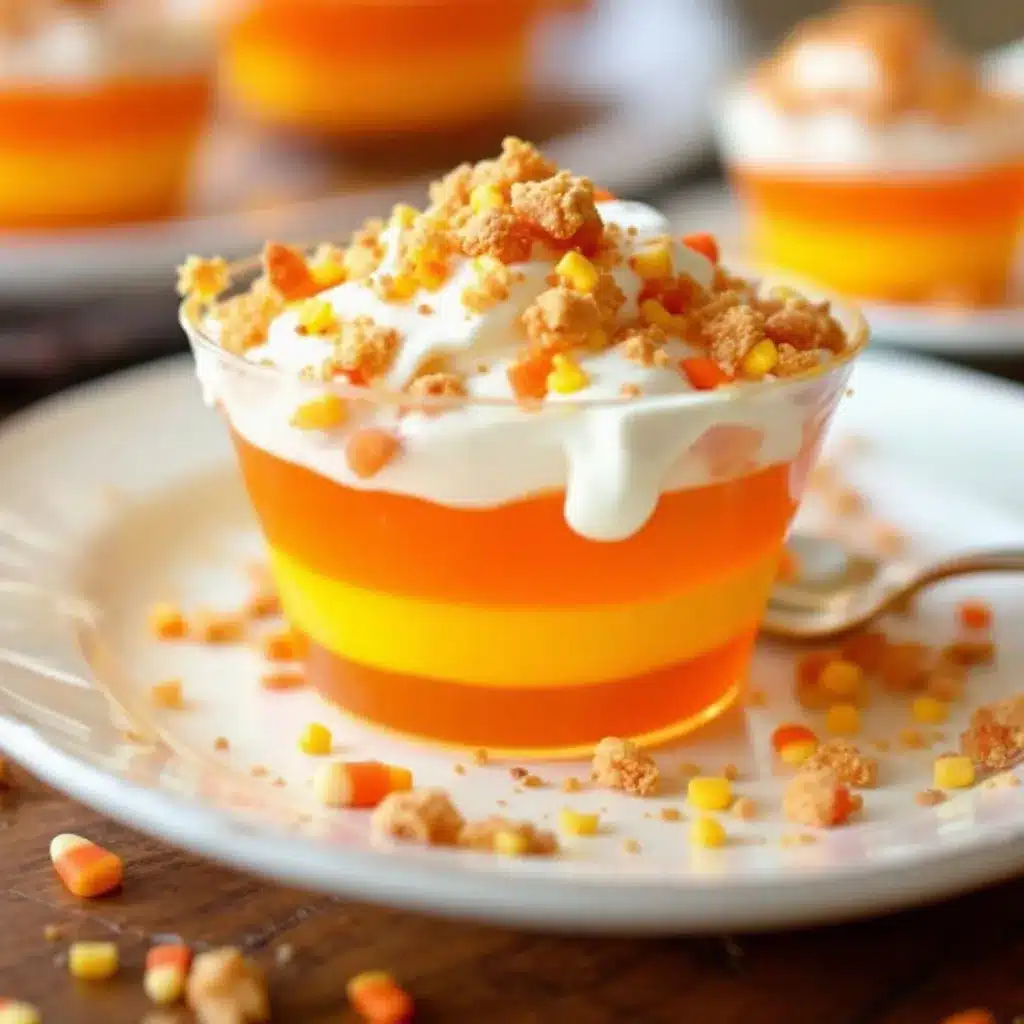
Alright, let’s get to the fun part. This method is broken down into steps so you don’t get overwhelmed. Trust the process, and you’ll have gorgeous, perfect layers every time.
- Prep the First Layer (Yellow Bottom): In a small bowl, empty the entire box of Lemon Jello. Add 1 cup of boiling water and whisk for a full 2 minutes until the granules are completely dissolved. You shouldn’t see any specks. Pour this into your 9×13 dish, tilting it gently to cover the bottom evenly. Pop it in the fridge for about 45 minutes to 1 hour, or until it’s completely set and firm to the touch. Don’t rush this step—if the layer is still tacky, the next layer will bleed into it.
- Prep the Second Layer (Orange Middle): While the first layer is setting, you can get the second one ready. In another bowl, empty the Orange Jello. Add 1 cup of boiling water and whisk until dissolved. Set it aside on the counter to cool to room temperature. You don’t want it hot when you pour it over the set yellow layer, or it will melt the first layer.
- Pour the Second Layer: Once the yellow layer is fully set, gently pour the cooled orange Jello over the top. Use the back of a spoon to help distribute it evenly without disturbing the yellow layer. Return the dish to the fridge for another 45 minutes to 1 hour, until firm.
- Make the Creamy Top Layer: This is the trickiest part, but I promise it’s easy. In a third bowl, empty the Lime Jello. Add 1 cup of boiling water and whisk until dissolved. Now, add 1 cup of cold water and whisk again. Let this mixture cool on the counter for about 10 minutes. Then, slowly pour in the can of evaporated milk while whisking constantly. You’ll see it turn a beautiful, soft pastel yellow—almost white. This is your creamy top layer.
- Pour the Creamy Layer: Make sure the orange layer is fully set. Gently pour the creamy lime mixture over the top. Use a spoon to guide it if needed. Return the dish to the fridge and let it set for at least 4 hours, or overnight for the best results. The longer it sets, the cleaner the slices will be.
- Slice and Serve: Once fully set, you can cut the Jello into squares, or use a sharp knife to cut it into candy corn-shaped triangles. To get clean slices, dip your knife in hot water and wipe it dry between each cut. Use a thin spatula to lift the pieces out.
Sensory Cue: When the Jello is fully set, it should feel firm and springy to the touch, not wobbly or jiggly. The creamy top layer should be smooth and not sticky. If it feels tacky, give it another 30 minutes in the fridge.
Cooking Tips & Techniques
I’ve made these cups about a dozen times now, and I’ve learned a few things the hard way so you don’t have to. Here are my best tips for perfect layers every single time.
The Patience Principle: The number one mistake people make is rushing the setting time. I get it—you’re hungry, the kids are waiting, you want to see the final product. But if you pour a warm layer over a partially set layer, you’ll get a muddy, blended mess. Trust me, I’ve done it. Set a timer and walk away. The fridge is your friend here.
The Temperature Trick: For the creamy top layer, it’s crucial that the gelatin mixture is cooled to room temperature before you add the evaporated milk. If the mixture is too hot, the milk can curdle, leaving you with little white flecks in your Jello. It’s still edible, but it’s not pretty. Let it sit on the counter for a full 10 minutes before adding the milk.
Multitasking Strategy: While the first layer is setting, you can prep the second and third layers. Just leave them on the counter to cool. This saves you a ton of time and makes the whole process feel less like a science experiment and more like a fun afternoon project.
Consistency is Key: If you want the most perfect, crisp layers, use a glass dish. You can actually see through the sides to check if the layers are fully set. It’s a small thing, but it makes a big difference in confidence.
Variations & Adaptations
Once you’ve mastered the basic version, the possibilities are endless. Here are a few ways to make these cups your own.
- Dietary Adaptation (Sugar-Free): You can absolutely use sugar-free Jello for a lower-sugar version. The texture will be slightly different—a little less firm—but it still works beautifully. Just follow the same ratios.
- Flavor Twist (Raspberry Lemonade): Swap the lemon and orange for raspberry and lemonade flavors. The creamy top layer can be made with a berry-flavored Jello for a pinkish hue. It’s a fun summer version that’s totally different from the candy corn look.
- Dairy-Free Option: Instead of evaporated milk, use a full-fat canned coconut milk. It will give you a slightly different flavor—coconut is pretty strong—but it sets up just as well and is perfect for anyone avoiding dairy. I’ve tried this for a friend who’s lactose intolerant, and she loved it.
- Holiday Version (Red, White, and Blue): Use strawberry Jello for the bottom, blueberry for the middle, and the creamy top layer with a lemon or plain flavor. It’s a perfect 4th of July dessert that’s just as easy to make. If you’re looking for more festive summer ideas, check out my Easy Dairy-Free Star Spangled Fruit Pizza for another crowd-pleasing option.
- Personal Variation: My favorite twist is to add a few drops of vanilla extract to the creamy top layer. It gives it a subtle birthday cake flavor that takes these cups over the top. Just whisk it in with the milk.
Serving & Storage Suggestions
These cups are best served cold, straight from the fridge. The texture is perfect when they’re chilled—firm, jiggly, and refreshing.
Serving Temperature: Serve them directly from the fridge. Don’t let them sit out on the counter for more than 10 minutes, or the creamy layer can start to soften.
Presentation: For a fun Halloween party, you can cut the Jello into candy corn shapes using a small cookie cutter or a sharp knife. Arrange them on a platter with a dollop of whipped cream on the side. For a simpler approach, just scoop them into clear plastic cups so everyone can see the layers.
Storage Instructions: Store any leftovers in an airtight container in the fridge. They’ll keep for up to 5 days, but honestly, they never last that long in my house. The layers will stay perfectly intact.
Reheating: Don’t. Just don’t. These are a cold dessert through and through. If you try to reheat them, you’ll get a soupy mess.
Flavor Development: The flavors actually meld together a bit overnight, making the creamy layer taste even more smooth and balanced. So if you can resist eating them right away, they’re even better the next day.
Nutritional Information & Benefits
While these are definitely a treat, there are a few surprising benefits to this dessert. Each serving (about a 2×2 inch square) is roughly:
- Calories: 110
- Protein: 3g
- Carbohydrates: 22g
- Sugar: 18g
- Fat: 2g
Health Benefits: Gelatin is actually a good source of collagen, which is great for skin and joint health. The evaporated milk adds a bit of calcium and protein, making this a slightly more balanced dessert than a plain bowl of Jello. Plus, the portion control is built in—each cup is a perfect single serving.
Dietary Considerations: This recipe is naturally gluten-free and nut-free. It can be made dairy-free with coconut milk and sugar-free with the appropriate Jello boxes. As always, check your labels if you have specific allergies, especially with the evaporated milk.
My Personal Take: I’m not one to pretend a dessert is a health food, but I do feel better about serving these to my family than a bag of candy. They’re colorful, fun, and made from real ingredients you can actually pronounce. That’s a win in my book.
Conclusion
These Easy Candy Corn Layered Jello Cups are proof that you don’t need a fancy pastry degree to make something that looks and tastes incredible. They’re simple, they’re fun, and they’re guaranteed to put a smile on everyone’s face. I love that I can whip them up with ingredients I already have in my pantry, and that they look so impressive without any real effort.
I want you to try these and make them your own. Play with the flavors, change up the colors, and don’t be afraid to get creative. If you make a version with a different flavor combo, I’d love to hear about it in the comments. Drop a photo, share your tips, or just tell me how much your kids loved them. And if you’re looking for another easy, crowd-pleasing dessert that’s perfect for summer, don’t miss my Easy Gluten-Free Red, White & Blueberry Parfaits—they’re just as simple and just as delicious.
Now go make some Jello and have a little fun in the kitchen. You’ve got this!
Frequently Asked Questions
Can I use sugar-free Jello for this recipe?
Yes, absolutely. The texture will be slightly less firm than the regular version, but it still sets up beautifully. Just follow the same measurements and setting times.
How long does it take for each layer to set?
Each layer takes about 45 minutes to 1 hour in the fridge. The final creamy layer needs at least 4 hours, but overnight is best for the cleanest slices.
Can I make these in individual cups instead of a 9×13 dish?
Yes! You can pour the layers directly into clear plastic cups or small glass jars. Just adjust the setting time—individual cups will set a bit faster, so check them after 30 minutes for each layer.
What can I use instead of evaporated milk?
Full-fat canned coconut milk is the best substitute. It sets up just as well and gives a subtle coconut flavor. You can also use heavy cream, but it will be richer and might separate slightly.
Can I freeze these Jello cups?
I don’t recommend freezing them. The texture of Jello changes dramatically when frozen and thawed—it becomes watery and grainy. Stick to the fridge for storage.
Pin This Recipe!
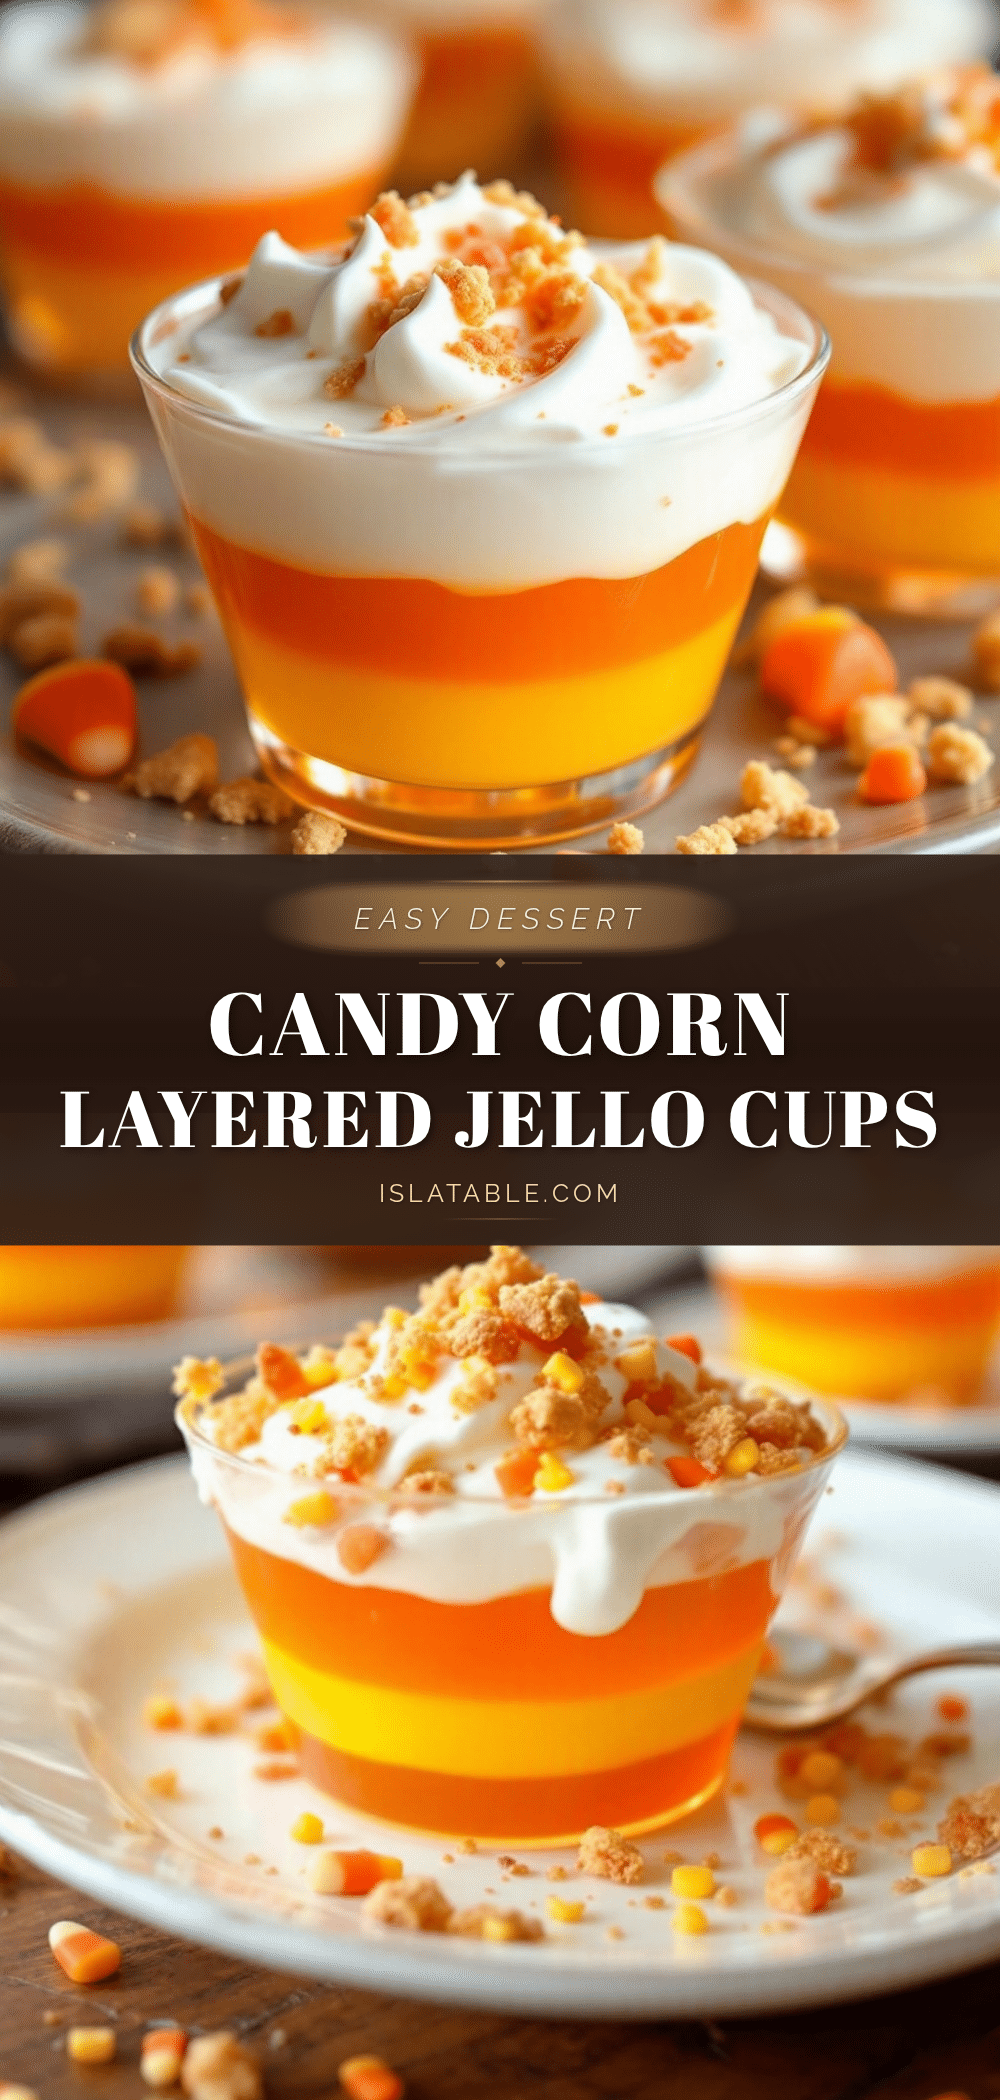
Easy Candy Corn Layered Jello Cups: Best 3-Layer Dessert
These Easy Candy Corn Layered Jello Cups are a fun, no-bake Halloween treat with three distinct layers that mimic candy corn colors. Made with simple ingredients like lemon, orange, and lime Jello plus evaporated milk, they’re quick to prepare and always a crowd-pleaser.
- Prep Time: 15 minutes
- Cook Time: 0 minutes
- Total Time: 5 hours 15 minutes (includes setting time)
- Yield: 12 servings 1x
- Category: Dessert
- Cuisine: American
Ingredients
- 1 box (3 oz) Lemon Jello
- 1 box (3 oz) Orange Jello
- 1 box (3 oz) Lime Jello
- 3 cups boiling water (divided into 1-cup portions)
- 1 cup cold water
- 1 can (12 oz) evaporated milk
Instructions
- Prep the First Layer (Yellow Bottom): In a small bowl, empty the entire box of Lemon Jello. Add 1 cup of boiling water and whisk for a full 2 minutes until the granules are completely dissolved. Pour into a 9×13-inch dish, tilting to cover the bottom evenly. Refrigerate for 45 minutes to 1 hour, or until fully set and firm to the touch.
- Prep the Second Layer (Orange Middle): In another bowl, empty the Orange Jello. Add 1 cup of boiling water and whisk until dissolved. Set aside on the counter to cool to room temperature.
- Pour the Second Layer: Once the yellow layer is fully set, gently pour the cooled orange Jello over the top. Use the back of a spoon to distribute evenly without disturbing the yellow layer. Return to the fridge for another 45 minutes to 1 hour, until firm.
- Make the Creamy Top Layer: In a third bowl, empty the Lime Jello. Add 1 cup of boiling water and whisk until dissolved. Add 1 cup of cold water and whisk again. Let cool on the counter for about 10 minutes. Slowly pour in the evaporated milk while whisking constantly until the mixture turns a soft pastel yellow.
- Pour the Creamy Layer: Ensure the orange layer is fully set. Gently pour the creamy lime mixture over the top. Return to the fridge and let set for at least 4 hours, or overnight for best results.
- Slice and Serve: Once fully set, cut into squares or candy corn-shaped triangles. For clean slices, dip a knife in hot water and wipe dry between cuts. Use a thin spatula to lift pieces out.
Notes
Patience is key: let each layer set completely before adding the next to avoid muddy layers. For the creamy top layer, cool the gelatin mixture to room temperature before adding evaporated milk to prevent curdling. For clean slices, dip knife in hot water and wipe dry between cuts. Store leftovers in an airtight container in the fridge for up to 5 days.
Nutrition
- Serving Size: 1 square (2x2 inch)
- Calories: 110
- Sugar: 18
- Sodium: 85
- Fat: 2
- Saturated Fat: 1
- Carbohydrates: 22
- Protein: 3
Keywords: candy corn, Jello cups, layered Jello, Halloween dessert, no-bake dessert, easy dessert, 3-layer Jello


