For a while, I just accepted that store-bought cookie dough was the only way to get that specific Halloween spook factor without spending hours in the kitchen. It was always too sweet, or the texture was just wrong, lacking that snap that makes a treat feel special. You know how it is when you’re scrolling through Pinterest at 10 PM, looking for something that looks impressive but requires zero actual culinary skill? That was me. I wanted something that looked like a genuine witch finger, complete with a nail and a wrinkled skin effect, but didn’t involve making pie crust from scratch or dealing with temperamental chocolate.
Let’s face it, Halloween baking can be a lot of stress when you have a house full of kids running around. You don’t need another recipe that requires a stand mixer and three cups of flour. I needed a shortcut that didn’t compromise on the scary aesthetic. The gap was clear: a cookie that was crispy, easy to shape, and looked authentically creepy without the fuss. I tried rolling dough into logs, but they always cracked unevenly. I tried piping, but it looked too uniform. It felt like a lost cause until I stumbled onto the concept of using pre-made dough as a canvas.
This recipe changed the game for my annual Halloween party. It arrived not as a triumphant culinary discovery, but as a quiet solution to a persistent problem. I realized that sugar cookie dough, when handled just right, could be molded into anything. The almonds for the nails added that final touch of realism that made the kids gasp (in a good way). It’s matter-of-fact, simple, and gets the job done. Now, every October, I don’t worry about the spooky treats. I just know where to look in the freezer aisle. It sticks because it works, every single time, without any drama.
Why You’ll Love This Recipe
This isn’t just another cookie recipe; it’s a hack that saves your sanity during the busiest month of the year. I’ve tested this method with various brands of dough, and the results are consistently spooky and delicious. The beauty here lies in its simplicity and the high reward for minimal effort. You get that professional-looking Halloween treat vibe without the hours of prep time.
- Quick & Easy: Comes together in under 30 minutes, perfect for busy weeknights or last-minute party planning.
- Simple Ingredients: No fancy grocery trips needed; you likely already have almonds and cookie dough in your pantry or freezer.
- Perfect for Kids: Great for school parties, Halloween parties, or just a fun weekend baking activity with the little ones.
- Crowd-Pleaser: Always gets rave reviews from kids and adults alike, especially when they realize it’s just a cookie.
- Unbelievably Delicious: The texture and flavor combo is next-level comfort food with a fun twist.
What makes this recipe different is the visual impact. Most witch finger recipes rely on complex icing techniques to create wrinkles. This method uses the natural spread and texture of the cookie dough to create realistic creases. It’s not just good—it is the kind of treat that makes you close your eyes after the first bite and just smile. It’s comfort food reimagined—fun, festive, but with the same soul-soothing satisfaction of a warm cookie. Perfect for impressing guests without stress, or turning a simple dessert table into something memorable.
What Ingredients You Will Need
This recipe relies on the quality of your base dough and the freshness of your almonds to create the perfect creepy aesthetic. You don’t need a pantry full of exotic spices. The magic is in the simplicity. We are using a high-fat cookie dough to ensure the “fingers” hold their shape but still bake up with a nice crispy edge. The almonds provide the structural nail, so choosing the right cut is key.
- Sugar Cookie Dough (2 cups): You can use homemade dough for the best flavor, or a high-quality refrigerated tube for speed. I recommend a dough that is slightly soft but not melted. If using homemade, ensure it has enough flour to hold the finger shape.
- Raw Almonds (12-15 whole): Look for large, whole almonds. They need to be big enough to look like fingernails but not so large that they fall off during baking. Raw almonds work best because they don’t have added oil or salt that might interfere with the bake.
- Food Coloring Gel (Red or Black): Gel food coloring is essential here. Liquid coloring will make the dough too wet and cause it to spread too much. Gel provides intense color without altering the texture. Red looks like dried blood, while black looks like a dirty, old nail.
- Flour (for dusting): Just a light dusting on your hands to prevent sticking. All-purpose flour is fine.
- Extra Flour (for the surface): You’ll need a clean surface to roll and shape the dough. Make sure it’s generously floured so the dough doesn’t tear.
For the almonds, I personally prefer buying them from a bulk bin where you can inspect them for cracks. Broken almonds don’t look as realistic. If you can’t find whole almonds, you can use blanched almonds, but the skin on raw almonds actually adds a nice rustic touch. For the dough, if you want to go gluten-free, check out my guide on easy gluten-free cornbread muffins for inspiration on how to handle gluten-free doughs, though sugar cookies can be tricky. Generally, a sturdy gluten-free blend works, but you may need to chill it longer.
Equipment Needed
You don’t need a lot of fancy gadgets for this. A few basic tools will get you from raw dough to spooky cookie in no time.
- Baking Sheets: Two standard baking sheets are ideal. If you only have one, you’ll need to bake in batches. Make sure they are clean and dry.
- Parchment Paper: Line your baking sheets with parchment paper. This prevents sticking and makes cleanup a breeze. I never bake these directly on the metal; the almond nails can scratch the pan.
- Pastry Brush: A small pastry brush is helpful if you want to add a little water or egg wash to help the almonds stick. However, the dough’s natural tackiness usually works fine.
- Small Knife or Paring Knife: You can use this to trim the almond tips if they are too long or to score the dough for wrinkles.
- Ziplock Bags: Optional, but useful for storing leftover dough or keeping the almonds organized.
I’ve tried using silicone mats, and they work, but parchment paper gives a slightly better crisp on the bottom. If you don’t have a pastry brush, your fingers work just as well for pressing the almonds in. For budget-friendly options, any standard baking sheet from a thrift store will do. Just make sure it’s not warped, or your cookies will bake unevenly.
Preparation Method
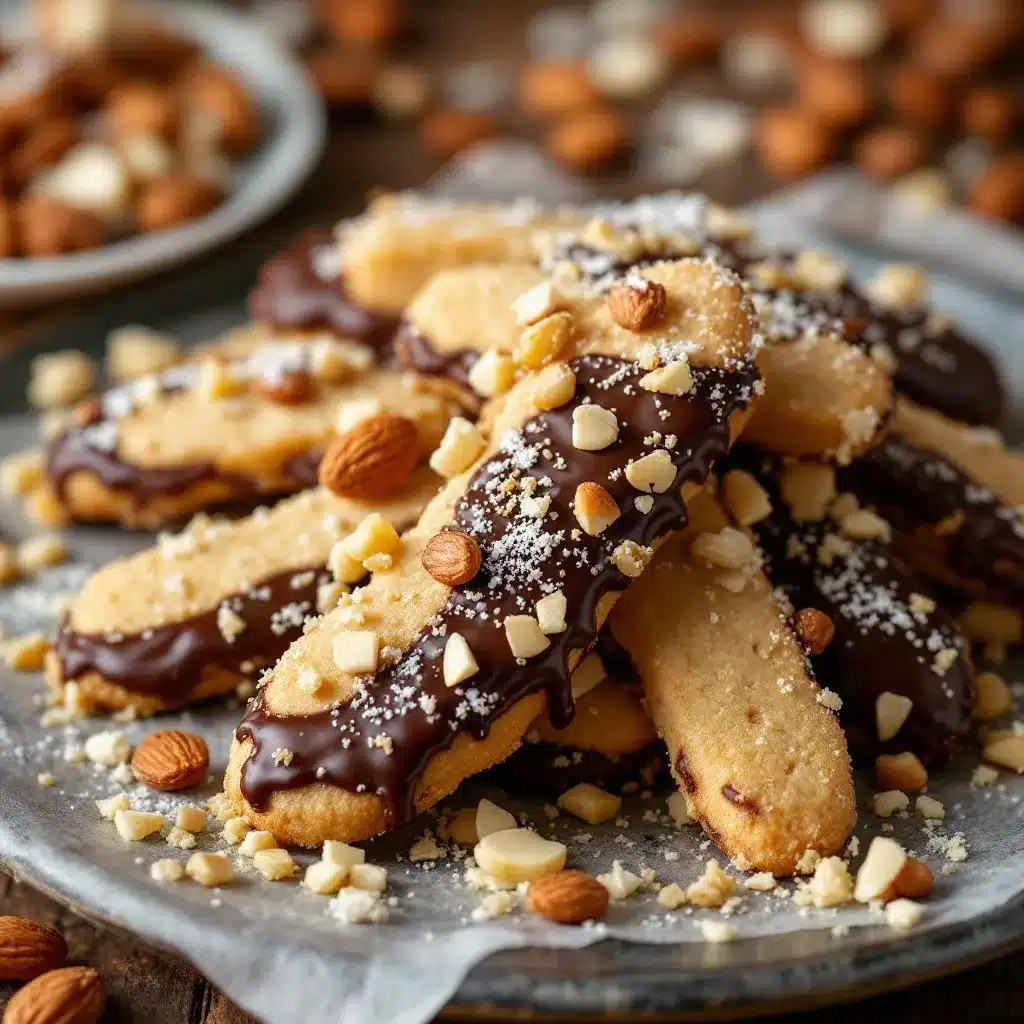
Getting the shape right is the most important part. Take your time here. Rushing leads to lumpy fingers that don’t look like fingers.
- Prepare the Dough: If using refrigerated dough, let it sit at room temperature for about 10-15 minutes. It needs to be pliable. If it’s too cold, it will crack when you roll it. If it’s too warm, it will lose its shape. Cut the dough into portions of about 2 tablespoons each. This will give you 12-15 fingers depending on the size of your almonds.
- Shape the Fingers: Take a portion of dough and roll it between your palms to form a smooth ball. Then, gently roll it on the counter to form a tapered cylinder. One end should be thicker (the knuckle) and the other thinner (the fingertip). It should look roughly like a human finger. Place it on a parchment-lined tray. Repeat with all dough portions.
- Create Wrinkles: This is the secret step. Take a small knife or the back of a spoon and gently press lines into the dough. Focus on the “knuckle” area and near the tip. You want natural-looking creases. Don’t overdo it; you want it to look like skin, not a rope. Score lightly.
- Add the Nails: Take a raw almond and press the pointed end into the thinner tip of the dough finger. Press it in about halfway so it’s secure but still visible. If the dough is too dry, dab a tiny bit of water on the tip first. The almond should sit firmly.
- Color the Nails: Dip the tip of the almond (the part sticking out) into your red or black gel food coloring. You can use a toothpick or just dip it quickly. The goal is to make it look like a dirty or bloody nail. Let the excess drip off.
- Chill: Place the tray in the refrigerator for at least 30 minutes. This firms up the dough so the fingers don’t spread out in the oven. This step is non-negotiable if you want sharp, defined fingers.
- Bake: Preheat your oven to 350°F (175°C). Bake for 10-12 minutes, or until the edges are lightly golden. The centers will still be soft. Let them cool on the baking sheet for 5 minutes before transferring to a wire rack. They will crisp up as they cool.
How do I prevent the almonds from falling off?
Chilling the dough before baking is the key. If the dough is too warm, the almond will sink in or fall off. Also, pressing the almond in firmly but gently ensures it embeds into the surface.
Can I use store-bought cookie dough?
Yes, absolutely. This is a great hack for using up leftover dough. Just make sure it’s a sugar cookie or vanilla cookie dough. Gingerbread or chocolate dough won’t give the same “skin” tone effect.
Cooking Tips & Techniques
One thing I learned the hard way is that not all almond cuts are created equal. Some almonds are curved, which makes them look like bent fingers. This can be a feature, not a bug, if you want a more realistic or grotesque look. But if you want straight fingers, look for the straightest almonds you can find. Also, don’t skip the chilling step. I once tried to bake them immediately, and they turned into flat, nail-less discs. It was a disaster, but a funny one. Now, I always chill them.
Another tip is to keep your hands floured while shaping. Cookie dough is sticky, and you don’t want to tear the delicate “skin” wrinkles you just created. If the dough gets too warm in your hands, put it back in the fridge for a few minutes. Multitasking here means having your almonds prepped and your food coloring ready before you start shaping. Timing is everything.
For consistency, try to make all your fingers the same size. This ensures they bake evenly. If one is too thick, it might burn before the thinner ones are done. Use a kitchen scale if you want to be precise, but eyeballing it works fine for Halloween fun. The goal is uniformity in appearance, not perfection in measurement.
Variations & Adaptations
While the classic witch finger is great, you can mix it up. Try using gluten-free red white blueberry parfaits as a theme for a summer twist, but for Halloween, stick to the spooky colors. You can use hazelnuts instead of almonds for a different nutty flavor, though they are smaller. For a dairy-free version, use a vegan cookie dough base. The technique remains the same. You can also use different colors for the nails, like green or purple, for a more fantasy witch vibe. If you want a healthier option, you can use almond flour dough, but it will be more crumbly. I also tried using raisins as “fingernails” for a fun, nut-free alternative for school parties. It’s less realistic but still fun for kids.
Serving & Storage Suggestions
Serve these cookies on a platter with some fake cobwebs or black tulle for extra effect. They pair well with a glass of cold milk or a spooky themed drink. Store leftovers in an airtight container at room temperature for up to 5 days. If you live in a humid climate, add a paper towel to absorb moisture. They can also be frozen before baking. Just place the shaped, uncooked fingers on a tray, freeze them solid, then transfer to a freezer bag. Bake straight from frozen, adding 2-3 minutes to the baking time. The flavors develop nicely over the first day, as the cookies crisp up further.
Nutritional Information & Benefits
These cookies are primarily sugar and flour, so they are a treat to be enjoyed in moderation. Each cookie contains roughly 80-100 calories, depending on the size of the dough portion and the almond. The almonds add a bit of healthy fat and protein, which helps balance the sugar spike slightly. They are not suitable for those with nut allergies, so always check with your guests. For a lower-carb option, you can use a keto-friendly cookie dough, but the texture will be different. I view these as a fun, occasional treat rather than a health food. Enjoy the process and the taste, but keep an eye on the portion size.
Conclusion
These Crispy Witch Finger Cookies are a winner every time. They are easy to make, look amazing, and taste great. I love them because they take the stress out of Halloween baking. You can make them with your kids, and they will have a blast shaping the fingers. Customize them with different colors or nuts to suit your taste. I hope you enjoy making these as much as I do. Please leave a comment below and let me know how they turned out! Share your photos on social media and tag me. Happy Halloween!
FAQs
Can I use frozen cookie dough?
Yes, but let it thaw slightly so it’s pliable. If it’s too hard, it will crack when you try to shape it.
What if I don’t have gel food coloring?
You can use liquid food coloring, but use very little to avoid making the dough wet. Dip the almond quickly and let it dry.
How long do these cookies stay fresh?
They stay fresh for about 5 days in an airtight container. They might get soft if it’s humid.
Can I make these nut-free?
Yes, use raisins or chocolate chips as “nails” instead of almonds. It’s a fun alternative for nut-free environments.
Why did my cookies spread too much?
Probably because the dough was too warm. Always chill the shaped fingers before baking to help them hold their shape.
Pin This Recipe!

Crispy Witch Finger Cookies: 3-Ingredient Halloween Treat

A spooky and easy Halloween cookie hack using sugar cookie dough and almonds to create realistic witch fingers with wrinkled skin and nail details.
- Prep Time: 15 minutes
- Cook Time: 12 minutes
- Total Time: 27 minutes
- Yield: 12-15 servings 1x
- Category: Dessert
- Cuisine: American
Ingredients
- 2 cups Sugar Cookie Dough (homemade or refrigerated tube)
- 12–15 whole Raw Almonds
- Red or Black Gel Food Coloring
- Flour (for dusting hands and surface)
Instructions
- Let refrigerated dough sit at room temperature for 10-15 minutes until pliable. Cut into 2-tablespoon portions.
- Roll each portion into a smooth ball, then gently roll on a floured surface to form a tapered cylinder resembling a finger.
- Place fingers on a parchment-lined baking sheet.
- Use a small knife or spoon back to gently press lines into the dough at the knuckle and tip areas to create wrinkles.
- Press the pointed end of an almond into the thinner tip of the dough finger, embedding it halfway.
- Dip the exposed tip of the almond into gel food coloring to resemble a dirty or bloody nail.
- Chill the tray in the refrigerator for at least 30 minutes to firm up the dough.
- Preheat oven to 350°F (175°C).
- Bake for 10-12 minutes until edges are lightly golden.
- Let cool on the baking sheet for 5 minutes before transferring to a wire rack to crisp up.
Notes
Chilling the dough before baking is essential to prevent spreading and ensure the almonds stay attached. Use gel food coloring to avoid altering dough texture. For nut-free versions, substitute almonds with raisins or chocolate chips.
Nutrition
- Serving Size: 1 cookie
- Calories: 90
- Sugar: 8
- Sodium: 45
- Fat: 4
- Saturated Fat: 1
- Carbohydrates: 12
- Fiber: 0.5
- Protein: 1.5
Keywords: Halloween cookies, witch fingers, sugar cookie hack, easy Halloween treats, 3-ingredient recipe, spooky snacks


