My niece showed up at my door on a rainy October afternoon, clutching a bag of candy corn and looking frankly disappointed that I hadn’t turned my kitchen into a haunted house yet. The fridge was bare except for butter, eggs, and a block of cream cheese I’d bought for bagels I never got around to eating. I had exactly one hour before her mom came back, and the pressure was on.
I started pulling things from the pantry—flour, sugar, cocoa powder, vanilla—and realized I could make a cookie cake. But not just any cookie cake. This needed to look like something that belonged at a Halloween party, even if we were just two people in a kitchen that smelled faintly of last night’s garlic. I shaped the dough into a big round, pressed in some chocolate chips, and then it hit me: I could cut out little ears and a tail from the extra dough, arrange them before baking, and turn this thing into a black cat. It was a ridiculous, last-minute idea, but honestly, that’s how the best ideas happen.
The cat came out lopsided. One ear was bigger than the other, and the tail looked more like a wonky snake. But when I set it on the cooling rack, my niece’s face lit up like I’d handed her the moon. She didn’t care that it wasn’t perfect. She cared that it was a black cat cookie cake, and it was ours. That moment stuck with me—not because of the recipe, but because of the feeling. This Best Black Cat Halloween Cookie Cake isn’t about precision or bakery-level decorating. It’s about making something spooky and sweet when you have almost nothing planned, and watching someone smile because you tried.
So if you’re looking for an easy Halloween dessert that doesn’t require piping bags or fondant or three hours of your life, you’re in the right place. This recipe is forgiving, flexible, and honestly, it tastes way better than it has any right to for how simple it is. Let’s make a black cat.
Why You’ll Love This Recipe
I’ve tested this cookie cake four times now, and I can tell you with confidence that it works every single time. Here’s why this one stands out from the usual Halloween treats:
- Quick & Easy : From start to finish, you’re looking at about 45 minutes. That includes mixing, shaping, baking, and cooling. Perfect for a last-minute Halloween party or a Tuesday night craving.
- Simple Ingredients : You probably have most of these in your kitchen right now. No specialty candy melts, no gel food coloring, no trips to three different stores. Just butter, sugar, eggs, flour, cocoa, and chocolate chips.
- Perfect for Halloween : This works for classroom parties, office potlucks, or a quiet night in with the kids. It’s festive without being fussy.
- Crowd-Pleaser : Every time I’ve made this, it disappears fast. Kids love the cat shape, and adults love that it’s basically a giant chocolate chip cookie with a spooky twist.
- Unbelievably Delicious : The edges get slightly crisp, the center stays soft and chewy, and the chocolate chips melt into little pockets of gooey goodness. It’s comfort food in cat form.
What makes this different from other Halloween cookie cakes? It’s the texture. I use a ratio of brown sugar to white sugar that gives you that perfect chew, plus a touch of cornstarch for softness. And instead of royal icing or complicated decorations, you just shape the dough into a cat silhouette before baking. No decorating skills required. This is the kind of dessert that makes you close your eyes after the first bite because it’s that good—and it’s also the kind that makes you feel like a kitchen rockstar when someone asks, “Wait, you made that?”
What Ingredients You Will Need
This recipe relies on basic baking staples, but each one plays a specific role in getting that soft, chewy texture and rich chocolate flavor. Here’s what you need and why each ingredient matters.
For the Cookie Cake Base
- Unsalted butter, softened (1 cup / 2 sticks / 226g) – I use unsalted so I can control the salt level. Let it sit out for about 30 minutes before starting. If you forget, microwave it in 10-second bursts, but don’t melt it—you want it soft, not liquid.
- Granulated sugar (½ cup / 100g) – Adds sweetness and helps with spreading during baking.
- Light brown sugar, packed (¾ cup / 150g) – This is the secret to a chewy cookie cake. The molasses in brown sugar keeps things moist and adds a subtle caramel-like flavor.
- Large egg (1, room temperature) – Room temperature eggs incorporate more evenly into the butter mixture. If you’re in a rush, place the egg in a bowl of warm water for 5 minutes.
- Vanilla extract (2 teaspoons) – Pure vanilla makes a difference here. I prefer Nielsen-Massey, but any good brand works.
- All-purpose flour (2 cups / 250g) – Spoon and level your flour—don’t scoop directly from the bag or you’ll end up with a dry, crumbly dough.
- Cornstarch (2 tablespoons / 16g) – This is my secret weapon for soft cookie cakes. It tenderizes the gluten and keeps the center from getting tough.
- Unsweetened cocoa powder (½ cup / 50g) – I use Dutch-process cocoa for a darker, more intense chocolate flavor. Natural cocoa works too, but the color will be lighter and the flavor slightly more acidic.
- Baking soda (1 teaspoon) – Helps the cookie cake rise just enough to stay thick and soft.
- Salt (½ teaspoon) – Balances the sweetness and enhances the chocolate flavor. I use fine sea salt.
- Semi-sweet chocolate chips (1 cup / 175g) – I like Ghirardelli or Guittard for consistent melting. You can also use dark chocolate chips if you prefer less sweetness.
For the Cat Details (Optional but Fun)
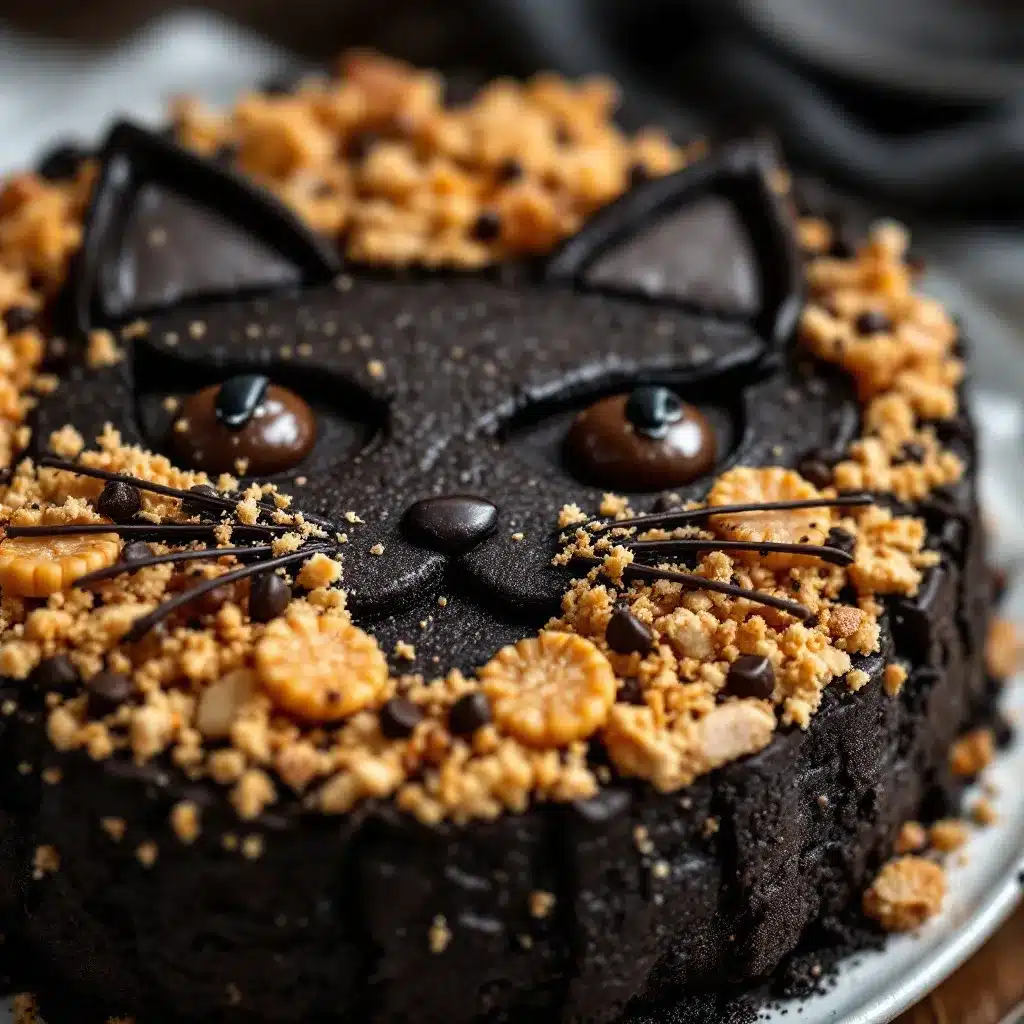
- White chocolate chips or candy eyes (a handful) – For the eyes. I just press in two white chocolate chips before baking, then add a tiny dot of melted dark chocolate for the pupils after cooling.
- Extra dough – Reserve about ¼ cup of dough before adding chocolate chips. Use this to shape ears and a tail.
One note on substitutions: If you’re gluten-free, swap the all-purpose flour for a 1:1 gluten-free baking flour blend. I’ve tested this with King Arthur Measure for Measure, and it works beautifully. Just add an extra tablespoon of milk if the dough feels too dry.
Equipment Needed
You don’t need fancy equipment for this recipe, which is part of why I love it. Here’s what you’ll need:
- Large mixing bowl – Any bowl works, but a wide one makes creaming the butter and sugar easier.
- Electric hand mixer or stand mixer – You can do this by hand with a wooden spoon, but a mixer saves time and gives you a fluffier texture. I use my KitchenAid for this.
- Parchment paper – Essential for easy cleanup and preventing sticking. I always line my baking sheet.
- Baking sheet – A standard 13×18 inch sheet works. If yours is dark, keep an eye on the bottom—dark pans brown faster.
- Rubber spatula – For scraping down the sides of the bowl and folding in chocolate chips.
- Measuring cups and spoons – For accuracy. I use dry measuring cups for flour and sugar, and liquid measuring cups for vanilla.
- Cooling rack – Lets air circulate under the cookie cake so the bottom doesn’t get soggy.
That’s it. No cookie cutters, no piping bags, no special pans. If you have these basics, you’re ready to go.
Preparation Method
Follow these steps, and you’ll have a black cat cookie cake that’s both spooky and scrumptious. I’ve included timing estimates and sensory cues so you know exactly what to look for at each stage.
- Preheat and prep. Preheat your oven to 350°F (175°C). Line a baking sheet with parchment paper. This is non-negotiable—parchment prevents sticking and makes cleanup a breeze.
- Cream the butter and sugars. In a large mixing bowl, beat the softened butter, granulated sugar, and brown sugar together on medium speed until light and fluffy. This takes about 3-4 minutes with a hand mixer. You’re looking for a pale, airy mixture that looks like wet sand. Scrape down the sides of the bowl once during this process.
- Add the egg and vanilla. Crack the egg into a small bowl first (just in case of shells), then add it to the butter mixture along with the vanilla. Beat on low speed until just combined. Don’t overmix here—you just want the egg incorporated. The mixture might look slightly curdled, and that’s okay.
- Whisk the dry ingredients. In a separate bowl, whisk together the flour, cornstarch, cocoa powder, baking soda, and salt. Whisking aerates the flour and ensures the leavening agents are evenly distributed. No clumps allowed.
- Combine wet and dry. Gradually add the dry ingredients to the wet mixture, mixing on low speed. Stop as soon as the flour disappears. You should have a thick, dark brown dough that smells intensely chocolatey. If it looks dry, that’s normal—the moisture from the butter and egg will hydrate the flour as it rests.
- Fold in chocolate chips. Using a rubber spatula, fold in the chocolate chips until they’re evenly distributed. Reserve about ¼ cup of plain dough (before adding chips) in a small bowl for the cat details.
- Shape the cat. Transfer the dough to the prepared baking sheet. Using your hands, shape it into a rough circle about 8 inches in diameter and ½ inch thick. Don’t worry about perfection—you’ll refine the shape after baking. Use the reserved plain dough to form two pointed ears and a curved tail. Press them gently onto the main body. The dough will spread slightly during baking, so make the ears a bit larger than you think you need.
- Bake. Bake at 350°F (175°C) for 18-22 minutes. At 18 minutes, the edges should look set and slightly cracked, but the center will still look soft and puffy. That’s exactly what you want—it continues baking as it cools. For a softer, gooier center, pull it at 18 minutes. For a firmer texture, go to 22 minutes. My sweet spot is 20 minutes.
- Cool completely. Let the cookie cake cool on the baking sheet for 10 minutes, then transfer it to a cooling rack. Do not skip this step. The cookie cake is fragile when hot, and moving it too soon can cause it to break. After 30 minutes, it should be firm enough to handle.
- Add the face. Once completely cool, press two white chocolate chips into the dough for eyes. If you want pupils, melt a few dark chocolate chips in the microwave (15-second bursts) and use a toothpick to dot the center of each white chip. You can also draw a little mouth with melted chocolate, but I prefer to keep it simple—just the eyes gives it a cute, slightly mysterious look.
Cooking Tips & Techniques
I’ve made my share of baking mistakes, and I’m happy to share what I’ve learned so you don’t have to repeat them.
Don’t overmix the dough. This is the number one mistake people make with cookie cakes. Overmixing develops gluten, which makes the cake tough and bread-like instead of tender and chewy. Mix just until the flour disappears, then stop.
Chill the dough if you have time. I know, I know—I didn’t chill it in my original story because I was in a rush. But if you have 30 minutes to spare, pop the shaped cookie cake in the fridge before baking. Chilling solidifies the butter, which means less spreading and a thicker, softer center. It’s a game-changer.
Watch the edges. Cookie cakes can go from perfect to overdone in about 90 seconds. Start checking at 18 minutes. The edges should be set and slightly darker than the center. If the edges are browning too fast but the center is still raw, tent the whole thing with aluminum foil for the last 5 minutes of baking.
Use a kitchen scale for accuracy. I know not everyone has one, but if you do, weigh your flour. Scooping flour directly from the bag can add up to 30% more flour than the recipe calls for, which leads to a dry, crumbly cookie cake. If you don’t have a scale, spoon the flour into your measuring cup and level it off with a knife.
Let it cool completely before decorating. I learned this the hard way. I once tried to press candy eyes into a warm cookie cake, and they melted into sad little puddles. Patience pays off. Wait until the cookie cake is at room temperature, then add your decorations.
Variations & Adaptations
This recipe is endlessly adaptable, and I’ve tried several variations myself. Here are some of my favorites:
- Gluten-Free Version : Swap the all-purpose flour for a 1:1 gluten-free baking blend. I’ve tested this with King Arthur Measure for Measure, and it works perfectly. Add 1 tablespoon of milk if the dough feels too dry.
- Vegan Version : Use vegan butter (I like Miyoko’s) and a flax egg (1 tablespoon ground flaxseed mixed with 3 tablespoons water, let sit for 5 minutes). The texture will be slightly less tender, but it’s still delicious.
- Peanut Butter Swirl : Before baking, drop spoonfuls of peanut butter on top of the shaped dough and swirl it in with a knife. The combination of chocolate and peanut butter is always a hit.
- White Chocolate Chips : Swap the semi-sweet chips for white chocolate chips for a lighter, sweeter flavor. This looks especially cute against the dark cocoa background.
- Spooky Add-Ins : Fold in ½ cup of pretzel pieces (for “bones”) or ¼ cup of crushed candy corn for a festive crunch. Just keep the total add-ins to about 1¼ cups so the dough doesn’t get overloaded.
- Ghost Variation : Skip the cat shape and shape the dough into a ghost instead. Use white chocolate chips for eyes and a small piece of white chocolate for the mouth. It’s equally cute and even easier to shape.
I personally love the peanut butter swirl version. It reminds me of the peanut butter cup cookies my grandma used to make, but in a giant, shareable form. If you’re looking for another easy dessert that feeds a crowd, you might also enjoy our dairy-free star-spangled fruit pizza for a completely different take on festive sweets.
Serving & Storage Suggestions
This cookie cake is best served at room temperature, but honestly, it’s also incredible straight from the fridge—the chocolate chips get extra firm and snappy. Here’s how to serve and store it for maximum enjoyment.
Serving: Cut the cookie cake into wedges like a pizza. For Halloween parties, I like to serve it on a black or orange plate with a dusting of powdered sugar (it looks like snow on a dark night). Pair it with a glass of cold milk, a scoop of vanilla ice cream, or a warm mug of spiced cider. If you’re feeling extra festive, drizzle some melted white chocolate over the top for a spiderweb effect.
Storage: Store leftover cookie cake in an airtight container at room temperature for up to 3 days. If you live in a humid climate, pop it in the fridge after day one to prevent it from getting soggy. To freeze, wrap the cooled, undecorated cookie cake tightly in plastic wrap, then in foil. Freeze for up to 3 months. Thaw at room temperature for about an hour before adding decorations and serving.
Reheating: For that fresh-from-the-oven experience, microwave individual slices for 10-15 seconds. The chocolate chips will get melty again, and the edges will soften slightly. If you’re reheating the whole cake, place it in a 300°F (150°C) oven for 5-7 minutes.
One thing I’ve noticed: the flavor actually improves after day one. The cocoa and vanilla meld together overnight, giving the cake a deeper, more rounded chocolate taste. So don’t be afraid to make this a day ahead.
Nutritional Information & Benefits
Let’s be real—this is a dessert, not a health food. But I believe in enjoying treats in moderation, and this cookie cake has a few redeeming qualities worth mentioning.
Per serving (1/8 of the cake): approximately 380 calories, 18g fat, 52g carbohydrates, 5g protein, 2g fiber, 30g sugar. These values are estimates and will vary based on specific brands and substitutions.
The cocoa powder is actually a decent source of antioxidants, specifically flavonoids, which can support heart health. Dark chocolate chips add a bit more of those beneficial compounds. And if you use semi-sweet chips instead of milk chocolate, you’ll get less added sugar per bite.
For dietary considerations: This recipe contains gluten, dairy, and eggs. For a gluten-free version, use a 1:1 gluten-free flour blend. For a dairy-free version, use vegan butter and dairy-free chocolate chips. The vegan adaptation I mentioned earlier works well for those avoiding eggs.
I’m not a nutritionist, and I don’t pretend to be one. But I do believe that a treat made from real ingredients—butter, eggs, flour, chocolate—is better than anything that comes from a box or a plastic wrapper. This cookie cake is made with love, and that counts for something.
Conclusion
This Best Black Cat Halloween Cookie Cake is proof that you don’t need fancy tools or hours of time to create something memorable. It started as a panic bake with a disappointed niece and a bare fridge, and it turned into a tradition I actually look forward to every October. The cookie cake is soft, chocolatey, and just spooky enough to feel festive without being intimidating.
I hope you try this recipe and make it your own. Add extra chocolate chips. Shape the ears a little bigger. Give your cat a crooked smile or no smile at all. The beauty of this recipe is that it’s forgiving—it wants you to succeed, even if your cat looks more like a bear or a blob. That’s half the fun.
If you do make it, I’d love to hear how it turned out. Drop a comment below and tell me about your black cat—or send a photo if you’re feeling proud. And if you’re looking for another easy dessert that’s perfect for feeding a crowd, check out our creamy Mexican street corn pasta salad for a sweet and savory twist on potluck favorites.
Happy Halloween, and happy baking!
Frequently Asked Questions
Can I use a different shape instead of a cat?
Absolutely! This dough works for any shape you can dream up. Try a ghost, pumpkin, bat, or even a simple round spider web. Just adjust the baking time slightly for smaller shapes—check at 12 minutes for mini cookies.
Why did my cookie cake spread too much?
This usually happens for one of three reasons: your butter was too soft or melted, you didn’t chill the dough, or your baking sheet was too warm when you put the dough on it. Next time, chill the shaped dough for 20 minutes before baking, and use a cool baking sheet.
Can I make this ahead of time for a party?
Yes! You can bake the cookie cake up to 2 days ahead. Store it in an airtight container at room temperature, and add the face decorations just before serving. You can also freeze the unbaked shaped dough for up to 3 months—just bake straight from frozen, adding 3-5 minutes to the baking time.
How do I get the ears to stay pointy?
Make the ears slightly thicker than the rest of the dough—about ¾ inch instead of ½ inch. Also, press the base of each ear firmly onto the main body so they fuse during baking. If they still spread into round blobs, you can trim and reshape them with a knife while the cookie cake is still warm.
Can I use a different type of chocolate?
Of course! Dark chocolate chips give a richer, less sweet flavor. Milk chocolate chips make it sweeter and more kid-friendly. White chocolate chips create a fun contrast against the dark cocoa base. You can even use a combination of all three for a chocolate lover’s dream.
Pin This Recipe!
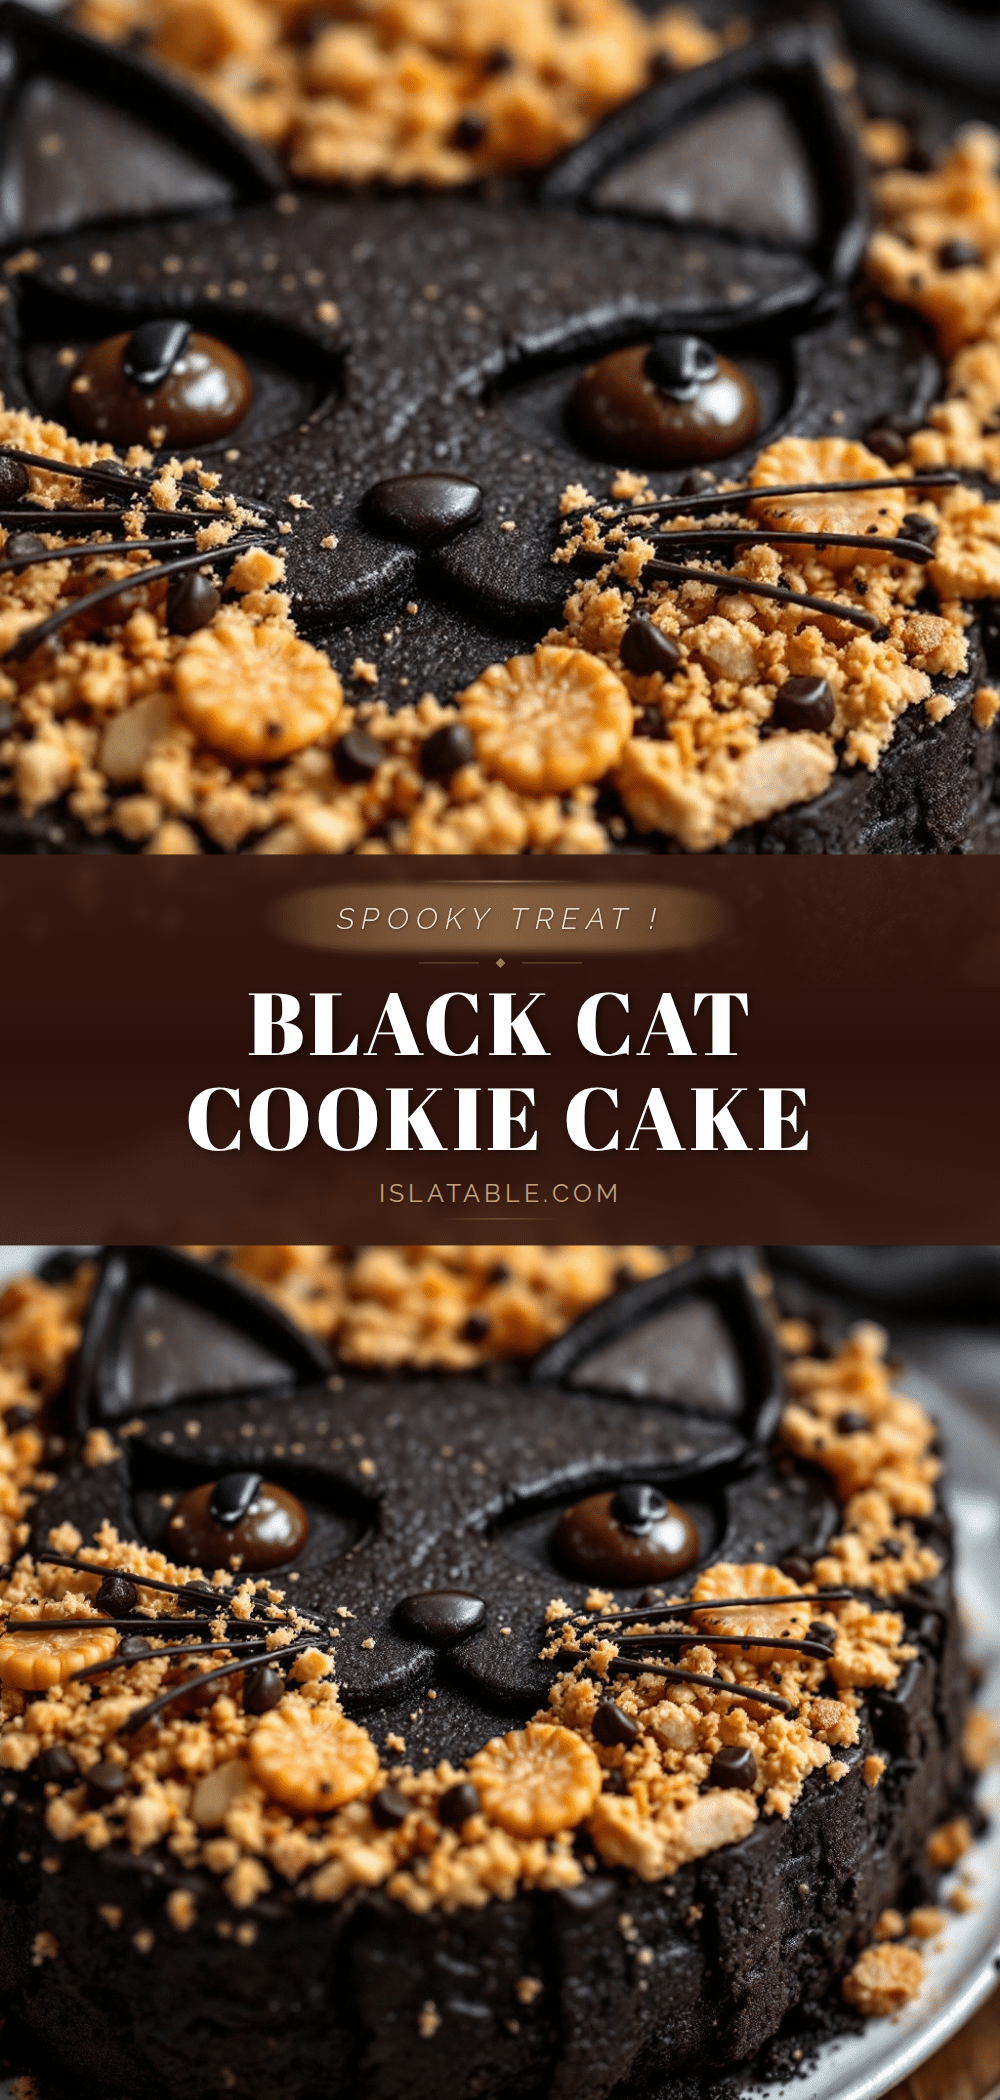
Best Black Cat Halloween Cookie Cake – Easy Spooky Dessert

This Best Black Cat Halloween Cookie Cake is a soft, chewy chocolate chip cookie cake shaped like a black cat. It’s an easy, last-minute Halloween dessert that requires no fancy decorating skills and is perfect for parties or a fun night in.
- Prep Time: 15 minutes
- Cook Time: 20 minutes
- Total Time: 45 minutes
- Yield: 8 servings 1x
- Category: Dessert
- Cuisine: American
Ingredients
- 1 cup (2 sticks / 226g) unsalted butter, softened
- ½ cup (100g) granulated sugar
- ¾ cup (150g) light brown sugar, packed
- 1 large egg, room temperature
- 2 teaspoons vanilla extract
- 2 cups (250g) all-purpose flour
- 2 tablespoons (16g) cornstarch
- ½ cup (50g) unsweetened cocoa powder (Dutch-process preferred)
- 1 teaspoon baking soda
- ½ teaspoon fine sea salt
- 1 cup (175g) semi-sweet chocolate chips
- White chocolate chips or candy eyes (for decoration)
- Extra dough (reserve ¼ cup for ears and tail)
Instructions
- Preheat oven to 350°F (175°C). Line a baking sheet with parchment paper.
- In a large mixing bowl, beat softened butter, granulated sugar, and brown sugar together on medium speed until light and fluffy, about 3-4 minutes. Scrape down the sides once.
- Add the egg and vanilla extract. Beat on low speed until just combined. The mixture may look slightly curdled.
- In a separate bowl, whisk together flour, cornstarch, cocoa powder, baking soda, and salt.
- Gradually add the dry ingredients to the wet mixture, mixing on low speed until just combined. Do not overmix.
- Fold in the chocolate chips with a rubber spatula. Reserve about ¼ cup of plain dough (without chips) for the cat details.
- Transfer the dough to the prepared baking sheet. Shape into a rough circle about 8 inches in diameter and ½ inch thick. Use the reserved plain dough to form two pointed ears and a curved tail, pressing them gently onto the main body.
- Bake at 350°F (175°C) for 18-22 minutes. For a softer center, bake 18 minutes; for firmer, bake 22 minutes. The edges should be set and slightly cracked, the center soft and puffy.
- Let the cookie cake cool on the baking sheet for 10 minutes, then transfer to a cooling rack. Cool completely before decorating.
- Once cool, press two white chocolate chips into the dough for eyes. For pupils, melt a few dark chocolate chips and use a toothpick to dot the center of each white chip. Optionally, draw a mouth with melted chocolate.
Notes
For a thicker, softer center, chill the shaped dough for 30 minutes before baking. Start checking for doneness at 18 minutes to avoid overbaking. Let the cookie cake cool completely before adding decorations to prevent melting. The flavor improves after a day.
Nutrition
- Serving Size: 1/8 of the cake
- Calories: 380
- Sugar: 30
- Sodium: 220
- Fat: 18
- Saturated Fat: 11
- Carbohydrates: 52
- Fiber: 2
- Protein: 5
Keywords: Halloween cookie cake, black cat cookie cake, easy Halloween dessert, chocolate chip cookie cake, spooky dessert, last-minute Halloween treat


