Let me tell you, the sweet, marshmallowy scent of melted butter and marshmallows mingling in the kitchen is enough to make anyone’s mouth water. The first time I made these Easy Peeps Rice Krispie Nests, I was instantly hooked—the kind of moment where you pause, take a deep breath, and just smile because you know you’ve found a springtime treat that’s pure joy. Years ago, when I was knee-high to a grasshopper, my grandma used to make simple Rice Krispie treats, but adding those colorful Peeps chicks on top? That’s a game-changer I wish I’d discovered way sooner.
Honestly, my family couldn’t stop sneaking the nests off the cooling rack (and I can’t really blame them). It’s that dangerously easy recipe that brings pure, nostalgic comfort with a fun, festive twist. You know what else? These nests are perfect for potlucks, Easter brunches, or just brightening up your Pinterest cookie board for spring. After testing this recipe a handful of times (in the name of research, of course), it’s become a staple for family gatherings and gifting. If you’re looking for a simple, colorful, and crowd-pleasing treat that feels like a warm hug in dessert form, you’re going to want to bookmark this one.
Why You’ll Love This Recipe
From my many kitchen trials and family taste tests, here’s why this Easy Peeps Rice Krispie Nests recipe stands out:
- Quick & Easy: Comes together in under 20 minutes, perfect for those busy spring afternoons or last-minute party prep.
- Simple Ingredients: No fancy grocery trips needed; you likely already have everything in your pantry except the Peeps, of course.
- Perfect for Springtime Celebrations: Great for Easter baskets, classroom parties, or a sweet treat for your kiddos.
- Crowd-Pleaser: Always gets rave reviews from both kids and adults—those colorful Peeps chicks are impossible to resist.
- Unbelievably Delicious: The crispy, buttery base combined with the soft, sugary Peeps creates a texture and flavor combo that’s pure spring magic.
This isn’t just another Rice Krispie treat recipe. I’ve found that gently folding in the marshmallows instead of aggressively stirring helps keep the nests light and airy. Plus, choosing fresh, fluffy Peeps gives that perfect pop of color and fun. This recipe is the kind that makes you close your eyes after the first bite. It’s nostalgic comfort food reimagined—faster, easier, and just as joyful. Whether you’re impressing guests without stress or just treating your family, these nests hit the spot every time.
What Ingredients You Will Need
This recipe uses simple, wholesome ingredients to deliver bold flavor and satisfying texture without the fuss. You’ll find that most of these are pantry staples, with a seasonal pop from the Peeps that makes it so special.
- Unsalted butter, 3 tablespoons (adds richness and helps melt the marshmallows smoothly)
- Mini marshmallows, 4 cups (I prefer Jet-Puffed brand for best melting and fluffiness)
- Rice Krispies cereal, 6 cups (classic crispy rice cereal—no substitutes for texture here)
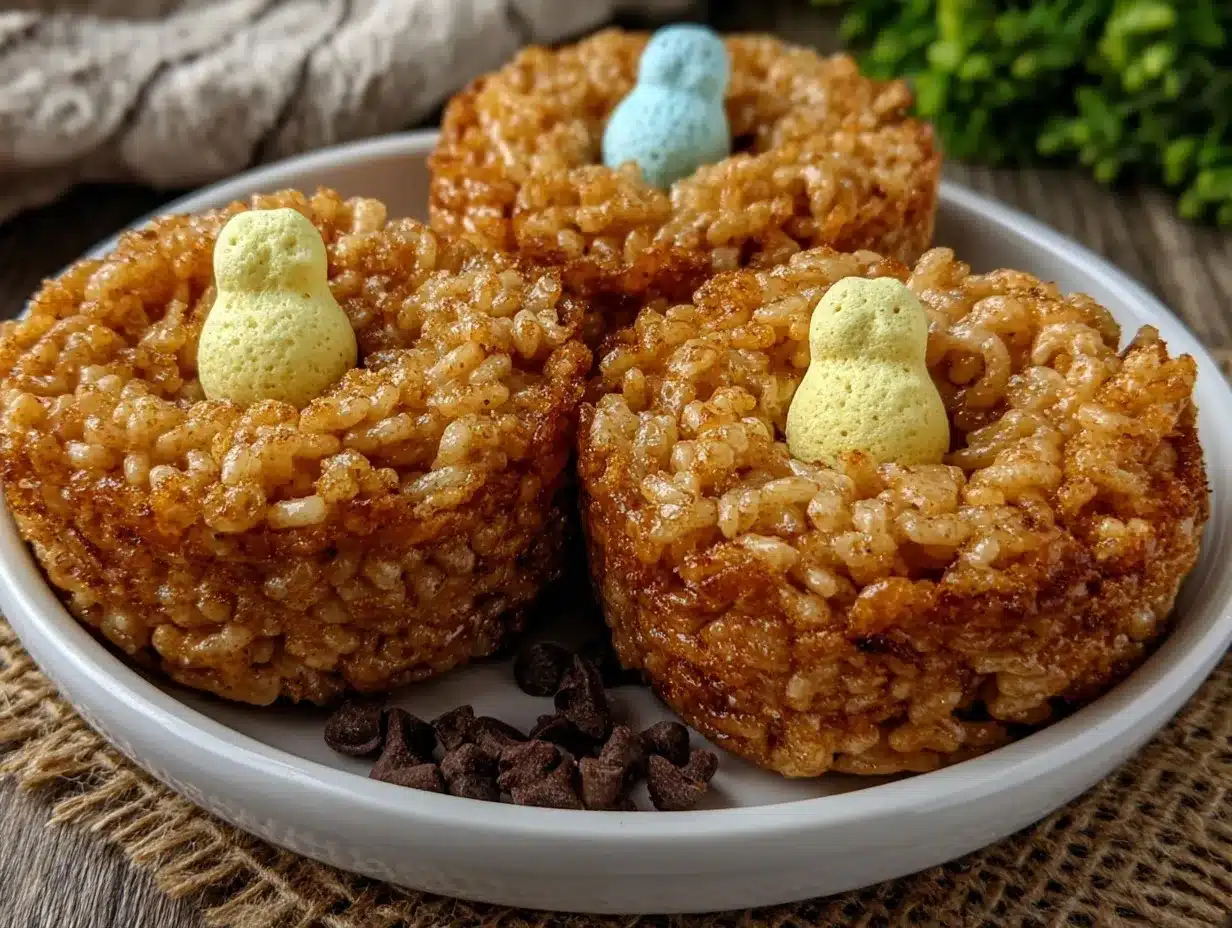
- Colorful Peeps marshmallow chicks, about 12 (choose your favorite colors; they’re the star of the show!)
- Non-stick cooking spray or butter (for greasing your hands and bowls)
- Optional: vanilla extract, 1 teaspoon (adds a subtle depth of flavor, but totally optional)
If you want to make this gluten-free, just double-check your Rice Krispies brand, as some varieties contain barley malt. I’ve also tried using dairy-free butter and mini marshmallows for a vegan-friendly version—just swap in your favorite plant-based options, and it works like a charm!
Equipment Needed
- Large mixing bowl (preferably heatproof)
- Medium saucepan (for melting butter and marshmallows)
- Wooden spoon or heat-resistant spatula (for stirring the marshmallow mixture)
- Measuring cups and spoons
- Non-stick baking mat or parchment paper (for cooling the nests)
- Small bowl of water or butter (to grease your hands for shaping nests)
If you don’t have a saucepan, a large microwave-safe bowl works too—just melt the butter and marshmallows in short bursts and stir often. I’ve used both methods, and honestly, stovetop melting gives a smoother texture, but microwave is great for speed and convenience.
Preparation Method
- Prepare your workspace: Spray your mixing bowl and a baking sheet or tray with non-stick cooking spray or lightly butter them. This prevents sticking when shaping the nests. Set aside.
Time: 5 minutes - Melt the butter: In a medium saucepan over low heat, melt 3 tablespoons of unsalted butter until fully liquid but not browned.
Watch closely to avoid burning; this should take about 2-3 minutes. - Add marshmallows: Pour 4 cups of mini marshmallows into the melted butter. Stir gently but continuously until the marshmallows are completely melted and smooth. This takes about 5 minutes.
If the mixture looks grainy, keep stirring on low heat; patience pays off here. - Add vanilla extract (optional): Remove from heat and stir in 1 teaspoon of vanilla extract if using. This adds a lovely subtle sweetness that complements the Peeps.
- Combine with cereal: Pour 6 cups of Rice Krispies cereal into the marshmallow mixture. Using a wooden spoon or spatula, fold gently until all the cereal is evenly coated.
Don’t over-mix—you want to keep the texture light and crispy. - Shape the nests: Grease your hands with butter or spray, then scoop about 1/3 cup (roughly 80g) of the mixture per nest. Mold each scoop into a small bowl shape with a hollow center to hold the Peeps.
Place each nest on the prepared baking sheet as you shape them. - Add the Peeps: Gently press 2-3 Peeps chicks into the hollow center of each nest. The marshmallow base will hold them in place once cooled.
Work quickly before the mixture hardens. - Cool and set: Let the nests cool at room temperature for about 30 minutes or until firm.
If you’re in a hurry, pop them in the fridge for 15 minutes.
If your mixture starts to harden while shaping, just warm it up slightly in the microwave for 10 seconds—it softens right back up for easy molding. I learned this the hard way after my first batch got too sticky!
Cooking Tips & Techniques
Here’s what I’ve picked up over countless batches of these Easy Peeps Rice Krispie Nests:
- Use low heat when melting: Marshmallows can scorch quickly, so keep the heat low and stir often to avoid that burnt taste.
- Grease your hands well: It makes shaping the nests so much easier and keeps the mixture from sticking. A little butter or cooking spray goes a long way.
- Don’t overmix: Fold the cereal in gently; vigorous stirring crushes the crispy texture you want.
- Work fast when shaping: The mixture cools and stiffens quickly. If it gets too firm, a quick zap in the microwave softens it right back up.
- Use fresh Peeps: Older Peeps can get hard or stale, which makes them less fun and harder to press into the nests.
- Timing is everything: Plan to make these close to when you’ll serve them. They’re best fresh but hold up well for a day or two if stored properly.
One time, I left the marshmallow mixture on the heat a bit too long, and it turned grainy—lesson learned: patience and low heat are key! Also, multitasking is your friend—while the nests cool, clean up your prep area for a smooth finish.
Variations & Adaptations
These nests are a fantastic base to customize. Here are a few ideas I’ve tried and loved:
- Chocolate Lover’s Nest: Stir in 1/2 cup of mini chocolate chips with the cereal or drizzle melted chocolate on top for an extra sweet touch.
- Nut-Free Option: Use sunflower seed butter instead of butter for those avoiding nuts or dairy; it still melts the marshmallows beautifully.
- Fruit-Infused: Swap Peeps for small jelly beans or mini chocolate eggs for a spring-themed variation that’s less sugary but just as festive.
- Gluten-Free: Use certified gluten-free crispy rice cereal and check marshmallow ingredients to keep it safe for gluten-sensitive folks.
- Vegan Adaptation: Use vegan marshmallows and plant-based butter substitutes; I’ve tried this with success using Earth Balance and Dandies marshmallows.
One year, I mixed in shredded coconut into the base for a tropical twist—my kids thought it was like little bird’s nests on a beach. Feel free to get creative! Just keep the marshmallow-to-cereal balance similar to keep that perfect chewy-crisp texture.
Serving & Storage Suggestions
Serve these Easy Peeps Rice Krispie Nests at room temperature for the best texture—crispy with that soft marshmallow chew. They’re adorable on a spring-themed dessert table paired with pastel-colored drinks like lemonade or iced tea. For a party, arrange them on a pretty platter with fresh flowers or greenery for extra charm.
To store, place the nests in an airtight container at room temperature for up to 2 days. If you want to keep them longer, store in the fridge for up to a week, though the cereal may lose some crispness. For longer storage, freeze the nests in a sealed bag or container for up to a month. Thaw at room temperature before serving.
Reheating isn’t really necessary, but if you want to soften them a bit, a 5-10 second microwave zap works wonders. Over time, the flavors mellow and the Peeps get a little chewier, which some folks actually love!
Nutritional Information & Benefits
Each nest contains approximately 150-180 calories depending on size, with most calories coming from marshmallows and butter. While this recipe is definitely a treat, it uses simple, recognizable ingredients—no artificial nonsense or mystery fillers.
Key ingredients like butter provide some fat for satiety, and the marshmallows add that sweet happiness boost we all need sometimes. If you opt for gluten-free or vegan versions, this recipe can fit several dietary needs, making it accessible for many.
Just a heads up: these nests contain dairy, gluten (depending on cereal brand), and are not nut-free unless adapted. Like any treat, best enjoyed in moderation, but honestly, they’re worth every bite of springtime fun.
Conclusion
In a nutshell, this Easy Peeps Rice Krispie Nests recipe is a winner for anyone who loves simple, colorful, and sweet spring treats. It’s quick, uses minimal ingredients, and brings smiles all around. I love how easy it is to customize, making it a recipe that grows with your creativity and tastes.
Give it a try and tweak it to suit your style—you might find your own signature twist to share with family and friends. If you make these nests, please drop a comment below and let me know how they turned out or what fun variations you tried. And hey, don’t forget to share this recipe with your fellow springtime treat lovers!
Here’s to sweet moments and colorful treats that brighten your day!
FAQs About Easy Peeps Rice Krispie Nests
Can I use regular marshmallows instead of mini marshmallows?
Yes! If you only have regular-sized marshmallows, chop them into smaller pieces to help them melt evenly and coat the cereal better.
How long do these nests stay fresh?
At room temperature in an airtight container, they stay fresh for about 2 days. Refrigerating can extend their life up to a week, but they might lose some crispness.
Can I make these nests ahead of time?
Absolutely! You can prepare the nests a day ahead and store them covered at room temperature. For longer storage, freeze and thaw before serving.
What if I don’t have Peeps—what else can I use?
Try mini jelly beans, chocolate eggs, or even small gummy candies for a fun alternative that fits the spring theme.
Is there a way to make this recipe vegan?
Yes! Use vegan marshmallows like Dandies and substitute butter with a plant-based spread. The texture and taste come out great with these swaps.
Pin This Recipe!
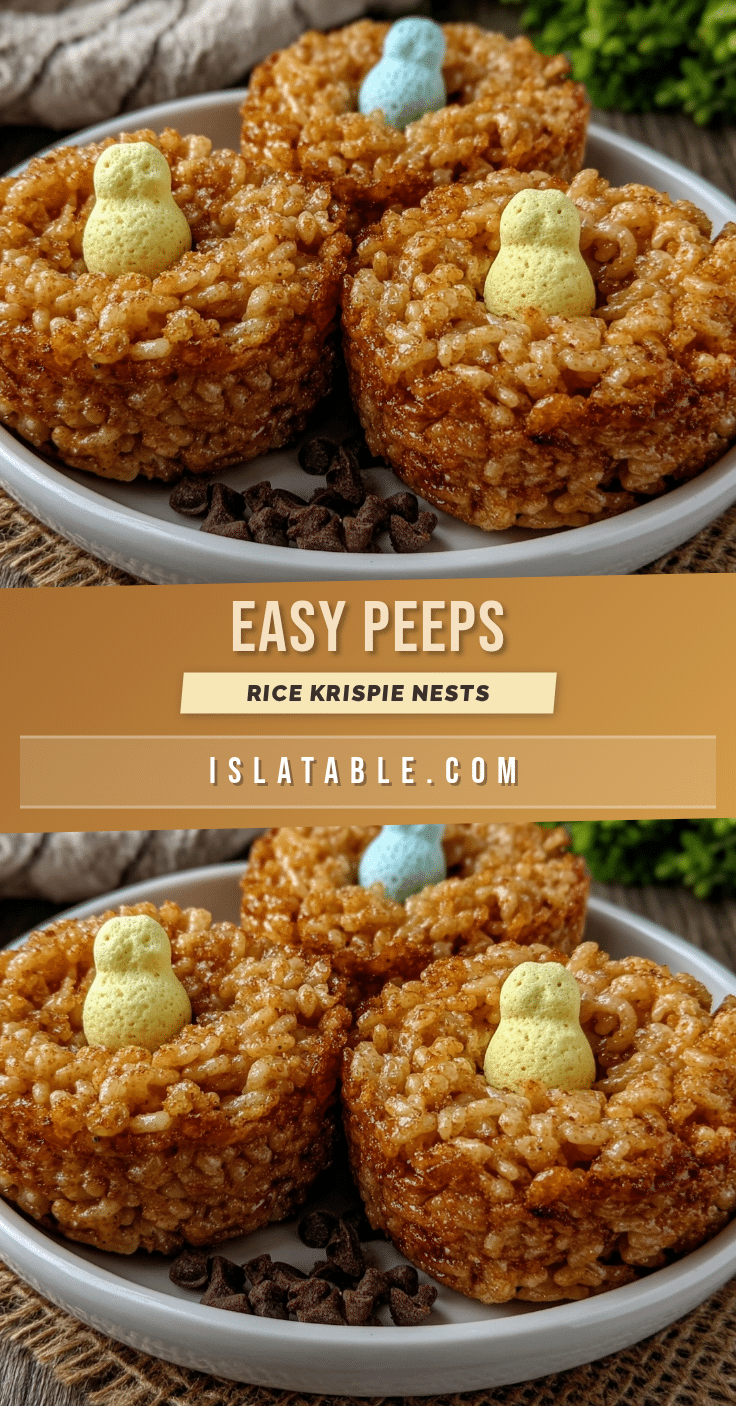
Easy Peeps Rice Krispie Nests Recipe Perfect for Springtime Treats

A quick and easy springtime treat featuring crispy Rice Krispies coated in melted marshmallows and topped with colorful Peeps chicks. Perfect for Easter, potlucks, or festive family gatherings.
- Prep Time: 10 minutes
- Cook Time: 10 minutes
- Total Time: 20 minutes
- Yield: 12 nests 1x
- Category: Dessert
- Cuisine: American
Ingredients
- 3 tablespoons unsalted butter
- 4 cups mini marshmallows
- 6 cups Rice Krispies cereal
- About 12 colorful Peeps marshmallow chicks
- Non-stick cooking spray or butter (for greasing)
- 1 teaspoon vanilla extract (optional)
Instructions
- Spray your mixing bowl and a baking sheet or tray with non-stick cooking spray or lightly butter them to prevent sticking. Set aside.
- In a medium saucepan over low heat, melt 3 tablespoons of unsalted butter until fully liquid but not browned (about 2-3 minutes).
- Add 4 cups of mini marshmallows to the melted butter. Stir gently and continuously until marshmallows are completely melted and smooth (about 5 minutes).
- Remove from heat and stir in 1 teaspoon of vanilla extract if using.
- Pour 6 cups of Rice Krispies cereal into the marshmallow mixture. Fold gently with a wooden spoon or spatula until all cereal is evenly coated. Avoid overmixing.
- Grease your hands with butter or spray. Scoop about 1/3 cup (approximately 80g) of the mixture per nest and mold each into a small bowl shape with a hollow center.
- Place each nest on the prepared baking sheet as you shape them.
- Gently press 2-3 Peeps chicks into the hollow center of each nest before the mixture hardens.
- Let the nests cool at room temperature for about 30 minutes or until firm. Alternatively, refrigerate for 15 minutes to speed up setting.
Notes
Use low heat when melting marshmallows to avoid scorching. Grease hands well to make shaping easier. Work quickly when shaping nests as the mixture hardens fast. If mixture hardens too much, warm it in the microwave for 10 seconds to soften. Use fresh Peeps for best results. Store nests in an airtight container at room temperature for up to 2 days or refrigerate for up to a week. Freeze for longer storage.
Nutrition
- Serving Size: 1 nest
- Calories: 150180
- Sugar: 20
- Sodium: 90
- Fat: 5
- Saturated Fat: 3
- Carbohydrates: 30
- Protein: 1
Keywords: Rice Krispie treats, Peeps, Easter treats, spring desserts, marshmallow nests, easy dessert, kid-friendly treats