“Hey, do you have any snacks that *aren’t* full of nuts? Tim’s allergic again,” my fellow sideline mom texted me just as I was juggling a cooler, a water bottle, and my own hungry kid at little league practice. Honestly, I was scrambling. Packing snacks for a full season that everyone can eat without worry? That felt like a puzzle. So, I threw together these easy nut-free protein balls on a whim one evening—half skeptical, half desperate.
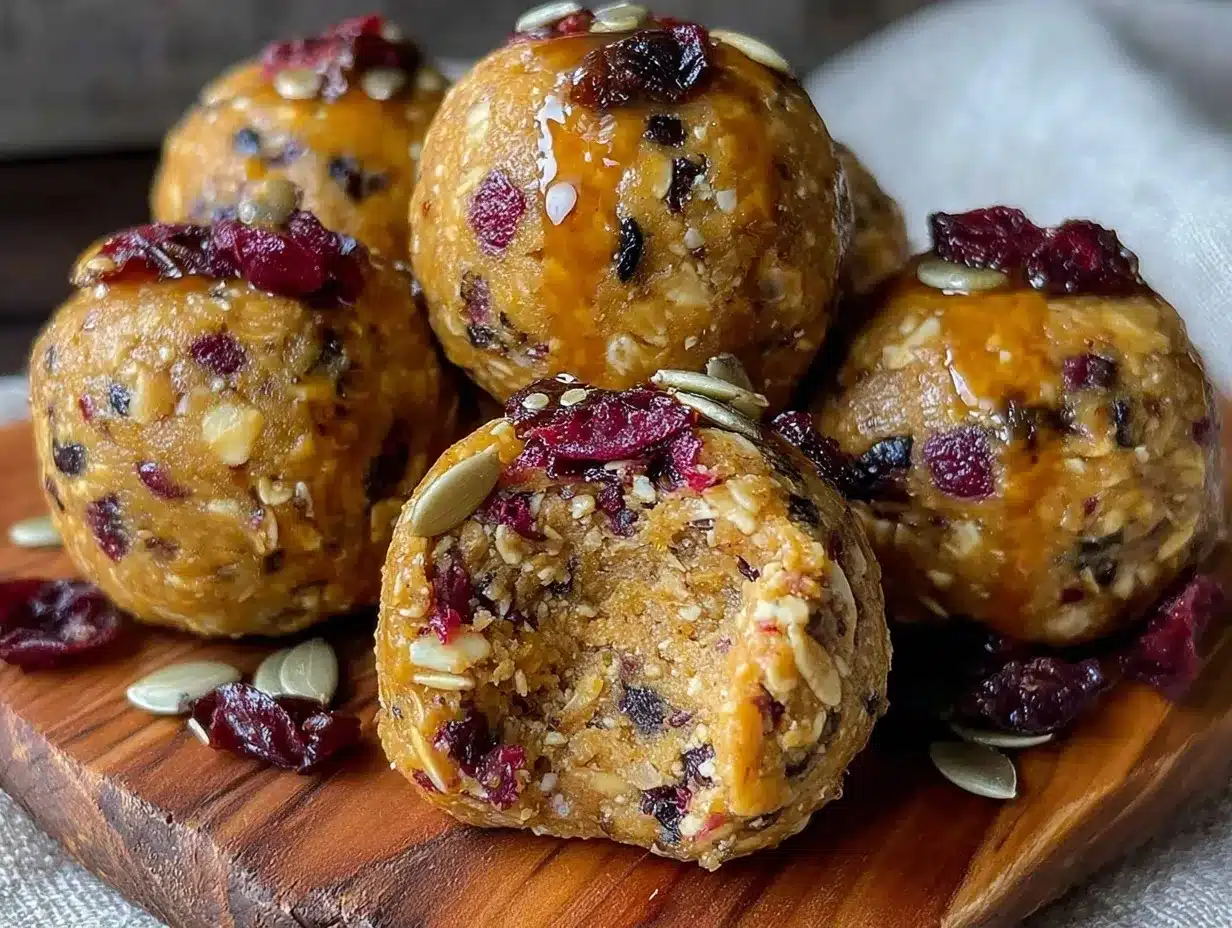
Turns out, they were a total game changer. The best part? They didn’t scream “health food” or taste like cardboard, which is saying something coming from my picky eaters. The texture was just right—chewy but not crumbly, and the flavor had a quiet sweetness that made them vanishingly good after practice. More than once, I caught myself sneaking one (or three) while cleaning up the dugout.
They’ve been a staple ever since, appearing in lunchboxes and snack bags alike. What’s funny is how simple the recipe is—no fancy ingredients, just straightforward stuff you probably already have on hand. I love that I can whip these up quickly before practice or on a busy weeknight. And knowing they’re nut-free means everyone on the team can enjoy them without me hovering nervously.
These protein balls stuck with me because they’re just the kind of snack that hits that sweet spot—easy, safe, and satisfying. If you’re looking for a reliable, crowd-pleasing bite for little league (or any kid’s snack arsenal), these might just become your secret weapon too.
Why You’ll Love This Easy Nut-Free Protein Balls Recipe for Little League Snacks
After testing out countless snack ideas (some better left unspoken), this recipe has proven itself over and over again. It’s not just about filling hungry bellies; it’s about doing it with ease and confidence. Here’s why this nut-free protein balls recipe has earned a permanent spot in my snack rotation:
- Quick & Easy: These balls come together in under 15 minutes, perfect for those frantic moments between work and practice.
- Simple Ingredients: No obscure health food store runs needed. Everything’s pantry-friendly, and you likely have most of it already.
- Perfect for Little League and Beyond: Whether it’s a game day, a weekend hike, or a classroom snack, these protein balls fit the bill.
- Crowd-Pleaser: Kids and adults alike reach for seconds. The texture and mild sweetness make them universally appealing.
- Nut-Free Safety: No nuts means less worry about allergies, a huge relief in team environments.
- Balanced Flavor and Texture: Using a blend of seeds and oats gives a satisfying chew without the dryness some protein snacks have.
What sets this recipe apart is how it balances practicality and taste. I’ve tried variations that use different seeds to keep things interesting, and the use of sunflower seed butter instead of nut butter is a game changer—smooth, creamy, and allergy-friendly. This isn’t just a snack; it’s a small moment of good fuel that feels like a treat. It’s the kind of recipe that makes you pause, smile, and think, “I nailed this snack game.”
What Ingredients You Will Need
This easy nut-free protein balls recipe relies on straightforward, wholesome ingredients that deliver texture, protein, and just enough sweetness to keep little players refueled without a sugar crash. Most of these are pantry staples, and substitutions are easy if needed.
- Rolled oats (1 1/2 cups / 135g) – The base, providing a hearty chew and fiber.
- Sunflower seed butter (3/4 cup / 190g) – Creamy and nut-free, it binds everything and adds protein.
- Honey (1/4 cup / 85g) – Natural sweetness that kids love.
- Chia seeds (2 tablespoons) – Adds a nutritional punch and helps with binding.
- Ground flaxseed (2 tablespoons) – Boosts fiber and omega-3s.
- Mini chocolate chips (1/4 cup / 45g) – For a touch of indulgence; use allergy-safe brands like Enjoy Life.
- Vanilla extract (1 teaspoon) – Enhances flavor depth.
- Salt (a pinch) – Balances sweetness and rounds out flavors.
Optional additions:
- Shredded coconut (1/4 cup) – For extra texture and a tropical hint.
- Sunflower or pumpkin seeds (2 tablespoons) – For crunch and extra nutrients.
When picking sunflower seed butter, I recommend brands like SunButter for its smooth texture and mild flavor—perfect for little palates. For oats, rolled oats are preferred over instant for better texture. If you want to mix things up seasonally, try adding dried cranberries or swapping the honey for maple syrup (especially nice when you want to keep it vegan). If allergies extend beyond nuts, swapping mini chocolate chips with carob chips keeps it safe and delicious.
Equipment Needed
Luckily, this recipe doesn’t demand anything fancy—perfect for busy parents or anyone looking to keep things simple.
- Mixing bowl: A medium to large bowl to combine all ingredients comfortably.
- Spoon or spatula: For mixing; a sturdy silicone spatula works well to scrape down the sides.
- Measuring cups and spoons: Accuracy helps keep the texture spot-on.
- Baking sheet or plate: To set the balls while they firm up.
- Refrigerator: Not equipment per se, but essential for chilling the balls to hold their shape.
If you want to save time, a food processor can help pulse the oats or mix ingredients more evenly, but it’s not required. I’ve made these many times just with a spoon and bowl, no mess or fuss. For families with limited kitchen tools, a large zip-top bag and rolling them by hand on the counter can be a fun way to involve kids too.
Preparation Method
- Gather your ingredients and measure everything out. This step helps avoid scrambling mid-mix.
- Combine dry ingredients: In your mixing bowl, add the rolled oats, chia seeds, ground flaxseed, and a pinch of salt. Stir lightly to distribute everything evenly.
- Add wet ingredients: Spoon in the sunflower seed butter, drizzle the honey, and pour in the vanilla extract.
- Mix thoroughly: Use your spatula or spoon to blend the mixture. It should start sticking together but remain slightly crumbly. If it feels too dry, add a teaspoon of water or a little more honey.
- Fold in mini chocolate chips (and optional shredded coconut or seeds if using). The batter should be thick enough to hold its shape when pressed.
- Shape into balls: Use your hands to roll the mixture into 1-inch (2.5 cm) balls. You should get about 18-20 balls. Don’t worry if they aren’t perfectly round—rustic shapes taste just as good!
- Chill: Place the balls on a baking sheet or plate and refrigerate for at least 30 minutes. This helps them firm up so they don’t fall apart during transport.
- Store: Once chilled, transfer the protein balls to an airtight container. They’ll keep in the fridge for up to a week or freeze well for longer storage.
Quick tip: If the mixture is sticky, wet your hands slightly before rolling to avoid sticking. Also, if you want to make these ahead for back-to-back games, freezing individual balls on a parchment-lined tray before storing them together prevents clumping.
Cooking Tips & Techniques
From my kitchen adventures (and a few mishaps), here are some tips to keep your nut-free protein balls perfect every time:
- Mixing consistency matters: The blend should be sticky enough to hold but not gooey. If too dry, the balls crumble; too wet, and they’ll be mushy. Adding flaxseed or chia helps absorb moisture while boosting nutrition.
- Use room-temperature wet ingredients: Sunflower seed butter and honey blend better when not cold from the fridge.
- Patience on chilling: Don’t skip the refrigeration step. It’s the difference between shapeless blobs and snack-ready bites.
- Customize texture: For crunch lovers, toss in a few crushed sunflower seeds or pumpkin seeds before shaping.
- Watch for allergies: Always double-check ingredient labels for nut cross-contamination, especially with sunflower seed butter brands.
- Batch prep: These balls freeze beautifully. Pop a few in your kid’s lunch bag frozen, and they thaw by snack time—perfect for busy mornings.
I once made these without enough honey, and honestly, they were way too dry—lesson learned. Also, I used to skip the vanilla extract, but that little splash really brings the whole flavor together, so don’t leave it out! Multitasking tip: While these chill, I often prep a batch of creamy chicken salad with sweet grapes for lunches—snacking and meal prep done in tandem.
Variations & Adaptations
This recipe is a great base, easy to tweak for different needs and tastes:
- Gluten-Free: Use certified gluten-free oats to make these safe for gluten-sensitive kids.
- Vegan Version: Swap honey for maple syrup or agave nectar, and make sure your chocolate chips are dairy-free.
- Flavor Twists: Add a pinch of cinnamon or pumpkin pie spice for a seasonal spin. I’ve also tossed in dried cherries or cranberries for tart bursts.
- Seed Swap: If chia isn’t your thing, substitute with hemp seeds or extra flaxseed for a slightly different texture.
- Boost Protein: Stir in a scoop of plant-based or whey protein powder. Just adjust the binding ingredients slightly if it gets too dry.
Personally, I once made a batch with shredded zucchini mixed in (squeezed dry) to sneak in some veggies during a hectic tournament week. It was a hit, and no one guessed! For those who want a little extra crunch and zest, sprinkling a few crispy broccoli salad with bacon crunch on the side makes for a fun snack plate.
Serving & Storage Suggestions
These nut-free protein balls are best served chilled or at room temperature. They travel well, making them perfect for little league games, after-school snacks, or quick energy boosts on the go.
- Serving suggestions: Pair them with fresh fruit or a small cup of yogurt for a balanced, kid-friendly snack.
- Storage: Keep refrigerated in an airtight container up to one week. For longer storage, freeze in a sealed container for up to 3 months.
- Reheating: No need to reheat, but letting them sit out for 10 minutes before eating softens the texture slightly.
- Flavor development: The flavors actually mellow and meld after a day in the fridge, making them even tastier the next day.
When packing for games, I like to include a few frozen balls wrapped in parchment paper. They thaw just enough to be chewy but still refreshingly cool—a nice treat on a hot afternoon. And if you’re looking for a savory bite to balance these, check out the hearty savory Italian beef sandwiches I often bring for tailgate-style post-game meals.
Nutritional Information & Benefits
Per serving (1 ball, based on 20 servings): approximately 90 calories, 3g protein, 4g fat, 12g carbohydrates, 2g fiber.
Key nutrition highlights:
- Protein: Sunflower seed butter and chia seeds provide a solid plant-based protein boost.
- Fiber: Rolled oats, flaxseed, and chia contribute to digestive health and steady energy release.
- Healthy fats: Sunflower seed butter offers heart-healthy fats without the allergy concerns of nuts.
- Natural sweeteners: Honey keeps added sugars low compared to processed snacks.
These balls fit well into gluten-free and dairy-free diets (when choosing appropriate chocolate chips) and are free from common allergens like nuts. As a busy parent, I appreciate snacks that fuel without crashing energy—these strike that balance nicely. For a wholesome snack that feels indulgent but is genuinely nourishing, they’re a winner.
Conclusion
Snacks for little league don’t have to be complicated or nerve-wracking, especially when you have a reliable recipe like these easy nut-free protein balls. They’re straightforward to make, safe for allergy-sensitive kids, and taste good enough to make you want to keep a stash for yourself. I love how flexible this recipe is—whether you tweak the flavors or add mix-ins, it’s always a crowd-pleaser.
Give these a try the next time you’re packing for practice or need a quick energy boost. Feel free to experiment and make them your own. And hey, if you ever want to round out the game day spread, pairing these with some creamy chicken bacon ranch pasta is always a hit with the whole family.
Would love to hear how you customize your protein balls or what other snacks keep your little league team fueled—drop a comment below and share your go-to recipes!
FAQs About Easy Nut-Free Protein Balls for Little League Snacks
Can I make these protein balls ahead of time?
Absolutely! They keep well refrigerated for up to a week and freeze nicely for up to 3 months. Just thaw before serving.
Are these protein balls safe for kids with nut allergies?
Yes, this recipe uses sunflower seed butter instead of nut butters, making it safe for most nut allergies. Just double-check ingredient labels for cross-contamination.
Can I substitute sunflower seed butter with something else?
You can try tahini (sesame seed butter) if no sesame allergies exist, or use a seed-free butter alternative, but sunflower seed butter provides the best texture and flavor here.
How can I make these protein balls vegan?
Swap the honey for maple syrup or agave nectar and ensure your chocolate chips are dairy-free to keep them vegan-friendly.
What’s the best way to store and transport these snacks for games?
Pack the protein balls in an airtight container. For hot days, include a small ice pack or freeze them beforehand to keep them fresh and cool during games.
Pin This Recipe!
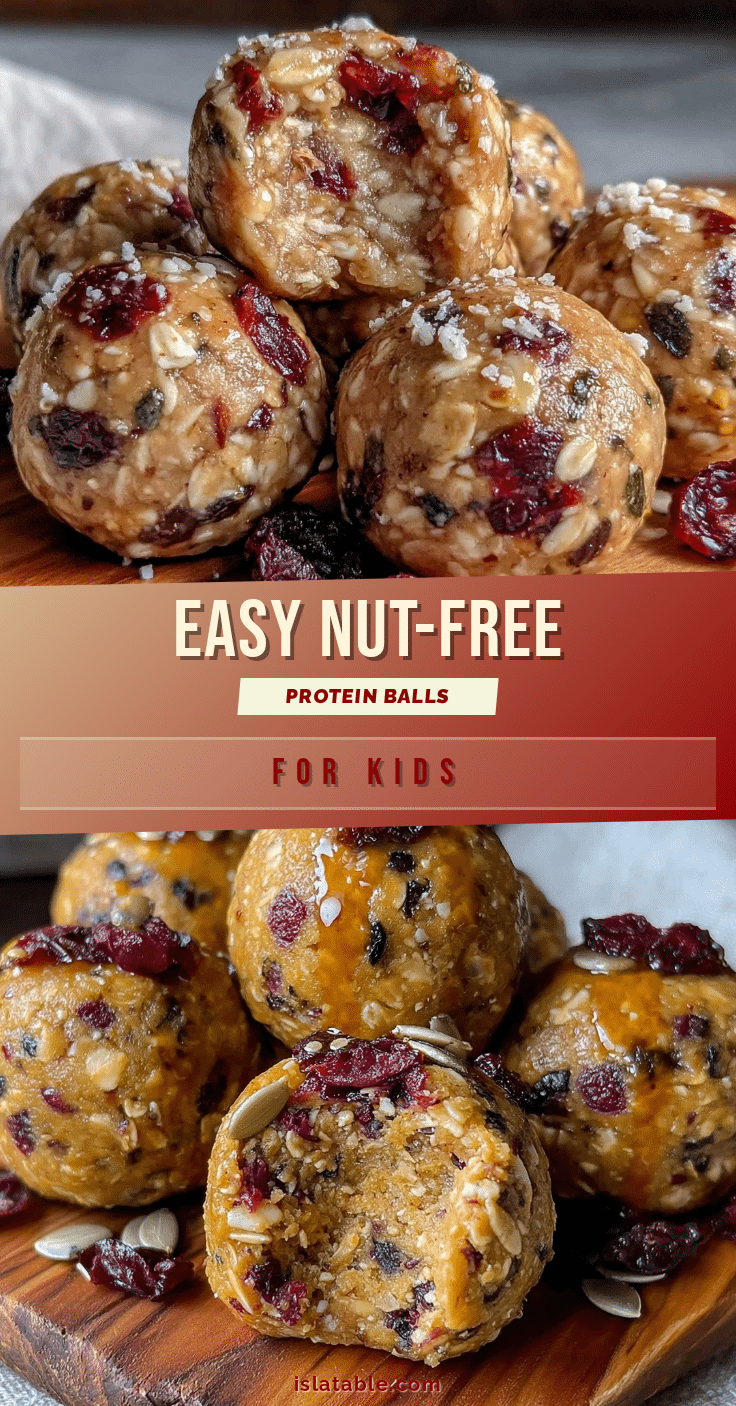
Easy Nut-Free Protein Balls Recipe Perfect for Little League Snacks
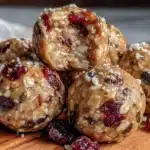
These easy nut-free protein balls are a quick, allergy-friendly snack perfect for little league games and beyond. They have a chewy texture, mild sweetness, and are made with simple pantry ingredients.
- Prep Time: 10 minutes
- Cook Time: 0 minutes
- Total Time: 40 minutes
- Yield: 18-20 balls 1x
- Category: Snack
- Cuisine: American
Ingredients
- 1 1/2 cups rolled oats (135g)
- 3/4 cup sunflower seed butter (190g)
- 1/4 cup honey (85g)
- 2 tablespoons chia seeds
- 2 tablespoons ground flaxseed
- 1/4 cup mini chocolate chips (45g) – allergy-safe brands like Enjoy Life recommended
- 1 teaspoon vanilla extract
- Pinch of salt
- Optional: 1/4 cup shredded coconut
- Optional: 2 tablespoons sunflower or pumpkin seeds
Instructions
- Gather your ingredients and measure everything out.
- In a mixing bowl, combine rolled oats, chia seeds, ground flaxseed, and a pinch of salt. Stir lightly to distribute evenly.
- Add sunflower seed butter, honey, and vanilla extract to the dry ingredients.
- Mix thoroughly with a spatula or spoon until the mixture starts sticking together but remains slightly crumbly. If too dry, add a teaspoon of water or a little more honey.
- Fold in mini chocolate chips and optional shredded coconut or seeds if using.
- Roll the mixture into 1-inch balls using your hands, making about 18-20 balls.
- Place the balls on a baking sheet or plate and refrigerate for at least 30 minutes to firm up.
- Store the chilled protein balls in an airtight container in the refrigerator for up to one week or freeze for longer storage.
Notes
Use room-temperature sunflower seed butter and honey for easier mixing. Chill the balls for at least 30 minutes to help them hold their shape. Wet your hands slightly when rolling to prevent sticking. Freeze individual balls on a parchment-lined tray before storing together to prevent clumping. Substitute maple syrup or agave nectar for honey to make vegan. Use allergy-safe chocolate chips to keep the recipe safe for sensitive kids.
Nutrition
- Serving Size: 1 ball
- Calories: 90
- Fat: 4
- Carbohydrates: 12
- Fiber: 2
- Protein: 3
Keywords: nut-free, protein balls, little league snacks, allergy-friendly, quick snack, kid-friendly, no nuts, healthy snack