Let me tell you, the scent of golden, crispy potatoes mingling with bubbling cheese and a whisper of onion baking in the oven is enough to make anyone’s mouth water. The first time I baked this Crispy Funeral Potatoes Casserole, I was instantly hooked—the kind of moment where you pause, take a deep breath, and just smile because you know you’re onto something truly special. It’s the kind of dish that feels like a warm hug on a chilly day, a nostalgic comfort food that’s both satisfying and dangerously easy to whip up.
Years ago, when I was knee-high to a grasshopper, my grandma would bring this casserole to every family gathering. The crunchy topping, creamy potatoes, and cheesy goodness were always the first to disappear from the buffet table. I still remember sneaking bites off the cooling rack while she wasn’t looking. Honestly, I wish I’d discovered this recipe myself sooner because it’s perfect for potlucks, holiday dinners, or just a sweet treat to brighten up your weeknight meals.
My family couldn’t stop sneaking this casserole off the plate—(and I can’t really blame them). The cheesy crunch and creamy texture combo is pure, nostalgic comfort that feels like a gift every time. Whether you’re cooking for your crew or bringing something special to a gathering, this Crispy Funeral Potatoes Casserole recipe is going to become a staple you’ll want to bookmark for good. I’ve tested it more times than I can count—in the name of research, of course—and it never disappoints.
Why You’ll Love This Crispy Funeral Potatoes Casserole Recipe
This recipe isn’t just another cheesy potato casserole—it’s the best version you’ll find, hands down. Tested in my kitchen and family-approved, it offers the perfect balance between crispy topping and creamy inside, with just the right hint of seasoning. Whether you’re a busy weeknight warrior or a weekend comfort food enthusiast, this recipe hits all the right notes.
- Quick & Easy: Comes together in under 45 minutes, perfect for busy nights or last-minute cravings.
- Simple Ingredients: No need for fancy grocery trips—you probably have everything in your pantry right now.
- Perfect for Any Occasion: Whether it’s brunch, holiday dinners, or potlucks, this casserole shines every time.
- Crowd-Pleaser: Kids and adults alike rave about the cheesy crunch and creamy potatoes.
- Unbelievably Delicious: The texture combo is next-level comfort food that’ll have you closing your eyes after the first bite.
What makes this Crispy Funeral Potatoes Casserole recipe different? Well, it’s the perfectly balanced seasoning profile paired with a crunchy topping made from crushed cornflakes and melted butter that makes the difference. Plus, I blend the cottage cheese until ultra-smooth for a creamy, luscious texture you don’t get in other versions. Honestly, this casserole isn’t just good—it feels like comfort food reimagined, faster, lighter, but with all the soul-soothing satisfaction you crave.
Whether you want to impress guests without stress or turn a simple meal into something memorable, this recipe will be your go-to.
What Ingredients You Will Need
This Crispy Funeral Potatoes Casserole uses simple, wholesome ingredients to deliver bold flavor and a satisfying texture without the fuss. Most of these are pantry staples, and you can easily substitute a few if needed.
- Frozen hash brown potatoes (about 2 lbs / 900 g): The base for creamy, tender potatoes. I recommend shredded over diced for best texture.
- Cottage cheese, small-curd (1 cup / 240 ml): Blended smooth to add creamy richness without heaviness.
- Sour cream (1 cup / 240 ml): Adds tang and moisture to balance the potatoes.
- Sharp cheddar cheese, shredded (2 cups / 200 g): For that irresistible cheesy flavor.
- Onion, finely chopped (1 small): Adds a mild, savory aroma.
- Garlic powder (1 tsp / 5 ml): For subtle depth without overpowering.
- Salt (1 tsp / 5 ml): Enhances all the flavors.
- Black pepper (½ tsp / 2.5 ml): Adds a gentle kick.
- Butter, melted (½ cup / 115 g): For mixing with crushed cornflakes to create the crispy topping.
- Cornflake cereal, crushed (2 cups / 60 g): The secret to that perfect cheesy crunch on top.
- Optional: Chopped fresh chives or parsley for garnish (adds a fresh pop of color).
Substitution tips: Swap Greek yogurt for sour cream if you want a tangier bite, or use dairy-free cottage cheese and butter for a lactose-free option. For gluten-free, choose gluten-free cornflakes or crushed gluten-free crackers for topping.
Equipment Needed
- 9×13-inch (23×33 cm) baking dish: The perfect size for even cooking and crispy edges.
- Mixing bowls: One large for combining potatoes and dairy, another small for topping mix.
- Food processor or blender: To blend the cottage cheese until smooth. A quick pulse does the trick!
- Measuring cups and spoons: For precise ingredient amounts.
- Spatula or large spoon: For gentle mixing.
- Optional: Cheese grater if shredding your own cheddar.
If you don’t have a food processor, a blender or even a sturdy hand mixer can work to smooth out the cottage cheese. For budget-friendly options, store brands of frozen hash browns and cornflakes work just as well without compromising taste or texture. Just remember to keep your butter melted and ready to mix with the topping for the best crunch!
Preparation Method

- Preheat your oven: Set it to 350°F (175°C) and lightly grease your 9×13-inch (23×33 cm) baking dish to prevent sticking. (About 10 minutes)
- Blend the cottage cheese: In a food processor or blender, pulse 1 cup (240 ml) of small-curd cottage cheese until smooth and creamy. This step makes the casserole ultra-luscious inside. (2-3 minutes)
- Mix the potato base: In a large mixing bowl, combine 2 lbs (900 g) frozen shredded hash browns (thawed and drained if needed), the blended cottage cheese, 1 cup (240 ml) sour cream, 2 cups (200 g) shredded sharp cheddar cheese, finely chopped small onion, 1 tsp (5 ml) garlic powder, 1 tsp (5 ml) salt, and ½ tsp (2.5 ml) black pepper. Stir gently until everything is evenly combined. (5 minutes)
- Transfer to baking dish: Spread the potato mixture evenly into the prepared 9×13-inch dish. It should be packed lightly but evenly. (2 minutes)
- Prepare the crunchy topping: In a small bowl, mix 2 cups (60 g) crushed cornflakes with ½ cup (115 g) melted butter. Stir until the cornflakes are fully coated and glossy. (3 minutes)
- Top the casserole: Sprinkle the buttery cornflake mixture evenly over the potato base, making sure to cover all edges for extra crispiness. (2 minutes)
- Bake: Place the casserole in the oven and bake for 40-45 minutes, or until the top is golden brown and crispy, and the casserole is bubbling around the edges. (40-45 minutes)
- Cool briefly and serve: Let the casserole rest for 5-10 minutes before serving to allow it to set up slightly. Garnish with chopped fresh chives or parsley if you like. (5-10 minutes)
Tip: If the topping browns too quickly, loosely cover the casserole with foil halfway through baking. Also, be sure not to overmix the potato base, or it may become too mushy.
Cooking Tips & Techniques
Getting that perfect crispy topping with creamy potatoes inside can be a little tricky, but here’s what I’ve learned from many casseroles gone right—and a few not-so-right.
- Thaw and drain your frozen hash browns: If they’re too wet, your casserole could turn soggy. I usually spread them on paper towels and gently press out excess moisture.
- Blend the cottage cheese well: This is a game changer. If you skip this, you’ll get lumps and uneven texture. A few quick pulses in a food processor smooth things out beautifully.
- Don’t skimp on the butter in the topping: It’s what makes the cornflakes crisp up nicely and gives that irresistible golden-brown finish.
- Watch your oven temperature closely: Every oven’s a bit different. If your topping browns too quickly, tent with foil to prevent burning.
- Timing matters: Bake until bubbling and golden but not dried out. The casserole continues to firm up a bit as it cools.
- Make ahead tips: You can assemble the casserole a day ahead, cover it tightly, and bake it fresh before serving. Just add a few extra minutes to baking time if chilled.
Honestly, one of the biggest mistakes I made starting out was rushing the thawing step. Trust me, that little patience pays off every time. Once you nail the balance of creamy filling and crunchy topping, this recipe is a guaranteed crowd-pleaser.
Variations & Adaptations
Looking to mix things up or accommodate dietary needs? Here are some tasty variations I’ve tried and loved:
- Vegetarian-friendly: This recipe is naturally vegetarian, but you can add sautéed mushrooms or bell peppers for extra flavor and texture.
- Low-carb option: Swap frozen hash browns with cauliflower rice. The texture changes slightly, but it’s still creamy and delicious with the same cheesy crunch.
- Spicy twist: Add ½ tsp smoked paprika or a few dashes of hot sauce to the potato mixture for a gentle heat that wakes up the flavors.
- Dairy-free adaptation: Use dairy-free sour cream, cottage cheese substitutes (like blended silken tofu), and vegan cheese. For the topping, swap butter with coconut oil or vegan butter.
- Seasonal flair: In summer, try adding fresh chopped herbs like dill or basil and swap cheddar for a milder mozzarella for a lighter feel.
Personally, I once added caramelized onions and crispy bacon on top for a richer, smokier version that disappeared fast. Feel free to experiment—this recipe welcomes your personal touch.
Serving & Storage Suggestions
This Crispy Funeral Potatoes Casserole is best served warm, right out of the oven, so the cheesy crunch is at its peak. I like to plate it with a simple green salad or roasted veggies to balance the richness.
For drinks, a crisp white wine or a light iced tea pairs nicely, cutting through the creamy texture and highlighting the savory flavors.
Leftovers? No worries! Store cooled casserole tightly covered in the refrigerator for up to 3 days. To reheat, cover with foil and warm in a 350°F (175°C) oven for 15-20 minutes until heated through. If you want to keep the topping crispy, remove the foil for the last 5 minutes.
You can also freeze portions in airtight containers for up to 2 months. Thaw overnight in the fridge before reheating. Flavors actually deepen after a day, so leftovers can be even better than fresh!
Nutritional Information & Benefits
This Crispy Funeral Potatoes Casserole packs a comforting calorie count, roughly 350-400 calories per serving (based on 8 servings). The combination of potatoes, cheese, and sour cream delivers a good mix of carbs, protein, and fat—enough to satisfy and fuel you without feeling heavy.
Potatoes provide potassium and vitamin C, while cottage cheese adds protein and calcium. Using sharp cheddar brings some vitamin A and flavor punch. If you’re mindful of sodium, you can adjust salt levels or choose lower-sodium cheese options.
This casserole is gluten-free if you use gluten-free cornflakes, making it suitable for many dietary needs. It does contain dairy, so swap in alternatives if needed. The comfort it brings is not just in taste, but in the warmth and connection it fosters at the table.
Conclusion
Honestly, this Crispy Funeral Potatoes Casserole with cheesy crunch is one of those dishes that feels like a warm hug and never fails to impress. It’s simple to make, uses everyday ingredients, and delivers that perfect balance of creamy and crispy every time. You’re going to want to make it your go-to comfort food for gatherings, weeknights, or whenever you need a little extra cozy in your life.
Feel free to tweak the seasonings, add your favorite mix-ins, or swap ingredients to suit your taste. I love this recipe because it’s flexible and forgiving—plus, it always brings smiles around the table.
If you try it, drop a comment below and share how it turned out or any fun variations you created. And hey, don’t forget to share this cheesy crunch delight with friends who need a little comfort food magic in their lives. Happy cooking!
Frequently Asked Questions
Can I use fresh potatoes instead of frozen hash browns?
Yes, but you’ll need to peel, shred, and dry them thoroughly to avoid excess moisture. Fresh potatoes may require a bit longer baking time to get creamy inside.
How do I make this casserole ahead of time?
Assemble the casserole in the baking dish, cover tightly with foil or plastic wrap, and refrigerate for up to 24 hours. Bake straight from the fridge, adding 10-15 extra minutes to the cooking time.
Can I make this casserole dairy-free?
Absolutely! Use dairy-free sour cream, cottage cheese substitutes like blended tofu, vegan cheese, and plant-based butter or oil for the topping. The texture will be a bit different but still tasty.
What can I substitute for cornflakes in the topping?
Crushed gluten-free crackers, panko breadcrumbs, or crushed potato chips work well. Just mix with melted butter for that signature crunchy topping.
Why is my casserole soggy?
Usually because of too much moisture. Make sure to thaw and drain hash browns well, blend cottage cheese to smooth it out, and avoid over-mixing. Also, don’t skip the crunchy topping—that helps keep moisture balanced.
Pin This Recipe!
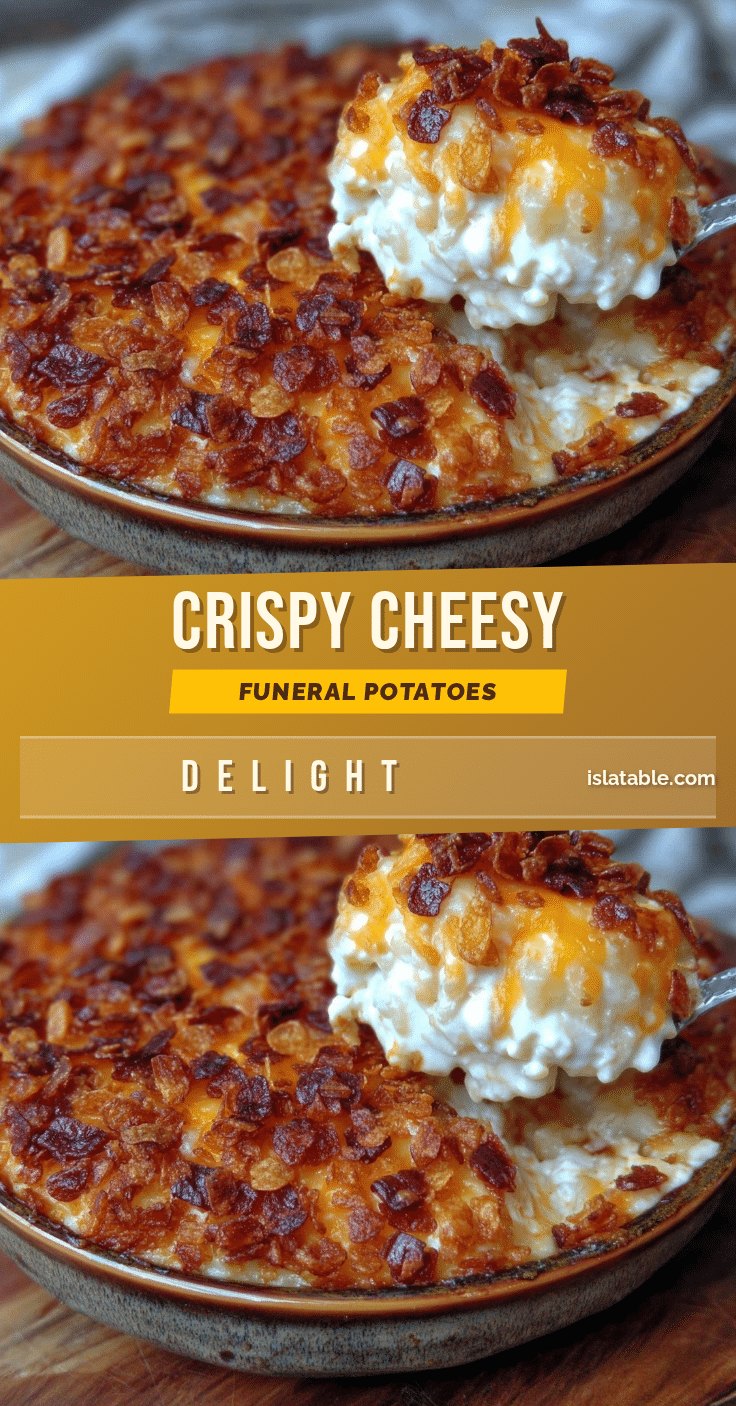
Crispy Funeral Potatoes Casserole Recipe Easy Cheesy Crunch Delight

A nostalgic comfort food casserole featuring crispy cornflake topping and creamy cheesy potatoes, perfect for potlucks, holiday dinners, or weeknight meals.
- Prep Time: 15 minutes
- Cook Time: 40-45 minutes
- Total Time: 55-60 minutes
- Yield: 8 servings 1x
- Category: Main Course
- Cuisine: American
Ingredients
- 2 lbs (900 g) frozen shredded hash brown potatoes
- 1 cup (240 ml) small-curd cottage cheese, blended smooth
- 1 cup (240 ml) sour cream
- 2 cups (200 g) sharp cheddar cheese, shredded
- 1 small onion, finely chopped
- 1 tsp (5 ml) garlic powder
- 1 tsp (5 ml) salt
- ½ tsp (2.5 ml) black pepper
- ½ cup (115 g) butter, melted
- 2 cups (60 g) cornflake cereal, crushed
- Optional: chopped fresh chives or parsley for garnish
Instructions
- Preheat your oven to 350°F (175°C) and lightly grease a 9×13-inch (23×33 cm) baking dish.
- In a food processor or blender, pulse 1 cup (240 ml) of small-curd cottage cheese until smooth and creamy.
- In a large mixing bowl, combine 2 lbs (900 g) frozen shredded hash browns (thawed and drained if needed), blended cottage cheese, 1 cup (240 ml) sour cream, 2 cups (200 g) shredded sharp cheddar cheese, finely chopped small onion, 1 tsp (5 ml) garlic powder, 1 tsp (5 ml) salt, and ½ tsp (2.5 ml) black pepper. Stir gently until evenly combined.
- Spread the potato mixture evenly into the prepared baking dish.
- In a small bowl, mix 2 cups (60 g) crushed cornflakes with ½ cup (115 g) melted butter until fully coated.
- Sprinkle the buttery cornflake mixture evenly over the potato base, covering all edges.
- Bake for 40-45 minutes, or until the top is golden brown and crispy and the casserole is bubbling around the edges.
- Let the casserole rest for 5-10 minutes before serving. Garnish with chopped fresh chives or parsley if desired.
Notes
Thaw and drain frozen hash browns well to avoid sogginess. Blend cottage cheese until smooth for creamy texture. Use enough melted butter in the topping for a golden, crispy finish. If topping browns too quickly, tent with foil halfway through baking. Assemble ahead and refrigerate up to 24 hours; add 10-15 minutes to baking time if baking from chilled.
Nutrition
- Serving Size: 1/8 of casserole
- Calories: 350400
- Sugar: 3
- Sodium: 600
- Fat: 22
- Saturated Fat: 13
- Carbohydrates: 28
- Fiber: 2
- Protein: 12
Keywords: funeral potatoes, cheesy casserole, crispy topping, comfort food, hash browns, cheesy potatoes, potluck recipe, easy casserole