My friend Jenna swore she didn’t like chocolate and peanut butter together. I know, right? We were planning a casual get-together, and she kept insisting on a “grown-up” dessert—something sophisticated, nothing too sweet. I nodded along, thinking about the box of brownie mix in my pantry and the jar of peanut butter that was practically winking at me. I told her I’d handle dessert, and honestly, I had no plan. I just knew I wanted something that felt like a celebration but didn’t require turning on the oven in the middle of a sticky July afternoon. That’s when the idea for this easy no-bake Reese’s peanut butter poke cake popped into my head, and I have not looked back since.
The thing is, I was the skeptic here. A poke cake always felt a little gimmicky to me—like a shortcut that couldn’t possibly deliver real flavor. And mixing boxed cake with pudding and candy? It sounded like something you’d make for a kid’s birthday party, not something you’d actually crave. But then I made one, and I had to eat my words (and a very generous slice). The texture is ridiculous—light, creamy, with pockets of peanut butter fudge running through every single bite. It’s not just easy; it’s the kind of dessert that makes people close their eyes and go quiet. That’s the moment I knew this recipe was going to stick around.
So, this easy no-bake Reese’s peanut butter poke cake is my little rebellion against complicated desserts. It’s for the days when you want to show up with something impressive but you also want to be sitting on the couch, feet up, twenty minutes later. It’s honest, it’s unapologetically indulgent, and it works every single time. Trust me on this one.
Why You’ll Love This Recipe
I’ve tested this easy no-bake Reese’s peanut butter poke cake about seven times (my neighbors have been very helpful taste-testers), and each batch confirmed what I suspected from the start: this is the dessert that disappears fastest. Here’s why it earns a permanent spot in your recipe rotation.
- No oven required. Summer heat, busy holidays, or just a lazy Sunday—this cake comes together without heating up your kitchen. It’s a total game-changer when you want something decadent without the sweat.
- Simple, everyday ingredients. You probably already have most of what you need. A box of chocolate cake mix, a can of sweetened condensed milk, creamy peanut butter, Cool Whip, and a bag of mini Reese’s cups. No fancy grocery store runs required.
- Perfect for potlucks and parties. This cake travels well, feeds a crowd, and always gets the “who made this?!” reaction. It’s the kind of dessert that makes you look like you spent hours, when really you spent twenty minutes and let the fridge do the rest.
- Kid-approved and adult-adored. Let’s face it—chocolate and peanut butter is a universal love language. My nephew asked for this for his birthday, and my dad, who claims he doesn’t have a sweet tooth, went back for thirds.
- Unbelievably creamy texture. The poke method lets that sweetened condensed milk and peanut butter mixture seep deep into the cake, creating pockets of fudgy goodness in every bite. It’s not dry, it’s not overly dense—it’s just right.
What sets this recipe apart is the balance. I’ve had poke cakes that were too soggy or too sweet, but this version hits that perfect middle ground. The peanut butter layer is rich without being cloying, and the chocolate cake provides a sturdy, moist base. Plus, the Reese’s cups on top add that satisfying crunch. It’s comfort food that doesn’t take itself too seriously, and honestly, that’s exactly what we need sometimes.
What Ingredients You Will Need
This easy no-bake Reese’s peanut butter poke cake uses a short list of ingredients, and each one plays a specific role in building that irresistible texture and flavor. Let’s break it down so you know exactly what to grab and why.
- 1 box chocolate cake mix (plus eggs, oil, and water as directed on the box). I usually go with a standard devil’s food or dark chocolate mix. Duncan Hines and Betty Crocker both work beautifully here. The cake mix is your base—it bakes up tender and sturdy enough to handle all that poked-in goodness without falling apart.
- 1 can (14 ounces) sweetened condensed milk. This is the secret weapon. It’s thick, sweet, and creates that luscious, almost fudge-like layer when combined with peanut butter. Do not substitute with evaporated milk—they are not the same, and the texture will be off.
- 1/2 cup creamy peanut butter. Use the standard processed kind (like Jif or Skippy) for the smoothest results. Natural peanut butter that separates can be too oily and might not blend as evenly. If you only have natural, stir it really well before measuring.
- 1 teaspoon vanilla extract. A small addition, but it rounds out the flavors and makes the peanut butter mixture taste even more like a Reese’s cup.
- 1 container (8 ounces) Cool Whip, thawed. This gives the cake its light, airy topping. You can use homemade whipped cream if you prefer, but Cool Whip holds its shape better for leftovers and is a little more stable for transporting.
- 1 cup mini Reese’s peanut butter cups, chopped. I buy the bag of miniatures and give them a rough chop. Some pieces stay whole, some crumble—that’s the goal. You want texture and little pockets of peanut butter candy in every slice.
- Optional: chocolate syrup or melted peanut butter for drizzling. Not necessary, but it makes the presentation look extra fancy for very little effort.
That’s it. Seven ingredients, and most of them are pantry staples. The beauty of this recipe is that it doesn’t demand perfection—just good quality basics and a little patience while it chills.
Equipment Needed
You don’t need a professional kitchen to pull off this easy no-bake Reese’s peanut butter poke cake. Here’s what you’ll want on hand.
- 9×13-inch baking pan. Glass or metal both work. I prefer glass because you can see the poke holes and how the filling is soaking in, but metal conducts heat a little faster if you’re baking the cake. Either way, it’s fine.
- Mixing bowls. One for the cake batter, one for the peanut butter filling. Nothing fancy—just medium and large sizes.
- Whisk or electric mixer. You can whisk the cake batter by hand, but an electric mixer makes it quicker. For the filling, a whisk is all you need.
- Wooden spoon handle or the end of a spatula. This is your poking tool. The round handle of a wooden spoon works perfectly. You want something about 1/2 inch thick to create holes that are big enough to hold the filling but not so large that the cake collapses.
- Rubber spatula. For spreading the Cool Whip evenly and scraping every last bit of peanut butter mixture out of the bowl.
- Measuring cups and spoons. Standard set—nothing unusual needed here.
- Plastic wrap or aluminum foil. For covering the cake while it chills in the fridge.
If you don’t have a 9×13 pan, you could use two 8×8 pans, but adjust the baking time slightly. And honestly, I’ve made this in a disposable aluminum pan for potlucks, and it works just as well. No need to overthink the equipment.
Preparation Method
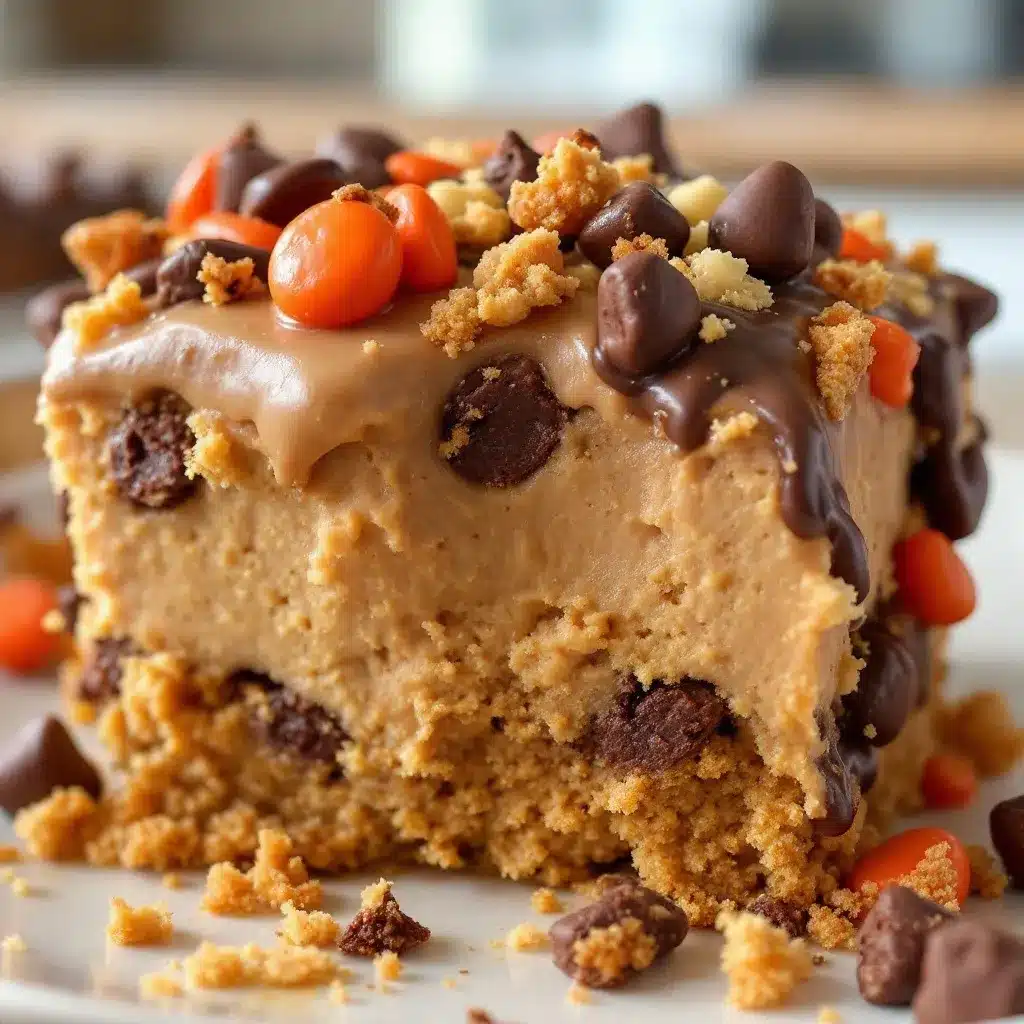
Let’s walk through this step by step. I promise, it’s simpler than it sounds, and the payoff is huge.
- Bake the cake. Preheat your oven to 350°F (175°C). Grease your 9×13-inch baking pan lightly. Prepare the chocolate cake mix according to the package directions—usually that means mixing the mix with eggs, oil, and water. Pour the batter into the pan and bake for the time recommended on the box, typically 28 to 33 minutes. You’ll know it’s done when a toothpick inserted in the center comes out clean or with a few moist crumbs. Let the cake cool in the pan on a wire rack for about 10 minutes. You want it warm but not piping hot for the next step.
- Poke the holes. While the cake is still warm, use the handle of a wooden spoon to poke holes all over the cake. Space them about 1 inch apart. Don’t be shy—poke all the way down to the bottom of the pan. The more holes, the more filling gets absorbed. I usually aim for about 20 to 25 holes. It looks a little chaotic, but that’s exactly what you want.
- Make the peanut butter filling. In a medium bowl, combine the sweetened condensed milk, creamy peanut butter, and vanilla extract. Whisk until smooth and fully combined. It will be thick and glossy. Taste it—I dare you not to eat a spoonful. This mixture is the heart of the cake.
- Pour and spread. Slowly pour the peanut butter mixture over the warm cake, focusing on the poked holes. Use a spatula to gently spread it around, making sure it seeps into every opening. Some will pool on top—that’s fine. It will soak in as the cake cools. Let the cake cool completely at room temperature, about 30 to 45 minutes.
- Top with Cool Whip. Once the cake is completely cool, spread the thawed Cool Whip evenly over the top. Don’t press too hard—you want it light and fluffy. Make sure it reaches the edges so every slice gets that creamy topping.
- Add the Reese’s cups. Sprinkle the chopped mini Reese’s cups all over the top. Press them down gently so they stick to the Cool Whip. You can also drizzle a little chocolate syrup or melted peanut butter if you’re feeling extra.
- Chill. Cover the pan with plastic wrap or foil and refrigerate for at least 4 hours, but overnight is even better. This is the crucial step—the cake needs time to absorb all that peanut butter goodness and set properly. Patience, my friend.
- Slice and serve. When you’re ready to serve, cut into squares. Run your knife under hot water and wipe it clean between cuts for the neatest slices. Serve cold straight from the fridge.
A few notes from my trials: If you rush the chilling time, the cake will be a little messy. It will still taste amazing, but the texture won’t be as cohesive. Also, if you’re making this a day ahead (which I highly recommend), wait to add the chopped Reese’s cups until just before serving so they stay crunchy.
Cooking Tips & Techniques
Over the course of testing this easy no-bake Reese’s peanut butter poke cake, I made a few mistakes so you don’t have to. Here’s what I learned.
Don’t let the cake cool completely before poking. I made this error on my first attempt. If the cake is too cool, the holes close up a bit and the filling doesn’t soak in as well. Poke while it’s still warm—about 10 minutes out of the oven is the sweet spot. The holes stay open, and the warm cake welcomes that peanut butter mixture like a hug.
Use room temperature peanut butter. Cold peanut butter is stiff and harder to whisk into the sweetened condensed milk. Let it sit on the counter for 15 minutes before you start. It makes a noticeable difference in how smoothly everything comes together.
Don’t overmix the filling. Whisk just until combined. Overmixing can make the peanut butter mixture a little grainy or cause it to separate. You want it smooth and homogenous, but you don’t need to beat it within an inch of its life.
Chill overnight for the best texture. I know, I know—waiting is hard. But if you can plan ahead, let the cake sit in the fridge for a full 12 to 24 hours. The flavors meld, the cake becomes incredibly moist, and the texture turns almost mousse-like in places. It’s a different (and better) cake the next day.
Keep the Cool Whip covered. If you’re storing leftovers, press a piece of plastic wrap directly onto the surface of the Cool Whip before covering the pan. This prevents a skin from forming and keeps the topping light and fluffy.
One more thing: if you’re bringing this to a gathering, let it sit at room temperature for about 10 minutes before serving. It takes the chill off and makes the flavors pop just a little more. Trust me on that one.
Variations & Adaptations
This easy no-bake Reese’s peanut butter poke cake is wonderfully adaptable. Here are a few twists I’ve tried and loved.
- Gluten-free version. Use a gluten-free chocolate cake mix. Most brands work well, just follow the box directions. The rest of the ingredients are naturally gluten-free, so you’re good to go. I’ve made this for a friend with celiac, and she couldn’t tell the difference.
- Peanut-free option. Swap the peanut butter for sunflower seed butter (like SunButter) and use chopped sun cups or a different chocolate candy that’s nut-free. The flavor changes a bit, but it’s still delicious and safe for school events or nut-free households.
- Extra chocolatey version. Add 1/2 cup of chocolate chips to the peanut butter filling before pouring it over the cake. They’ll melt slightly and create little chocolate pockets throughout. Or drizzle a layer of chocolate ganache over the Cool Whip before adding the Reese’s cups.
- Mint chocolate twist. Add 1/4 teaspoon of peppermint extract to the peanut butter filling and top with crushed Andes mints instead of Reese’s cups. It’s a fun holiday variation that feels fresh and festive.
- Dairy-free adaptation. Use a dairy-free cake mix (some brands are accidentally vegan), a can of full-fat coconut milk whisked with peanut butter instead of sweetened condensed milk, and a dairy-free whipped topping like CocoWhip. It’s not exactly the same, but it scratches the itch for those avoiding dairy.
I personally love the extra chocolatey version—it’s a little over the top, but sometimes that’s exactly what a Tuesday needs. Don’t be afraid to experiment; this recipe is forgiving.
Serving & Storage Suggestions
This cake is best served cold, straight from the fridge. The texture is firm enough to hold its shape but still incredibly creamy. I like to cut it into 12 to 15 squares, depending on how generous I’m feeling. A small slice goes a long way because it’s rich.
For presentation, a drizzle of chocolate syrup on the plate and a few extra mini Reese’s cups on top make it look like something from a bakery. If you’re serving it at a party, consider cutting it into smaller bite-sized squares—people always go back for seconds.
Storage: Cover the pan tightly with plastic wrap or aluminum foil and keep it in the refrigerator. It will stay fresh for up to 5 days. The Cool Whip may soften a little after day 3, but the flavor only gets better. I actually think it tastes best on day 2 or 3.
Freezing: Yes, this cake freezes beautifully. Wrap the entire pan (or individual slices) in a layer of plastic wrap, then a layer of foil. Freeze for up to 3 months. Thaw overnight in the refrigerator before serving. If you’re freezing individual slices, they make for a fantastic emergency dessert when you need something sweet in a hurry.
One note on reheating: don’t. This is a cold dessert through and through. If you want a warm chocolate and peanut butter experience, I’d suggest making a batch of these chicken zucchini boats and saving the cake for later. But honestly, cold is the way to go here.
Nutritional Information & Benefits
Let’s be real—this easy no-bake Reese’s peanut butter poke cake is a treat, not a health food. But here’s a rough estimate per serving (based on 12 servings): approximately 420 calories, 22 grams of fat, 52 grams of carbohydrates, and 8 grams of protein. It’s indulgent, and that’s okay.
On the plus side, peanut butter does offer some protein and healthy fats, and chocolate has antioxidants. But mostly, this cake is about joy and satisfaction. Sometimes you need a dessert that feels like a hug, and this delivers.
If you’re watching your sugar intake, you could reduce the amount of sweetened condensed milk slightly or use a sugar-free cake mix, but honestly, I’d recommend just enjoying a smaller slice. This cake is meant to be a celebration, not a daily staple. Pair it with a glass of cold milk or a hot cup of coffee, and savor every bite.
For those with dietary restrictions, the gluten-free and dairy-free variations above are solid options. Always check labels on your specific ingredients to ensure they meet your needs.
Conclusion
This easy no-bake Reese’s peanut butter poke cake is the kind of recipe that earns a permanent spot in your dessert rotation. It’s simple enough for a weeknight craving but impressive enough for a holiday table or potluck. The combination of moist chocolate cake, creamy peanut butter filling, and fluffy Cool Whip topping is honestly unbeatable. And the best part? You don’t need to turn on the oven for more than 30 minutes, which means more time enjoying the people around you.
I love this recipe because it reminds me that dessert doesn’t have to be complicated to be memorable. Some of the best things in life come from a box mix, a can of condensed milk, and a little bit of patience. So go ahead—make this cake, bring it to your next gathering, and watch it disappear. And when someone asks for the recipe, just smile and tell them it’s your little secret.
I’d love to hear how yours turns out! Drop a comment below and let me know if you tried any variations or if this became a new favorite in your house. And if you’re looking for another easy dessert that feeds a crowd, check out this dairy-free fruit pizza—it’s another no-fuss winner. Happy baking (or rather, happy not-baking)!
Frequently Asked Questions
Can I use a different cake flavor?
Absolutely. Yellow cake, vanilla, or even marble cake mix would work. Chocolate is the classic pairing with peanut butter, but feel free to experiment. Just keep the baking time the same.
Do I have to use Cool Whip?
No, you can use homemade whipped cream. Whip 1 1/2 cups of heavy cream with 2 tablespoons of powdered sugar until stiff peaks form. It’s a little less stable for leftovers, but it tastes incredible.
Can I make this in advance?
Yes! In fact, I recommend it. Make the cake a day ahead, chill it overnight, and add the chopped Reese’s cups just before serving for the best texture and crunch.
How do I get clean slices?
Use a sharp knife and run it under hot water before each cut. Wipe the blade clean between slices. This works like a charm for neat, bakery-style squares.
Can I use natural peanut butter?
You can, but it may not blend as smoothly and could separate slightly. If you use natural peanut butter, stir it really well and be prepared for a slightly grainier texture. The flavor will still be great.
Pin This Recipe!
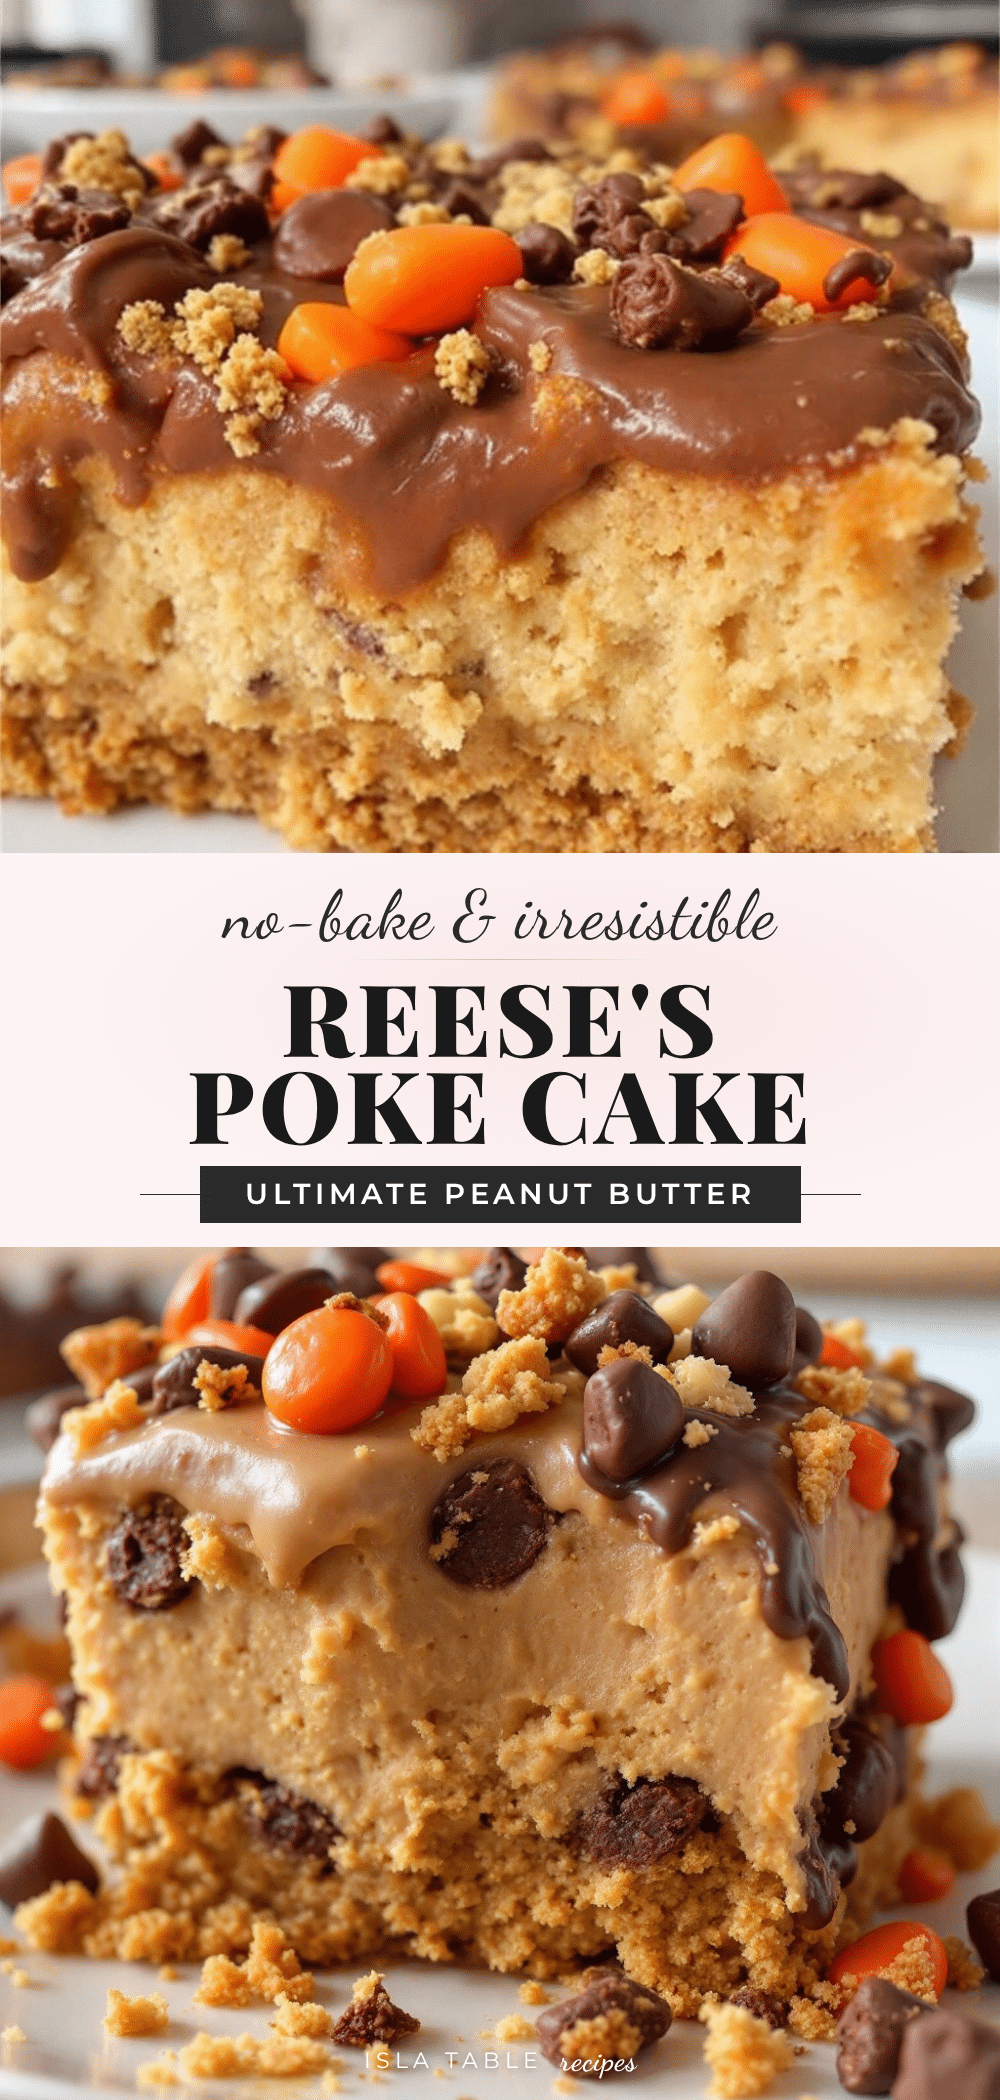
Easy No-Bake Reeses Peanut Butter Poke Cake

This easy no-bake Reese’s peanut butter poke cake is a decadent dessert that combines moist chocolate cake with a creamy peanut butter filling and fluffy Cool Whip topping. Perfect for potlucks and parties, it requires no oven time and uses simple ingredients.
- Prep Time: 20 minutes
- Cook Time: 30 minutes
- Total Time: 4 hours 50 minutes (includes chilling)
- Yield: 12 servings 1x
- Category: Dessert
- Cuisine: American
Ingredients
- 1 box chocolate cake mix (plus eggs, oil, and water as directed on the box)
- 1 can (14 ounces) sweetened condensed milk
- 1/2 cup creamy peanut butter
- 1 teaspoon vanilla extract
- 1 container (8 ounces) Cool Whip, thawed
- 1 cup mini Reese’s peanut butter cups, chopped
- Optional: chocolate syrup or melted peanut butter for drizzling
Instructions
- Preheat oven to 350°F (175°C). Grease a 9×13-inch baking pan. Prepare the chocolate cake mix according to package directions. Pour batter into pan and bake for 28-33 minutes, until a toothpick inserted in center comes out clean or with a few moist crumbs. Let cool in pan on a wire rack for about 10 minutes.
- While cake is still warm, use the handle of a wooden spoon to poke holes all over the cake, spacing them about 1 inch apart and poking all the way to the bottom of the pan. Aim for 20-25 holes.
- In a medium bowl, combine sweetened condensed milk, creamy peanut butter, and vanilla extract. Whisk until smooth and fully combined.
- Slowly pour the peanut butter mixture over the warm cake, focusing on the poked holes. Use a spatula to gently spread it around, ensuring it seeps into every opening. Let cake cool completely at room temperature, about 30-45 minutes.
- Once cake is completely cool, spread the thawed Cool Whip evenly over the top.
- Sprinkle chopped mini Reese’s cups over the Cool Whip. Press down gently so they stick.
- Cover pan with plastic wrap or foil and refrigerate for at least 4 hours, preferably overnight.
- Slice into squares and serve cold. For clean slices, run knife under hot water and wipe clean between cuts.
Notes
For best texture, chill overnight. If making ahead, add chopped Reese’s cups just before serving to keep them crunchy. Use room temperature peanut butter for easier mixing. Do not let cake cool completely before poking holes.
Nutrition
- Serving Size: 1 square
- Calories: 420
- Sugar: 38
- Sodium: 380
- Fat: 22
- Saturated Fat: 8
- Carbohydrates: 52
- Fiber: 2
- Protein: 8
Keywords: no-bake dessert, Reese's, peanut butter, poke cake, chocolate, easy dessert, potluck dessert


