Fourth time in two weeks and I finally stopped overcomplicating it. The first batch I tried to layer with homemade pastry cream and a stabilized whipped topping that took an hour and a half to set properly. Second attempt I went full shortcut mode with pre-made pudding and cool whip and it tasted like someone described a summer picnic from memory. Third time I found the sweet spot but the berries bled into the cream overnight and the whole thing turned a sad shade of pink. This time I just let the ingredients do what they already do best.
This Easy Red White and Blue Berry Icebox Cake is the dessert equivalent of a flag that actually tastes good. No gelatin, no food coloring, no fussy piping bags. Just layers of crisp graham crackers, billowy vanilla cream, and fresh berries that stack up into something that looks like you tried way harder than you actually did. The first time I brought it to a backyard barbecue my sister-in-law asked where I bought it and I felt both proud and slightly offended.
The beauty of this recipe is that it doesn’t need to be fancy to be impressive. It’s the kind of thing you throw together between pool trips and sunscreen reapplications. And honestly? It might be the best no-bake summer dessert I’ve ever made.
Why You’ll Love This Recipe
Let me tell you why this icebox cake keeps showing up at every gathering I attend this summer.
- No Oven Required : When it’s ninety degrees outside the last thing you want to do is turn on the oven. This comes together on your countertop and chills in the fridge. That’s it.
- Simple Ingredients : Graham crackers, heavy cream, cream cheese, powdered sugar, vanilla, and fresh berries. You might already have most of this in your kitchen right now.
- Perfect for Patriotic Holidays : Fourth of July, Memorial Day, Labor Day — this dessert is basically made for red white and blue celebrations. It also works for summer birthdays and random Tuesday nights when you need something pretty.
- Crowd-Pleaser : I’ve served this to kids who usually push dessert around their plate and adults who claim they’re watching their carbs. Both groups went back for seconds. The texture is what gets them — the graham crackers soften into something between cake and cheesecake while the berries burst with freshness.
- Make-Ahead Friendly : This actually gets better after sitting overnight. The flavors meld together and the texture becomes perfectly sliceable. You can make it a full day ahead which means less stress on party day.
What makes this version different from other icebox cakes I’ve tried is the cream cheese layer. Most recipes use straight whipped cream which tastes fine but collapses under the weight of the berries and crackers. Adding cream cheese gives the filling structure and a subtle tang that balances the sweetness. It slices clean and holds its shape without feeling heavy. Trust me on this one.
What Ingredients You Will Need
This recipe uses simple ingredients that work together to create something surprisingly elegant. Here’s what you need and why each one matters.
For the Cream Layer
- 16 ounces cream cheese, softened to room temperature (full fat works best here — low fat can make the filling grainy)
- 2 cups heavy whipping cream, cold (this is non-negotiable for getting that fluffy texture)
- 1 cup powdered sugar, sifted if you have the patience (lumps won’t ruin it but sifting gives smoother results)
- 2 teaspoons vanilla extract (use pure vanilla extract if you can — the flavor difference is real)
- Pinch of salt (just a tiny one to balance the sweetness)
For the Layers
- 1 box (about 14 ounces) graham crackers (I prefer Honey Maid but any brand works — just get the full-size sheets not the crumbs)
- 2 cups fresh strawberries, hulled and sliced thin (look for bright red berries that are fragrant — that’s how you know they’re ripe)
- 2 cups fresh blueberries (tiny wild blueberries work great here because they distribute more evenly)
- 1 cup fresh raspberries (optional but adds nice tartness and another layer of red)
For the Topping
- Extra whipped cream for spreading on top (reserve about a cup of the cream mixture before layering)
- Fresh berries for decorating (save the prettiest ones for the top)
- Optional: mint leaves or edible flowers for garnish (makes it look extra fancy with zero effort)
I want to mention that the quality of your berries matters more here than in a baked dessert where they’d get cooked down. Since these stay fresh and raw, you want berries that actually taste like something. If strawberries are out of season and looking pale, consider using frozen raspberries that have been thawed and drained. I’ve done this in a pinch and it worked fine.
Equipment Needed
You don’t need anything fancy for this recipe. Here’s what you’ll need and a few notes from my own kitchen experiments.
- 9×13 inch baking dish (glass is ideal so you can see the layers but metal works too)
- Electric hand mixer or stand mixer (you can whip cream by hand but your arm will hate you — I’ve done it once and never again)
- Large mixing bowl (make sure it’s big enough to hold the cream mixture without splashing)
- Spatula (a rubber one for scraping the bowl clean and an offset one for spreading if you have it)
- Sharp knife and cutting board (for slicing strawberries)
- Plastic wrap (for covering the dish while it chills)
If you don’t have a 9×13 dish you can use two 8×8 pans or even a deep pie plate. The layers will just be thicker and you might need to adjust the number of graham cracker layers. I’ve also made this in a springform pan for a round presentation and it looked gorgeous — just make sure the sides are tall enough to hold everything.
Preparation Method
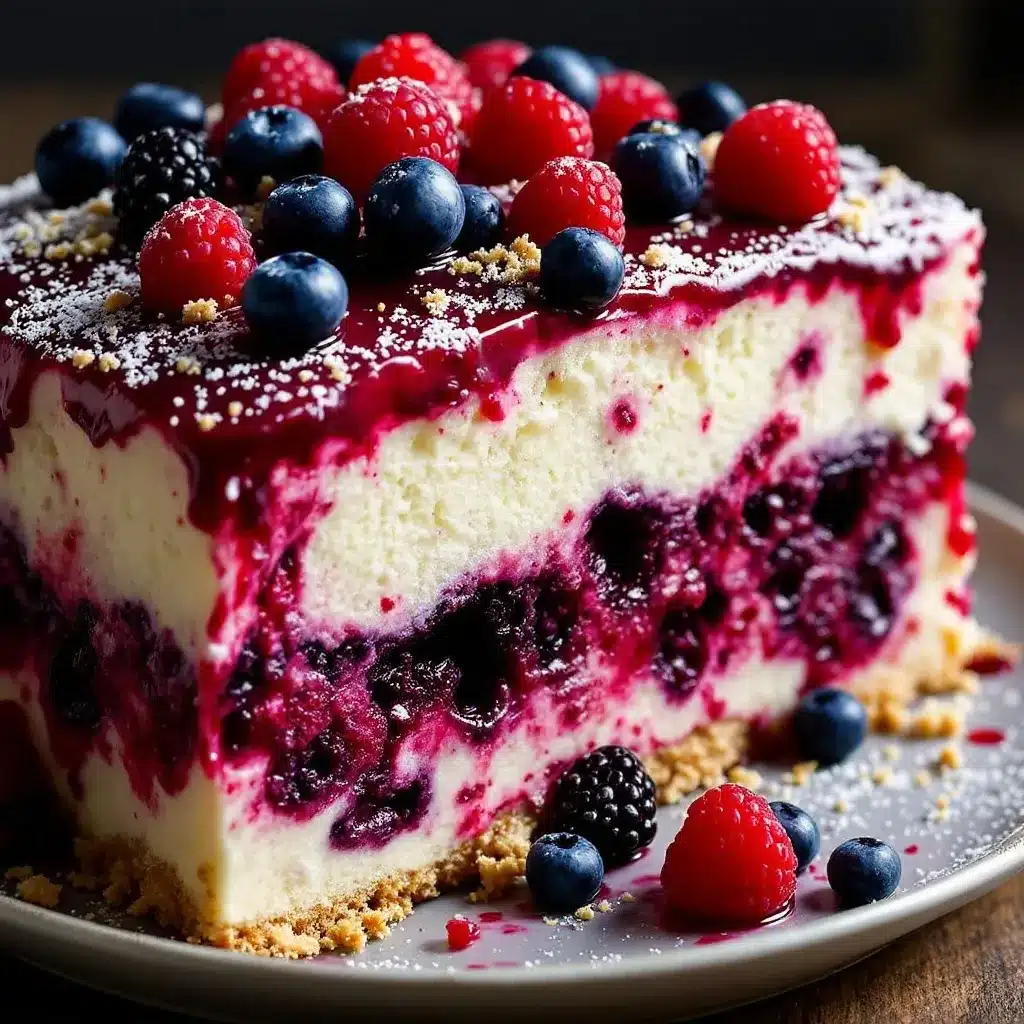
Let me walk you through this step by step. The process is straightforward but a few details make the difference between a good icebox cake and a great one.
-
Make the cream filling. In a large mixing bowl, beat the softened cream cheese with an electric mixer on medium speed until smooth and fluffy — about 2 minutes. Scrape down the sides of the bowl with a spatula. Add the powdered sugar and vanilla extract and beat until fully combined, another minute or so. The mixture should look creamy with no lumps.
-
Whip the cream separately. In a separate bowl (chill it first if you remember — it helps the cream whip faster), pour in the cold heavy whipping cream. Using clean beaters, whip the cream on medium-high speed until soft peaks form. You want the cream to hold its shape but still look silky — about 3 to 4 minutes. Be careful not to overwhip or you’ll end up with butter.
-
Fold everything together. Add about a third of the whipped cream to the cream cheese mixture and stir gently to lighten it up. Then add the remaining whipped cream and fold it in using a spatula. Use a gentle cutting and folding motion — don’t stir or you’ll deflate all that air you just whipped in. The final mixture should be light, fluffy, and spreadable.
-
Prep your berries. Wash and dry all the berries thoroughly. Wet berries will make the graham crackers soggy before they should be. Hull the strawberries and slice them into thin rounds — about 1/8 inch thick. Set aside your prettiest berries for decorating the top.
-
Start layering. Spread a thin layer of the cream mixture on the bottom of your 9×13 dish — just enough to keep the first layer of graham crackers from sliding around. Arrange a single layer of graham crackers on top, breaking pieces as needed to fill the gaps. Don’t worry if they don’t fit perfectly — the cream will fill in the spaces.
-
Add the first cream layer. Spread about one-third of the remaining cream mixture evenly over the graham crackers. Use an offset spatula or the back of a spoon to smooth it out. The layer should be thick enough to cover the crackers completely.
-
Add the berries. Scatter about one-third of the sliced strawberries and one-third of the blueberries over the cream layer. Press them in gently so they stick. Don’t overload this layer or the cake will get unstable.
-
Repeat the layers. Add another layer of graham crackers on top of the berries, pressing down gently. Spread another third of the cream mixture over the crackers. Add another layer of berries. Repeat one more time — graham crackers, remaining cream, remaining berries. You should end with a top layer of cream.
-
Finish the top. Spread any remaining cream mixture smoothly over the top. Arrange your reserved berries in a decorative pattern — rows of strawberries and blueberries alternating, a flag design, or just scattered artfully. This is where you can get creative.
-
Chill overnight. Cover the dish tightly with plastic wrap and refrigerate for at least 6 hours, but overnight is better. The graham crackers need time to soften into that cake-like texture. Don’t rush this step — I’ve tried cutting into it after 4 hours and the center was still crunchy.
One thing I learned the hard way — make sure your cream cheese is truly at room temperature. If it’s cold when you try to beat it, you’ll end up with tiny lumps that never smooth out. Leave it on the counter for at least an hour before starting.
Cooking Tips & Techniques
After making this Easy Red White and Blue Berry Icebox Cake more times than I care to admit, here are the things I wish someone had told me.
Don’t skip the cream cheese. I know it adds an extra step but it makes a massive difference. Pure whipped cream icebox cakes taste fine but they don’t hold up well. The cream cheese gives structure and a subtle tang that keeps the dessert from being one-note sweet. It’s the difference between something that tastes homemade and something that tastes like a grocery store dessert cup.
Watch your berry placement. If you pile all the berries in the middle of each layer, the cake will tilt and slide when you try to slice it. Distribute them evenly across the surface. I like to place them in a single layer rather than stacking them. You get berry flavor in every bite without the structural issues.
Let it rest before serving. Take the cake out of the fridge about 15 minutes before you plan to serve it. This takes the chill off and lets the flavors open up. If you serve it straight from the fridge the cream will be too firm and the flavors will be muted.
Use a sharp knife for slicing. Run your knife under hot water and wipe it dry between cuts. This gives you clean slices instead of smearing the cream everywhere. I learned this after my first attempt looked like a toddler had been let loose on it.
Make extra cream if you like thick layers. The recipe as written gives you balanced layers but if you’re a cream lover like me, increase the cream cheese to 20 ounces and the heavy cream to 2.5 cups. Adjust the powdered sugar up by a quarter cup. This gives you thicker, more decadent layers.
Variations & Adaptations
This recipe is surprisingly flexible. Here are some variations I’ve tried and loved.
Dairy-Free Version : Use dairy-free cream cheese (Kite Hill makes a good one) and full-fat coconut cream chilled and whipped instead of heavy cream. The coconut cream adds a subtle tropical flavor that works surprisingly well with the berries. I tested this for a friend who’s dairy-free and she said it was better than the original — though I’m not sure I agree.
Gluten-Free Option : Swap the graham crackers for gluten-free graham crackers or even gluten-free vanilla wafers. I’ve used Schär brand graham crackers and they soften beautifully. The texture is slightly different — a bit more tender — but still delicious. If you want to go the gluten-free route, check out our Easy Gluten-Free Red White Blueberry Parfaits for a similar flavor in individual servings.
Low-Sugar Version : Use a sugar substitute like monk fruit sweetener in the cream layer and let the natural sweetness of the berries carry the dessert. The texture will be slightly different but still satisfying. I made this for my uncle who’s watching his sugar intake and he ate three slices.
Different Berry Combinations : Not a fan of blueberries? Use blackberries instead. Want more red? Add extra raspberries. In the fall I’ve made this with sliced apples and caramel sauce instead of berries — completely different dessert but same technique. The flexibility is what makes this recipe a keeper.
Individual Servings : Layer everything in mason jars or small glasses for a grab-and-go dessert. This works great for picnics and barbecues where you don’t want to deal with slicing and serving. Layer it the same way but in smaller containers and chill for at least 4 hours.
If you’re looking for another summer dessert that’s equally easy, try our Easy Dairy-Free Star Spangled Fruit Pizza — it uses similar ingredients but in a completely different format.
Serving & Storage Suggestions
This Easy Red White and Blue Berry Icebox Cake is best served cold straight from the fridge. Let it sit at room temperature for about 15 minutes before slicing — this takes the edge off the chill without letting the cream get too soft.
For presentation, I like to garnish the top with a few fresh mint leaves and maybe some edible flowers if I’m feeling fancy. The green adds a nice contrast to all that red and blue. You can also drizzle a little honey or berry syrup over each slice for extra visual appeal.
This cake pairs beautifully with a cold glass of lemonade or iced tea. If you’re serving it after a barbecue, a light white wine like Sauvignon Blanc works well too. For the kids, a tall glass of cold milk is always a winner.
Storage : Cover the dish tightly with plastic wrap and store in the refrigerator for up to 3 days. The texture actually improves on day two as the flavors continue to meld. By day three the graham crackers are very soft — almost pudding-like — which some people prefer.
Freezing : You can freeze this cake for up to 2 months. Wrap the entire dish in plastic wrap and then a layer of aluminum foil. Thaw in the refrigerator overnight before serving. The texture will be slightly different — a bit more icy — but still delicious. I don’t recommend freezing it if you plan to serve it to guests, but for a quick dessert fix it works.
One thing to note — the berries will release some liquid as the cake sits. This is normal and actually helps soften the graham crackers. Just make sure your dish has sides tall enough to contain any extra liquid. If you notice pooling on the surface, blot it gently with a paper towel before serving.
Nutritional Information & Benefits
Here’s the nutritional breakdown for one serving (based on 12 servings):
| Nutrient | Amount Per Serving |
|---|---|
| Calories | 385 |
| Total Fat | 26g |
| Saturated Fat | 15g |
| Cholesterol | 78mg |
| Sodium | 290mg |
| Total Carbohydrates | 35g |
| Dietary Fiber | 3g |
| Sugars | 22g |
| Protein | 5g |
While this isn’t exactly health food, it does have some redeeming qualities. The berries are packed with antioxidants and vitamin C. Blueberries are particularly good for brain health and strawberries are loaded with vitamin C and manganese. The cream cheese provides some calcium and protein, though admittedly not enough to call this a healthy dessert.
If you’re looking for a lighter option, check out our Fresh Vegan Watermelon Flag Salad — it’s patriotic and refreshing with way fewer calories. Or for a protein-packed summer snack, our Easy Nut-Free Protein Balls are great for post-swim energy.
This recipe contains dairy and gluten. For those with allergies, see the variations section above for suitable substitutions.
Conclusion
This Easy Red White and Blue Berry Icebox Cake has become my go-to summer dessert for good reason. It’s simple enough to throw together on a Tuesday night but pretty enough to serve at a Fourth of July party. The combination of creamy, crunchy, and fresh is unbeatable — and the fact that you don’t have to turn on the oven is just the cherry on top.
What I love most about this recipe is how forgiving it is. If your layers aren’t perfect or your berries are a little uneven, it doesn’t matter. The finished product always looks beautiful and tastes even better. It’s the kind of dessert that makes you look like you put in way more effort than you actually did — and honestly, isn’t that the best kind of recipe?
I’d love to hear how yours turns out. Did you try a variation? Did your family love it? Drop a comment below and let me know. And if you have a favorite summer dessert that’s equally easy, share that too — I’m always looking for new recipes to add to my rotation.
Now go make this cake. Your summer self will thank you.
Frequently Asked Questions
Can I use frozen berries instead of fresh?
Yes, but thaw and drain them thoroughly first. Frozen berries release a lot of liquid as they thaw, which can make the cake soggy if you don’t drain them well. Pat them dry with paper towels before layering. The texture won’t be quite as good as fresh, but in a pinch it works.
How far ahead can I make this cake?
You can make it up to 2 days ahead of time. The texture actually improves on day two as the graham crackers soften and the flavors meld. After day three the crackers become very soft — almost pudding-like — which some people love and others don’t. I recommend making it the day before you plan to serve it for the best texture.
Can I use a different type of cracker?
Absolutely. Vanilla wafers, shortbread cookies, or even chocolate graham crackers all work well. Just keep in mind that different cookies soften at different rates. Chocolate graham crackers take slightly longer to soften. If you’re using a gluten-free option, check the texture after 6 hours and adjust chilling time as needed.
My cream mixture turned out runny. What went wrong?
A few things could cause this. Your cream cheese might not have been fully softened, which prevents it from incorporating properly. Or your heavy cream might not have been cold enough to whip correctly. You could also have overmixed when folding the cream into the cream cheese. If this happens, chill the mixture for 30 minutes before layering — it will firm up enough to work with.
Can I make this in a different size dish?
Yes, just adjust the number of layers accordingly. An 8×8 pan will give you thicker layers and you might only get 3 layers of graham crackers instead of 4. A round springform pan works beautifully for a more elegant presentation. Just make sure your dish has sides at least 2 inches tall to hold everything.
Pin This Recipe!
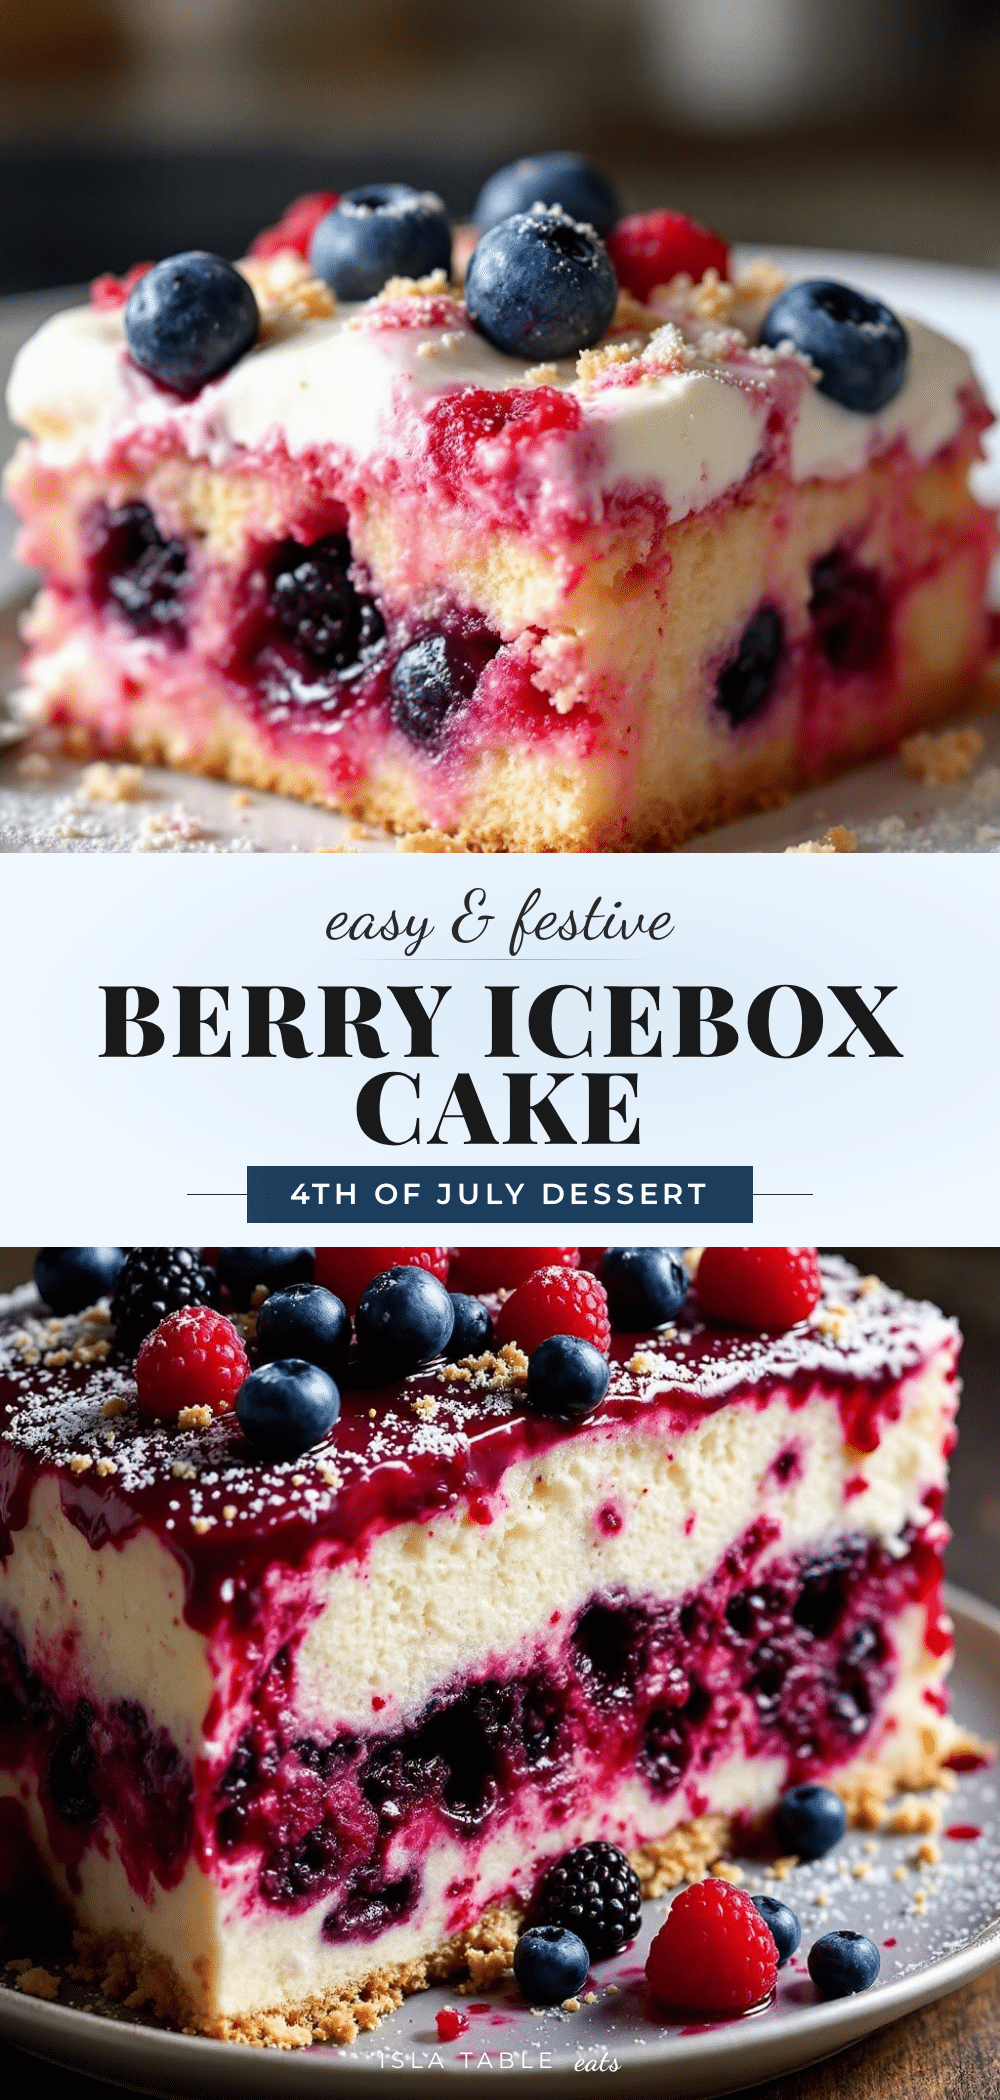
Easy Red White and Blue Berry Icebox Cake

This Easy Red White and Blue Berry Icebox Cake is the dessert equivalent of a flag that actually tastes good. No gelatin, no food coloring, no fussy piping bags—just layers of crisp graham crackers, billowy vanilla cream, and fresh berries that stack up into something that looks like you tried way harder than you actually did.
- Prep Time: 30 minutes
- Cook Time: 0 minutes
- Total Time: 6 hours 30 minutes (includes chilling)
- Yield: 12 servings 1x
- Category: Dessert
- Cuisine: American
Ingredients
- 16 ounces cream cheese, softened to room temperature
- 2 cups heavy whipping cream, cold
- 1 cup powdered sugar, sifted if possible
- 2 teaspoons vanilla extract
- Pinch of salt
- 1 box (about 14 ounces) graham crackers
- 2 cups fresh strawberries, hulled and sliced thin
- 2 cups fresh blueberries
- 1 cup fresh raspberries (optional)
- Extra whipped cream for topping (reserve about 1 cup of cream mixture)
- Fresh berries for decorating
- Optional: mint leaves or edible flowers for garnish
Instructions
- Make the cream filling. In a large mixing bowl, beat the softened cream cheese with an electric mixer on medium speed until smooth and fluffy — about 2 minutes. Scrape down the sides of the bowl with a spatula. Add the powdered sugar and vanilla extract and beat until fully combined, another minute or so. The mixture should look creamy with no lumps.
- Whip the cream separately. In a separate bowl (chill it first if you remember — it helps the cream whip faster), pour in the cold heavy whipping cream. Using clean beaters, whip the cream on medium-high speed until soft peaks form. You want the cream to hold its shape but still look silky — about 3 to 4 minutes. Be careful not to overwhip or you’ll end up with butter.
- Fold everything together. Add about a third of the whipped cream to the cream cheese mixture and stir gently to lighten it up. Then add the remaining whipped cream and fold it in using a spatula. Use a gentle cutting and folding motion — don’t stir or you’ll deflate all that air you just whipped in. The final mixture should be light, fluffy, and spreadable.
- Prep your berries. Wash and dry all the berries thoroughly. Wet berries will make the graham crackers soggy before they should be. Hull the strawberries and slice them into thin rounds — about 1/8 inch thick. Set aside your prettiest berries for decorating the top.
- Start layering. Spread a thin layer of the cream mixture on the bottom of your 9×13 dish — just enough to keep the first layer of graham crackers from sliding around. Arrange a single layer of graham crackers on top, breaking pieces as needed to fill the gaps. Don’t worry if they don’t fit perfectly — the cream will fill in the spaces.
- Add the first cream layer. Spread about one-third of the remaining cream mixture evenly over the graham crackers. Use an offset spatula or the back of a spoon to smooth it out. The layer should be thick enough to cover the crackers completely.
- Add the berries. Scatter about one-third of the sliced strawberries and one-third of the blueberries over the cream layer. Press them in gently so they stick. Don’t overload this layer or the cake will get unstable.
- Repeat the layers. Add another layer of graham crackers on top of the berries, pressing down gently. Spread another third of the cream mixture over the crackers. Add another layer of berries. Repeat one more time — graham crackers, remaining cream, remaining berries. You should end with a top layer of cream.
- Finish the top. Spread any remaining cream mixture smoothly over the top. Arrange your reserved berries in a decorative pattern — rows of strawberries and blueberries alternating, a flag design, or just scattered artfully. This is where you can get creative.
- Chill overnight. Cover the dish tightly with plastic wrap and refrigerate for at least 6 hours, but overnight is better. The graham crackers need time to soften into that cake-like texture. Don’t rush this step — I’ve tried cutting into it after 4 hours and the center was still crunchy.
Notes
Make sure cream cheese is truly at room temperature (leave on counter for at least 1 hour). Don’t skip the cream cheese—it gives structure and tang. Distribute berries evenly to prevent tilting. Let cake rest 15 minutes before serving. Use a sharp knife run under hot water for clean slices. For thicker layers, increase cream cheese to 20 oz and heavy cream to 2.5 cups.
Nutrition
- Serving Size: 1 slice (1/12 of cak
- Calories: 385
- Sugar: 22
- Sodium: 290
- Fat: 26
- Saturated Fat: 15
- Carbohydrates: 35
- Fiber: 3
- Protein: 5
Keywords: icebox cake, no-bake dessert, summer dessert, Fourth of July, patriotic dessert, berry dessert, graham cracker cake


