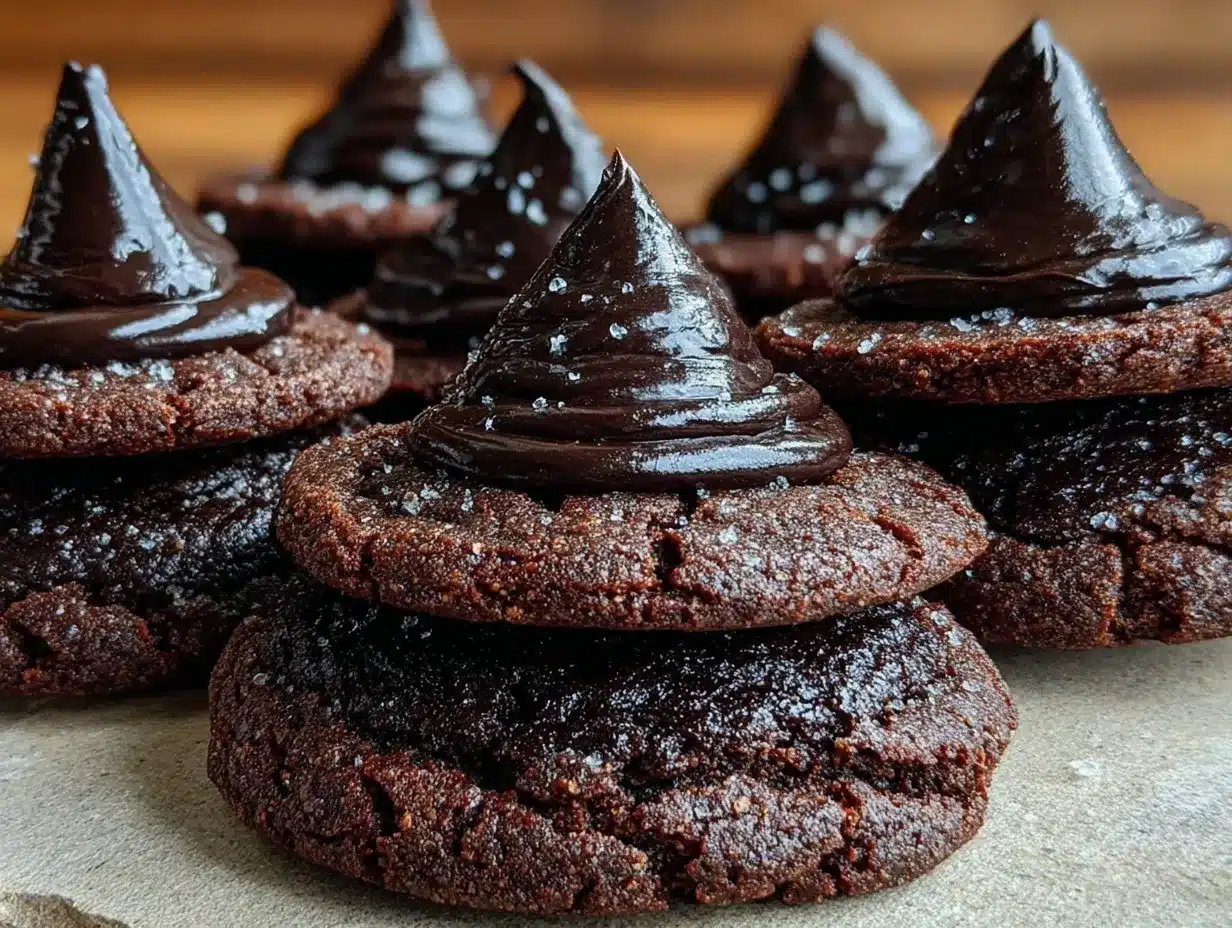
Crackly edges, and that’s the whole point. The way these witch hat cookies snap when you bite into them is what I made this for—everything else is secondary. I’m not even kidding. You know that satisfying, almost brittle crunch that you get from a cookie baked just right? These chocolate sugar cookies achieve that perfect texture, with just the right amount of snap to contrast the smooth, glossy black royal icing crowning each one like a little midnight spell. Honestly, the moment I cracked one open, I was hooked. The icing’s matte finish and delicate piped details make these treats look like something straight out of a spooky storybook, but it’s the texture that truly steals the show.
Making these cookies became a bit of an obsession last Halloween. I remember sitting at the kitchen table, carefully piping each hat brim and tip, feeling the royal icing dry to that perfect hard shell that shatters softly as you bite. It’s oddly satisfying to watch the glossy black icing set just right without cracking off the cookie base, which is a rare feat with such a crisp cookie. And you know, they aren’t just pretty—they’re the kind of cookie you can dunk in milk without worry, because they hold firm and don’t turn into a soggy mess. That balance between crunch and a hint of chewiness in the center is what made me come back to this recipe year after year.
There’s a quiet magic in these crispy witch hat chocolate sugar cookies with black royal icing. They’re the kind of treat that makes Halloween feel a little more special, a little more tactile, a little more fun to share. And honestly, if you’ve ever been frustrated with soggy Halloween cookies that don’t hold their shape or texture, this recipe is like a little sigh of relief. It’s the one I trust, the one that never lets me down, and the one I’m quietly proud to pass on when spooky season rolls around again.
Why You’ll Love This Recipe
Coming from a texture-obsessed baker who’s tried countless Halloween cookie recipes, these crispy witch hat chocolate sugar cookies with black royal icing stand out for so many reasons:
- Quick & Easy: You can have these baked and decorated in under 90 minutes, making them perfect for last-minute party prep or spontaneous baking urges.
- Simple Ingredients: No weird or hard-to-find stuff here. Just pantry staples and a few basics for royal icing that you might already have.
- Perfect for Halloween: The iconic witch hat shape is festive but not gimmicky—it’s a classic standout on any Halloween dessert table.
- Crowd-Pleaser: Kids love the fun shape, and adults appreciate the rich chocolate flavor balanced with just the right sweetness.
- Unbelievably Delicious: The crisp cookie base with that silky black icing is a comforting combo that keeps you coming back for more.
What really sets this recipe apart from other chocolate sugar cookies is the attention to getting the texture just right. I’ve tested this recipe multiple times, adjusting baking times and chilling periods to create that perfect crisp edge while keeping the center pleasantly tender. The black royal icing isn’t just for show either—it’s smooth, not overly sweet, and has that wonderful matte finish that’s tricky to achieve without a little patience and technique. Whether you’re a seasoned baker or just someone who likes to impress without stress, this recipe hits that sweet spot.
This isn’t just some Halloween cookie—it’s a little piece of crunchy, chocolate-coated nostalgia that you’ll want to make a tradition. It’s the kind of recipe that makes you pause and appreciate the little details, the textures, and the simple joy of homemade treats.
What Ingredients You Will Need
This recipe uses simple, wholesome ingredients to deliver bold flavor and satisfying texture without the fuss. Most are pantry staples, and substitutions are easy if you need them.
- For the Chocolate Sugar Cookies:
- All-purpose flour – 2 ½ cups (315g), sifted for smooth dough
- Unsweetened cocoa powder – ½ cup (50g), use Dutch-processed for richer color and flavor
- Baking powder – 1 teaspoon
- Salt – ½ teaspoon
- Unsalted butter – 1 cup (227g), softened (I like using Land O Lakes for consistent creaminess)
- Granulated sugar – 1 ¼ cups (250g)
- Large eggs – 2, room temperature for better mixing
- Pure vanilla extract – 1 teaspoon
- For the Black Royal Icing:
- Powdered sugar – 3 cups (375g), sifted to avoid lumps
- Egg whites – 2 large or 4 tablespoons meringue powder + 6 tablespoons water for a safer alternative
- Lemon juice – 1 teaspoon (helps stabilize the icing)
- Black gel food coloring – enough to achieve a deep black (I recommend AmeriColor for vibrant, true black)
Ingredient selection tips: For the cocoa powder, Dutch-processed gives a smoother, less acidic chocolate flavor, which pairs beautifully with the buttery cookie. When picking butter, unsalted is best so you control the salt level. For the royal icing, if you’re wary of raw egg whites, meringue powder is a safe and reliable substitute that still gives you that crisp finish. And of course, use a gel-based black food coloring to avoid thinning the icing too much.
Substitution guidance: For gluten-free, you can try a 1-to-1 gluten-free flour blend, but expect a slightly different texture. For dairy-free, swap butter with a vegan margarine or coconut oil, although the flavor will shift a bit. If you need a nut-free option, this recipe is naturally free from nuts, so no worries there.
Equipment Needed
- Mixing bowls – one large for dough, one medium for icing
- Electric mixer or stand mixer – makes creaming butter and mixing icing a breeze (I use a KitchenAid stand mixer and swear by it)
- Measuring cups and spoons – accuracy matters for baking
- Sifter or fine mesh sieve – to sift flour, cocoa, and powdered sugar for smooth dough and icing
- Rolling pin – for even dough thickness
- Witch hat cookie cutter set (cone-shaped hat top and brim) – essential for shaping those classic hats; if you don’t have this, a small round and triangle cutter can work
- Baking sheets lined with parchment paper or silicone mats – prevents sticking and browning
- Piping bags and small round tips (size #1 or #2) – for precise royal icing details
- Cooling racks – to let cookies cool perfectly crisp
Alternatives and tips: If you don’t have a stand mixer, a hand mixer works fine but might take longer to cream the butter. For cookie cutters, using a sharp knife carefully to cut shapes can work in a pinch. Silicone mats are reusable and a great investment for any cookie baker, but parchment paper is a budget-friendly alternative. Keep your piping tips clean during icing to avoid clogs — a quick rinse under warm water can save you from frustrating interruptions.
Preparation Method
- Prep the dough (15-20 minutes): In a large bowl, sift together 2 ½ cups (315g) all-purpose flour, ½ cup (50g) cocoa powder, 1 teaspoon baking powder, and ½ teaspoon salt. Set aside. In your mixer, cream 1 cup (227g) softened unsalted butter with 1 ¼ cups (250g) granulated sugar on medium speed for about 3-4 minutes until light and fluffy.
- Add eggs and vanilla (2 minutes): Beat in 2 room temperature eggs one at a time, then add 1 teaspoon pure vanilla extract. Mix until just combined.
- Combine dry and wet (2-3 minutes): Gradually add the dry ingredients to the butter mixture on low speed, mixing until a smooth dough forms. Avoid over-mixing to keep cookies tender.
- Chill dough (at least 1 hour): Wrap the dough in plastic wrap and refrigerate. This step is key for easy rolling and crisp cookies that hold their shape. I sometimes chill overnight if I’m prepping ahead.
- Preheat oven and roll dough (15 minutes): When ready, preheat oven to 350°F (175°C). Lightly flour your surface and roll dough to about ¼ inch (6mm) thickness. Use your witch hat cookie cutter to cut shapes. Transfer cookies to lined baking sheets, spacing about 1 inch apart.
- Bake cookies (10-12 minutes): Bake until edges are set and just starting to crisp—don’t wait for full browning. The cookies will continue to crisp as they cool. Remove from oven and cool on sheets for 5 minutes, then transfer to racks to cool completely.
- Prepare royal icing (10 minutes): In a mixing bowl, beat 3 cups (375g) sifted powdered sugar with 2 large egg whites (or meringue powder substitute + water) and 1 teaspoon lemon juice until stiff peaks form. Add black gel food coloring a bit at a time until deep black is achieved.
- Decorate cookies: Using piping bags fitted with small round tips, pipe the icing onto the cookies to form the hat brims and tips. Let dry uncovered at room temperature for at least 4 hours or overnight to harden completely.
Troubleshooting tips: If your dough feels too sticky, chill it a bit longer. If the royal icing is too runny, add more powdered sugar a tablespoon at a time. When piping, steady your hand and don’t overload your bag to avoid messy blobs. The icing will look matte when dry—don’t be tempted to apply more while wet or it can crack.
Cooking Tips & Techniques
Getting these crispy witch hat cookies just right took some trial and error, so here are a few tips I swear by:
- Chill the dough fully: This is non-negotiable for shape retention and crisp edges. Warm dough spreads and loses that sharp hat silhouette.
- Don’t overbake: Cookies should look set but still pale when taken out. They crisp up on the cooling rack, so pulling them too late results in hard, dry cookies.
- Piping patience: Let royal icing dry completely between layers if you want to add details. I learned this the hard way when my hats bled colors and lost their neat look.
- Use gel food coloring: Liquid colors can thin royal icing too much, making it harder to pipe crisp edges.
- Consistent thickness: Roll dough evenly at about ¼ inch (6mm) for uniform baking and texture.
One time, I skipped sifting the cocoa and ended up with gritty spots in the dough—lesson learned! Also, if you want a smoother texture, try folding the dry ingredients in by hand instead of just mixing. Multitasking tip: While cookies bake and cool, whip up the royal icing so you’re ready to decorate right away.
Variations & Adaptations
These cookies are versatile and can be customized easily:
- Flavor twist: Add a teaspoon of espresso powder to the dough for a mocha note that deepens the chocolate flavor beautifully.
- Different icing colors: Swap the black royal icing for vibrant orange or purple to mix up your Halloween palette.
- Gluten-free option: Use a high-quality gluten-free flour blend like Bob’s Red Mill 1-to-1. Expect a slightly softer texture but still delicious.
- Vegan adaptation: Replace butter with vegan margarine and use aquafaba (chickpea water) in place of egg whites for the icing. The texture changes slightly but still tasty.
I once tried piping white spider web designs on black hats, adding a spooky flair that was a hit at a party. For a simpler alternative, you can drizzle melted white chocolate over the hats instead of royal icing decoration. Baking method-wise, these cookies work great in convection ovens too—just reduce baking time by a minute or two and keep an eye on them.
Serving & Storage Suggestions
Serve these witch hat cookies at room temperature to preserve their crisp texture and let the chocolate and vanilla notes shine. They look fantastic arranged on a dark serving platter with a few sprigs of fresh rosemary or thyme for a forest-harvest vibe that feels just right for Halloween gatherings.
Pair these cookies with a hot cup of spiced tea or a glass of cold milk for a classic treat combo. They’re perfect for Halloween parties, school events, or as a fun surprise in a lunchbox.
Storage tips: Store cookies in an airtight container layered with parchment paper at room temperature for up to 5 days. If you want to keep them longer, freeze un-iced cookies in a single layer wrapped tightly in plastic wrap. Royal icing-decorated cookies freeze best on a baking sheet before transferring to a container, and can be frozen up to 2 months. Thaw at room temperature to keep the crisp texture intact.
These cookies actually taste better after a day or two as the flavors meld and the edges gain a slight snap. Just be sure to keep them away from humidity to avoid softening.
Nutritional Information & Benefits
Each crispy witch hat chocolate sugar cookie contains approximately:
| Nutrient | Per Cookie (1 of 24) |
|---|---|
| Calories | 130 kcal |
| Fat | 6 g |
| Carbohydrates | 18 g |
| Protein | 1.5 g |
| Sugar | 12 g |
The cocoa powder adds antioxidants, and using real butter contributes a richness that feels indulgent but with wholesome ingredients. These cookies are naturally gluten-free if you swap the flour for a suitable blend, making them adaptable for various dietary needs. Note: Royal icing contains egg whites, so they’re not suitable for those with egg allergies.
From a wellness perspective, I appreciate how homemade treats like this let me control sugar levels and avoid artificial additives. Making these cookies from scratch is a little moment of mindful cooking that’s just as satisfying as eating them.
Conclusion
These crispy witch hat chocolate sugar cookies with black royal icing are truly a Halloween treat worth making. They bring together a satisfying crunch, rich chocolate flavor, and that iconic spooky shape with just enough decoration to impress without overwhelming. Whether you’re baking for kids, friends, or just yourself (hey, no judgment), this recipe offers a tactile, delicious experience that feels special every time.
Feel free to tweak the flavors, colors, or icing designs to match your mood or party vibe. Personally, I’ll always come back to this recipe for the texture alone—the way each bite cracks and melts is pure magic in cookie form. And if you want to balance out those treats, you might enjoy a fresh, healthy side like the healthy keto coleslaw recipe I often make alongside savory snacks.
Happy baking, and may your Halloween be full of fun textures and sweet moments!
FAQs
Can I make these cookies ahead of time?
Absolutely! The dough can be chilled for up to 3 days before baking. Decorated cookies keep well stored in an airtight container for 5 days at room temperature.
How do I get the black royal icing so dark without it being runny?
Use gel food coloring instead of liquid and add it gradually. If the icing thins too much, add more powdered sugar to reach the right consistency for piping.
Can I use a different shape for the cookies?
Sure! While the witch hat shape is fun, you can use any cookie cutter you like. Just remember the baking time may vary with thickness and shape.
Is it safe to use raw egg whites in the royal icing?
If you’re concerned, use meringue powder mixed with water as a safe alternative that still hardens perfectly.
How do I prevent my cookies from becoming soft or soggy?
Store them in an airtight container away from moisture. Also, make sure they cool completely before storing, and avoid stacking decorated cookies without parchment paper in between.
PrintCrispy Witch Hat Chocolate Sugar Cookies Recipe Easy Homemade Halloween Treats

These crispy witch hat chocolate sugar cookies feature crackly edges and a perfect snap, crowned with smooth, glossy black royal icing. Ideal for Halloween, they combine a rich chocolate flavor with a satisfying crunch and delicate decoration.
- Prep Time: 20 minutes
- Cook Time: 12 minutes
- Total Time: 1 hour 45 minutes
- Yield: 24 cookies 1x
- Category: Dessert
- Cuisine: American
Ingredients
- 2 ½ cups (315g) all-purpose flour, sifted
- ½ cup (50g) unsweetened cocoa powder (Dutch-processed recommended)
- 1 teaspoon baking powder
- ½ teaspoon salt
- 1 cup (227g) unsalted butter, softened
- 1 ¼ cups (250g) granulated sugar
- 2 large eggs, room temperature
- 1 teaspoon pure vanilla extract
- 3 cups (375g) powdered sugar, sifted
- 2 large egg whites or 4 tablespoons meringue powder + 6 tablespoons water
- 1 teaspoon lemon juice
- Black gel food coloring (enough to achieve deep black)
Instructions
- Prep the dough (15-20 minutes): In a large bowl, sift together 2 ½ cups all-purpose flour, ½ cup cocoa powder, 1 teaspoon baking powder, and ½ teaspoon salt. Set aside. In your mixer, cream 1 cup softened unsalted butter with 1 ¼ cups granulated sugar on medium speed for about 3-4 minutes until light and fluffy.
- Add eggs and vanilla (2 minutes): Beat in 2 room temperature eggs one at a time, then add 1 teaspoon pure vanilla extract. Mix until just combined.
- Combine dry and wet (2-3 minutes): Gradually add the dry ingredients to the butter mixture on low speed, mixing until a smooth dough forms. Avoid over-mixing to keep cookies tender.
- Chill dough (at least 1 hour): Wrap the dough in plastic wrap and refrigerate. This step is key for easy rolling and crisp cookies that hold their shape.
- Preheat oven and roll dough (15 minutes): Preheat oven to 350°F (175°C). Lightly flour your surface and roll dough to about ¼ inch (6mm) thickness. Use witch hat cookie cutter to cut shapes. Transfer cookies to lined baking sheets, spacing about 1 inch apart.
- Bake cookies (10-12 minutes): Bake until edges are set and just starting to crisp—don’t wait for full browning. Remove from oven and cool on sheets for 5 minutes, then transfer to racks to cool completely.
- Prepare royal icing (10 minutes): In a mixing bowl, beat 3 cups sifted powdered sugar with 2 large egg whites (or meringue powder substitute + water) and 1 teaspoon lemon juice until stiff peaks form. Add black gel food coloring gradually until deep black is achieved.
- Decorate cookies: Using piping bags fitted with small round tips, pipe the icing onto the cookies to form the hat brims and tips. Let dry uncovered at room temperature for at least 4 hours or overnight to harden completely.
Notes
Chill dough fully to retain shape and crisp edges. Do not overbake; cookies should be pale when removed and will crisp as they cool. Use gel food coloring to avoid thinning royal icing. Let royal icing dry completely between layers to prevent bleeding. Store cookies in airtight container with parchment paper layers at room temperature for up to 5 days. Freeze un-iced cookies wrapped tightly for longer storage. Royal icing contains egg whites; use meringue powder for a safer alternative.
Nutrition
- Serving Size: 1 cookie
- Calories: 130
- Sugar: 12
- Fat: 6
- Carbohydrates: 18
- Protein: 1.5
Keywords: Halloween cookies, witch hat cookies, chocolate sugar cookies, royal icing cookies, crispy cookies, homemade Halloween treats


