I want something spicy, crispy, and ridiculously satisfying right now and have everything except the Hatch chiles. There’s this itch in my brain—those smoky, slightly tangy Hatch chiles wrapped in creamy cheese and bacon, sizzling in the pan. It’s not just a craving; it’s a mental demand. I remember the first time I had something like this at a friend’s barbecue, the crunch of that bacon and the cool cream cheese inside melting just enough to balance the chile’s heat. Honestly, I wasn’t sure if I could pull it off myself. But here I am, perfecting these Crispy Cream Cheese Hatch Chile Poppers Wrapped in Bacon, and I swear it’s become my go-to crowd-pleaser for game days and casual get-togethers.
There’s something about the combination—the pop of the chile’s smoky warmth with the cool, tangy cream cheese, all hugged by salty, crisp bacon. It’s a layered experience you don’t quite get with ordinary jalapeño poppers. Plus, Hatch chiles have this unique flavor that makes you want to come back for just one more bite, and the bacon? Well, that’s just the icing on the cake—or maybe the crunchiest part of the package.
Making these is a bit of a ritual for me now. I’ve tweaked the cheese blend a few times, tested different bacon thicknesses, and even tried baking versus pan-frying before landing here. It’s funny how a simple snack can wrap up so many small victories and moments of trial. If you’re reading this, I’m guessing you’re about to create your own version of that magic, and honestly, you’re in for some serious deliciousness without the fuss.
These poppers aren’t just an appetizer; they’re a little celebration of bold flavors and simple ingredients. And between you and me, when I make these, I start thinking about what else I can pair them with—maybe a crisp, creamy coleslaw like the healthy keto coleslaw I love, just to cut through all that richness. It’s funny how the simplest cravings turn into these really memorable cooking moments.
Why You’ll Love This Recipe
This recipe nails the sweet spot between indulgence and approachability. Here’s why I keep coming back to these Crispy Cream Cheese Hatch Chile Poppers Wrapped in Bacon:
- Quick & Easy: Ready in about 30 minutes, perfect for when you want to impress without spending hours in the kitchen.
- Simple Ingredients: You probably have cream cheese, bacon, and frozen or fresh Hatch chiles on hand, no special trips needed.
- Perfect for Any Occasion: Whether it’s a casual party, game day, or a fun weekend appetizer, these poppers fit right in.
- Ultimate Crowd-Pleaser: I’ve watched kids and adults alike disappear plate after plate—there’s just something about that crispy bacon and creamy filling combo.
- Unbelievably Delicious: The smoky, mildly spicy Hatch chiles marry so well with the tangy cream cheese and crispy bacon, creating a flavor that’s comforting yet exciting.
What sets this recipe apart? I blend cream cheese with a touch of sharp cheddar for a smooth but flavorful filling, and instead of the usual jalapeño, I’m all about those Hatch chiles for a mellow smoky vibe. Wrapping them in bacon slices that crisp perfectly without burning is a little trick I’ve perfected — it’s all about the pan temperature and timing. Honestly, this isn’t just another popper recipe; it’s the best version I’ve found after a few kitchen experiments.
And here’s the emotional bit: This recipe always makes me feel like I’m sharing a little piece of comfort food that’s been made with care. It’s not just about the taste, but the joy of biting into something that feels special but isn’t complicated. When you try it, you might find yourself closing your eyes for a second after the first bite—and that’s exactly why it’s stuck with me.
What Ingredients You Will Need
This recipe uses straightforward, wholesome ingredients to deliver that crave-worthy texture and flavor without any drama. Most are pantry staples or easy to find at your local market, especially if you can get fresh Hatch chiles in season (late summer is ideal!).
- Hatch Chiles: 12 medium-sized, roasted, peeled, and deseeded (fresh is best, but you can use jarred or frozen roasted Hatch chiles if fresh are unavailable)
- Cream Cheese: 8 ounces (about 225 grams), softened (I recommend Philadelphia for that smooth texture)
- Sharp Cheddar Cheese: ½ cup shredded (adds richness and flavor)
- Garlic Powder: 1 teaspoon (for that subtle savory depth)
- Onion Powder: ½ teaspoon
- Smoked Paprika: ½ teaspoon (to enhance the smoky vibe)
- Bacon Slices: 12 slices, thin to medium thickness (thinner bacon crisps up nicely without overcooking the filling)
- Black Pepper: Freshly ground, to taste
- Salt: Just a pinch, as bacon already adds plenty of saltiness
- Optional: Finely chopped fresh cilantro or green onions for garnish (adds fresh brightness)
For substitutions, if you want a dairy-free option, swap cream cheese with a plant-based cream cheese alternative. And if you’re looking for a gluten-free snack, this recipe fits the bill perfectly as is. If you can’t find Hatch chiles, roasted poblano peppers make a decent substitute, but you’ll miss that signature Hatch flavor.
Pro tip: When buying bacon, I prefer brands like Applegate or Oscar Mayer for consistent quality and flavor, but honestly, any good bacon you like works. And roasting the chiles yourself adds that unbeatable charred flavor, but if you’re short on time, pre-roasted packs save the day.
Equipment Needed
Keeping things simple here, nothing fancy required to make these poppers.
- Sharp knife (to carefully slice and deseed chiles)
- Cutting board
- Mixing bowl (for the cheese filling)
- Measuring spoons and cups
- Skillet or frying pan (cast iron preferred for even heat, but non-stick works fine too)
- Tongs (to turn bacon-wrapped poppers safely)
- Paper towels (to drain excess bacon fat)
- Baking sheet with rack (optional, if you prefer baking instead of pan-frying)
If you bake them, a wire rack on a baking sheet helps bacon crisp all around without sitting in grease. I’ve tried both baking and pan-frying—pan-frying gives you that perfectly crisp bacon edge with a little smoky caramelization, but baking is hands-off and less messy.
For budget-friendly setups, a sturdy non-stick skillet will do just fine, and you don’t need a fancy mandoline to slice the chiles—just careful knife work.
Preparation Method

- Roast and Prep the Hatch Chiles (if not pre-roasted): Place fresh Hatch chiles under a broiler or on a grill, turning occasionally until skin is charred and blistered, about 10-15 minutes. Transfer to a bowl and cover with plastic wrap or a towel to steam for 10 minutes. Peel off the charred skin, then slice each chile lengthwise and remove seeds and membranes carefully. Pat dry with paper towels. (Roasting imparts that smoky depth you want).
- Prepare the Cheese Filling: In a medium bowl, combine softened cream cheese, shredded sharp cheddar, garlic powder, onion powder, smoked paprika, and a pinch of black pepper. Mix until smooth and creamy. Taste and adjust seasoning if needed. (I like to whip it with a fork for a silky texture.)
- Stuff the Chiles: Spoon the cheese mixture evenly into each deseeded Hatch chile, filling them generously but avoid overstuffing to prevent spilling during cooking.
- Wrap with Bacon: Take one slice of bacon and wrap it tightly around the filled chile, starting at one end and overlapping slightly. Secure with a toothpick if needed. (I usually don’t need toothpicks if the bacon is pliable.)
- Pan-Fry the Poppers: Heat a skillet over medium heat. Place bacon-wrapped poppers seam side down first to seal. Cook for about 3-4 minutes per side, turning carefully with tongs until bacon is crisp and cooked through, about 12-15 minutes total. (Adjust heat if bacon browns too fast; you want it crispy but not burnt.) Drain on paper towels before serving.
- Optional Baking Method: Preheat oven to 400°F (200°C). Place poppers on a wire rack over a baking sheet and bake for 20-25 minutes until bacon is crispy. Rotate halfway through for even cooking.
- Garnish and Serve: Sprinkle with chopped cilantro or green onions if desired. Serve warm. (These are best fresh but hold well for about an hour.)
When stuffing, if the filling feels too stiff, soften the cream cheese a bit more or add a splash of milk. If your bacon isn’t curling nicely, try securing it with a toothpick or wrapping tighter. The key is patience with the bacon crisping—don’t rush the heat.
Cooking Tips & Techniques
Cooking bacon-wrapped poppers can be a little tricky, but here’s what I’ve learned:
- Control Your Heat: Medium heat is your best friend. Too high, and bacon crisps on the outside but stays chewy inside; too low, and it takes forever to cook, drying out the cheese.
- Use Thin Bacon: It crisps evenly and doesn’t overpower the chile or cheese filling. Thick-cut bacon can be harder to cook through without burning.
- Don’t Skip the Resting: Let poppers rest a few minutes after cooking to let the cheese set a bit, so it doesn’t ooze out the moment you bite.
- Pre-Roast the Chiles: This is crucial for authentic flavor and tenderness. If you skip roasting, you lose that smoky, slightly sweet pop that makes Hatch chiles special.
- Watch for Leaks: When wrapping bacon, overlap seams and seal edges well to prevent filling from leaking in the pan.
Once, I tried cooking these poppers straight from the fridge without warming the cream cheese first and ended with uneven filling and a less creamy bite. Lesson learned: soften your cream cheese well before mixing.
Also, multitasking helps—while your chiles roast, prep the filling and slice bacon. This keeps things moving and cuts down on total time.
Variations & Adaptations
Here are some fun ways to switch up this recipe:
- Cheese Variations: Swap sharp cheddar for pepper jack for extra spice, or add crumbled blue cheese for a tangy punch.
- Meat Alternatives: Use turkey bacon for a leaner option, or skip bacon and bake the poppers wrapped in thin prosciutto for a different flavor and texture.
- Spice Level: Add finely chopped jalapeños or a pinch of cayenne in the cheese mixture if you want more heat.
- Cooking Method: Try air frying for a crispier texture with less grease. About 12 minutes at 400°F (200°C) works well, flipping halfway.
- Dairy-Free: Use dairy-free cream cheese and a plant-based bacon alternative to make this vegan-friendly.
Personally, I once added a little cooked chorizo into the cheese for a meatier, spiced filling—totally worth trying if you want a heartier popper. Also, pairing these with a gluten-free cornbread muffin on the side turns this snack into a full-on party platter.
Serving & Storage Suggestions
Serve these Crispy Cream Cheese Hatch Chile Poppers Wrapped in Bacon hot or warm for the best flavor and texture. They pair wonderfully with a cooling dip like sour cream or a fresh salsa verde. For a refreshing balance, try alongside a crunchy, creamy salad such as the healthy keto coleslaw—the creaminess and tang cut through the richness perfectly.
Store leftovers in an airtight container in the refrigerator for up to 2 days. Reheat in a low oven (around 350°F / 175°C) for 10 minutes to restore crispiness. Avoid microwaving, as it can make bacon soggy and the cheese rubbery.
Flavors actually deepen if you let them sit for a few hours before reheating, so making them ahead for a party isn’t a bad idea. Just keep them chilled until serving time.
Nutritional Information & Benefits
Each popper contains roughly 150-180 calories, mostly from fats and protein. The Hatch chiles provide vitamin C and antioxidants, while cream cheese adds calcium and a creamy texture. Bacon contributes protein and fat, but keep in mind it’s also high in sodium.
This snack fits well into low-carb and keto-friendly diets, especially if you watch portions. The blend of protein and fat helps keep you full, and the Hatch chiles add a flavorful kick without adding many carbs.
Allergen note: Contains dairy and pork. For gluten-free eaters, this recipe is naturally free of gluten.
Conclusion
If you’re after a snack that’s crispy, creamy, and packed with smoky spice, these Crispy Cream Cheese Hatch Chile Poppers Wrapped in Bacon are your new best friend. They strike the perfect balance between indulgence and simplicity, and you don’t need to be a pro chef to nail them.
Feel free to make them your own—try different cheeses or spice levels, and pair with your favorite sides. For me, they’re a little celebration on a plate, a satisfying bite after a long day. They’ve earned a permanent spot in my recipe rotation, and I’m betting once you try them, they’ll earn a spot in yours too.
Let me know how your batch turns out or what twists you add. I love hearing about your kitchen victories and adaptations. Happy cooking, and may your bacon always be perfectly crispy!
FAQs
Can I use jalapeños instead of Hatch chiles?
Yes, jalapeños work fine, but the flavor will be sharper and less smoky. Hatch chiles offer a mellow, smoky taste that’s unique to this recipe.
What’s the best way to reheat these poppers?
Reheat in a 350°F (175°C) oven for about 10 minutes to keep the bacon crispy and cheese melty. Avoid microwaving to prevent sogginess.
Can I make these ahead of time and freeze them?
You can freeze unbaked poppers wrapped in bacon. Freeze on a tray first, then transfer to a bag. Bake from frozen, adding extra cooking time.
How spicy are Hatch chiles compared to jalapeños?
Hatch chiles are generally milder with a smoky flavor, while jalapeños tend to be hotter and sharper. Roasting Hatch chiles also mellows their heat.
Is it necessary to roast the chiles before stuffing?
Roasting is key for flavor and texture. It softens the chiles and adds that smoky depth that makes this recipe special.
Pin This Recipe!
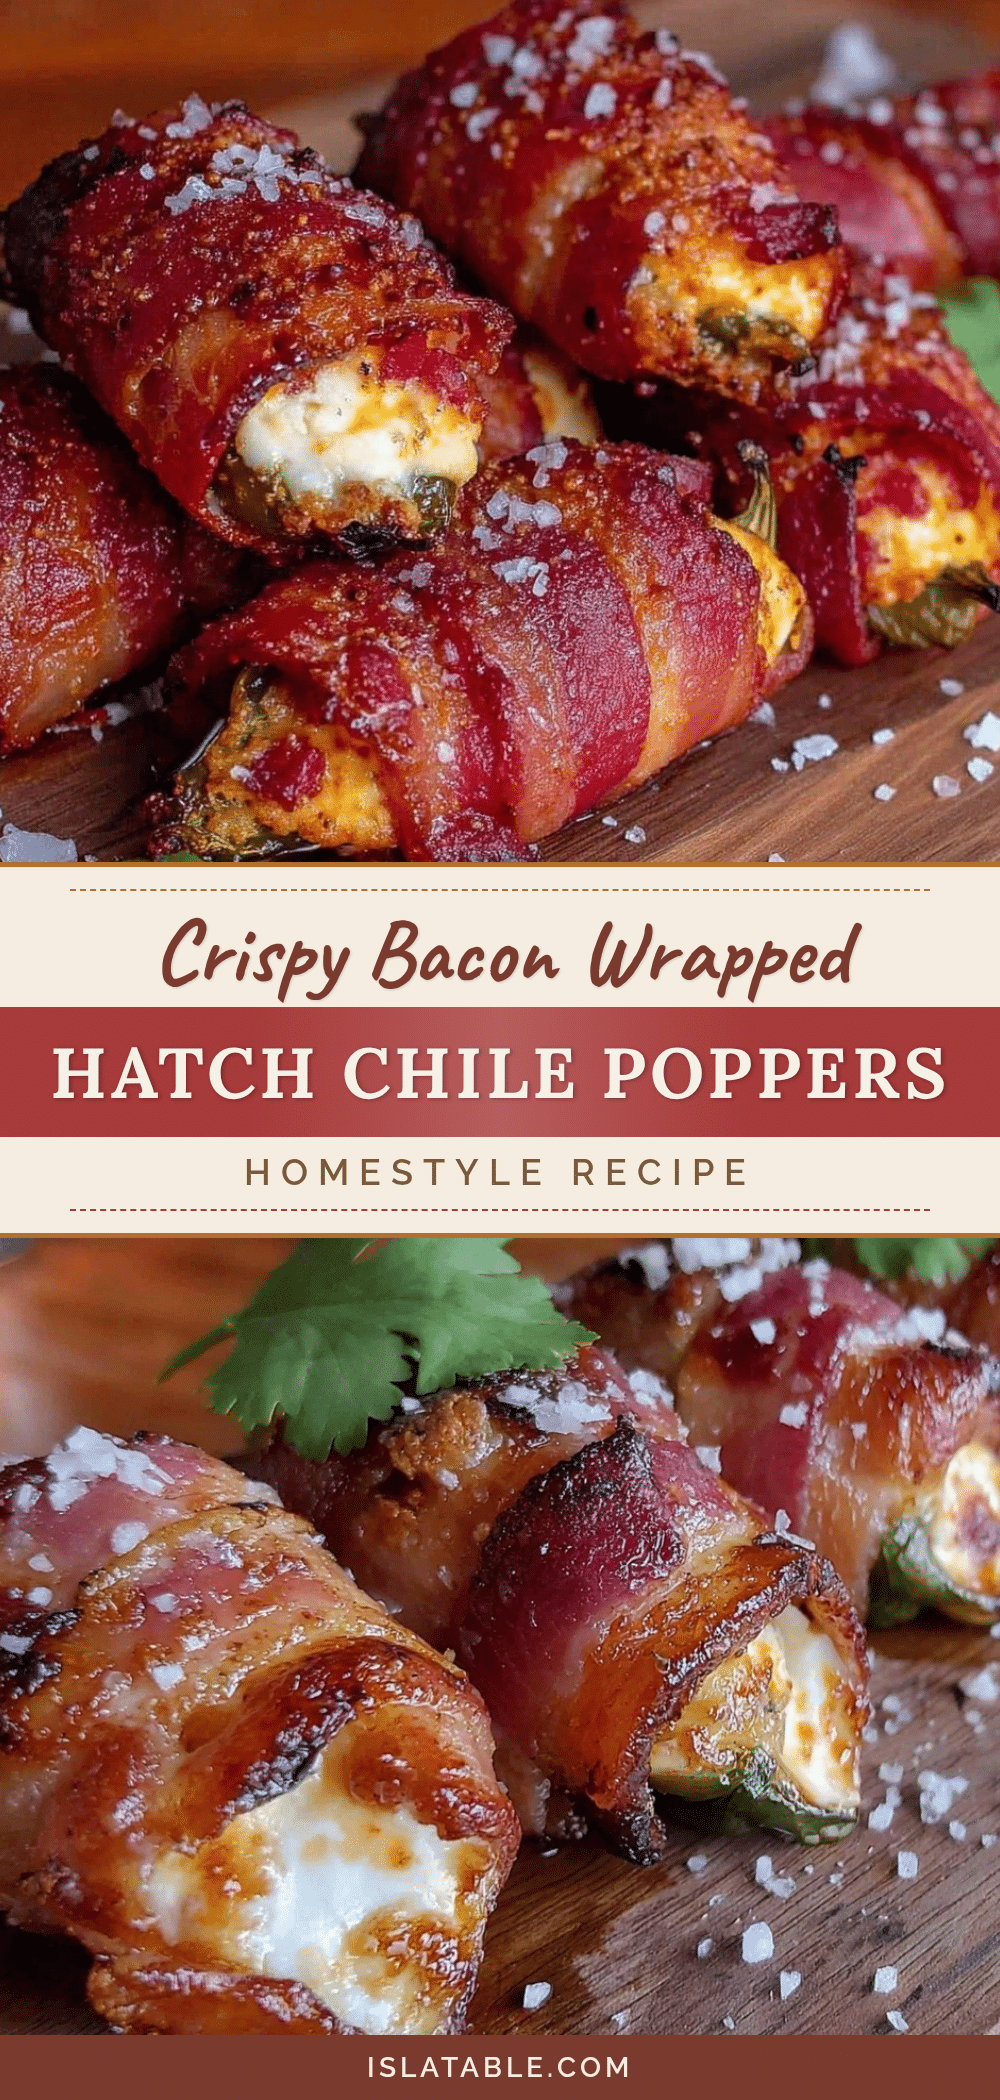
Crispy Cream Cheese Hatch Chile Poppers Wrapped in Bacon

These crispy bacon-wrapped poppers feature smoky Hatch chiles stuffed with a creamy blend of cream cheese and sharp cheddar, perfect for game days and casual get-togethers.
- Prep Time: 15 minutes
- Cook Time: 15 minutes
- Total Time: 30 minutes
- Yield: 12 servings 1x
- Category: Appetizer
- Cuisine: American
Ingredients
- 12 medium-sized Hatch chiles, roasted, peeled, and deseeded
- 8 ounces cream cheese, softened
- ½ cup shredded sharp cheddar cheese
- 1 teaspoon garlic powder
- ½ teaspoon onion powder
- ½ teaspoon smoked paprika
- 12 slices bacon, thin to medium thickness
- Freshly ground black pepper, to taste
- Pinch of salt
- Optional: finely chopped fresh cilantro or green onions for garnish
Instructions
- Roast and prep the Hatch chiles: char skin under broiler or grill for 10-15 minutes, steam covered for 10 minutes, peel skin, slice lengthwise, and remove seeds and membranes. Pat dry.
- Prepare the cheese filling by mixing softened cream cheese, shredded sharp cheddar, garlic powder, onion powder, smoked paprika, and black pepper until smooth.
- Stuff each deseeded chile with the cheese mixture, filling generously but not overstuffing.
- Wrap each filled chile tightly with one slice of bacon, overlapping slightly. Secure with a toothpick if needed.
- Pan-fry the poppers over medium heat, placing seam side down first to seal. Cook 3-4 minutes per side until bacon is crisp, about 12-15 minutes total. Drain on paper towels before serving.
- Optional baking method: Preheat oven to 400°F (200°C). Place poppers on a wire rack over a baking sheet and bake for 20-25 minutes, rotating halfway, until bacon is crispy.
- Garnish with chopped cilantro or green onions if desired and serve warm.
Notes
Use medium heat to ensure bacon crisps evenly without burning. Soften cream cheese well before mixing for smooth filling. Rest poppers a few minutes after cooking to let cheese set. Thin bacon crisps better and cooks through without overpowering the filling. Roasting chiles is key for authentic smoky flavor. Avoid microwaving leftovers to keep bacon crispy.
Nutrition
- Serving Size: 1 popper
- Calories: 165
- Sugar: 0.5
- Sodium: 350
- Fat: 13
- Saturated Fat: 5
- Carbohydrates: 1
- Fiber: 0.3
- Protein: 7
Keywords: Hatch chile poppers, bacon wrapped poppers, cream cheese poppers, game day snacks, appetizer, smoky poppers, easy recipe


