“You really think red velvet whoopie pies will work for a summer cookout?” my friend asked, eyeing the towering stack of these rich, velvety treats cooling on my kitchen counter. Honestly, I wasn’t so sure either when I first tried to whip up this recipe. Red velvet usually screams cozy winter vibes, but something about the cream cheese filling and the soft, tender cake layers felt like a perfect match for warm evenings and backyard chatter.
My initial attempt was kind of an accident—I mixed up the oven temperature on a busy Thursday night, and those whoopie pies came out softer and more cake-like than I expected. Instead of tossing them, I grabbed one with a glass of iced tea, and, well, that moment changed my mind. The bright red color popped against the green backyard, and that creamy filling? It cut through the sweetness with just the right tang.
Since then, I’ve made these red velvet whoopie pies multiple times in a week whenever friends popped by for an unplanned hangout. They’re now a quiet staple whenever summer rolls around, standing out on picnic tables next to the smoky flavors of grilled ribs or alongside a cool, crunchy keto coleslaw. The recipe has this way of turning casual moments into something a little more special without much effort—and that’s why it stuck around my cookout lineup.
Why You’ll Love This Recipe
- Quick & Easy: These whoopie pies come together in about 30 minutes of active prep time, making them perfect for last-minute summer gatherings or sweet cravings.
- Simple Ingredients: You don’t need a fancy pantry—most of these ingredients are staples you probably already have at home.
- Perfect for Summer Cookouts: The light, fluffy cake combined with the cool cream cheese filling is a refreshing twist on traditional desserts often too heavy for warm weather.
- Crowd-Pleaser: Kids and adults alike keep asking for these—probably because they’re soft, not-too-sweet, and just downright fun to eat.
- Unbelievably Delicious: The velvety texture and balance of flavors make these whoopie pies feel indulgent without being overwhelming.
This isn’t just any red velvet recipe, you know. The trick is using buttermilk and a touch of vinegar to achieve that classic tang and softness, while the cream cheese filling is whipped to a fluffy, silky texture that spreads easily and melts in your mouth. I’ve tried other versions before, but this one nails the balance—you get the signature red velvet flavor, but with a lightness that’s just right for summer.
Whether you’re planning a backyard barbecue or just want a sweet treat that feels a bit more festive, these whoopie pies bring a little magic to the table without stressing you out. Plus, pairing them with easy sides like gluten-free cornbread muffins or a refreshing fruit salad turns your cookout into a full-on feast.
What Ingredients You Will Need
This recipe uses simple, wholesome ingredients to deliver bold flavor and satisfying texture without the fuss. Here’s the breakdown:
- For the Red Velvet Cake Layers:
- All-purpose flour, 2 ½ cups (312 g) – sifted for the fluffiest cake
- Cocoa powder, 2 tablespoons (unsweetened, preferably Dutch-processed for richer color and flavor)
- Baking soda, 1 teaspoon
- Salt, ½ teaspoon
- Unsalted butter, ½ cup (113 g), softened (I like using Land O’Lakes for consistency)
- Sugar, 1 ¾ cups (350 g) – granulated works best here
- Large eggs, 2 (room temperature)
- Buttermilk, 1 cup (240 ml) – this adds tang and moisture; if you don’t have buttermilk, use regular milk with 1 tablespoon vinegar or lemon juice
- Vanilla extract, 1 teaspoon
- Red food coloring, 2 tablespoons (gel-based recommended for vibrant color without thinning batter)
- White vinegar, 1 teaspoon (helps the cake rise and keeps it tender)
- For the Cream Cheese Filling:
- Cream cheese, 8 oz (226 g), softened (look for full-fat for best flavor and texture)
- Unsalted butter, ½ cup (113 g), softened
- Powdered sugar, 3 cups (360 g), sifted to avoid lumps
- Vanilla extract, 1 teaspoon
- Pinch of salt (balances sweetness)
These ingredients keep the recipe straightforward, but feel free to tweak the sweetness or creaminess of the filling to your taste. If you want a dairy-free version, swapping cream cheese for a vegan alternative and butter for coconut oil works surprisingly well.
Equipment Needed
- Mixing bowls (at least two) – I like glass or stainless steel for easy cleanup
- Electric mixer or stand mixer – highly recommended for beating the butter and cream cheese to that perfect fluffy texture
- Measuring cups and spoons – for accuracy, especially with baking soda and vinegar
- Sifter or fine mesh sieve – to aerate the flour and powdered sugar
- Baking sheets lined with parchment paper – prevents sticking and makes cleanup a breeze
- Cooling racks – to cool the whoopie pies evenly and avoid sogginess
- Offset spatula or butter knife – for spreading the filling smoothly
If you don’t have a stand mixer, a hand mixer works just fine—just be patient when whipping the cream cheese filling. When I first started, I used a whisk and some elbow grease, but that took forever and wasn’t as smooth. Also, if you don’t own a sifter, a fine sieve or even a fork can help break up lumps in flour and powdered sugar.
Preparation Method

- Prep Your Oven and Pans: Preheat your oven to 350°F (175°C). Line two baking sheets with parchment paper to prevent sticking and make cleanup easier. (About 10 minutes preparation)
- Mix Dry Ingredients: In a medium bowl, sift together 2 ½ cups all-purpose flour, 2 tablespoons cocoa powder, 1 teaspoon baking soda, and ½ teaspoon salt. Set aside. (5 minutes)
- Cream Butter and Sugar: In a large bowl, beat ½ cup softened unsalted butter with 1 ¾ cups sugar until light and fluffy. This usually takes about 3–5 minutes on medium speed. You’ll notice the mixture turn pale and fluffy—this is key for tender whoopie pies.
- Add Eggs and Flavorings: Beat in 2 large eggs, one at a time, followed by 1 teaspoon vanilla extract. Mix until fully incorporated.
- Combine Wet and Dry Ingredients: Alternate adding the dry ingredient mixture and 1 cup buttermilk to the butter mixture, starting and ending with the dry ingredients. Mix gently after each addition. Then stir in 2 tablespoons red food coloring and 1 teaspoon white vinegar until the batter is smooth and evenly colored. (Avoid overmixing to keep the cakes tender.)
- Portion Batter: Use a small ice cream scoop or tablespoon to drop rounded dollops (about 2 tablespoons each) onto the prepared baking sheets, spacing them about 2 inches apart. They will spread slightly during baking.
- Bake: Place the trays in the preheated oven and bake for 12–14 minutes, or until the tops spring back lightly when touched and a toothpick inserted comes out mostly clean with a few moist crumbs. (Don’t overbake or they’ll dry out!)
- Cool Completely: Transfer the whoopie pies to a wire rack to cool. This usually takes about 20 minutes. It’s tempting to fill them warm, but wait until they’re fully cooled to avoid melting the filling.
- Make the Cream Cheese Filling: In a clean bowl, beat together 8 oz softened cream cheese and ½ cup softened unsalted butter until smooth and fluffy. Gradually add 3 cups sifted powdered sugar, mixing on low speed to combine, then increase speed and beat until creamy. Stir in 1 teaspoon vanilla extract and a pinch of salt.
- Assemble: Match the baked cakes in pairs of similar size. Spread or pipe about 2 tablespoons of filling onto the flat side of one cake, then sandwich with the other. Press lightly to spread the filling evenly to the edges.
A quick tip: if you want extra pretty whoopie pies, chill the filling for 10 minutes before assembling to make it easier to pipe. Also, if your batter feels too thick, a splash more buttermilk can loosen it without sacrificing texture.
Cooking Tips & Techniques
One of the trickiest parts of making red velvet whoopie pies is getting that tender crumb without overmixing the batter. I learned the hard way that mixing too long after adding the flour flattens the texture. Mix just until combined—some small lumps won’t hurt.
Also, I recommend using gel food coloring instead of liquid. It delivers a richer red without watering down the batter, which keeps the pies moist and fluffy. If you only have liquid, use less and add a bit more cocoa to deepen the color.
When baking, watch the pies through the oven window rather than relying solely on time. Oven temperatures vary, and a few extra minutes can dry them out, while underbaked ones are dense and heavy. You want them to feel springy to the touch.
For the filling, room temperature ingredients make a world of difference. Cold cream cheese or butter won’t whip up as fluffy and can result in a lumpy filling. If you’re short on time, soften them quickly by microwaving in 5-second bursts, but don’t melt!
Finally, assembling the pies when they’re fully cooled prevents the filling from melting and sliding out. Patience here pays off with neat, tidy whoopie pies that hold their shape even at a warm summer picnic.
Variations & Adaptations
- Dairy-Free Version: Use vegan cream cheese and coconut oil instead of butter for the filling. Swap buttermilk with almond milk plus lemon juice. The flavor shifts slightly, but it’s just as delicious.
- Chocolate Twist: Mix mini chocolate chips into the batter or sprinkle on the filling before sandwiching for a fun chocolate surprise inside.
- Fruit-Infused Filling: Stir in 2 tablespoons of raspberry or strawberry jam into the cream cheese filling for a bright, fruity contrast.
- Gluten-Free Option: Substitute the all-purpose flour with a gluten-free baking blend like Bob’s Red Mill 1-to-1. Adjust baking time slightly and watch for doneness.
- Seasonal Flair: For a patriotic summer cookout, pair these with easy gluten-free cornbread muffins from my cornbread recipe and a fresh fruit salad for a full red, white, and blue spread.
I once tried adding a pinch of cinnamon and allspice to the batter for a warm spice note—unexpected but surprisingly good, especially with the cream cheese filling.
Serving & Storage Suggestions
These red velvet whoopie pies are best served chilled or at room temperature. The cream cheese filling is a little firmer when cold, making them easier to handle at outdoor gatherings. You can plate them on a pretty tray or wrap them individually in wax paper for easy grab-and-go treats.
They pair beautifully with iced tea, lemonade, or even a light coffee after a long summer day. For a heartier meal, consider serving alongside grilled favorites like smoky ribs or my smokeless BBQ chicken recipe.
Store leftover whoopie pies in an airtight container in the refrigerator for up to 4 days. You can freeze them for longer storage; just wrap each pie tightly in plastic wrap and place in a freezer-safe bag. Thaw in the fridge overnight before serving.
Reheat gently in the microwave for 10-15 seconds if you prefer a softer filling and warmer cake, but honestly, I love them straight from the fridge during hot weather. The flavors actually mellow and blend beautifully after a day, making them taste even better.
Nutritional Information & Benefits
Each red velvet whoopie pie offers a comforting balance of carbs, fats, and protein, mainly from the cream cheese and butter. One whoopie pie (about 100 grams) typically contains around:
| Calories | 320 |
|---|---|
| Carbohydrates | 40 g |
| Fat | 16 g |
| Protein | 4 g |
| Sugar | 28 g |
While these aren’t low-calorie treats, they bring joy and a sense of occasion to your summer cookouts. The buttermilk provides calcium and probiotics, and cream cheese adds a touch of protein and vitamin A. If you’re watching sugar intake, try cutting the powdered sugar in the filling by a quarter or swapping for a powdered sugar substitute.
Note: This recipe contains gluten, dairy, and eggs. For allergen-friendly options, check the variations section above. From a wellness perspective, enjoying a treat like this with friends outdoors is a perfect reminder that balance and enjoyment go hand in hand.
Conclusion
Perfect Red Velvet Whoopie Pies have quietly become my go-to dessert for summer cookouts because they bring a unique mix of indulgence and lightness that’s hard to resist. Whether you’re baking for a crowd or just a sweet weekend treat, these whoopie pies deliver that classic red velvet flavor with a creamy twist that feels just right for warm weather.
Feel free to customize the filling or try out the variations to suit your taste and dietary needs. I love that this recipe welcomes tweaks and still turns out reliably delicious every time. It’s one of those desserts that invites smiles—and maybe a little friendly competition over who gets the last one.
Give these a try at your next summer gathering, and don’t be shy about sharing how you made them your own. I always enjoy hearing about new takes on this recipe, so leave a comment or share your photos. Here’s to sweet, simple moments that make summer cookouts unforgettable!
FAQs
- Can I make the batter and filling ahead of time? Yes! You can prepare the batter and refrigerate it for up to 24 hours before baking. The filling can also be made a day ahead and stored in the fridge—just whisk it again before assembling.
- How do I prevent the whoopie pies from sticking to the pan? Lining baking sheets with parchment paper or silicone mats is your best bet. Avoid greasing the pan directly, as it can cause uneven baking.
- What’s the best way to store leftover whoopie pies? Store them in an airtight container in the refrigerator for up to 4 days. For longer storage, freeze them individually wrapped and thaw in the fridge overnight.
- Can I use a different filling if I don’t like cream cheese? Absolutely! Whipped buttercream, marshmallow fluff, or even peanut butter frosting work well as alternatives.
- Are red velvet whoopie pies gluten-free? Traditional recipes use all-purpose flour, but you can swap for a gluten-free baking blend to make them gluten-free. See the variations section for details.
Pin This Recipe!
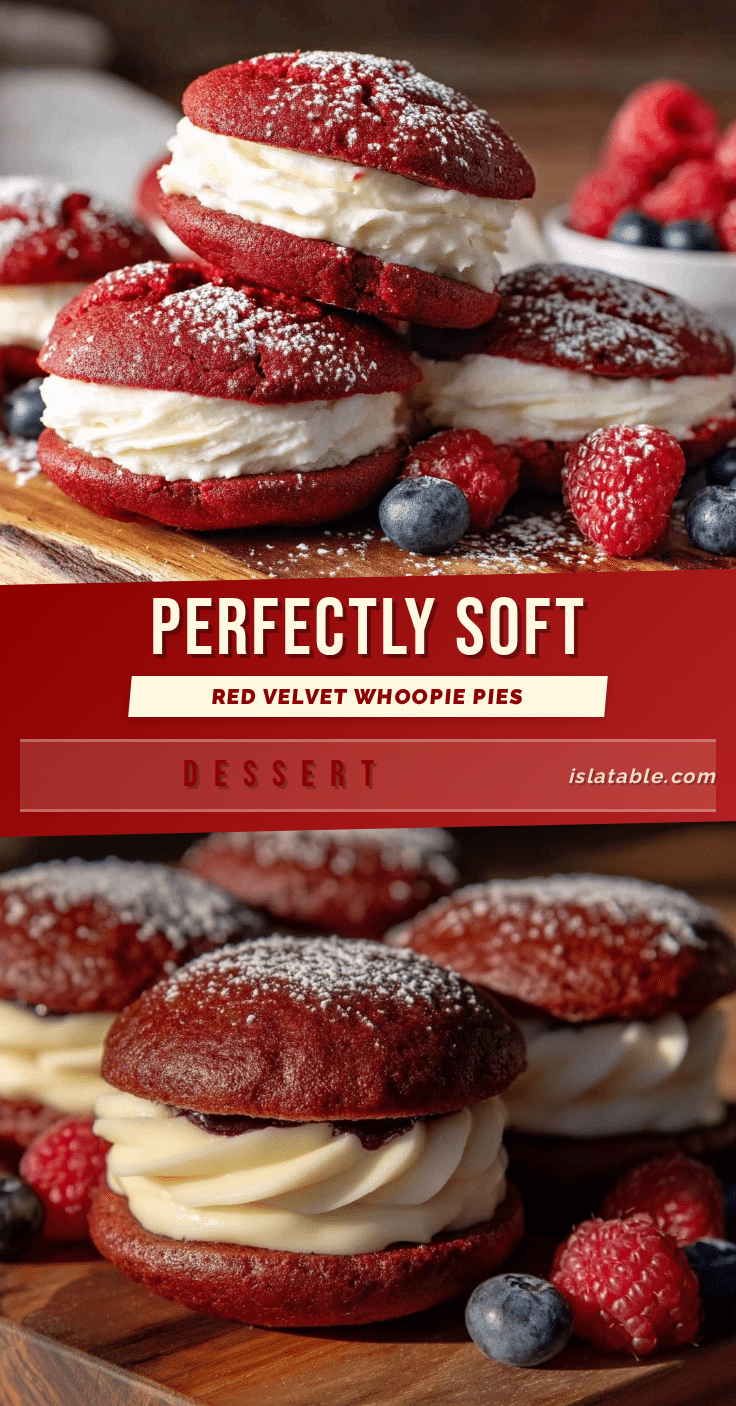
Perfect Red Velvet Whoopie Pies

Soft, tender red velvet whoopie pies with a fluffy cream cheese filling, perfect for summer cookouts and casual gatherings.
- Prep Time: 20 minutes
- Cook Time: 14 minutes
- Total Time: 34 minutes
- Yield: 12 servings 1x
- Category: Dessert
- Cuisine: American
Ingredients
- 2 ½ cups all-purpose flour (312 g), sifted
- 2 tablespoons unsweetened cocoa powder (preferably Dutch-processed)
- 1 teaspoon baking soda
- ½ teaspoon salt
- ½ cup unsalted butter (113 g), softened
- 1 ¾ cups granulated sugar (350 g)
- 2 large eggs, room temperature
- 1 cup buttermilk (240 ml) or regular milk with 1 tablespoon vinegar/lemon juice
- 1 teaspoon vanilla extract
- 2 tablespoons red food coloring (gel-based recommended)
- 1 teaspoon white vinegar
- 8 oz cream cheese (226 g), softened
- ½ cup unsalted butter (113 g), softened
- 3 cups powdered sugar (360 g), sifted
- 1 teaspoon vanilla extract
- Pinch of salt
Instructions
- Preheat oven to 350°F (175°C). Line two baking sheets with parchment paper.
- In a medium bowl, sift together flour, cocoa powder, baking soda, and salt. Set aside.
- In a large bowl, beat softened butter and sugar until light and fluffy, about 3–5 minutes.
- Beat in eggs one at a time, then add vanilla extract and mix until incorporated.
- Alternate adding dry ingredients and buttermilk to the butter mixture, starting and ending with dry ingredients. Mix gently after each addition.
- Stir in red food coloring and white vinegar until batter is smooth and evenly colored. Avoid overmixing.
- Drop rounded dollops (about 2 tablespoons each) onto prepared baking sheets, spacing about 2 inches apart.
- Bake for 12–14 minutes until tops spring back lightly and a toothpick comes out mostly clean with a few moist crumbs.
- Cool completely on wire racks, about 20 minutes.
- For the filling, beat cream cheese and softened butter until smooth and fluffy.
- Gradually add powdered sugar, mixing on low speed then increasing speed until creamy.
- Stir in vanilla extract and a pinch of salt.
- Match cakes in pairs of similar size. Spread or pipe about 2 tablespoons of filling on one cake and sandwich with the other.
- Press lightly to spread filling evenly to edges.
Notes
Use gel food coloring for vibrant color without thinning batter. Avoid overmixing batter to keep cakes tender. Chill filling for 10 minutes before assembling for easier piping. Batter and filling can be prepared up to 24 hours ahead and refrigerated. Store finished pies in airtight container in fridge up to 4 days or freeze individually wrapped.
Nutrition
- Serving Size: 1 whoopie pie (about
- Calories: 320
- Sugar: 28
- Fat: 16
- Carbohydrates: 40
- Protein: 4
Keywords: red velvet, whoopie pies, summer dessert, cream cheese filling, easy bake, cookout treats