“Are you sure these are ready?” my sister asked, peering suspiciously at the chilled cups lined up on the counter. Honestly, I wasn’t sure either when I first threw together this easy no-bake graduation dessert cups recipe. It started out as a last-minute save—my usual baking mojo had left town just as the graduation party countdown hit single digits. With little time and a kitchen that felt more chaotic than celebratory, I needed something that could be made ahead, looked good, and tasted like I’d actually planned it all along.
The miracle? These dessert cups came together in about 15 minutes, required zero oven time, and were ready to chill while I handled the rest of the party chaos. The layers of creamy filling, crunchy bits, and fresh pops of fruit turned skeptics into fans by the first bite. And no kidding, they’ve become my go-to for any gathering where I want a fuss-free, crowd-pleasing sweet ending. Every time I serve these, there’s at least one friend who asks for the recipe—sometimes twice.
What stuck with me is how this recipe blends simplicity and a bit of elegance, perfect for marking milestones without the stress. Plus, making them well ahead means you actually get to enjoy the celebration instead of rushing around last minute. So if you’re looking for an easy no-bake graduation dessert cup recipe that feels special but won’t steal your time, you’re in the right place. Let’s just say, these cups hold a little magic in every spoonful—and maybe a bit of relief for the busy host, too.
Why You’ll Love This Recipe
From countless trial runs—some with too-much-of-this and not-enough-of-that moments—this easy no-bake graduation dessert cups recipe has proven itself a winner time and again. I’ve learned a few things along the way, and here’s why it’s become a staple in my celebration toolkit:
- Quick & Easy: You can whip these dessert cups up in under 20 minutes, no baking required. Perfect for those hectic graduation weeks or any last-minute celebration.
- Simple Ingredients: No obscure items here. Most are pantry staples or easy to grab from your local store—think cream cheese, whipped topping, and fresh fruit.
- Perfect for Make-Ahead: These cups hold up beautifully in the fridge for 24-48 hours, so you can prep well before the party and relax on the big day.
- Crowd-Pleaser: Kids, adults, picky eaters—you name it. The creamy sweetness paired with a hint of crunch makes it a universal favorite.
- Unbelievably Delicious: The texture is just right—light yet indulgent, with layers that tease your taste buds in all the right ways.
What sets this recipe apart? Instead of just tossing together typical pudding or whipped cream, I add a little tangy cream cheese for balance and fold in crushed cookies for texture that isn’t soggy or overwhelming. Plus, a splash of vanilla and a touch of citrus zest really bring the whole thing alive. It’s not just another no-bake dessert—it’s the one you’ll find yourself making again and again for celebrations.
Honestly, this recipe hits the sweet spot between comfort and ease, making it feel like a treat without the kitchen chaos. It’s the kind of dessert that makes you smile quietly, knowing you nailed it without breaking a sweat.
What Ingredients You Will Need
This recipe uses straightforward, wholesome ingredients to create a dessert that’s creamy, flavorful, and easy to customize. You likely have most of these in your pantry or fridge already, which makes this recipe a breeze for last-minute or planned celebrations.
- Cream Cheese, softened (about 8 oz / 225 g) – adds a tangy richness that keeps the dessert from being overly sweet. I prefer Philadelphia for a smooth, consistent texture.
- Powdered Sugar (1 cup / 120 g) – sweetens without graininess; sift it to avoid lumps.
- Vanilla Extract (1 tsp) – this little splash amps up the flavor.
- Heavy Whipping Cream (1 cup / 240 ml), cold – whipped to soft peaks to fold in airiness and lightness.
- Crushed Graham Crackers or Digestive Biscuits (1 ½ cups / 150 g) – for that perfect crunchy layer. You can swap with crushed pretzels or gluten-free cookies if needed.
- Fresh Berries (1 ½ cups / 225 g), such as strawberries, blueberries, or raspberries – seasonal and fresh is best here for bright flavor and color.
- Lemon Zest (1 tsp) – optional but highly recommended for a subtle zing that wakes up the palate.
For a dairy-free twist, almond or coconut-based cream cheese substitutes work well, paired with coconut whipped topping. Also, in summer, swapping fresh berries for stone fruits like diced peaches or nectarines offers a lovely seasonal touch.
One side note: I’ve found that using cold heavy cream whips better and holds its shape longer, which is key for that fluffy, light texture everyone loves.
Equipment Needed
- Mixing Bowls: A couple of medium-sized bowls for whipping cream and mixing the cream cheese mixture.
- Electric Hand Mixer or Stand Mixer: This makes whipping cream and blending the cream cheese smooth and easy. I’ve tried hand-whisking, but it takes forever and doesn’t get quite as fluffy.
- Measuring Cups and Spoons: For precise ingredient amounts.
- Spatula: Essential for folding whipped cream into the cream cheese mixture gently.
- Serving Cups or Mason Jars: Any small clear cups work great to show off the pretty layers. I like using 8 oz (240 ml) mason jars because they seal tightly for make-ahead storage.
- Food Processor or Plastic Bag and Rolling Pin: For crushing the graham crackers or cookies. If you don’t have a food processor, just pop the cookies in a sealed bag and crush with a rolling pin or heavy pan.
Don’t worry if you’re on a budget—these tools are pretty standard kitchen gear. I’ve made this recipe with just a hand mixer and basic bowls, and it still comes out great. Just takes a bit longer and more elbow grease!
Preparation Method
- Prepare the Cream Cheese Mixture (10 minutes): In a medium bowl, beat the softened cream cheese until smooth using an electric mixer on medium speed. Scrape down the sides as needed to avoid lumps.
- Add Sweetness and Flavor: Gradually add the powdered sugar and vanilla extract to the cream cheese, beating until fully combined and smooth. Stir in the lemon zest here if you’re using it.
- Whip the Cream: In a separate chilled bowl, whip the heavy cream on high speed until soft peaks form. You’ll know it’s ready when the cream holds its shape but still looks soft and billowy.
- Fold in the Whipped Cream: Gently fold the whipped cream into the cream cheese mixture using a spatula. Do this carefully to keep the airy texture—overmixing will deflate the cream.
- Crush the Graham Crackers: Pulse graham crackers in a food processor or crush inside a plastic bag with a rolling pin until you get mostly fine crumbs with some small chunks for crunch.
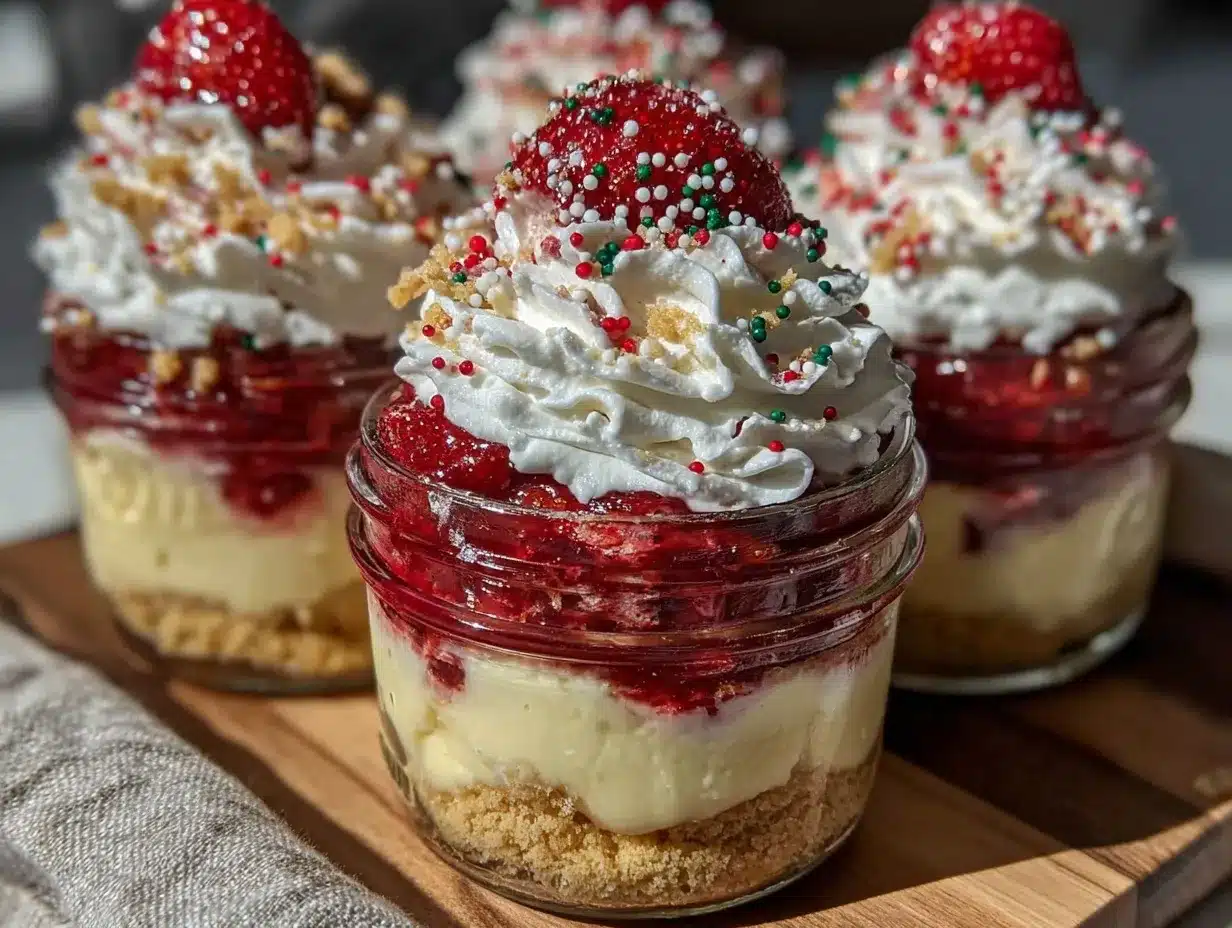
- Assemble the Dessert Cups: Spoon a layer of crushed graham crackers into the bottom of each serving cup (about 2 tablespoons or 30 g). Add a layer of the creamy mixture (about ¼ cup / 60 ml), then top with a few fresh berries. Repeat one more layer of crumbs, cream, and berries if your cups are tall enough.
- Chill: Cover the cups with lids or plastic wrap and refrigerate for at least 2 hours or up to 48 hours. This allows the flavors to meld and the texture to firm up nicely.
- Serve and Enjoy: Just before serving, you can add an extra garnish of fresh mint or a dusting of powdered sugar for a little flair.
Pro tip: If your cream cheese is too cold and stiff, it can be tough to blend smoothly. Let it sit at room temperature for about 30 minutes before starting. Also, if the whipped cream deflates a bit while folding, don’t panic—it still tastes amazing!
Cooking Tips & Techniques
Making no-bake desserts can be deceptively simple, but a few tips make a world of difference. For these dessert cups, the key is in balancing texture and flavor, plus timing your prep right.
- Softening Cream Cheese: This is a step you can’t skip. Cream cheese straight from the fridge will clump, making it harder to mix evenly. I usually slice it and leave it on the counter while I prep other ingredients.
- Whipping Cream to the Right Consistency: Stop whipping at soft peaks—not too runny, not too stiff. Overwhipped cream can become grainy and separate, which ruins the texture.
- Folding Technique: Use a spatula and gently fold the whipped cream into the cream cheese mixture. Think of it like tucking the cream in rather than stirring it in. This keeps the dessert light and fluffy.
- Layering for Texture: Don’t skip the crunchy graham cracker layers. They bring an essential contrast to the creamy filling. Crushing some chunks rather than all fine crumbs gives a nice bite.
- Chilling Time: Patience here pays off. The longer the cups chill, the better the flavors meld and the texture firms up. I’ve found overnight chilling is ideal if you can plan ahead.
One time I tried assembling these without chilling—big mistake. The cream was too loose and the layers just slid around. Lesson learned: chill, chill, chill. It’s the secret to turning a quick mix into a showstopper.
Variations & Adaptations
This recipe is pretty forgiving and lends itself well to tweaks based on taste preferences, dietary needs, or seasonal availability. Here are a few ideas to make it your own:
- Chocolate Lover’s Twist: Add a tablespoon of unsweetened cocoa powder to the cream cheese mixture and swap graham crackers for crushed chocolate wafer cookies. It’s like a no-bake chocolate mousse cup.
- Gluten-Free Version: Use gluten-free cookies or crushed nuts (like almonds or pecans) in place of graham crackers. Make sure your powdered sugar and other ingredients are certified gluten-free if needed.
- Tropical Flair: Fold in finely chopped pineapple or mango with the berries. You can also sprinkle toasted coconut flakes between layers for extra texture and flavor.
- Dairy-Free Alternative: Swap cream cheese for a dairy-free, plant-based cream cheese and use coconut whipped topping instead of heavy cream. The flavor will be slightly different but still delicious.
- Personal Favorite: I once made a batch with a swirl of homemade raspberry jam layered in for a tart surprise. It was a hit at a potluck and added a beautiful color pop.
These variations keep the base technique the same but let you customize for your occasion or guests’ preferences. You could even experiment with layering in nuts or seeds for a crunchier texture.
Serving & Storage Suggestions
These dessert cups are best served chilled, straight from the fridge. The cool, creamy texture is part of the charm, especially on a warm graduation day. I like to garnish with a sprig of fresh mint or a few extra berries for a pretty finish that looks like you put in way more effort than you did.
Pair these cups nicely with light, refreshing beverages like iced tea, sparkling water with lemon, or even a fruity punch. They work great alongside savory dishes like creamy chicken salad with sweet grapes or a crisp fresh cowboy caviar salad bowl, balancing out the meal with just the right touch of sweetness.
For storage, keep the cups tightly covered in the refrigerator. They’ll stay fresh for up to 48 hours, which makes them perfect for prepping a day or two ahead. If you want to store longer, freezing isn’t recommended as the texture can get grainy after thawing.
When reheating (if you must), just bring to room temperature before serving and give a quick stir. But honestly, these taste best cold, and the flavors actually meld and deepen after a day in the fridge.
Nutritional Information & Benefits
Each serving of these easy no-bake graduation dessert cups provides a satisfying sweet treat without going overboard on calories. Roughly, one cup contains about 250-300 calories, depending on portion size and ingredient brands.
The recipe includes key ingredients like cream cheese, which offers some protein and calcium, and fresh berries packed with antioxidants and vitamin C. The use of powdered sugar keeps sweetness moderate, and you can always reduce it slightly for a lighter dessert.
For those watching carbs, swapping graham crackers for nuts or seeds reduces the carb load. Gluten-free and dairy-free versions can be made to fit common dietary restrictions.
Overall, this dessert feels indulgent but can fit nicely into a balanced diet when eaten in moderation. It’s a sweet way to celebrate without the heaviness of traditional cakes or pies.
Conclusion
This easy no-bake graduation dessert cups recipe is one of those rare finds that combines simplicity, speed, and that little bit of wow-factor every host hopes for. Whether you’re juggling a million other party details or just want a fuss-free, delicious sweet finish, these cups have your back.
Feel free to adjust the layers, swap ingredients, and add your personal touch—this recipe is a great canvas. It’s become a favorite in my circle because it lets me enjoy the celebration instead of stressing over complicated desserts.
Give it a try for your next graduation or any special occasion, and see how these little cups of joy can bring smiles all around. And hey, if you have your own twists or questions, I’d love to hear about them in the comments!
Frequently Asked Questions
Can I make these dessert cups a day ahead?
Absolutely! In fact, I recommend making them 24 hours in advance. It helps the flavors meld and the texture set perfectly.
What if I don’t have heavy cream?
You can substitute with whipped topping, but the texture might be a bit less rich. Avoid using regular milk as it won’t whip properly.
Can I use other cookies instead of graham crackers?
Yes! Crushed digestive biscuits, shortbread, or even chocolate cookies work well. Just watch the sweetness level and adjust powdered sugar if needed.
Is there a dairy-free version?
Definitely. Use dairy-free cream cheese and coconut whipped topping to keep it creamy and light. The flavor will be slightly different but still tasty.
How do I keep the dessert cups from getting soggy?
Layer the crumbs carefully and don’t over-soak them with the cream mixture. Chilling them well also helps maintain that nice crunchy texture.
Pin This Recipe!
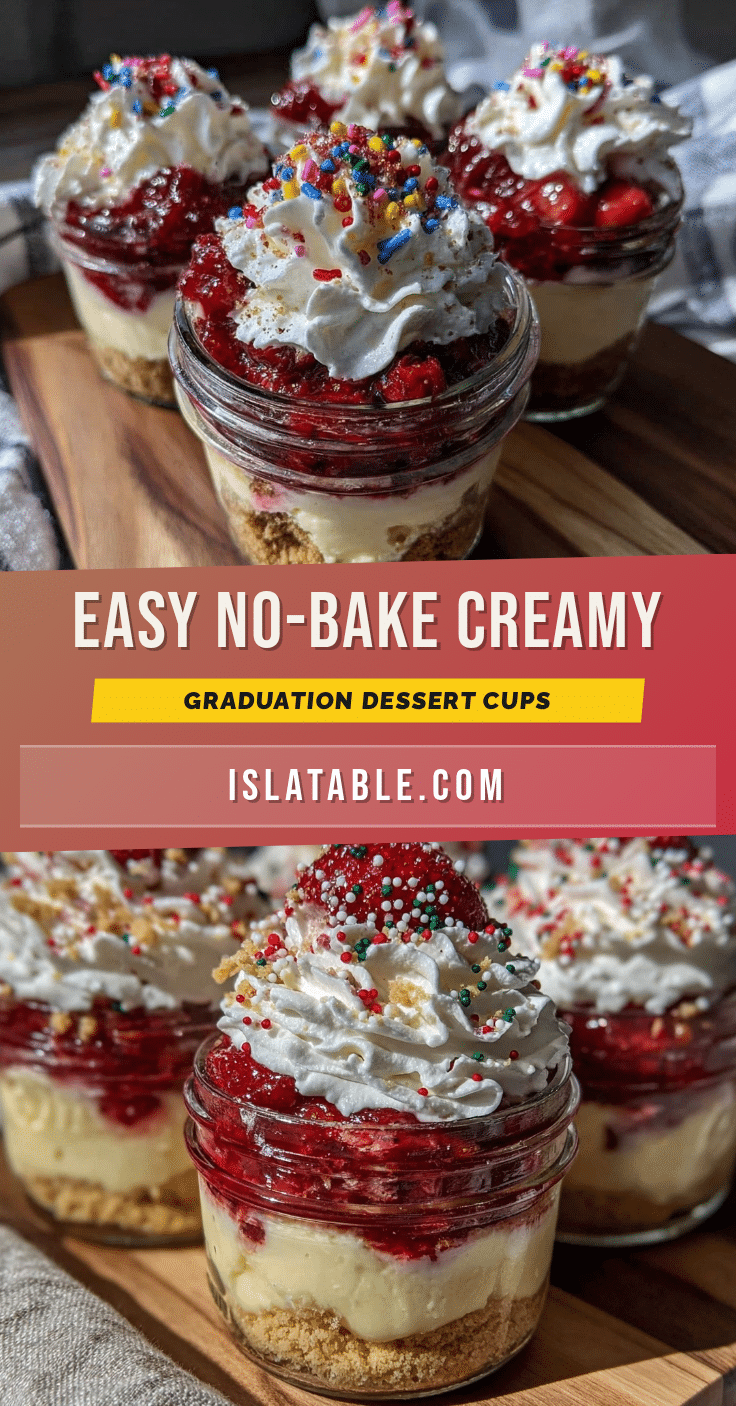
Easy No-Bake Graduation Dessert Cups

A quick and easy no-bake dessert perfect for graduation parties, featuring layers of creamy tangy filling, crunchy graham crackers, and fresh berries. Ready in 15 minutes and can be made ahead for stress-free celebrations.
- Prep Time: 15 minutes
- Cook Time: 0 minutes
- Total Time: 2 hours 15 minutes
- Yield: 6 servings 1x
- Category: Dessert
- Cuisine: American
Ingredients
- 8 oz (225 g) cream cheese, softened
- 1 cup (120 g) powdered sugar, sifted
- 1 tsp vanilla extract
- 1 cup (240 ml) heavy whipping cream, cold
- 1 ½ cups (150 g) crushed graham crackers or digestive biscuits
- 1 ½ cups (225 g) fresh berries (strawberries, blueberries, raspberries)
- 1 tsp lemon zest (optional)
Instructions
- In a medium bowl, beat the softened cream cheese until smooth using an electric mixer on medium speed, scraping down the sides as needed.
- Gradually add the powdered sugar and vanilla extract to the cream cheese, beating until fully combined and smooth. Stir in the lemon zest if using.
- In a separate chilled bowl, whip the heavy cream on high speed until soft peaks form.
- Gently fold the whipped cream into the cream cheese mixture using a spatula, being careful not to deflate the cream.
- Crush the graham crackers in a food processor or inside a plastic bag with a rolling pin until mostly fine crumbs with some small chunks remain.
- Assemble the dessert cups by spooning about 2 tablespoons (30 g) of crushed graham crackers into the bottom of each serving cup, followed by about ¼ cup (60 ml) of the creamy mixture, then a few fresh berries. Repeat layers if cups are tall enough.
- Cover the cups with lids or plastic wrap and refrigerate for at least 2 hours or up to 48 hours to allow flavors to meld and texture to firm.
- Before serving, optionally garnish with fresh mint or a dusting of powdered sugar.
Notes
Let cream cheese sit at room temperature for 30 minutes before mixing for smooth blending. Whip heavy cream to soft peaks to maintain light texture. Fold whipped cream gently to avoid deflating. Chill dessert cups for at least 2 hours or overnight for best flavor and texture. Avoid freezing as it affects texture. Variations include adding cocoa powder for chocolate twist, using gluten-free cookies, or dairy-free cream cheese and coconut whipped topping.
Nutrition
- Serving Size: 1 cup dessert cup
- Calories: 275
- Sugar: 16
- Sodium: 150
- Fat: 18
- Saturated Fat: 10
- Carbohydrates: 22
- Fiber: 2
- Protein: 4
Keywords: no-bake dessert, graduation dessert, dessert cups, make-ahead dessert, easy dessert, creamy dessert, berry dessert