“You can’t believe it’s under $20,” my sister said, eyeing the cake skeptically. Honestly, I wasn’t sure either. The idea of a budget-friendly graduation cake seemed almost impossible—especially one that looked this good. But there I was, juggling a pile of last-minute party plans and a tight budget, trying to whip up something that felt special without breaking the bank. It was one of those “let’s just see what happens” moments, fueled by a mix of necessity, a little panic, and a stubborn refusal to settle for store-bought.
The kitchen smelled like vanilla and cocoa, the kind of comforting scent that settles nerves and starts to lift the mood. I’d made cakes before, sure, but this one had to be different. A graduation cake that could impress a crowd, satisfy a sweet tooth, and still leave me enough cash for party snacks. The recipe took shape from a few staples I had on hand, plus a few smart buys from the grocery store—no fancy ingredients, no complicated steps, just straightforward, honest baking.
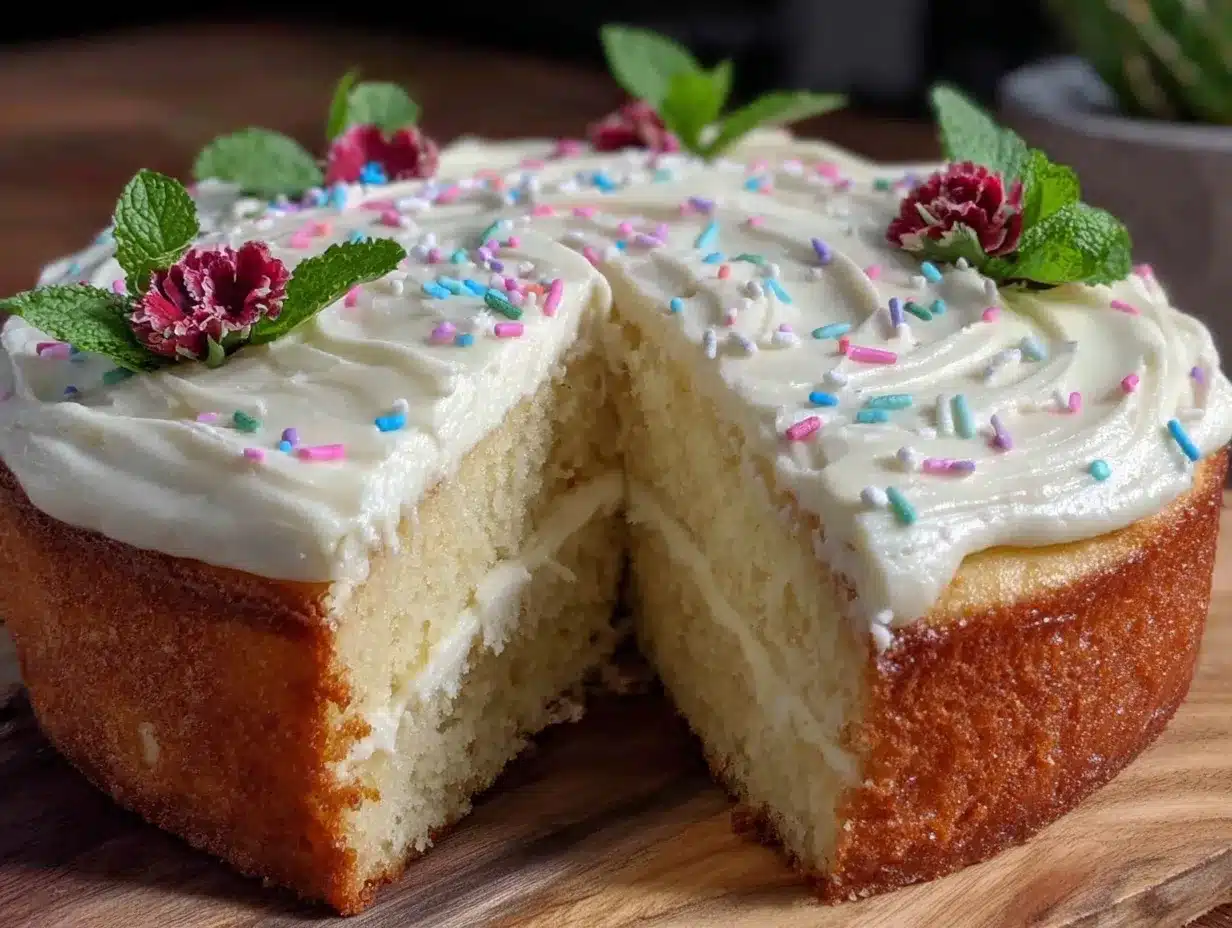
What surprised me most was how quickly it came together. The crumb was tender, the frosting creamy but not over-the-top, and the decorations simple yet festive. By the time I was done, I wasn’t just relieved—I was quietly proud. Turns out, this budget-friendly graduation cake isn’t just a fallback; it’s a winner that stuck around for every celebration since. And honestly, it’s the kind of recipe you’ll want in your back pocket for any party where you want to impress without stress.
Why You’ll Love This Recipe
This budget-friendly graduation cake recipe is the kind of find that makes you want to bake it over and over (and trust me, I have). Here’s why it stands out:
- Quick & Easy: You can have this cake ready in under 90 minutes, which is perfect when you realize the party’s starting soon and you still need dessert.
- Simple Ingredients: No hunting for obscure items here. Basic pantry staples like flour, sugar, and eggs do the heavy lifting.
- Perfect for Graduation Parties: It’s festive enough to celebrate milestones but neutral enough to please all tastes.
- Crowd-Pleaser: Whether it’s kids, adults, or picky eaters, this cake always gets a thumbs-up.
- Unbelievably Delicious: The balance of moist crumb and fluffy frosting is just right, creating that classic homemade cake vibe.
This isn’t just a cheap cake; it’s a thoughtfully crafted recipe that balances budget with flavor. By using a simple but effective frosting technique and a reliable cake mix base, you get a texture and taste that often rival fancier versions. Plus, it’s adaptable—you can tweak the frosting flavor or add decorations to match any graduation theme. I’ve found it’s also a great companion to dishes like the creamy chicken salad with sweet grapes if you want to round out your celebration menu with easy, crowd-friendly options.
What Ingredients You Will Need
This budget-friendly graduation cake uses simple, wholesome ingredients to deliver bold flavor and satisfying texture without the fuss. Most of these are pantry staples, so you probably already have them on hand.
- All-purpose flour – 2 ½ cups (about 312 g), the base for a tender crumb
- Granulated sugar – 1 ¾ cups (350 g), for sweetness
- Baking powder – 2 ½ teaspoons, helps the cake rise nicely
- Baking soda – ½ teaspoon, adds a little lift and softness
- Salt – ½ teaspoon, balances flavors
- Unsalted butter – ½ cup (113 g), softened; using a good brand like Land O’Lakes makes a difference in texture
- Large eggs – 3, at room temperature for better mixing
- Whole milk – 1 cup (240 ml), adds moisture (you can substitute almond milk for a dairy-free twist)
- Vanilla extract – 2 teaspoons, for that classic flavor punch
- Powdered sugar – 3 cups (360 g), for the frosting
- Cream cheese – 8 oz (227 g), softened, creates a tangy, creamy frosting (Philadelphia brand is my go-to)
- Heavy cream – ¼ cup (60 ml), to lighten the frosting and make it spreadable
- Food coloring (optional) – to match your graduation colors
- Sprinkles or edible decorations (optional) – for that festive touch
If you want to switch things up, consider swapping the cream cheese frosting for a simple whipped buttercream or even a chocolate glaze. For a nut-free version, just skip any sprinkled nuts or use allergy-friendly decorations. When fresh berries are in season, adding them between layers can bring a bright, fresh note to this cake.
Equipment Needed
- 9-inch round cake pans – two pans work best for even layers; if you only have one, bake layers one at a time.
- Mixing bowls – at least two, one for dry ingredients and one for wet.
- Electric mixer or stand mixer – makes batter and frosting smooth and fluffy; hand mixers are fine but may take longer.
- Measuring cups and spoons – accuracy matters, especially for baking powder and soda.
- Rubber spatula – essential for scraping bowls and folding batter gently.
- Cooling racks – allows cakes to cool evenly and prevents sogginess.
- Offset spatula or butter knife – perfect for spreading frosting evenly; a clean spoon can work in a pinch.
- Parchment paper – helps prevent sticking and makes cleanup easier.
If you don’t have cake pans, you can use a square pan or even a loaf pan, adjusting baking time accordingly. For frosting, a simple bowl and whisk can work, but an electric mixer definitely saves time and effort. I find that investing in a good mixer pays off over time—makes recipes like this much more enjoyable to prepare.
Preparation Method
- Preheat your oven to 350°F (175°C). Grease and flour two 9-inch round cake pans, then line the bottoms with parchment paper to prevent sticking.
- Mix dry ingredients: In a large bowl, whisk together the all-purpose flour, granulated sugar, baking powder, baking soda, and salt until evenly combined. This helps distribute the leavening agents properly.
- Combine wet ingredients: In a separate bowl, beat the softened unsalted butter until smooth and creamy (about 2 minutes). Add the eggs one at a time, beating well after each addition. Stir in the whole milk and vanilla extract.
- Incorporate dry into wet: Gradually add the dry ingredients to the wet mixture in three parts, mixing gently but thoroughly after each addition. Avoid overmixing, or the cake can become dense.
- Divide batter evenly: Pour the batter into the prepared pans, smoothing the tops with a spatula. The batter should fill each pan about halfway.
- Bake: Place pans in the oven and bake for 30 to 35 minutes. Check for doneness by inserting a toothpick into the center; it should come out clean or with just a few crumbs.
- Cool: Let the cakes cool in the pans for 10 minutes, then run a knife around the edges and turn them out onto cooling racks. Allow them to cool completely before frosting (this can take about 1 hour).
- Prepare frosting: Beat the softened cream cheese with an electric mixer until smooth. Gradually add powdered sugar, beating on low until combined, then increase speed to medium and add heavy cream until frosting is light and fluffy. If desired, divide and tint with food coloring to match your graduation theme.
- Assemble: Place one cake layer on your serving plate. Spread a thick, even layer of frosting on top. Add the second cake layer, then cover the entire cake with the remaining frosting.
- Decorate: Finish with sprinkles, edible glitter, or simple piped borders using remaining frosting. Keep it festive but fuss-free.
- Chill: For best results, refrigerate the cake for at least 30 minutes before serving to allow frosting to set and flavors to meld.
Pro Tip: If your frosting feels too soft, pop it in the fridge for 15 minutes; if too stiff, beat in a little more cream. The right texture makes spreading a breeze!
Cooking Tips & Techniques
One key to success with this budget-friendly graduation cake is not rushing the mixing process. Taking the time to cream the butter and sugar well makes the crumb lighter. I remember one batch turning out a bit heavy because I hurried through this step—lesson learned!
Another tip: always sift your dry ingredients or whisk thoroughly. It helps avoid clumps and ensures the baking powder and soda are evenly distributed, so your cake rises uniformly.
When baking, resist opening the oven door too early, or the cake may sink. The toothpick test is your best friend here—check it right at 30 minutes, then every few minutes if needed.
Frosting can make or break the look of your cake. Using cream cheese frosting adds a subtle tang that balances the sweetness, but make sure the cream cheese is at room temperature to avoid lumps. If you’re short on time, whip the frosting last and keep it chilled until spreading.
Multitasking works wonders here—cool the cake layers while prepping your decorations or tidying up the kitchen. That way, you’re not waiting around awkwardly with a timer ticking.
Variations & Adaptations
There are plenty of ways to tailor this cake to your taste or dietary needs:
- Chocolate Version: Swap ½ cup of flour with unsweetened cocoa powder for a rich chocolate cake. Use chocolate chips for extra indulgence.
- Gluten-Free: Use a gluten-free all-purpose flour blend instead of regular flour. Make sure your baking powder is gluten-free too.
- Dairy-Free: Substitute butter for coconut oil and use almond or oat milk. For frosting, try a dairy-free cream cheese alternative or a simple coconut whipped cream.
- Fruit-Filled: Add fresh or frozen berries between layers for a fresh pop of flavor. Strawberries or blueberries work beautifully.
- Flavor Twist: Add a teaspoon of almond extract or lemon zest to the batter for a subtle but delightful change.
Personally, I once made a version with a simple lemon glaze instead of frosting for a lighter summer celebration. It paired nicely with the fresh cowboy caviar salad bowl we were serving, keeping the meal bright and fresh without heaviness.
Serving & Storage Suggestions
This cake is best served chilled or at room temperature, depending on your preference. The cream cheese frosting tastes creamier when slightly cool but softens beautifully if left out for 15 minutes.
For presentation, a simple cake stand or platter helps the cake look special. Adding fresh flowers or themed graduation toppers can personalize the look without extra cost.
Leftovers store well covered in the fridge for up to 4 days. When you want to enjoy it again, let the cake sit at room temperature for 20 minutes before slicing to soften the frosting.
You can also freeze the cake (wrapped tightly in plastic wrap and foil) for up to 2 months. Thaw overnight in the fridge and bring to room temperature before serving. Freezing can actually help the flavors meld together, making it taste even better on day two.
Nutritional Information & Benefits
Per slice (assuming 12 servings), this budget-friendly graduation cake contains approximately:
| Calories | 280 |
|---|---|
| Fat | 12g |
| Carbohydrates | 38g |
| Protein | 4g |
| Sugar | 24g |
The use of cream cheese adds a bit of protein and calcium, while the butter and milk provide essential fat that helps with satiety. This cake is not low in sugar, but like all treats, best enjoyed in moderation. Substituting almond milk or using less sugar can reduce calories slightly.
From a wellness perspective, this cake shows that celebrating special moments doesn’t require compromising your budget or taste. It’s a reminder that simple ingredients can come together to create joy, which is as nourishing as any superfood sometimes.
Conclusion
This budget-friendly graduation cake recipe proves you don’t need to spend a fortune to make a meaningful, delicious dessert for a milestone event. It’s flexible, forgiving, and genuinely tasty—a recipe I keep returning to for celebrations big and small.
Feel free to customize it with your favorite flavors or decorations to make it truly yours. It’s a crowd-pleaser that fits your wallet and your schedule, which is pretty much a win-win in my book.
I love this cake because it turns the often stressful party prep into a manageable, even enjoyable task. And the best part? Seeing smiles around the table, knowing you made something special with your own hands.
Ready to try it out? I’d love to hear how your cake turns out or any fun twists you add. Share your stories and let’s celebrate together!
FAQs
Can I make this cake ahead of time?
Yes! Bake the layers a day before and wrap them tightly. Assemble and frost the cake the day of the event for the freshest appearance.
What if I don’t have cream cheese for the frosting?
You can substitute with a buttercream frosting made from butter, powdered sugar, and a splash of milk or vanilla.
How do I keep the cake moist?
Don’t overbake and be sure to measure ingredients accurately. Also, letting the cake cool completely before frosting helps retain moisture.
Can I double the recipe for a bigger crowd?
Absolutely! Just double all ingredients and bake in larger pans or multiple cake pans, adjusting baking time as needed.
Is this cake suitable for kids?
Definitely! The flavors are classic and mild, making it a hit with kids and adults alike.
Pin This Recipe!
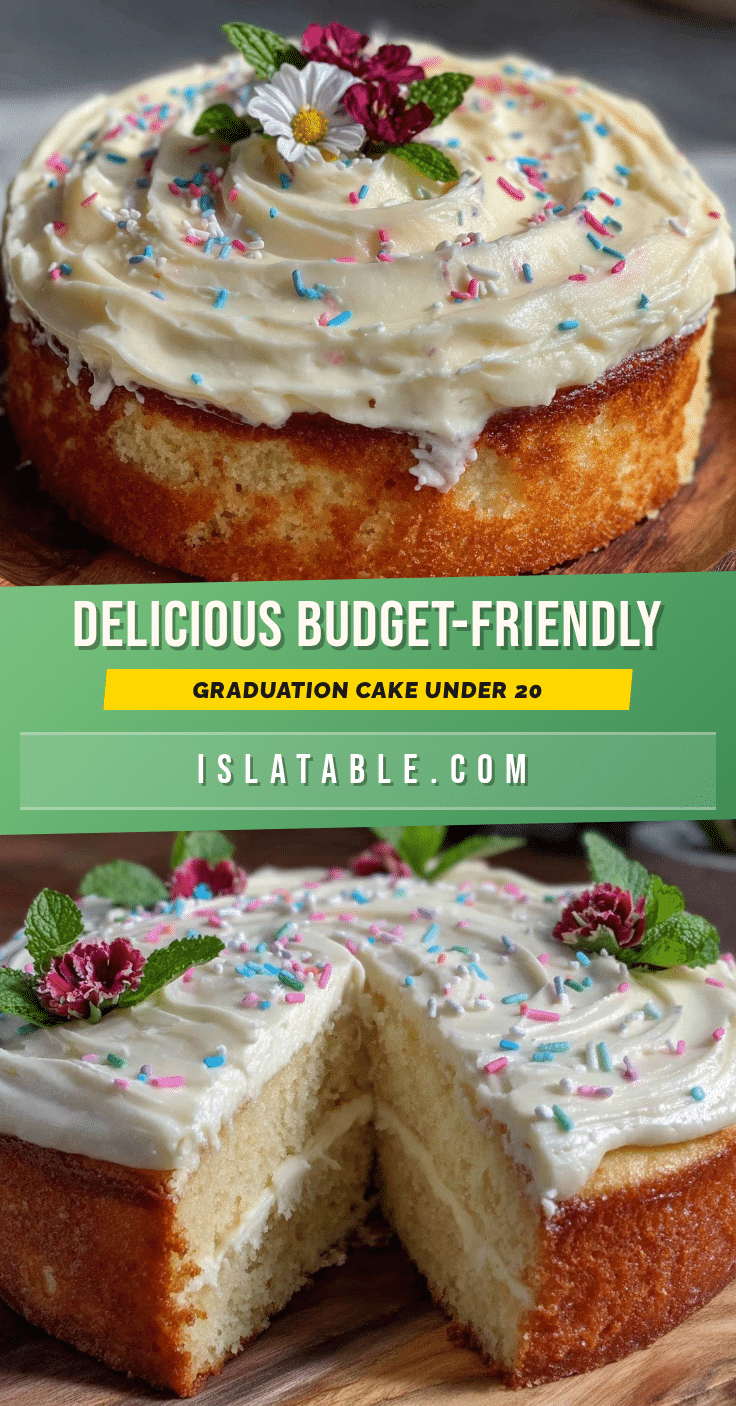
Budget-Friendly Graduation Cake Recipe Under 20 Dollars Easy and Delicious

A simple, delicious, and budget-friendly graduation cake recipe that uses basic pantry staples and comes together quickly, perfect for celebrations without breaking the bank.
- Prep Time: 20 minutes
- Cook Time: 35 minutes
- Total Time: 1 hour 45 minutes
- Yield: 12 servings 1x
- Category: Dessert
- Cuisine: American
Ingredients
- 2 ½ cups all-purpose flour (about 312 g)
- 1 ¾ cups granulated sugar (350 g)
- 2 ½ teaspoons baking powder
- ½ teaspoon baking soda
- ½ teaspoon salt
- ½ cup unsalted butter (113 g), softened
- 3 large eggs, at room temperature
- 1 cup whole milk (240 ml)
- 2 teaspoons vanilla extract
- 3 cups powdered sugar (360 g)
- 8 oz cream cheese (227 g), softened
- ¼ cup heavy cream (60 ml)
- Food coloring (optional)
- Sprinkles or edible decorations (optional)
Instructions
- Preheat your oven to 350°F (175°C). Grease and flour two 9-inch round cake pans, then line the bottoms with parchment paper to prevent sticking.
- In a large bowl, whisk together the all-purpose flour, granulated sugar, baking powder, baking soda, and salt until evenly combined.
- In a separate bowl, beat the softened unsalted butter until smooth and creamy (about 2 minutes). Add the eggs one at a time, beating well after each addition. Stir in the whole milk and vanilla extract.
- Gradually add the dry ingredients to the wet mixture in three parts, mixing gently but thoroughly after each addition. Avoid overmixing.
- Pour the batter into the prepared pans, smoothing the tops with a spatula. The batter should fill each pan about halfway.
- Bake for 30 to 35 minutes. Check for doneness by inserting a toothpick into the center; it should come out clean or with just a few crumbs.
- Let the cakes cool in the pans for 10 minutes, then run a knife around the edges and turn them out onto cooling racks. Allow them to cool completely before frosting (about 1 hour).
- Beat the softened cream cheese with an electric mixer until smooth. Gradually add powdered sugar, beating on low until combined, then increase speed to medium and add heavy cream until frosting is light and fluffy. Tint with food coloring if desired.
- Place one cake layer on your serving plate. Spread a thick, even layer of frosting on top. Add the second cake layer, then cover the entire cake with the remaining frosting.
- Decorate with sprinkles, edible glitter, or simple piped borders using remaining frosting.
- Refrigerate the cake for at least 30 minutes before serving to allow frosting to set and flavors to meld.
Notes
If frosting is too soft, chill for 15 minutes; if too stiff, beat in a little more cream. Avoid overmixing batter to keep cake tender. Sift or whisk dry ingredients to avoid clumps. Check cake doneness with toothpick starting at 30 minutes. Cake can be made a day ahead and assembled on event day. Variations include chocolate version, gluten-free, dairy-free, and fruit-filled options.
Nutrition
- Serving Size: 1 slice (1/12 of cak
- Calories: 280
- Sugar: 24
- Fat: 12
- Carbohydrates: 38
- Protein: 4
Keywords: budget-friendly cake, graduation cake, easy cake recipe, cream cheese frosting, party cake, affordable dessert