“Hey, do you have a snack that won’t send my nephew into an allergy panic?” That text popped up on my phone mid-morning, right when my kitchen was a mess and my patience was running thin. Honestly, I was juggling a million things, and the idea of whipping up a snack from scratch felt like a bad joke. But then, I remembered a quick granola bar recipe I’d been tweaking for weeks—one that’s allergy-friendly, individually wrapped, and perfect for grab-and-go moments like this.
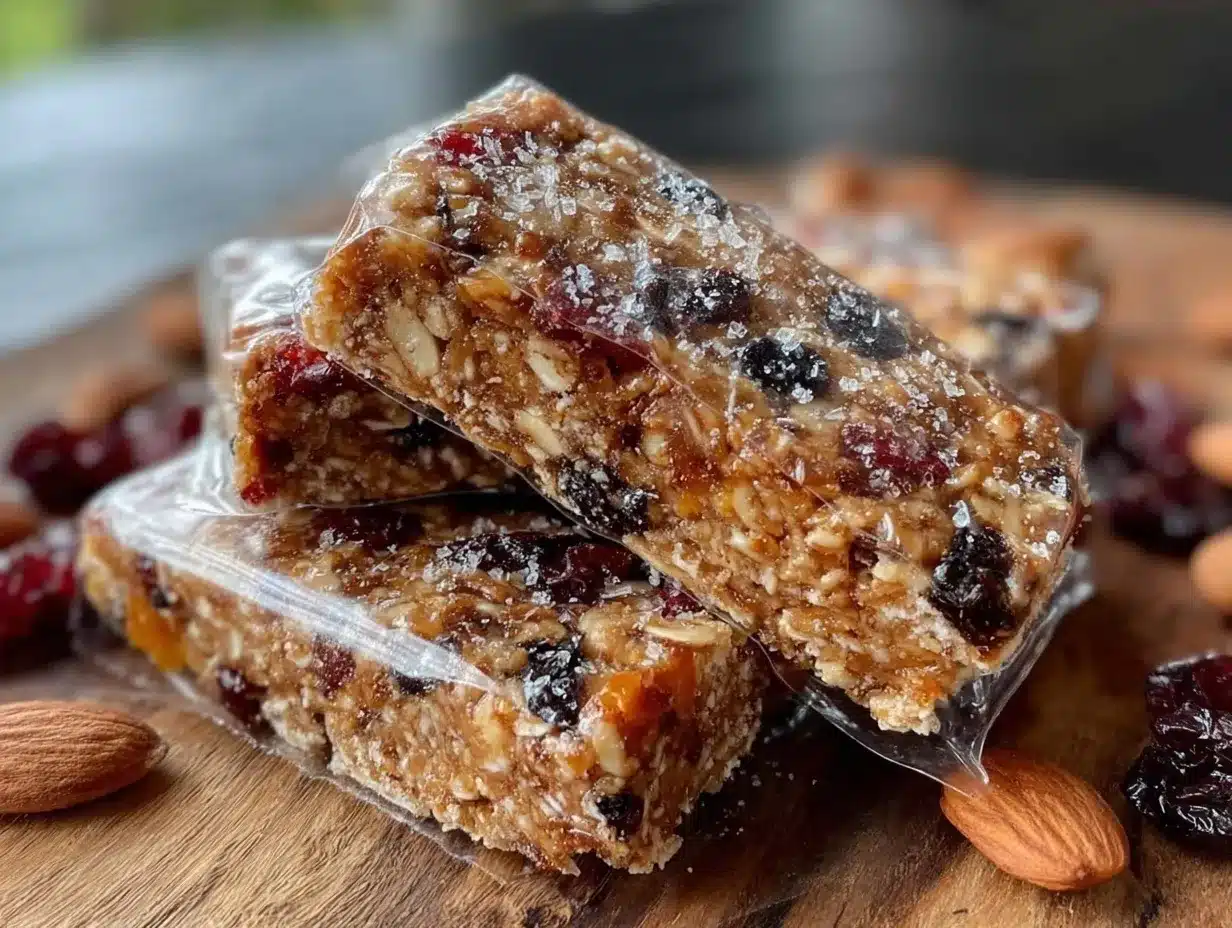
At first, I was skeptical—no nuts, no dairy, no soy? Could it even taste good? But after a couple of trial runs (and a few sneaky taste tests), the bars turned out surprisingly delicious and held together beautifully. The texture was just right—chewy but with a little crunch—and the kids loved unwrapping their own bars like little treasures. I wrapped them up individually, which made handing them out during chaotic afternoons a breeze.
It wasn’t some fancy recipe, just simple ingredients you’d find in most pantries. The best part? It gave me this quiet little victory in the middle of a hectic day. These bars stuck around as a reliable snack that I could count on when life got crazy—and I figured, maybe you’d like to have that same comfort ready in your kitchen.
Why You’ll Love This Recipe
After making these allergy-friendly granola bars over and over (no joke, I was on a bit of an obsession phase), I found they check all the boxes for quick, healthy snacking. Here’s why they’ve become a staple in my snack arsenal:
- Quick & Easy: Ready in under 30 minutes, including baking—perfect for last-minute snack emergencies or busy mornings.
- Simple Ingredients: No hunting for obscure items; mostly pantry staples that you probably already have on hand.
- Perfect for On-the-Go: Individually wrapped bars mean no mess, no fuss, just grab and go—ideal for school lunches, road trips, or work breaks.
- Allergy-Friendly: Free from nuts, dairy, soy, and gluten, making these bars suitable for many dietary restrictions.
- Crowd-Pleaser: The flavor is mild but satisfying, with a subtle sweetness and satisfying bite that kids and adults both appreciate.
This recipe isn’t your typical granola bar. Instead of clumping together with sticky honey or marshmallows, I use a mixture of gluten-free oats with sunflower seed butter to get that perfect chewy texture without any allergens. Plus, individually wrapping each bar keeps them fresh and super convenient—something I learned after many bars mysteriously vanished before I could store them properly.
What Ingredients You Will Need
This recipe keeps things straightforward, using wholesome ingredients to deliver a snack that’s tasty and safe for allergy-sensitive eaters. The ingredients are mostly pantry basics, and you can swap a few depending on your needs or what you have on hand.
For the Granola Bars
- Gluten-free rolled oats (2 cups / 180g) – look for certified gluten-free to avoid cross-contamination
- Sunflower seed butter (1/2 cup / 120ml) – a great nut-free alternative that adds creaminess and helps bind
- Maple syrup (1/3 cup / 80ml) – natural sweetness without refined sugar
- Ground flaxseed (2 tablespoons) – adds fiber and helps with binding
- Vanilla extract (1 teaspoon) – for a subtle, comforting flavor
- Dried cranberries or raisins (1/2 cup / 75g) – optional, for a chewy, fruity bite (choose unsweetened for less sugar)
- Chia seeds (1 tablespoon) – optional, for extra nutrition and texture
- Salt (a pinch) – balances the sweetness
Optional Toppings or Mix-ins
- Sunflower seeds or pumpkin seeds (2 tablespoons) – for extra crunch
- Shredded coconut (1/4 cup / 20g) – unsweetened, adds a tropical note
- Mini chocolate chips (1/4 cup / 40g) – allergy-friendly if dairy-free and soy-free brands are used
For the best results, I like to use Justin’s Classic Sunflower Seed Butter because it’s smooth and not too oily, but any no-stir brand works fine. If you’re looking for a gluten-free option, make sure your oats are certified gluten-free—as regular oats can sometimes cause issues. When it comes to dried fruit or mix-ins, I usually keep it simple, but you can switch things up with seasonal additions like chopped dried apricots or blueberries.
Equipment Needed
- Mixing bowl: A large one to combine all your ingredients comfortably.
- Measuring cups and spoons: For precise ingredient amounts.
- Wooden spoon or silicone spatula: To mix the sticky batter thoroughly.
- 8×8-inch baking pan: Lined with parchment paper for easy removal and clean edges.
- Plastic wrap or parchment squares: For individually wrapping the bars after cooling.
- Sharp knife: To cut the bars evenly without crumbling.
If you don’t have parchment paper, a silicone baking mat is a great alternative and reusable too. Personally, I avoid metal pans as they can sometimes cause the bars to brown unevenly. Also, wrapping each bar right after cutting helped me avoid the crumbly mess I used to get when letting them sit exposed. Trust me, this little step saves a lot of headaches!
Preparation Method
- Preheat your oven to 350°F (175°C). Line your 8×8-inch pan with parchment paper, leaving some overhang on the sides for easy lifting later. This step really makes getting the bars out cleanly so much easier.
- In a large mixing bowl, combine the gluten-free rolled oats, ground flaxseed, a pinch of salt, and any dry mix-ins like chia seeds or shredded coconut. Stir them together to distribute everything evenly.
- In a microwave-safe bowl, gently warm the sunflower seed butter and maple syrup together for about 20-30 seconds. Stir until smooth and combined. This liquid mixture will help bind the bars and add natural sweetness.
- Pour the sunflower seed butter and maple syrup mixture over the dry ingredients. Add the vanilla extract. Use a wooden spoon or spatula to mix everything thoroughly. The mixture should be sticky but manageable. If it feels too dry, add a teaspoon of water or more maple syrup gradually.
- Fold in the dried cranberries or raisins last. This keeps them from breaking up too much. You can also add any seeds or chocolate chips at this stage.
- Transfer the mixture to your prepared baking pan. Press it down firmly and evenly with a spatula or your clean hands. Pressing firmly is key for bars that hold together well—don’t be shy about it!
- Bake for 15-18 minutes. You want the edges to be just golden but not too crisp. The center might still seem a bit soft but will firm up as it cools. Keep an eye on it after 15 minutes to avoid over-baking.
- Remove from the oven and let the bars cool completely in the pan. This usually takes about 30-40 minutes. Cooling is crucial—cutting too soon means crumbly bars.
- Once cooled, lift the bars out using the parchment overhang. Place on a cutting board and cut into 8 or 10 bars with a sharp knife. Wrapping each bar individually in plastic wrap or parchment helps keep them fresh and perfect for snacking.
Pro tip: If your bars crumble a bit while cutting, try warming the knife slightly under hot water and drying it before slicing. It glides through the bars more cleanly.
Cooking Tips & Techniques
Making allergy-friendly granola bars can be tricky, but a few tricks make the process much smoother. For starters, choosing the right seed butter matters—a smooth, creamy sunflower seed butter works best to bind without adding grittiness. I learned the hard way that some brands are too oily, which makes the bars greasy.
Don’t rush the cooling process. I used to slice the bars right out of the oven, and they’d fall apart every single time. Letting them cool completely (and even chilling in the fridge for 10-15 minutes if you’re in a hurry) makes a huge difference in texture.
Pressing the mixture firmly into the pan is another key step. I sometimes line the top with parchment and press down with a flat-bottomed glass to get an even, tight surface. This helps keep the bars from crumbling when cut.
When it comes to wrapping, I recommend using parchment squares or wax paper if you want to avoid plastic wrap. Individually wrapping bars isn’t just about convenience—it also keeps moisture out and stops them from sticking together, which is a lifesaver for busy snackers.
As for timing, these bars bake quickly, so watch the oven closely after 15 minutes. Over-baked bars turn dry and lose their chewy charm.
Variations & Adaptations
One of the great things about this granola bar recipe is how easy it is to tweak depending on what you like or need.
- Vegan Option: This recipe is naturally vegan if you double-check your maple syrup and mix-ins. Swap any honey-like ingredients with extra maple syrup if you try variations.
- Seasonal Flavors: In fall, try adding cinnamon and chopped dried apples for a cozy twist. Summer? Toss in freeze-dried berries or shredded coconut for a bright kick.
- Low Sugar: Reduce the maple syrup slightly and add unsweetened dried fruit or seeds to keep natural sweetness without overdoing it.
- Gluten-Free Flour Boost: For a softer bar, add 1/4 cup (30g) of gluten-free oat flour. This helps bind the bars more tightly without nuts.
- Protein Boost: Stir in a scoop of plant-based protein powder (vanilla or unflavored) to make these bars even more filling.
Personally, I’ve tried swapping sunflower seed butter for tahini when I wanted a slightly more savory note—it worked surprisingly well! Just watch the salt levels if you try that.
Serving & Storage Suggestions
These granola bars are best served at room temperature right out of their wrappers. They’re perfect for packing in lunchboxes or tossing in a tote for hikes and busy days. Pair them with a glass of your favorite dairy-free milk or a cup of herbal tea for a simple snack break.
Store the individually wrapped bars in an airtight container at room temperature for up to a week. If you want to keep them longer, pop them into the fridge where they’ll stay fresh for about two weeks. For even longer storage, freeze the bars in a sealed freezer bag—thaw at room temperature when you’re ready to enjoy.
The flavors actually deepen a bit after a day or two, so if you can wait, letting the bars sit wrapped overnight can make them taste even better. Just don’t expect them to last long once everyone discovers them!
Nutritional Information & Benefits
Each allergy-friendly granola bar offers a wholesome balance of fiber, healthy fats, and natural sugars from maple syrup and dried fruit. Here’s a rough estimate per bar (assuming 10 bars per batch):
| Calories | ~150 kcal |
|---|---|
| Protein | 3g |
| Fat | 7g (mostly unsaturated fats) |
| Carbohydrates | 20g |
| Fiber | 3g |
| Sugar | 7g (natural sources) |
The use of sunflower seed butter provides vitamin E and magnesium, while flax and chia seeds add omega-3 fatty acids and fiber, which are great for digestion and heart health. Since the recipe avoids common allergens like nuts, dairy, and gluten, it works well for many people with dietary restrictions.
From my experience, these bars make a solid, guilt-free snack that keeps energy steady without the crash from processed sugars. They fit nicely into a balanced diet, especially when paired with protein-rich meals like the creamy chicken salad with sweet grapes or alongside a fresh vegetable side like the crispy broccoli salad with bacon crunch.
Conclusion
Making allergy-friendly individually wrapped granola bars might sound like a tall order, but it’s really a straightforward way to have healthful, convenient snacks ready anytime. I love how this recipe lets me feel confident about what’s going into each bar—and the individually wrapped part means less stress handing them out on busy days.
Feel free to tweak the mix-ins or sweeteners to suit your taste or dietary needs. Honestly, once you find your favorite combo, these bars become a small but steady comfort in the whirlwind of everyday life.
If you try this recipe, I’d love to hear how you customize it or what your go-to snack hacks are. Here’s to fewer snack-time surprises and more easy, allergy-friendly treats that everyone can enjoy!
Frequently Asked Questions
Can I use peanut butter instead of sunflower seed butter?
Yes, if there are no nut allergies to consider. Peanut butter will change the flavor and texture slightly but works well as a binder.
How long do these granola bars stay fresh?
Individually wrapped and stored in an airtight container at room temperature, they last about a week. Refrigerate for up to two weeks or freeze for longer storage.
Can I make these bars vegan?
Absolutely! This recipe is naturally vegan, especially if you use pure maple syrup and avoid honey or other non-vegan sweeteners.
What if I don’t have flaxseed or chia seeds?
You can skip them, but they add nutrition and help with binding. A tablespoon of oat flour or additional sunflower seed butter can help maintain texture.
How can I make these bars crunchier?
Add extra seeds like pumpkin or sunflower, or sprinkle some chopped nuts on top if allergies aren’t a concern. Toasting the oats lightly before mixing can also add crunch.
Pin This Recipe!
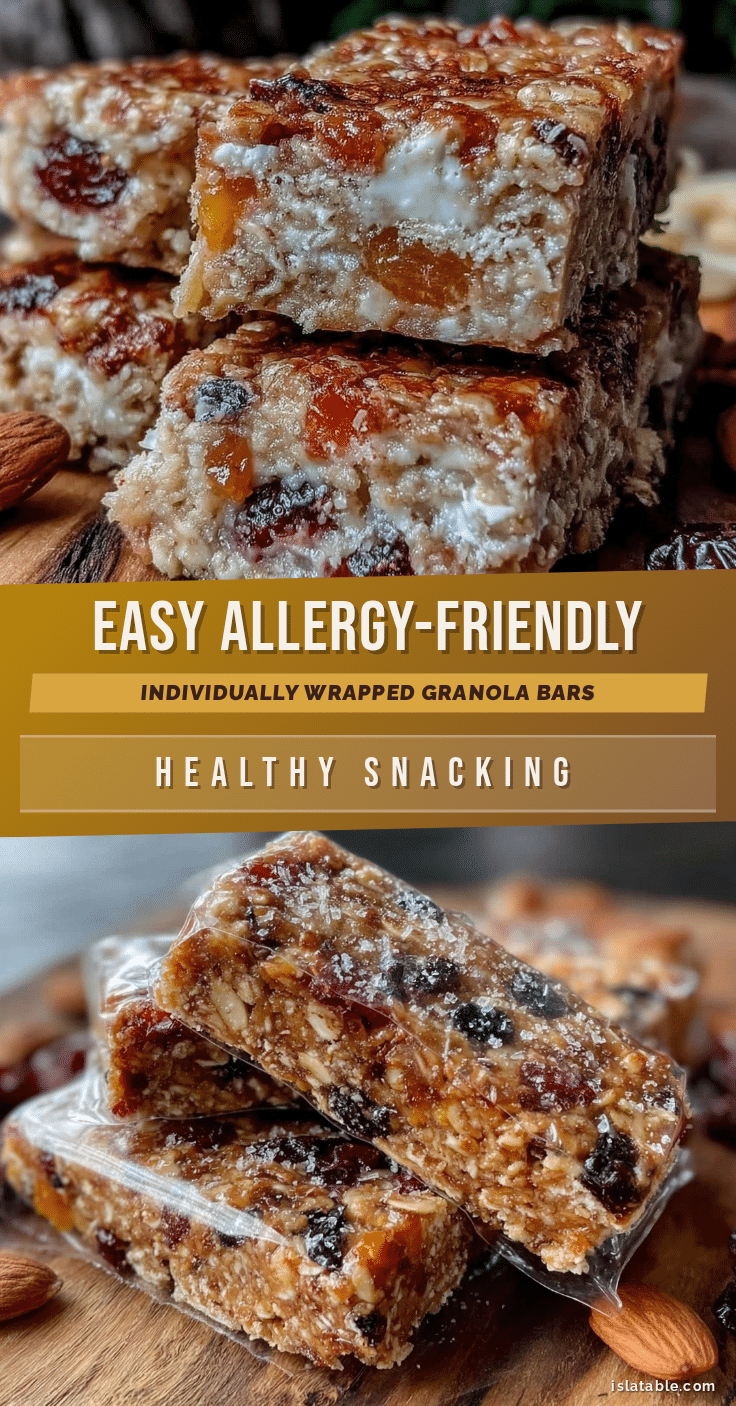
Easy Allergy-Friendly Individually-Wrapped Granola Bars Recipe for Quick Healthy Snacks
A quick and easy allergy-friendly granola bar recipe that is nut-free, dairy-free, soy-free, and gluten-free. Perfect for individually wrapped, grab-and-go healthy snacks suitable for kids and adults.
- Prep Time: 10 minutes
- Cook Time: 18 minutes
- Total Time: 50-60 minutes
- Yield: 8-10 bars 1x
- Category: Snack
- Cuisine: American
Ingredients
- 2 cups (180g) gluten-free rolled oats
- 1/2 cup (120ml) sunflower seed butter
- 1/3 cup (80ml) maple syrup
- 2 tablespoons ground flaxseed
- 1 teaspoon vanilla extract
- 1/2 cup (75g) dried cranberries or raisins (optional)
- 1 tablespoon chia seeds (optional)
- Pinch of salt
- 2 tablespoons sunflower seeds or pumpkin seeds (optional)
- 1/4 cup (20g) shredded unsweetened coconut (optional)
- 1/4 cup (40g) mini chocolate chips (optional, dairy-free and soy-free)
Instructions
- Preheat your oven to 350°F (175°C). Line an 8×8-inch baking pan with parchment paper, leaving some overhang for easy lifting.
- In a large mixing bowl, combine gluten-free rolled oats, ground flaxseed, a pinch of salt, and any dry mix-ins like chia seeds or shredded coconut. Stir to distribute evenly.
- In a microwave-safe bowl, gently warm sunflower seed butter and maple syrup together for 20-30 seconds. Stir until smooth and combined.
- Pour the sunflower seed butter and maple syrup mixture over the dry ingredients. Add vanilla extract and mix thoroughly with a wooden spoon or spatula until sticky but manageable. Add a teaspoon of water or more maple syrup if too dry.
- Fold in dried cranberries or raisins last, along with any seeds or chocolate chips if using.
- Transfer the mixture to the prepared baking pan. Press down firmly and evenly with a spatula or clean hands.
- Bake for 15-18 minutes until edges are just golden but center is still slightly soft.
- Remove from oven and let bars cool completely in the pan for 30-40 minutes.
- Lift bars out using parchment overhang, place on cutting board, and cut into 8 or 10 bars with a sharp knife.
- Individually wrap each bar in plastic wrap or parchment squares to keep fresh.
Notes
Use certified gluten-free oats to avoid cross-contamination. Press mixture firmly into pan for bars that hold together well. Let bars cool completely before cutting to avoid crumbling. Warm knife under hot water and dry before slicing for cleaner cuts. Individually wrapping bars keeps them fresh and prevents sticking. Avoid metal pans to prevent uneven browning.
Nutrition
- Serving Size: 1 bar (if 10 bars pe
- Calories: 150
- Sugar: 7
- Fat: 7
- Carbohydrates: 20
- Fiber: 3
- Protein: 3
Keywords: allergy-friendly, granola bars, nut-free, dairy-free, soy-free, gluten-free, healthy snacks, quick snacks, individually wrapped