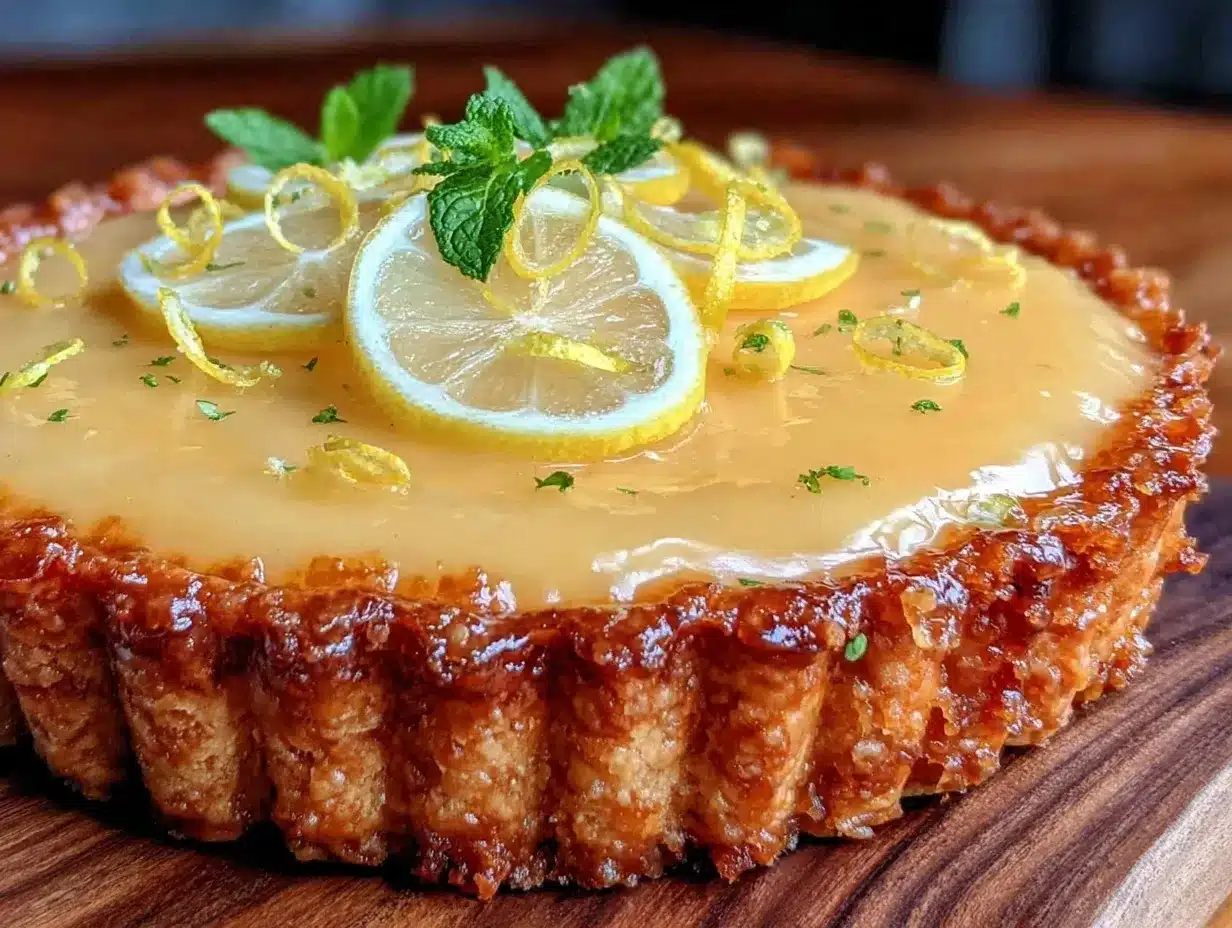
Let me tell you, the zingy scent of fresh lemons mingling with sweet, creamy custard is enough to make anyone’s mouth water. The first time I baked this perfect lemon curd tart, I was instantly hooked—the kind of moment where you pause, take a deep breath, and just smile because you know you’re onto something truly special. I remember being knee-high to a grasshopper, watching my grandma whip up her famous lemon curd, and years ago I finally decided to put that tangy goodness into a crisp, buttery tart shell. Honestly, I wish I’d discovered this recipe way sooner—it’s dangerously easy and offers pure, nostalgic comfort.
My family couldn’t stop sneaking bites off the cooling rack (and I can’t really blame them). You know what? This perfect lemon curd tart is the kind of recipe that brightens up your Pinterest cookie board and is perfect for potlucks, sweet treats for your kids, or a special dessert for weekend gatherings. After testing this recipe a handful of times in the name of research, of course, it’s now a staple for family celebrations and gifting. This creamy, zesty filling nestled in a flaky crust feels like a warm hug in tart form—you’re definitely going to want to bookmark this one.
Why You’ll Love This Recipe
Honestly, this perfect lemon curd tart recipe stands out because it’s been tried, tested, and adored by folks from all walks of life. It’s one of those rare desserts that’s as straightforward as it is impressive. Here’s why you’ll want to keep this recipe close:
- Quick & Easy: Comes together in under an hour, perfect for those busy weeknights or last-minute dessert emergencies.
- Simple Ingredients: No fancy grocery runs needed—you probably already have everything in your pantry.
- Perfect for Every Occasion: Whether it’s brunch, a potluck, or a cozy family dinner, this tart fits right in.
- Crowd-Pleaser: Kids and adults alike rave about the balanced sweet-tart flavor and creamy texture.
- Unbelievably Delicious: The luscious lemon curd filling with that crisp, flaky shell is comfort food at its best.
What sets this tart apart? It’s all about the zesty creamy filling—fresh lemon juice and zest combined with just the right amount of sweetness and butter, cooked gently until silky smooth. Plus, the crust is tender but sturdy enough to hold all that luscious curd without sogginess. I’ve swapped in a touch of vanilla extract to round out the flavors, and trust me, it’s a game-changer. This isn’t just another lemon tart recipe; it’s the best version you’ll find, and it’s the kind you’ll close your eyes after the first bite.
If you want a dessert that feels fancy but is totally doable, this recipe is your new go-to. It’s comfort food reimagined—brighter, fresher, and with that perfect creamy zing you didn’t know you needed.
What Ingredients You Will Need
This recipe uses simple, wholesome ingredients to deliver bold flavor and satisfying texture without the fuss. Most are pantry staples, and if you keep lemons on hand, you’re halfway there!
- For the Tart Crust:
- 1 1/4 cups (160g) all-purpose flour (I prefer King Arthur for consistent results)
- 1/2 cup (115g) unsalted butter, cold and cubed (adds that perfect flakiness)
- 1/4 cup (50g) granulated sugar
- 1/4 teaspoon salt
- 1 large egg yolk, room temperature (helps bind the dough)
- 2-3 tablespoons ice-cold water (add gradually as needed)
- For the Lemon Curd Filling:
- 1 cup (200g) granulated sugar
- 3 large eggs, room temperature
- 1/2 cup (120ml) freshly squeezed lemon juice (about 3-4 lemons)
- 2 teaspoons finely grated lemon zest (for that extra zing)
- 6 tablespoons (85g) unsalted butter, cubed and softened
- 1 teaspoon vanilla extract (optional, but I love the warmth it adds)
Ingredient Notes: Fresh lemons make all the difference here—bottled lemon juice just won’t cut it. If you’re in a pinch, Meyer lemons add a sweeter, less tart flavor. For a dairy-free version, swap butter with coconut oil, and use a gluten-free flour blend for the crust. You can also experiment with swapping sugar for honey or maple syrup, but be aware it may change the texture slightly.
Equipment Needed
- 9-inch tart pan with removable bottom: Makes it easier to release your tart without breaking the crust. If you don’t have one, a pie dish works too, but be gentle when slicing.
- Mixing bowls: At least two, for crust and filling.
- Electric mixer or stand mixer: Helpful for creaming butter and sugar, but a whisk and some elbow grease will do.
- Whisk and spatula: Essential for stirring the lemon curd smoothly.
- Saucepan: For gently cooking the lemon curd.
- Fine grater or zester: To get that fresh lemon zest.
- Rolling pin: For rolling out the tart dough evenly.
If you’re on a budget, silicone baking mats can replace parchment paper and make clean-up a breeze. I’ve also found that investing in a good zester is worth it—nothing beats fresh lemon zest for flavor. For maintenance, keep your tart pan dry and lightly greased to prevent sticking, and avoid metal utensils that can scratch non-stick surfaces.
Preparation Method
- Prepare the Tart Crust: In a large bowl, whisk together 1 1/4 cups (160g) all-purpose flour, 1/4 cup (50g) granulated sugar, and 1/4 teaspoon salt. Add 1/2 cup (115g) cold, cubed unsalted butter. Use your fingers or a pastry cutter to work the butter into the flour until the mixture resembles coarse crumbs with pea-sized bits.
- Add Wet Ingredients: Stir in 1 large egg yolk and 2 tablespoons of ice-cold water. Mix gently until the dough just comes together. If it feels dry, add the extra tablespoon of water. Don’t overwork the dough; you want it tender, not tough.
- Chill Dough: Form the dough into a disk, wrap it in plastic wrap, and refrigerate for at least 30 minutes. This rest period helps the gluten relax and the butter firm up, which keeps the crust flaky.
- Roll Out the Dough: Lightly flour your surface and rolling pin. Roll the dough into a 12-inch (30 cm) circle, about 1/8 inch (3 mm) thick. Carefully transfer to your 9-inch tart pan, pressing into the edges and trimming any excess. Chill again for 15 minutes to prevent shrinkage during baking.
- Blind Bake the Crust: Preheat your oven to 375°F (190°C). Line the crust with parchment paper and fill with pie weights or dried beans. Bake for 15 minutes, then remove weights and parchment. Bake for another 8-10 minutes or until the crust is golden and set. Let cool completely.
- Make the Lemon Curd Filling: In a medium saucepan, whisk together 1 cup (200g) granulated sugar and 3 large eggs until smooth. Stir in 1/2 cup (120ml) freshly squeezed lemon juice and 2 teaspoons lemon zest.
- Cook the Curd: Place the saucepan over medium-low heat, stirring constantly with a wooden spoon or heatproof spatula. Cook for about 8-10 minutes until thickened—when it coats the back of the spoon and you can draw a line through it with your finger. Be patient; rushing this step can scramble the eggs.
- Finish the Curd: Remove from heat and whisk in 6 tablespoons (85g) softened unsalted butter and 1 teaspoon vanilla extract until silky. Strain the curd through a fine-mesh sieve into a bowl to remove zest and any cooked egg bits for ultra-smooth filling.
- Assemble the Tart: Pour the warm lemon curd into the cooled tart shell, smoothing the top with a spatula. Chill in the fridge for at least 3 hours, preferably overnight, until set.
- Serve: Garnish with fresh lemon slices, whipped cream, or a sprinkle of powdered sugar if you like. Slice with a sharp knife dipped in hot water to get clean cuts.
Pro Tip: If your curd seems too thick after chilling, let the tart sit at room temperature for 10-15 minutes before serving to soften the filling slightly. Also, avoid rushing the blind baking step—it’s the secret to a crisp crust that won’t get soggy.
Cooking Tips & Techniques
Getting the perfect lemon curd tart is all about balance and patience. Here are some tips I’ve picked up from kitchen trials and happy accidents:
- Use Room Temperature Eggs: They incorporate better and prevent lumps in your curd.
- Constant Stirring: When cooking the lemon curd, keep stirring to avoid scrambling the eggs. Honestly, it’s worth the arm workout!
- Low and Slow: Don’t crank the heat. Medium-low ensures the curd thickens smoothly without curdling.
- Blind Bake Properly: Weigh down your crust well with pie weights or dried beans. This stops it from puffing up or shrinking.
- Chill Thoroughly: The tart needs time to set completely. Rushing this step can lead to a runny filling.
- Sharp Knife Trick: Dip your knife in hot water and wipe it dry between slices for clean, pretty cuts.
One time, I forgot to chill the dough and ended up with a stubborn crust that kept shrinking in the oven—lesson learned! Patience really pays off here. Also, multitasking by prepping your crust while the curd cooks is a perfect way to save time without rushing.
Variations & Adaptations
If you want to switch things up or cater to different tastes, this lemon curd tart recipe adapts beautifully:
- Dairy-Free Version: Use coconut oil instead of butter in both the crust and filling, and swap heavy cream for coconut cream if you add whipped topping.
- Gluten-Free Crust: Substitute the all-purpose flour with a gluten-free blend designed for baking. Just note the texture might be a touch more crumbly.
- Berry Twist: Add fresh raspberries or blueberries on top of the lemon curd before chilling for a colorful, tangy contrast.
- Herb-Infused: Stir a teaspoon of finely chopped fresh thyme or basil into the curd for a sophisticated flavor twist.
Personally, I once tried this tart with a graham cracker crust for a more rustic, sweet crunch. It was a hit at a summer picnic! You can also bake mini tarts using the same recipe for individual servings—perfect for fancy gatherings or portion control.
Serving & Storage Suggestions
This perfect lemon curd tart is best served chilled, straight from the fridge, to keep that creamy filling firm and refreshing. For presentation, a dusting of powdered sugar or a dollop of lightly sweetened whipped cream adds a lovely touch.
Pair it with a cup of Earl Grey tea or a sparkling lemonade for a bright, zesty balance. It also makes a stunning finish to brunch or light dinners.
Store leftover tart covered tightly in the refrigerator for up to 4 days. The flavors actually mellow and marry beautifully overnight, so it’s great for prepping ahead. If you want to freeze it, wrap tightly in plastic wrap and foil; thaw overnight in the fridge before serving.
When reheating (if you want a slightly warm filling), pop slices in a 300°F (150°C) oven for 5-7 minutes—just don’t overdo it, or the curd might lose its silky texture.
Nutritional Information & Benefits
Each slice of this perfect lemon curd tart packs roughly 320 calories, with about 15 grams of fat and 35 grams of carbs, depending on portion size. The fresh lemon juice and zest deliver a good dose of vitamin C, which is great for immunity and skin health.
The eggs provide protein and essential nutrients, while the butter adds richness and fat-soluble vitamins. If you’re watching sugar intake, you can reduce the sugar slightly, but remember it balances the tartness of the lemon.
This recipe is naturally gluten-containing but easy to adapt for gluten-free and dairy-free diets, making it a versatile treat everyone can enjoy. From a wellness perspective, it’s a refreshing dessert that feels indulgent but made with real, simple ingredients.
Conclusion
There you have it—the perfect lemon curd tart with a zesty creamy filling that’s as simple as it is stunning. Whether you’re a seasoned baker or just getting your toes wet, this recipe is forgiving, approachable, and truly rewarding. I love how it brings a little sunshine to the table, and I hope you’ll make it your own by tweaking the zest, sweetness, or toppings to suit your taste.
Give it a try, share your favorite variations, or let me know how your tart turns out in the comments. Baking is about joy and discovery, and this tart is a sweet way to celebrate both. So grab those lemons, roll up your sleeves, and get ready to impress yourself and everyone around you.
Happy baking—and remember, the best tarts are made with a little patience and a lot of love!
FAQs
How long does lemon curd tart last in the fridge?
It keeps well for up to 4 days when stored in an airtight container. The flavors actually improve after a day or two.
Can I make the lemon curd ahead of time?
Absolutely! You can prepare the lemon curd up to 3 days in advance and store it in the fridge. Just give it a good stir before pouring into the crust.
What’s the best way to prevent a soggy tart crust?
Blind baking the crust with weights and chilling the dough before baking are key. Also, make sure the lemon curd isn’t too hot when you pour it in.
Can I use bottled lemon juice instead of fresh lemons?
Fresh lemons are best for flavor and zest, but in a pinch, bottled juice works. Just avoid any with added preservatives or sweeteners.
Is this recipe suitable for beginners?
Definitely! The steps are straightforward, and with a bit of care during cooking, even novice bakers can nail this tart. Just take your time with the lemon curd and blind baking.
Pin This Recipe!

Perfect Lemon Curd Tart

A zesty, creamy lemon curd filling nestled in a crisp, buttery tart shell. This easy and quick recipe is perfect for potlucks, family gatherings, or a special dessert treat.
- Prep Time: 20 minutes
- Cook Time: 25 minutes
- Total Time: 4 hours 45 minutes
- Yield: 8 servings 1x
- Category: Dessert
- Cuisine: American
Ingredients
- 1 1/4 cups (160g) all-purpose flour
- 1/2 cup (115g) unsalted butter, cold and cubed
- 1/4 cup (50g) granulated sugar
- 1/4 teaspoon salt
- 1 large egg yolk, room temperature
- 2–3 tablespoons ice-cold water
- 1 cup (200g) granulated sugar
- 3 large eggs, room temperature
- 1/2 cup (120ml) freshly squeezed lemon juice (about 3–4 lemons)
- 2 teaspoons finely grated lemon zest
- 6 tablespoons (85g) unsalted butter, cubed and softened
- 1 teaspoon vanilla extract (optional)
Instructions
- Prepare the Tart Crust: In a large bowl, whisk together flour, sugar, and salt. Add cold, cubed butter and work into the flour until mixture resembles coarse crumbs with pea-sized bits.
- Add Wet Ingredients: Stir in egg yolk and 2 tablespoons ice-cold water. Mix gently until dough just comes together. Add extra tablespoon water if dry. Do not overwork.
- Chill Dough: Form dough into a disk, wrap in plastic wrap, and refrigerate for at least 30 minutes.
- Roll Out the Dough: Lightly flour surface and rolling pin. Roll dough into 12-inch circle about 1/8 inch thick. Transfer to 9-inch tart pan, press into edges, trim excess. Chill 15 minutes.
- Blind Bake the Crust: Preheat oven to 375°F (190°C). Line crust with parchment and fill with pie weights or dried beans. Bake 15 minutes, remove weights and parchment, bake another 8-10 minutes until golden. Cool completely.
- Make the Lemon Curd Filling: In medium saucepan, whisk sugar and eggs until smooth. Stir in lemon juice and zest.
- Cook the Curd: Place saucepan over medium-low heat, stirring constantly. Cook 8-10 minutes until thickened and coats back of spoon.
- Finish the Curd: Remove from heat, whisk in softened butter and vanilla extract until silky. Strain through fine-mesh sieve into bowl.
- Assemble the Tart: Pour warm lemon curd into cooled tart shell, smooth top. Chill in fridge at least 3 hours or overnight until set.
- Serve: Garnish with fresh lemon slices, whipped cream, or powdered sugar. Slice with knife dipped in hot water for clean cuts.
Notes
Use fresh lemons for best flavor; bottled lemon juice is not recommended. For dairy-free version, substitute butter with coconut oil and use gluten-free flour for crust if needed. Chill dough and blind bake crust properly to avoid sogginess. Let tart sit at room temperature 10-15 minutes before serving if curd is too thick.
Nutrition
- Serving Size: 1 slice (1/8 of tart
- Calories: 320
- Fat: 15
- Carbohydrates: 35
Keywords: lemon curd tart, lemon tart, lemon dessert, easy lemon tart, creamy lemon filling, tart crust, homemade lemon curd