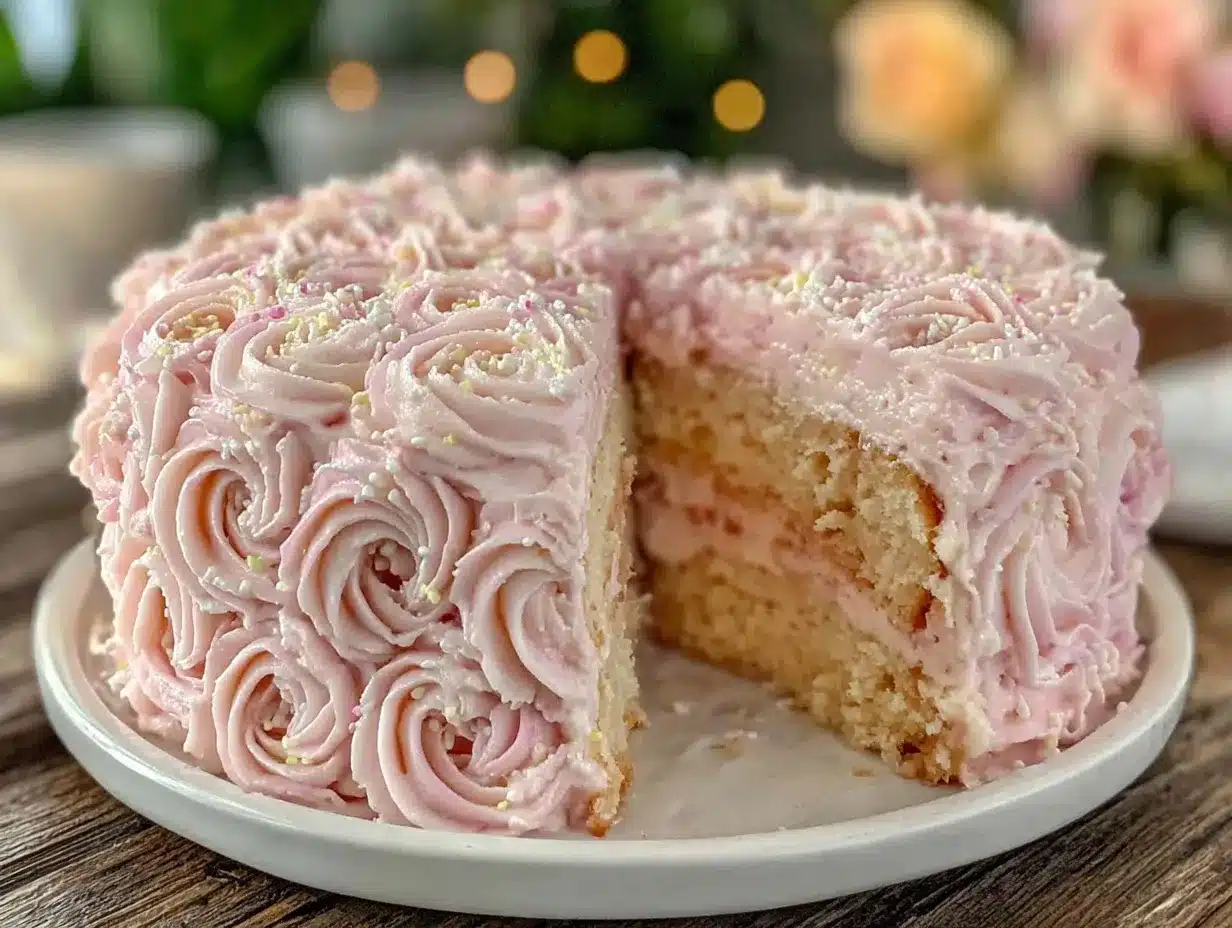
Let me tell you, the sight of a Perfect Ombre Rose Cake sitting on my countertop, each creamy buttercream rosette gently fading from soft pink to deep rose, is enough to make anyone’s heart skip a beat. The moment I first sliced into this cake, the delicate layers and luscious frosting mingled on my tongue—it was the kind of moment where you pause, take a deep breath, and just smile because you know you’re onto something truly special. Honestly, when I was knee-high to a grasshopper, I never imagined I’d be crafting cakes that look like a bouquet of fresh roses, but here we are.
Years ago, I stumbled upon this recipe on a rainy weekend, trying to recreate a cake my grandma used to make for family celebrations. The Perfect Ombre Rose Cake with creamy buttercream rosettes quickly became a staple for birthdays and special occasions. My family couldn’t stop sneaking pieces off the cooling rack (and I can’t really blame them). You know what? This cake is dangerously easy to make but feels like pure, nostalgic comfort wrapped in frosting.
Whether you’re looking to brighten up your Pinterest cookie board, impress at a potluck, or treat your kids to a sweet surprise, this Perfect Ombre Rose Cake is your go-to. I’ve tested it multiple times—in the name of research, of course—and it never fails to bring smiles. You’re going to want to bookmark this one.
Why You’ll Love This Recipe
Trust me, this Perfect Ombre Rose Cake with creamy buttercream rosettes isn’t just another pretty face in the cake world. After countless trials, tweaks, and frosting smears, I can say this recipe hits all the right notes:
- Quick & Easy: Comes together in under 2 hours, perfect for busy weeknights or last-minute celebrations.
- Simple Ingredients: No fancy grocery trips needed; you likely already have everything in your kitchen.
- Perfect for Special Occasions: Great for birthdays, bridal showers, or anytime you want to impress without stress.
- Crowd-Pleaser: Always gets rave reviews from kids and adults alike—trust me, the rosettes alone steal the show.
- Unbelievably Delicious: The moist, tender crumb paired with the rich, creamy buttercream is pure comfort food magic.
What makes this recipe stand out? It’s the way the buttercream rosettes transition flawlessly from pale blush to deep rose, creating an ombre effect that looks professionally done—even if you’re a beginner. Plus, the secret to the ultra-smooth buttercream is whipping in just the right amount of cream cheese, giving it that melt-in-your-mouth texture.
This cake isn’t just good—it’s the kind that makes you close your eyes after the first bite. It feels like a warm hug from a loved one and can turn a simple gathering into a memorable event.
What Ingredients You Will Need
This Perfect Ombre Rose Cake recipe uses simple, wholesome ingredients to deliver bold flavor and that satisfying creamy texture without fuss. Most of these are pantry staples, and substitutions are easy if needed.
- For the Cake Batter:
- 2 ½ cups (312g) all-purpose flour, sifted (King Arthur Flour recommended for best texture)
- 2 ½ tsp baking powder
- ½ tsp salt
- 1 cup (226g) unsalted butter, softened (use European-style for richer flavor)
- 1 ¾ cups (350g) granulated sugar
- 4 large eggs, room temperature
- 1 tbsp pure vanilla extract
- 1 cup (240ml) whole milk, room temperature (almond milk works if dairy-free)
- For the Creamy Buttercream Rosettes:
- 1 cup (227g) unsalted butter, softened
- 4 cups (480g) powdered sugar, sifted
- 4 oz (115g) cream cheese, softened (adds creaminess and stability)
- 1 tsp pure vanilla extract
- 2-3 tbsp heavy cream (or coconut cream for dairy-free)
- Gel food coloring in shades of pink and red (I love AmeriColor gels for vibrant, streak-free color)
If you want a gluten-free option, swap the flour for a 1-to-1 gluten-free baking blend. For a dairy-free take, choose coconut cream and dairy-free butter alternatives—just remember that the texture might shift slightly.
Equipment Needed
- Two 8-inch (20 cm) round cake pans (non-stick or lined with parchment paper)
- Electric stand mixer or hand mixer (for smooth buttercream and batter)
- Mixing bowls (medium and large)
- Measuring cups and spoons
- Rubber spatula (for scraping bowls)
- Offset spatula (to smooth frosting)
- Piping bags (disposable or reusable)
- Wilton 1M piping tip (for classic rosettes)
- Cooling rack
If you don’t have a stand mixer, a hand mixer works just fine—though be ready to give your arm a workout! For piping bags, you can improvise with sturdy plastic sandwich bags and snip a corner, but the real magic happens with a quality tip like the Wilton 1M.
Preparation Method
- Preheat and Prep: Preheat your oven to 350°F (175°C). Grease and flour two 8-inch cake pans or line them with parchment paper. This step helps the cakes release easily later.
- Mix Dry Ingredients: In a medium bowl, sift together 2 ½ cups flour, 2 ½ tsp baking powder, and ½ tsp salt. Set aside.
- Cream Butter and Sugar: In your mixer bowl, beat 1 cup softened butter and 1 ¾ cups sugar on medium-high speed for about 3-4 minutes until light and fluffy. This step is crucial—it traps air that helps the cake rise beautifully.
- Add Eggs and Vanilla: Add eggs one at a time, mixing well after each addition. Stir in 1 tbsp vanilla extract. Your batter should look creamy and smooth here.
- Alternate Dry Ingredients and Milk: With the mixer on low, add the dry ingredients in three additions, alternating with 1 cup whole milk, starting and ending with the dry. Mix just until combined—overmixing can make the cake dense.
- Divide and Tint Batter: Divide the batter evenly into three bowls. Leave one plain, tint the second with a few drops of light pink gel, and the third with a deeper rose color. Stir gently for even color.
- Layer the Batter: Pour the darkest batter into one pan and spread evenly. Pour the medium color into the second pan and the lightest into the third. Bake each for about 25-30 minutes or until a toothpick inserted comes out clean.
- Cool the Cakes: Let the cakes cool in pans for 10 minutes, then transfer to a wire rack to cool completely. Patience here pays off for smooth frosting application.
- Make the Buttercream: Beat 1 cup softened butter and 4 oz cream cheese until smooth. Gradually add 4 cups powdered sugar, mixing on low to avoid a sugar cloud. Add 1 tsp vanilla and 2-3 tbsp heavy cream, beating on high until fluffy and spreadable.
- Color the Frosting: Divide buttercream into three bowls. Leave one plain, tint the second light pink, and the third deep rose, matching the cake layers.
- Assemble the Cake: Place the darkest cake layer on your serving plate, spread a thin layer of matching buttercream on top. Repeat with the medium and light layers.
- Pipe Rosettes: Fit your piping bag with the Wilton 1M tip. Starting with the lightest color, pipe rosettes around the cake’s base. Switch to medium pink in the middle and deep rose on the top, creating that beautiful ombre rose effect.
- Final Touches: Smooth any gaps with leftover buttercream. Chill the cake for 30 minutes before serving to set the frosting.
Cooking Tips & Techniques
Honestly, the key to this Perfect Ombre Rose Cake is in the little details. Here’s what I’ve learned over time:
- Don’t skip room temperature ingredients: Cold eggs or butter can cause your batter to curdle or not mix properly.
- Beat the butter and sugar well: This step determines the cake’s fluffiness, so give it enough time (3-4 minutes minimum).
- Mix batter gently after adding flour: Overmixing develops gluten, leading to a tougher crumb.
- Test your oven temperature: Ovens vary, so use an oven thermometer if possible to avoid under or overbaking.
- Practice your piping technique: Hold the bag perpendicular and apply even pressure for uniform rosettes. Don’t be afraid to practice on parchment before decorating the cake.
- Chill the cake layers: Slightly chilled layers are easier to frost without crumbs getting mixed into your buttercream.
One time, I rushed the frosting and ended up with runny rosettes that looked more like blobs—lesson learned! Taking your time with each step is worth it.
Variations & Adaptations
You can easily customize this Perfect Ombre Rose Cake to suit different tastes or dietary needs:
- Flavor Twists: Add a teaspoon of almond extract to your buttercream for a nutty note, or fold fresh strawberry puree into the frosting for a fruity flair.
- Color Variations: Swap pink for pastel blues or purples for baby showers or weddings. The piping technique stays the same.
- Gluten-Free: Use a gluten-free blend instead of all-purpose flour. Just be sure to check the baking powder is gluten-free too.
- Dairy-Free: Try dairy-free butter and coconut cream in the buttercream for a vegan-friendly option.
- Alternative Cake Flavors: Use chocolate or lemon cake layers instead of vanilla—just keep the frosting colors to maintain the ombre rose effect.
Personally, I’ve made a lavender-honey version that was subtle and elegant—perfect for springtime celebrations. Changing up the flavors keeps this cake fresh and exciting.
Serving & Storage Suggestions
This Perfect Ombre Rose Cake is best served at room temperature. Let it sit out for about 30 minutes before slicing to let the buttercream soften slightly—makes cutting smoother and flavors pop.
Pair it with a light cup of tea or a chilled glass of bubbly for a lovely afternoon treat or celebratory dessert. The floral appearance makes it a fantastic centerpiece for bridal showers or birthdays.
Store any leftovers covered in the refrigerator for up to 4 days. Bring back to room temperature before serving to enjoy the full creamy texture. For longer storage, wrap tightly and freeze up to 2 months. Thaw overnight in the fridge and then bring to room temp before enjoying.
Flavors actually deepen a bit after a day, so if you can wait, you’ll be rewarded with an even tastier slice.
Nutritional Information & Benefits
This Perfect Ombre Rose Cake offers about 350-400 calories per slice (depending on frosting thickness). Key ingredients like butter and cream cheese provide richness and calcium, while the eggs contribute protein.
While this cake is definitely a treat, swapping in almond or oat milk and reducing sugar slightly can lighten it up. The homemade buttercream lets you control ingredients—no mystery additives here.
Gluten-free and dairy-free adaptations mean more people can enjoy this beauty. Just be mindful of allergies to dairy or eggs and substitute accordingly.
From a wellness viewpoint, sharing this cake with loved ones brings joy and connection, which is just as important as nutrition!
Conclusion
If you’re looking for a show-stopping dessert that’s both beautiful and delicious, this Perfect Ombre Rose Cake with creamy buttercream rosettes is worth every minute. It’s approachable for beginners, customizable for all occasions, and always a crowd-pleaser. I love how it brings a bit of artistry into everyday baking and the smiles it creates around my table.
Give it a try, make it your own with your favorite colors or flavors, and don’t forget to share your creations—I’d love to hear how it turns out for you! Remember, the best cakes are the ones made with love (and a little buttercream on your fingers). Happy baking!
FAQs
Can I make this cake a day ahead?
Absolutely! Bake and frost the cake the day before, then store it covered in the fridge. Bring to room temperature before serving for the best taste and texture.
What if I don’t have gel food coloring?
You can use liquid food coloring, but gel produces more vibrant colors with less chance of thinning your buttercream.
How do I fix runny buttercream?
Chill the buttercream for 15-30 minutes and then re-whip. Using room temperature but not melted butter helps prevent runniness.
Can I use a different piping tip for the rosettes?
Yes, but the Wilton 1M tip is classic for rosettes. Other star tips can work but may create different shapes.
Is this cake suitable for beginners?
Definitely! The recipe is straightforward, and the piping technique is easy to learn with a little practice.
Pin This Recipe!
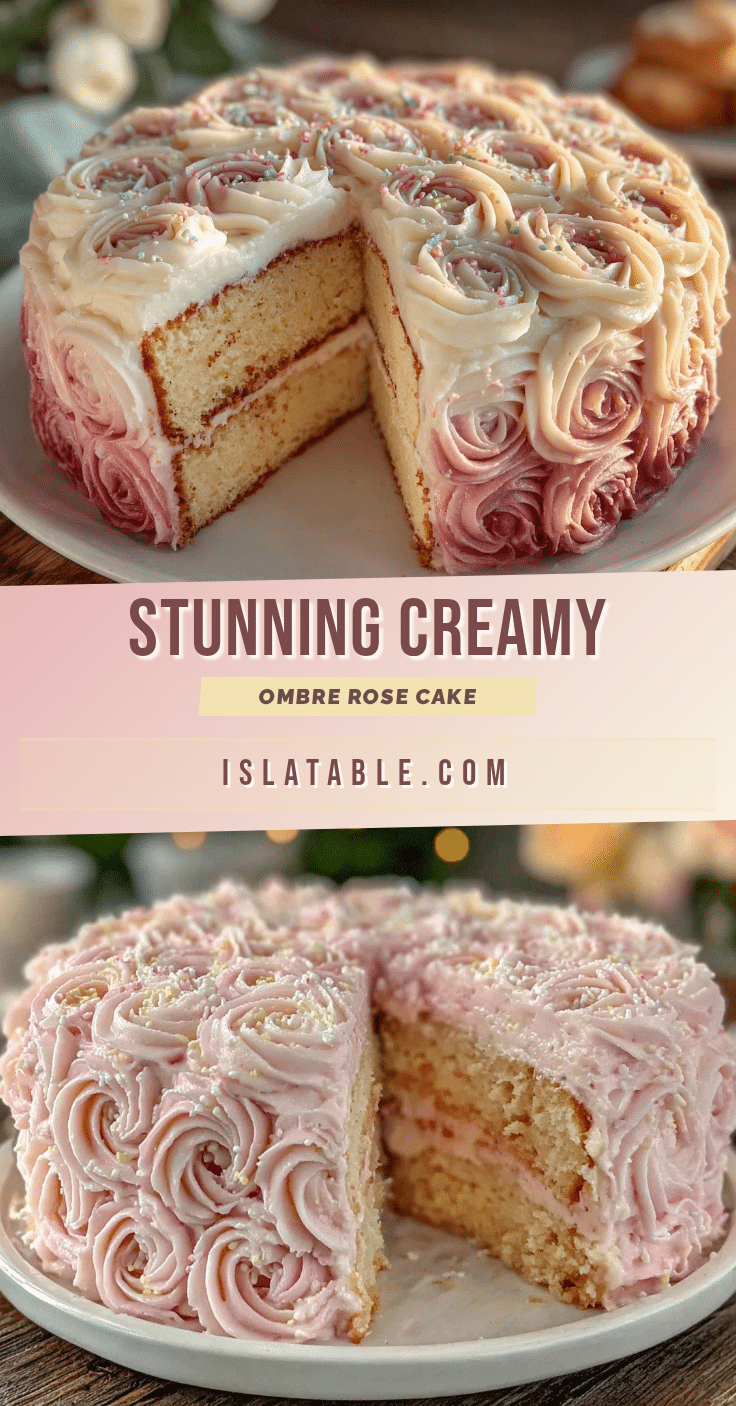
Perfect Ombre Rose Cake Recipe with Easy Creamy Buttercream Rosettes Tutorial
A beautiful and delicious ombre rose cake featuring creamy buttercream rosettes that transition from soft pink to deep rose. Perfect for special occasions and beginner bakers alike.
- Prep Time: 30 minutes
- Cook Time: 30 minutes
- Total Time: 1 hour
- Yield: 12 servings 1x
- Category: Dessert
- Cuisine: American
Ingredients
- 2 ½ cups (312g) all-purpose flour, sifted
- 2 ½ tsp baking powder
- ½ tsp salt
- 1 cup (226g) unsalted butter, softened
- 1 ¾ cups (350g) granulated sugar
- 4 large eggs, room temperature
- 1 tbsp pure vanilla extract
- 1 cup (240ml) whole milk, room temperature
- 1 cup (227g) unsalted butter, softened (for buttercream)
- 4 cups (480g) powdered sugar, sifted
- 4 oz (115g) cream cheese, softened
- 1 tsp pure vanilla extract (for buttercream)
- 2–3 tbsp heavy cream
- Gel food coloring in shades of pink and red
Instructions
- Preheat oven to 350°F (175°C). Grease and flour two 8-inch cake pans or line with parchment paper.
- In a medium bowl, sift together flour, baking powder, and salt. Set aside.
- In a mixer bowl, beat 1 cup softened butter and 1 ¾ cups sugar on medium-high speed for 3-4 minutes until light and fluffy.
- Add eggs one at a time, mixing well after each addition. Stir in 1 tbsp vanilla extract.
- With mixer on low, add dry ingredients in three additions, alternating with 1 cup whole milk, starting and ending with dry ingredients. Mix just until combined.
- Divide batter evenly into three bowls. Leave one plain, tint second with light pink gel, third with deep rose color. Stir gently.
- Pour darkest batter into one pan, medium color into second, lightest into third. Bake each for 25-30 minutes or until toothpick comes out clean.
- Cool cakes in pans for 10 minutes, then transfer to wire rack to cool completely.
- Beat 1 cup softened butter and 4 oz cream cheese until smooth. Gradually add 4 cups powdered sugar, mixing on low. Add 1 tsp vanilla and 2-3 tbsp heavy cream, beat on high until fluffy.
- Divide buttercream into three bowls. Leave one plain, tint second light pink, third deep rose to match cake layers.
- Place darkest cake layer on serving plate, spread thin layer of matching buttercream on top. Repeat with medium and light layers.
- Fit piping bag with Wilton 1M tip. Pipe rosettes starting with lightest color at base, medium pink in middle, deep rose on top to create ombre effect.
- Smooth any gaps with leftover buttercream. Chill cake for 30 minutes before serving.
Notes
[‘Use room temperature ingredients for best results.’, ‘Beat butter and sugar well to trap air for fluffiness.’, ‘Avoid overmixing after adding flour to prevent tough crumb.’, ‘Test oven temperature with thermometer to avoid under or overbaking.’, ‘Practice piping technique on parchment before decorating cake.’, ‘Chill cake layers slightly before frosting to reduce crumbs.’, ‘Gel food coloring preferred for vibrant colors without thinning buttercream.’, ‘Buttercream can be chilled and re-whipped if runny.’]
Nutrition
- Serving Size: 1 slice (1/12 of cak
- Calories: 375
- Sugar: 35
- Sodium: 210
- Fat: 22
- Saturated Fat: 13
- Carbohydrates: 45
- Fiber: 0.5
- Protein: 4
Keywords: ombre rose cake, buttercream rosettes, birthday cake, easy cake recipe, creamy buttercream, cake decorating, special occasion cake