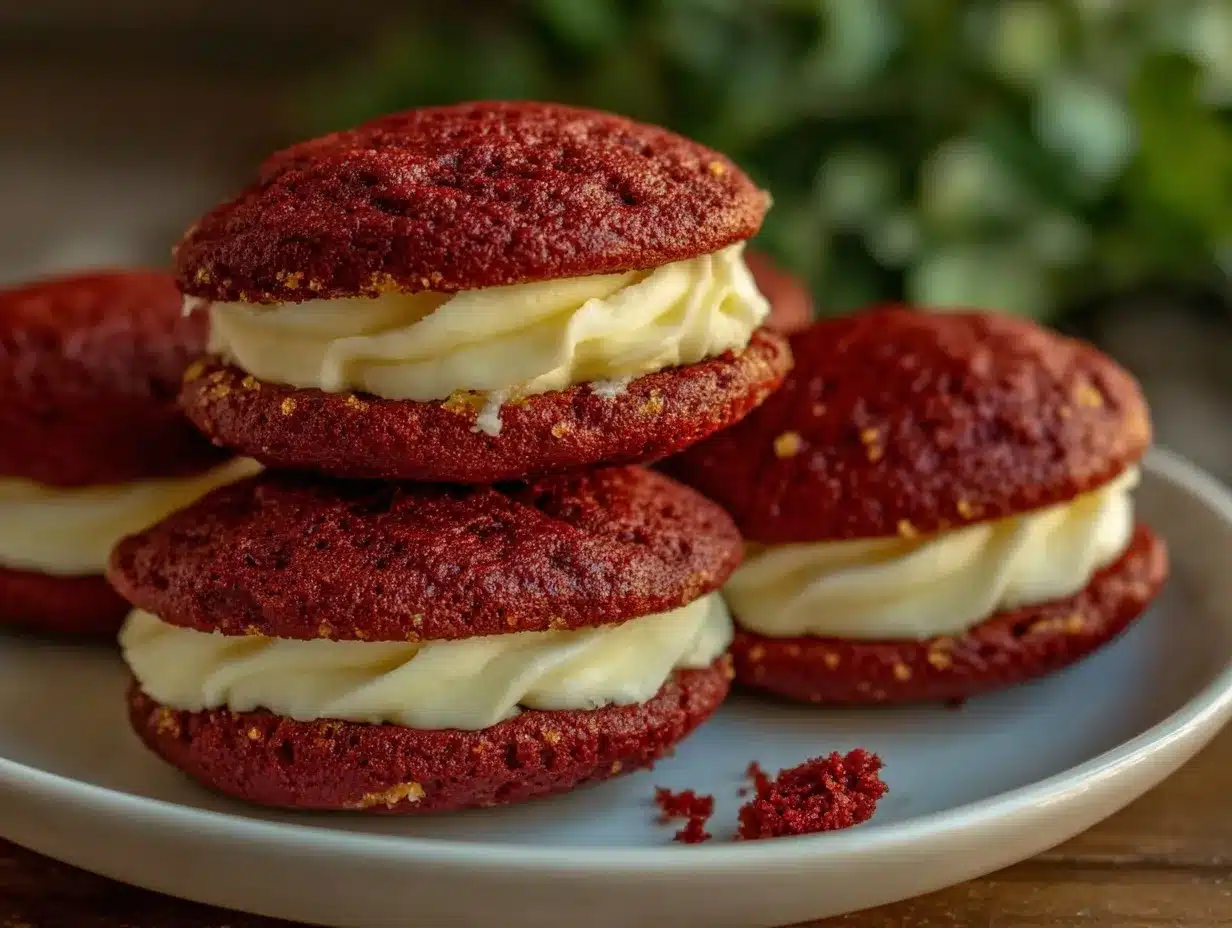
Let me tell you, the moment those moist red velvet whoopie pies come out of the oven, their rich, cocoa-infused aroma swirls through the kitchen like a warm invitation you simply can’t resist. The first time I baked these beauties, I was instantly hooked—the kind of moment where you pause, take a deep breath, and just smile because you know you’re onto something truly special. Honestly, there’s something magical about that velvety, tender cake paired with a luscious, creamy filling that feels like a sweet little secret you want to share with everyone.
Years ago, when I was knee-high to a grasshopper, my grandma used to make simple sandwich cookies, but these red velvet whoopie pies are a whole new level of nostalgic comfort with a modern twist. I stumbled upon this recipe during a rainy weekend bake-a-thon, trying to recreate that perfect balance of moist cake and fluffy filling I’d been dreaming about. I wish I’d discovered these red velvet whoopie pies way sooner because my family couldn’t stop sneaking them off the cooling rack (and I can’t really blame them).
Whether you’re looking for a sweet treat to brighten up your Pinterest cookie board, a show-stopping dessert for potlucks, or just a cozy snack to enjoy with your afternoon tea, these moist red velvet whoopie pies with creamy filling fit the bill perfectly. I’ve tested this recipe multiple times in the name of research, of course, and it’s now a staple for family gatherings and gifting, delivering pure, nostalgic comfort every time.
Why You’ll Love This Recipe
After countless kitchen trials and happy taste testers, I can confidently say this moist red velvet whoopie pies recipe is one you’ll want to keep close. Here’s why:
- Quick & Easy: Comes together in under 45 minutes, perfect for busy weeknights or last-minute dessert cravings.
- Simple Ingredients: No fancy grocery trips needed; you probably have everything in your pantry and fridge already.
- Perfect for Any Occasion: Great for birthday parties, holiday gatherings, or a sweet surprise on a quiet Sunday.
- Crowd-Pleaser: Kids, adults, and even picky eaters fall head over heels for these.
- Unbelievably Delicious: The moist, tender crumb paired with that creamy filling? It’s straight-up comfort food with a little red velvet flair.
This recipe isn’t just another whoopie pie; it’s crafted with a special technique that keeps the cake incredibly moist without being heavy. The creamy filling is whipped just right—light, fluffy, and sweet enough to balance the cocoa and tangy buttermilk flavors. Honestly, it’s the kind of treat that makes you close your eyes after the first bite and savor every crumb. Whether you’re impressing guests or sneaking a midnight snack, these whoopie pies bring the perfect blend of texture and flavor without any fuss.
What Ingredients You Will Need
This recipe uses simple, wholesome ingredients to deliver bold flavor and that satisfyingly soft texture without the fuss. Most of these are pantry staples, with a few fresh additions to bring it all together beautifully.
- For the Red Velvet Cake:
- All-purpose flour (2 ½ cups / 312 grams) – sifted for a lighter crumb
- Cocoa powder, unsweetened (2 tablespoons) – I prefer Ghirardelli for a rich, smooth taste
- Baking soda (1 teaspoon) – helps with that classic lift
- Salt (½ teaspoon)
- Granulated sugar (1 ¾ cups / 350 grams) – use your favorite brand for consistent sweetness
- Vegetable oil (1 cup / 240 ml) – keeps the cake moist without heaviness
- Large eggs (2) – room temperature works best
- Buttermilk (1 cup / 240 ml) – adds tang and tenderness; if you don’t have buttermilk, mix 1 cup milk with 1 tablespoon lemon juice and let sit for 5 minutes
- Vanilla extract (2 teaspoons) – for warmth and depth
- Red food coloring (2 tablespoons) – gel coloring works best for vibrant color without thinning the batter
- White vinegar (1 teaspoon) – reacts with baking soda to give a nice rise
- For the Creamy Filling:
- Unsalted butter (½ cup / 115 grams), softened – use Land O’Lakes for best texture
- Marshmallow fluff (7 ounces / 200 grams) – gives that dreamy, cloud-like sweetness
- Powdered sugar (2 ½ cups / 300 grams), sifted – for smooth, lump-free filling
- Vanilla extract (1 teaspoon)
- Pinch of salt – balances the sweetness
Feel free to swap regular flour for gluten-free all-purpose blend if needed, and coconut oil works in place of vegetable oil for a subtle twist. In summer, fresh raspberries make a lovely addition to the filling if you want a fruity surprise. The key is choosing high-quality ingredients to let the simple flavors shine through.
Equipment Needed
- Mixing bowls – a couple of medium and large sizes will do.
- Electric mixer or stand mixer – makes whipping the filling a breeze (hand mixer works too, if you’re patient!).
- Measuring cups and spoons – precise measurements help get consistent results.
- Rubber spatula – perfect for folding and scraping batter.
- Baking sheets – lined with parchment paper or silicone mats for easy cleanup.
- Cookie scoop or tablespoon – to portion out the whoopie pies evenly.
- Cooling racks – essential for cooling the cakes evenly to avoid sogginess.
If you don’t have a stand mixer, no worries—just give yourself a bit more arm workout whipping that creamy filling by hand! For budget-friendly options, silicone baking mats are reusable and a great alternative to parchment paper. Keep your equipment clean and dry, especially when mixing the filling, for the best fluff.
Preparation Method
- Preheat your oven: Set it to 350°F (175°C) and line two baking sheets with parchment paper or silicone mats. This helps the whoopie pies bake evenly and prevents sticking. (5 minutes prep)
- Mix dry ingredients: In a large bowl, sift together 2 ½ cups all-purpose flour, 2 tablespoons cocoa powder, 1 teaspoon baking soda, and ½ teaspoon salt. Whisk to combine evenly. This ensures no clumps and a smooth batter. (3 minutes)
- Combine wet ingredients: In another bowl, whisk 1 ¾ cups granulated sugar and 1 cup vegetable oil until smooth. Add 2 large eggs one at a time, beating well after each. Stir in 1 cup buttermilk, 2 teaspoons vanilla extract, 2 tablespoons red food coloring, and 1 teaspoon white vinegar. (7 minutes)
- Bring it all together: Gradually add the dry ingredients to the wet, mixing on low speed or folding gently with a spatula until just combined. Don’t overmix! The batter should be thick and velvety. (4 minutes)
- Portion the batter: Using a cookie scoop or tablespoon, drop rounded spoonfuls about 2 inches apart on the prepared baking sheets. Each mound should be roughly 2 inches in diameter to give you perfect sandwich sizes. (5 minutes)
- Bake: Place sheets in the oven and bake for 12-14 minutes. The tops will spring back lightly when touched, and a toothpick inserted should come out with moist crumbs but no wet batter. (12-14 minutes baking)
- Cool completely: Transfer the cakes to cooling racks and let them cool fully before filling—otherwise, the filling melts and makes a mess. (30 minutes)
- Make the filling: In a mixing bowl, beat ½ cup softened unsalted butter until creamy. Add 7 ounces marshmallow fluff and continue beating until fluffy. Gradually add 2 ½ cups sifted powdered sugar, 1 teaspoon vanilla, and a pinch of salt, beating until smooth and spreadable. (10 minutes)
- Assemble the whoopie pies: Pair the cooled cakes by size. Spread or pipe about 2 tablespoons of creamy filling on the flat side of one cake, then sandwich it with the matching cake. Press gently to spread the filling evenly. (10 minutes)
- Chill and serve: For best results, refrigerate the assembled whoopie pies for 30 minutes to let the filling set before serving. (30 minutes)
If your batter feels too thick or dry, add a splash of buttermilk to loosen it up. Also, resist the urge to open the oven door too often while baking—that sneaky draft can cause the cakes to fall! The cakes should be soft and springy with a slightly domed top. Trust me, taking these steps keeps your moist red velvet whoopie pies perfectly tender.
Cooking Tips & Techniques
One trick I’ve learned with red velvet recipes is to handle the batter gently—overmixing can lead to dense cakes, and no one wants that. When folding the dry into wet ingredients, slow and steady wins the race. Also, using gel food coloring instead of liquid keeps the batter from thinning out too much, which helps maintain that tender crumb.
Watch your baking time carefully—oven temperatures can vary, and those extra few minutes can turn moist into dry faster than you think. If you find your whoopie pies baking unevenly, rotate the sheets halfway through the baking time (but do it quickly to avoid heat loss).
For the creamy filling, softened butter is key. Too cold and it won’t whip up nicely; too warm and it becomes oily. Marshmallow fluff adds sweetness and fluffiness, but if you prefer a less sweet filling, cut back slightly on powdered sugar. I learned this the hard way after a few overly sweet batches!
Finally, chilling the assembled pies before serving helps the filling firm up just right, making them easier to handle and less messy. Multitask by prepping the filling while the cakes cool to save time.
Variations & Adaptations
Mixing things up keeps this recipe fresh and fun. Here are some ideas I’ve tried and loved:
- Dietary Twist: Swap the all-purpose flour for a gluten-free blend to make these whoopie pies safe for gluten-sensitive friends. Use dairy-free butter and coconut-based marshmallow fluff to keep it vegan-friendly.
- Seasonal Flavor: Add a teaspoon of orange zest to the batter for a citrusy pop that brightens the red velvet flavor. In fall, sprinkle a pinch of cinnamon or pumpkin spice for cozy vibes.
- Chocolate Lover’s Version: Mix mini chocolate chips into the batter for extra chocolate bursts or swap cocoa powder for dark Dutch-process cocoa for a richer taste.
- Filling Variations: Try cream cheese frosting instead of marshmallow fluff for tangier, thicker filling. Alternatively, lemon curd mixed into the filling creates a zesty surprise.
One personal favorite variation is swirling in a tablespoon of raspberry jam into the filling for a sweet-tart balance that really pops. Feel free to experiment and make these moist red velvet whoopie pies your own!
Serving & Storage Suggestions
These whoopie pies are best served chilled or at room temperature. I find they’re perfect straight from the fridge when the filling is set but still soft and creamy. For presentation, dust a light sprinkle of powdered sugar or garnish with fresh berries for that extra touch.
They pair wonderfully with a glass of cold milk, hot coffee, or even a warm cup of chai tea to contrast the sweetness. For party platters, stack them neatly or wrap individually in parchment for easy grab-and-go treats.
Store leftover whoopie pies tightly wrapped in an airtight container in the refrigerator for up to 5 days. They also freeze beautifully—wrap individually in plastic wrap and place in a freezer bag for up to 2 months. To enjoy, thaw in the fridge overnight and bring to room temperature before serving.
Interestingly, the flavors deepen and the crumb softens slightly after a day, so if you can wait, these moist red velvet whoopie pies taste even better the next day!
Nutritional Information & Benefits
Each moist red velvet whoopie pie contains roughly 250-300 calories, depending on the size and filling amount. They offer a comforting balance of carbohydrates and fats, with moderate protein from the eggs and dairy.
The key ingredients, like cocoa powder, contain antioxidants, and buttermilk adds a pleasant tang with a dose of calcium. While these treats are indulgent, using vegetable oil instead of butter in the cake keeps them lighter and less saturated fat-heavy than traditional cakes.
Be mindful of allergens: they contain gluten, dairy, eggs, and marshmallow fluff (which usually includes egg whites). For gluten-free or vegan adaptations, see the variations section.
From my wellness perspective, these whoopie pies are perfect for celebrations or as an occasional sweet treat when you want a classic dessert that feels homemade and heartfelt.
Conclusion
All in all, these moist red velvet whoopie pies with creamy filling are a recipe you’ll want to bookmark and bake again and again. They combine simple ingredients, easy steps, and a bit of love to create a dessert that truly feels like a warm hug every single time.
Feel free to customize the filling, experiment with flavors, or make them your signature treat for any occasion. I love these whoopie pies because they bring people together—whether it’s sneaking one after dinner or sharing at a family gathering, they never disappoint.
If you try this recipe, please drop a comment below or share your own variations. Nothing makes me happier than hearing how these moist red velvet whoopie pies find a special place in your kitchen and hearts. Happy baking!
Frequently Asked Questions (FAQs)
What makes red velvet cake red?
The vibrant red color comes from the addition of red food coloring combined with cocoa powder and buttermilk, which reacts to give that signature hue.
Can I make the whoopie pies ahead of time?
Absolutely! You can bake the cakes a day ahead and store them in an airtight container. Assemble with filling just before serving for the freshest taste.
Is there a substitute for marshmallow fluff in the filling?
You can swap marshmallow fluff with cream cheese frosting or homemade buttercream for a different but equally delicious filling.
How do I keep the cakes moist?
Using oil instead of butter and buttermilk in the batter helps keep the cakes tender and moist. Avoid overbaking and cool completely before filling.
Can I freeze assembled whoopie pies?
It’s best to freeze the cake layers separately and assemble after thawing, but you can freeze assembled whoopie pies wrapped tightly for up to 2 months. Thaw overnight in the fridge.
Pin This Recipe!
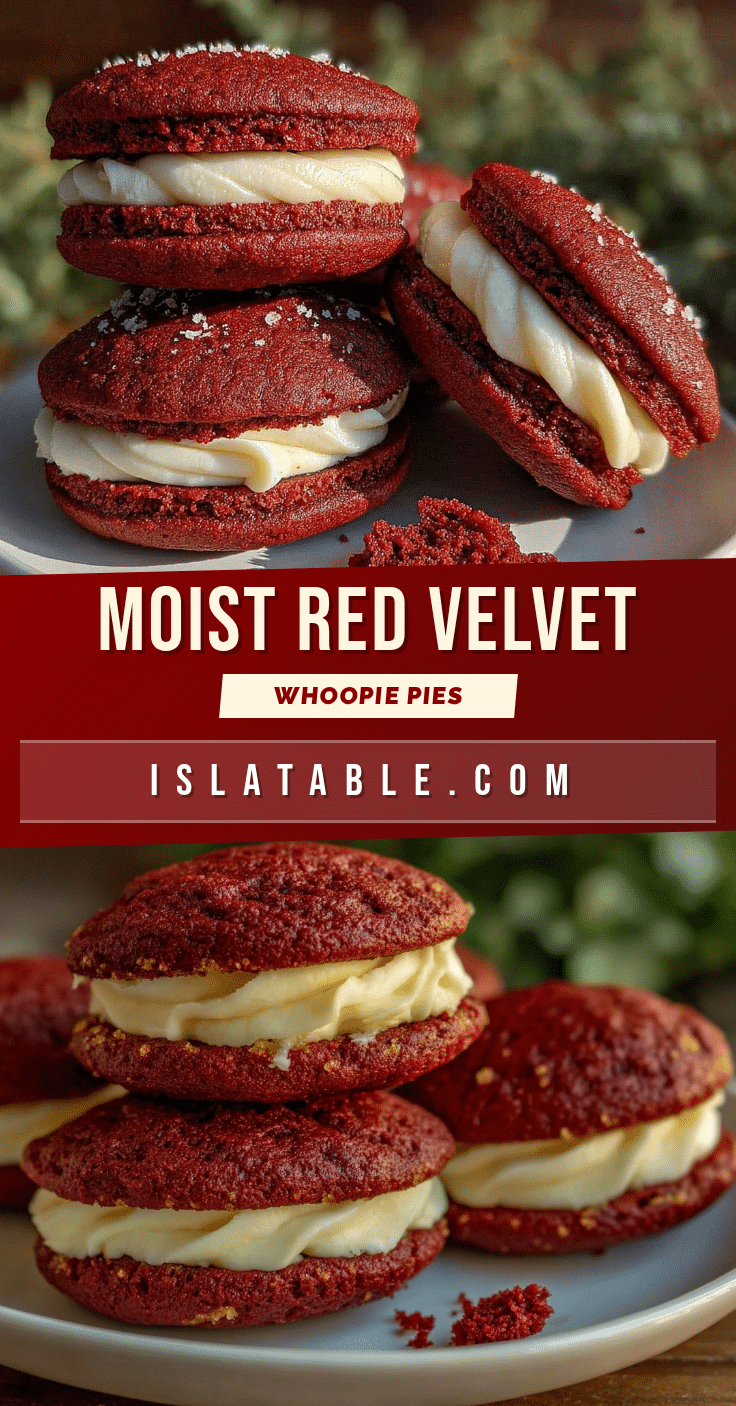
Moist Red Velvet Whoopie Pies Recipe Easy Homemade Creamy Filling

These moist red velvet whoopie pies feature a tender, cocoa-infused cake paired with a luscious, creamy marshmallow filling. Perfect for any occasion, they are quick to make and loved by kids and adults alike.
- Prep Time: 31 minutes
- Cook Time: 14 minutes
- Total Time: 1 hour 15 minutes
- Yield: 12 servings 1x
- Category: Dessert
- Cuisine: American
Ingredients
- 2 ½ cups all-purpose flour (312 grams), sifted
- 2 tablespoons unsweetened cocoa powder
- 1 teaspoon baking soda
- ½ teaspoon salt
- 1 ¾ cups granulated sugar (350 grams)
- 1 cup vegetable oil (240 ml)
- 2 large eggs, room temperature
- 1 cup buttermilk (240 ml) or 1 cup milk + 1 tablespoon lemon juice (let sit 5 minutes)
- 2 teaspoons vanilla extract
- 2 tablespoons red food coloring (gel preferred)
- 1 teaspoon white vinegar
- ½ cup unsalted butter (115 grams), softened
- 7 ounces marshmallow fluff (200 grams)
- 2 ½ cups powdered sugar (300 grams), sifted
- 1 teaspoon vanilla extract
- Pinch of salt
Instructions
- Preheat oven to 350°F (175°C) and line two baking sheets with parchment paper or silicone mats.
- In a large bowl, sift together flour, cocoa powder, baking soda, and salt. Whisk to combine.
- In another bowl, whisk sugar and vegetable oil until smooth. Add eggs one at a time, beating well after each.
- Stir in buttermilk, vanilla extract, red food coloring, and white vinegar.
- Gradually add dry ingredients to wet, mixing on low speed or folding gently until just combined. Do not overmix.
- Using a cookie scoop or tablespoon, drop rounded spoonfuls about 2 inches apart on prepared baking sheets.
- Bake for 12-14 minutes until tops spring back lightly and a toothpick comes out with moist crumbs.
- Transfer cakes to cooling racks and cool completely before filling.
- To make filling, beat softened butter until creamy. Add marshmallow fluff and beat until fluffy.
- Gradually add powdered sugar, vanilla extract, and salt, beating until smooth and spreadable.
- Pair cooled cakes by size. Spread or pipe about 2 tablespoons of filling on one cake and sandwich with matching cake.
- Refrigerate assembled whoopie pies for 30 minutes to let filling set before serving.
Notes
Use gel food coloring to avoid thinning the batter. Do not overmix the batter to keep cakes tender. Soften butter properly for fluffy filling. Chill assembled pies before serving for best texture. Variations include gluten-free flour, dairy-free butter, and cream cheese frosting filling.
Nutrition
- Serving Size: 1 whoopie pie
- Calories: 275
- Sugar: 25
- Sodium: 210
- Fat: 14
- Saturated Fat: 5
- Carbohydrates: 36
- Fiber: 1
- Protein: 3
Keywords: red velvet, whoopie pies, dessert, homemade, creamy filling, easy recipe, moist cake, marshmallow fluff